

P0014 on 2016-2019 Cadillac CT6: Exhaust Cam Timing Over-Advanced Causes and Fixes
On the 2016-2019 Cadillac CT6, equipped with 3.0L LGW or 3.6L LGX engines, code P0014 is most often caused by low/dirty engine oil or a faulty Bank 1 exhaust camshaft actuator solenoid. Always check your oil first. If the oil is clean and full, replacing the solenoid (Part No. 12697027 or superseded 12716051) is a common DIY fix costing between $40 and $120 for the part.
- Always check your engine oil level and condition first; a simple oil change with the correct full synthetic oil might fix the problem.
- The most likely failed part is the Bank 1 exhaust VVT solenoid. On V6 engines, this is on the firewall side, and it's the lower of the two solenoids.
- If multiple camshaft codes (P0011, P0021, P0024) are present along with P0014, suspect a software issue per TSB #PIP5568E before replacing any parts.
- Do not replace the camshaft position sensor; it is almost never the cause of a P0014 code.
- Replacing the VVT solenoid is a beginner-friendly DIY job that can save you significant labor costs.
What's Unique About the 2016-2019 Cadillac CT6
For the CT6 with the 3.0L (LGW) and 3.6L (LGX) V6 engines, this code is specifically mentioned in GM Preliminary Information Bulletin (TSB #PIP5568E). The bulletin was created to investigate a software anomaly where P0014 appears by itself or, more confusingly, in pairs or with all three other cam timing codes (P0011, P0021, P0024), sometimes after an engine auto-stop/start event. This makes it critical to check for other codes before assuming a single part has failed, as the initial dealer instruction was to clear the codes and monitor the situation. A subsequent service update, N192266190, was released to reprogram the ECM to fix this glitch.
Diagnostic Flowchart
Tap your situation to follow the diagnostic path that matches what you're seeing on this vehicle.
Symptoms You May Notice
- Check Engine Light is on
- Rough or unstable idle
- Engine stalling, especially when coming to a stop or after an auto-stop event
- Reduced engine power and poor acceleration
- Increased fuel consumption
- Rattling or knocking noise from the engine (in more severe cases)
- Hard starting or extended crank
- Increased brake pedal effort (if related to vacuum pump failure)
- Replacing the Camshaft Position Sensor. The sensor's job is to read the camshaft's position and report it; it does not control it. P0014 is a performance code indicating a control problem (solenoid, oil pressure) or a mechanical timing problem (phaser, chain, reluctor), not a sensor failure. 🎬 See this video for a clear explanation of the P0014 code.
Most Likely Causes
- Low, Dirty, or Incorrect Viscosity Engine Oil 🔴 High Probability The VVT system is entirely dependent on clean oil and proper pressure to function. The solenoids have fine mesh screens that are easily clogged by sludge or debris from neglected oil changes. Direct injection engines, like the LGX and LGW, can be harder on oil, leading to faster breakdown.
How to confirm: Check the oil level on the dipstick and observe its color and consistency. If the level is low or the oil is dark, gritty, or past its recommended change interval, this is the most likely cause. Many owner accounts confirm a simple oil change resolved the code.
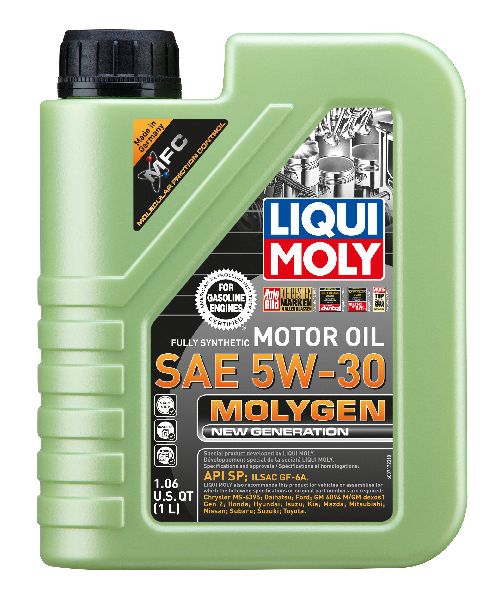
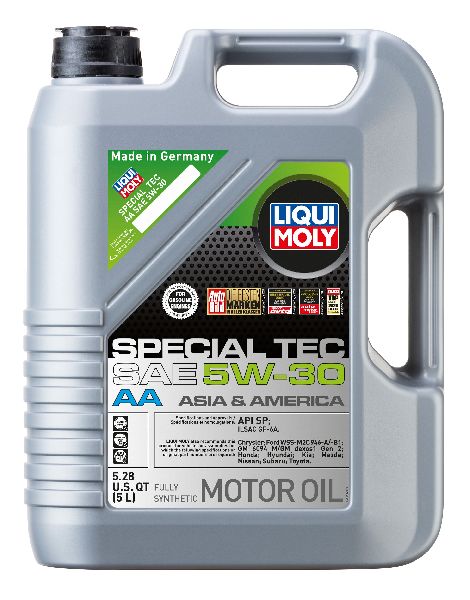
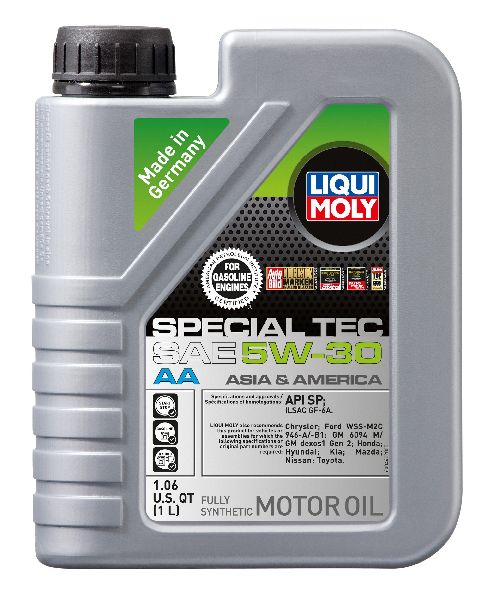
Typical fix: Perform an oil and filter change using a full synthetic oil that meets the GM dexos1 Gen 2 5W-30 specification and a quality oil filter.
Est. part cost: $60-$110 - Faulty Bank 1 Exhaust Camshaft Position Actuator Solenoid 🔴 High Probability These solenoids are a common failure point on many modern GM engines. They can become clogged with oil sludge, causing them to stick, or they can fail electrically, preventing them from controlling oil flow to the phaser.
How to confirm: After ruling out oil issues, this is the next step. A definitive diagnostic test is to swap the Bank 1 exhaust solenoid (firewall side, lower position) with the Bank 1 intake solenoid (firewall side, upper position). Clear the codes and drive. If the code changes from P0014 to P0011 (Intake Cam Position), the solenoid is confirmed to be faulty. Resistance should be between 8 and 13 Ohms.
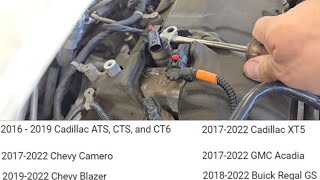
Typical fix: Replace the Bank 1 exhaust camshaft position actuator solenoid. The bolt should be torqued to 89 lb-in (approximately 10 N.m). 🎬 Watch: Step-by-step VVT solenoid replacement for the LGX engine.
Est. part cost: $40-$120 - Engine Control Module (ECM) Software Anomaly 🟡 Medium Probability TSB #PIP5568E was issued specifically to investigate this issue on 2016-2019 models with 3.0L and 3.6L engines. It notes that multiple cam codes (P0011, P0014, P0021, P0024) can set simultaneously as history codes, often triggered by an auto-stop/restart event where the ECM software fails to properly re-synchronize.
How to confirm: This is highly likely if you have multiple cam codes set at once, especially if they appeared after an auto-stop event and are stored as history codes. A GM dealer can check your VIN for any applicable software updates, specifically Service Update N192266190.
Typical fix: The TSB's initial instruction for dealers was to gather data, clear the codes, and return the vehicle to the customer. The permanent fix is an ECM software update (reprogram) performed by a dealer, as addressed in Service Update N192266190.
Est. part cost: $0-$200
Rare But Worth Checking
- Out-of-Phase Exhaust Camshaft Reluctor: TSB #21-NA-268 describes a scenario for the LGX/LGW engines where the reluctor ring on the exhaust camshaft can physically spin out of position. This causes a severe timing mismatch, leading to P0014, often accompanied by P0017, a crank/no-start or extended crank condition, and possible damage to the vacuum pump drive lugs. The fix requires removing the cam cover to inspect the reluctor's alignment and replacing the entire exhaust camshaft assembly if it has shifted.
- Stretched Timing Chain or Failed Tensioner: While the timing system on the LGX/LGW is more robust than on previous GM V6 engines, severe neglect of oil changes or very high mileage can still lead to timing chain stretch. This will throw off the base cam timing and can set this code, usually accompanied by a persistent rattling noise on startup.
- Failed Camshaft Phaser: The phaser is the mechanical gear at the end of the camshaft that the solenoid sends oil to. While the solenoid is far more likely to fail, the phaser itself can fail internally, getting stuck in an advanced position. This is a much more involved and expensive repair that typically requires removal of the timing cover.
Diagnosis Steps
- Check Engine Oil Level and Condition: This is the first and most important step. Verify the oil is full and clean. If not, perform an oil and filter change with full synthetic 5W-30 dexos1 Gen 2 oil. Clear the code and re-test.
- Scan for Other Codes: Use an OBD-II scanner to check for any other pending or stored codes. If P0011, P0021, or P0024 are present, suspect a systemic issue or software glitch per TSB #PIP5568E.
- Inspect Solenoid Wiring: Check the connector and wiring to the Bank 1 exhaust VVT solenoid for any visible damage, oil contamination, or loose connections. Bank 1 is on the firewall side of the engine; the exhaust solenoid is the lower of the two solenoids on the front of the cylinder head.
- Swap Solenoids (V6 Engines): Swap the Bank 1 exhaust solenoid (lower) with the Bank 1 intake solenoid (upper). They are identical parts. Clear codes and drive. If the code changes to P0011 (Intake Cam Position), you have confirmed the solenoid is faulty.
- Test or Replace Solenoid: If a swap isn't feasible, you can test the solenoid by applying 12V to its terminals to see if the internal piston actuates. Resistance across the terminals should be 8-13 Ohms. Given the high failure rate and moderate cost, replacement is a common and effective diagnostic step. Torque the new solenoid's bolt to 89 lb-in (10 N.m).
- Check for TSBs: Contact a GM dealer with your VIN to see if TSB #PIP5568E or TSB #21-NA-268 apply, or if any ECM software updates (like N192266190) are available.
- Advanced Mechanical Checks: If the above steps do not resolve the issue, the problem is likely mechanical. This involves inspecting for a failed cam phaser or a spun reluctor wheel per TSB #21-NA-268, which is best left to a professional.
Parts You'll Likely Need
- Camshaft Position Actuator Solenoid (VVT Solenoid)
(OEM #12697027 (Superseded by 12716051))— This solenoid controls oil flow to the cam phaser and is the most common part to fail or get clogged, leading directly to the P0014 code. All four solenoids on the V6 engines are typically the same part number.
Trusted brands: ACDelco, Delphi
OEM price range: $70-$120
Aftermarket price range: $40-$80 - Engine Oil and Filter — Low, old, or incorrect oil is a primary cause of VVT system faults. Always use a full synthetic oil that meets GM's dexos1 Gen 2 5W-30 specification to ensure proper VVT function and prevent sludge buildup.
Trusted brands: ACDelco dexos1, Mobil 1, Pennzoil Platinum
OEM price range: $60-$110
Aftermarket price range: $50-$90
Related Codes That Often Appear With This One
- P0011 — Intake Camshaft Position Timing Over-Advanced (Bank 1). If seen with P0014, it could point to a systemic issue on Bank 1 like low oil pressure or the software glitch described in TSB #PIP5568E.
- P0021 & P0024 — Bank 2 camshaft timing codes. TSB #PIP5568E notes that all four cam codes can set together on the V6 engines, often pointing to a software issue rather than four simultaneously failed parts.
- P0017 — Crankshaft Position - Camshaft Position Correlation (Bank 1 Exhaust). This code often appears with P0014 in the case of a more severe mechanical issue, such as a spun camshaft reluctor as described in TSB #21-NA-268.
Technical Service Bulletins (TSBs) & Recalls
- PIP5568E: Investigates the cause for P0011, P0014, P0021, and P0024 setting together or in pairs, potentially due to a software anomaly on 3.0L LGW and 3.6L LGX engines, often after an auto-stop.
- 21-NA-268: Provides diagnostic steps for a crank/no-start condition accompanied by DTC P0014 (and others), caused by an out-of-phase exhaust camshaft reluctor wheel on 3.0L and 3.6L engines.
Platform-Specific Known Issues
- A GM Preliminary Information Bulletin (PIP5568E) was issued for 2016-2019 models with the 3.0L (LGW) and 3.6L (LGX) engines regarding an investigation into P0014 setting along with P0011, P0021, and P0024. The bulletin suggests this can be a software glitch, especially after an auto-stop event, and initially instructed technicians to clear the codes before replacing parts. This was later addressed by a software update.
Mechanic-Grade Diagnostic Values
- Camshaft Position Actuator Solenoid (VVT Solenoid) Resistance — expected: 8 to 13 Ohms. Failure: A reading outside this range, or an open/short circuit, indicates a faulty solenoid.
- Engine Oil Pressure (LGX V6, warm idle) — expected: ~20-30 PSI. Failure: Pressure consistently below 20 PSI at warm idle can starve the VVT system and cause timing codes.
Scan Tool Commands That Help
- GDS2 (or equivalent professional scan tool): Camshaft Position Actuator Control — This bidirectional command allows a technician to manually command the camshaft phaser to advance or retard. By observing the 'desired' vs 'actual' cam position data on the scan tool, a technician can confirm if the solenoid and phaser are responding. A lazy or non-responsive phaser points to a hydraulic (oil pressure) or mechanical (solenoid/phaser) issue, helping to isolate the fault after basic checks are complete.
Wiring & Ground Locations
- Engine Compartment Fuse Block — On the driver's side of the engine compartment for the 3.0L and 3.6L engines.. This fuse block contains fuses and relays critical for the Engine Control Module (ECM) and its related sensors and actuators, including the VVT system. Checking relevant fuses (e.g., for ECM power) is a basic step in electrical diagnosis.
- Instrument Panel Fuse Block — Behind the storage compartment to the left of the steering wheel.. Contains fuses related to the ECM and other control modules that communicate with the engine systems.
- VVT Solenoid Connector — Bank 1 (firewall side) has two solenoids on the front of the cylinder head. The exhaust solenoid is the lower of the two. The connector is an oval shape with two wires.. This is the direct electrical connection to the most likely failed component. It should be inspected for damage, corrosion, or oil contamination.
Real Owner Repair Stories
- CAMARO6 forum user (2017 Chevrolet Camaro 1LT V6 LGX (same engine family as CT6)) — Check Engine Light with code P0014 appeared at ~64,000 miles. No noticeable loss of power or drivability issues initially.
❌ Tried (didn't work) Initially ignored the code as it turned off by itself, but it returned.
✅ What actually fixed it The user replaced the Bank 1 exhaust camshaft position actuator solenoid. They initially had trouble locating Bank 1 (passenger/firewall side) and mistakenly disconnected the Bank 2 sensor first. After locating the correct solenoid under the foam insulation on the passenger side, they replaced it, which resolved the Check Engine Light. - CorvetteForum user (2018 Chevrolet Colorado with 3.6L LGX engine, 40k miles) — Check engine light came on while cruising at 60 MPH, code P0014 was present.
❌ Tried (didn't work) User performed a visual inspection of wiring harnesses.
✅ What actually fixed it The user took the vehicle to a dealer. The dealer scanned the truck, confirmed the exhaust solenoid was bad, and replaced it under warranty. The repair took 1.5 hours and fixed the issue.
OEM Part Supersession History
12697027→12716051— Standard part revision and improvement by the manufacturer.
Model Year Variations Within This Range
- 2016-2019: The software anomaly described in TSB #PIP5568E was an ongoing investigation. A vehicle produced earlier in the range (e.g., 2016-2017) is more likely to have the original, unpatched ECM software compared to a later model (e.g., 2019) that may have received the fix from the factory. Therefore, checking for the N192266190 software update is more critical for earlier models in this range.
Helpful Videos
Used OEM Parts in Stock


New Aftermarket Parts Available


The information in this article is provided for general reference and educational purposes only. Vehicle specifications, procedures, and part compatibility can vary by production date, trim level, and region. Always consult your vehicle's factory service manual and verify part numbers before purchasing or performing repairs. Safety-critical components such as airbags, seat belts, and braking systems should be installed by a qualified professional.
- Cadillac CT6:
- 🎬 Helpful Videos
- 🛍️ Shop This Part
- What's Unique About the 2016-2019 Cadillac CT6
- Diagnostic Flowchart
- Symptoms You May Notice
- Most Likely Causes
- Rare But Worth Checking
- Diagnosis Steps
- Parts You'll Likely Need
- Related Codes That Often Appear With This One
- Technical Service Bulletins (TSBs) & Recalls
- Platform-Specific Known Issues
- Mechanic-Grade Diagnostic Values
- Scan Tool Commands That Help
- Wiring & Ground Locations
- Real Owner Repair Stories
- OEM Part Supersession History
- Model Year Variations Within This Range
- 🎟️ Get 5% Off