

OBD-II Code C2506: Front Camera Unit Malfunction
What C2506 means, why it triggers, and how to fix it
- Code C2506 disables critical safety systems like Automatic Emergency Braking, increasing your risk of a front-to-rear collision by up to 50%.
- The most common trigger is a skipped or failed ADAS calibration immediately following a windshield replacement.
- Before replacing an $800+ camera module, inspect the coaxial cables and wiring harness, a known failure point on Ford and Nissan vehicles.
- DIY repair is impossible because clearing the code requires an OEM-level scan tool and precise physical target calibration at a specialized shop.
- Always demand an OEM-equivalent windshield, as aftermarket glass with different optical thickness causes calibration to fail permanently.
What Does C2506 Mean?

Code C2506 means the Advanced Driver Assistance Systems (ADAS) module detects a fault with the windshield-mounted front camera. This camera drives safety features like automatic emergency braking and lane-keeping assist. The code triggers when the camera fails internally, loses calibration, or lacks initial configuration.
Technical definition: C2506 is a manufacturer-specific chassis code. Mitsubishi and Nissan define C2506-49 as a 'Front Camera Unit' internal malfunction or incomplete configuration. Ford uses a functionally equivalent code, U3000:49, indicating an internal electronic failure of the Image Processing Module A (IPMA).
Can I Drive With C2506?
Yes, But With Caution. Yes, but critical safety features are disabled. The vehicle's computer deactivates Automatic Emergency Braking (AEB) and Lane Departure Warning to prevent dangerous, unintended steering or braking. IIHS data shows AEB reduces front-to-rear crashes by 50%. Driving without it significantly increases collision risk.
Common Causes

- Improper camera calibration (Very Common) — After a windshield replacement or suspension work, the camera requires precise aiming. If calibration is skipped, performed on an unlevel surface, or done with incorrect lighting, the system sets this fault.
- Loose connection or damaged coaxial cable (Common) — The wiring connecting the camera to the main computer degrades or loosens. This is a documented failure point on Ford models, causing intermittent faults over bumps.
- Internal camera unit failure (Common) — The camera's internal electronics break down from heat stress or vibration over time, requiring full replacement.
- Non-OEM windshield installation (Common) — Aftermarket windshields often have different glass thickness or optical curvature. This distortion blinds the camera, making successful calibration impossible. 🎬 Watch: Why glass replacement requires professional ADAS recalibration.
- Software glitches (Less Common) — Communication breakdowns between the ADAS module and the camera trigger false hardware faults, often resolvable via a dealer firmware update.
- Obstructed camera view (Less Common) — Severe dirt, ice, or poorly placed windshield stickers block the lens. Prolonged obstruction triggers internal fault logic.
- Low battery voltage (Rare) — Modern ADAS modules are highly sensitive to voltage drops. A weak 12V battery causes initialization failures during vehicle startup.
Symptoms

- ADAS features disabled — Automatic Emergency Braking (AEB), Lane Keep Assist, and Adaptive Cruise Control immediately stop working.
- Dashboard warning messages — The instrument cluster displays 'Front Camera Fault', 'EyeSight Off', or a generic 'Driver Assistance System Malfunction'.
- Intermittent warnings — Faults appear only during heavy rain, direct sunlight, or when hitting potholes, indicating a loose wire or borderline hardware failure.
Diagnostic Flowchart

Tap your situation to follow the diagnostic path that matches what you're seeing on this code.
Common Fixes & Costs
- Front Camera Calibration/Aiming — Parts: $0, Labor: $250-$600, ~1.5 hr book time (Professional)
- Repairing Coaxial Camera Cables
— Parts: $50-$150, Labor: $200-$400, ~2.0 hr book time
(Intermediate)
Ford Mustang Mach-E (2021-2023): OEM Harness assembly per TSB 23-2137 (Alt: N/A) - Replacing the Front Camera Unit
— Parts: $500-$1000, Labor: $300-$500, ~2.5 hr book time
(Professional)
Mitsubishi Outlander (2022-2024): OEM 284F1W040P (Alt: N/A)
Nissan Sentra (2020-2024): OEM 284F1-6LB0B (Alt: N/A) - Updating Camera Control Module Software — Parts: $0, Labor: $100-$200, ~1.0 hr book time (Professional)
DIY vs Professional
- Front Camera Calibration/Aiming — Beginner:
Tools: OEM-level scan tool, specific ADAS targets, level ground, controlled lighting environment. - Replacing the Front Camera Unit — Beginner:
Tools: Trim removal tools, socket set. - Repairing Coaxial Camera Cables — Beginner:
Tools: Trim removal tools, multimeter, wire strippers, soldering iron. - Updating Camera Control Module Software — Beginner:
Tools: Manufacturer-specific diagnostic and programming tool.
Used vs. New Parts: Buying Guide
When a used part is worth it: Buying a used front camera module is highly discouraged. Used modules are often locked to the donor vehicle's VIN or contain internal faults.
Donor-vehicle mileage cap: roughly under 20000 miles for the part to have meaningful remaining life.
Donor quality checklist:
- Verify the exact OEM part number, including supersessions.
- Ensure the part comes from a vehicle with the exact same ADAS option package.
- Avoid parts from vehicles involved in front-end collisions.
Decision logic:
- If The part is a safety-critical electronic module like an ADAS camera. → Always buy new OEM. The risk of a used part failing to calibrate negates initial savings.
Warranty tradeoff: Used parts carry a 30-90 day warranty. New OEM parts carry a 1-year or longer warranty.
Worst-case if a used part fails: $800-$1500. If a used camera fails to calibrate, you pay for the failed labor, buy a new camera, and pay for labor again.
What Happens If You Wait — Timeline
- Immediate: Code C2506 stores. A warning message appears, and all dependent safety features (AEB, Lane Keep Assist) are disabled. (MPG impact: 0%% · Added cost: $0)
- 0-3 months: Risk of an at-fault collision increases by 50% without AEB. A minor collision repair costs more than the ADAS repair. (MPG impact: 0%% · Added cost: $2,000 - $15,000+)
- 3-12 months: The vehicle fails state safety inspections that check for illuminated dashboard warning lights. (MPG impact: 0%% · Added cost: $50 - $200)
Cost of Not Fixing It
- Immediate: All dependent ADAS features (Automatic Emergency Braking, Lane Keep Assist) are disabled. (Added cost: N/A)
- 0-6 months: Significantly increased risk of an at-fault collision. A rear-end crash easily costs thousands in repairs and insurance surcharges. (Added cost: $2,000 - $15,000+)
- 6+ months: The vehicle fails state safety inspections that check for active ADAS fault codes. (Added cost: $50 - $200)
Diagnosis Steps
- Check for Obvious Obstructions
Inspect the windshield area in front of the camera. Clean the glass thoroughly to remove dirt, bugs, or film blocking the lens.
Tools: Glass cleaner, microfiber towel (Beginner) - Read and Clear Codes
Use an all-system OBD-II scanner to read codes from the ADAS and BCM modules. Record U-series (communication) codes. Clear the codes and drive to see if C2506 returns immediately.
Tools: OBD-II Scanner with multi-system support (Beginner) - Check for TSBs
Search for Technical Service Bulletins related to your vehicle and C2506. Manufacturers frequently release software updates or wiring repair guides for this specific code.
Tools: Internet access (Intermediate) - Inspect Camera Wiring
Remove the plastic trim around the front camera. Inspect for loose connectors, pinched wires, or damaged coaxial cables (especially on Ford models).
Tools: Trim removal tools, flashlight (Intermediate) - Inspect Battery Voltage
Measure battery voltage with the car off (12.6V) and running (13.7-14.7V). Low voltage during engine cranking triggers false ADAS faults.
Tools: Multimeter (Beginner) - Analyze Live Data PIDs
Monitor live data from the Image Processing Module. Check 'Camera Status' and 'Calibration Status'. A 'Not Calibrated' status confirms a calibration issue, not a hardware failure.
Tools: OEM or professional-grade scan tool (Advanced) - Check Power and Ground at Camera
Unplug the camera and verify 12V power and near-zero resistance to ground at the connector. This proves the camera receives power before you condemn the unit.
Tools: Multimeter, vehicle-specific wiring diagram (Advanced) - Perform CAN Network Integrity Test
If communication codes are present, measure resistance between CAN-High (Pin 6) and CAN-Low (Pin 14) at the OBD-II port with the battery disconnected. It must read ~60 Ω.
Tools: Multimeter (Advanced) - Perform Camera Calibration
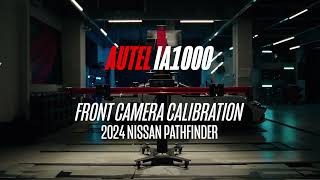
If the windshield was replaced or the camera removed, perform a static or dynamic calibration using OEM targets. This requires specialized shop equipment.
Tools: Professional scan tool, ADAS calibration targets (Professional)
When This Code Triggers (Freeze-Frame Conditions)
- System State: Active/On (The ADAS module runs a self-test upon ignition ON.)
- Vehicle Speed: 10-70 mph (The fault logs during both city and highway driving as the camera is continuously active.)
- Time Since Ignition Start: > 1 second (The code sets immediately after startup if an internal hardware fault or configuration issue is detected.)
Related Codes
- C2503 — Means 'Camera Aiming Incomplete'. If present with C2506, the issue is strictly a failed calibration. Do not replace parts.
- U3000:49 — Ford's equivalent code for an internal electronic failure in the Image Processing Module A (IPMA), often pointing to coaxial cable issues.
- U1000 — Generic CAN Communication code. Indicates the camera cannot talk to the network, shifting focus to wiring rather than the camera itself.
- C1F6B — Nissan code for 'Camera Unit Malfunction'. Appearing alongside C2506 strongly suggests internal hardware failure requiring replacement.
Climate & Environmental Factors
- Extreme Heat: Prolonged exposure to intense heat degrades internal camera electronics and adhesives, accelerating hardware failure.
- Direct Sunlight / Glare: Low-angle sunlight temporarily blinds the camera. Prolonged inability to see triggers internal fault logic.
- Heavy Rain or Snow: Severe weather reduces visibility, causing temporary system unavailability. High humidity also fogs the lens internally.
How to Talk to a Mechanic About This Code
Say this: "I have a C2506 front camera malfunction code. If it appeared after a windshield replacement, state that. For Fords, ask them to check coaxial cables per TSB 23-2137. For all others, ask them to check TSBs, software updates, and wiring integrity before quoting a new camera."
This directs the technician toward logical, cost-effective diagnostics (calibration, wiring, software) and prevents an immediate, expensive camera replacement.
Avoid saying:
- 'My camera isn't working, just fix it.'
- 'My pre-collision light is on, can you look at it?'
- 'I think I need a new camera.'
Questions to ask before authorizing the repair:
- Can you confirm you have OEM-specific targets and a level space for ADAS calibration?
- Did you verify the camera receives power and ground, and check for software updates?
- If calibration failed, was it due to the equipment, the vehicle, or an aftermarket windshield?
Where to Take It: Dealer vs Independent vs Chain
- Dealer:
A safe but expensive bet. Use the 'repair_order_language' to guide them away from the most expensive fix first.
Best for: Vehicles under warranty., Complex manufacturer-specific issues or required software updates., Guaranteed access to correct OEM tools and targets.
Downsides: Highest labor rates., May default to replacing the camera module rather than diagnosing wiring. (Typical cost: +50% vs. baseline) - Independent Shop:
Recommended ONLY if you find a certified ADAS specialist. A general mechanic cannot perform this repair.
Best for: Out-of-warranty vehicles where cost is a major factor., Shops that specifically advertise certified 'ADAS Calibration Services'.
Downsides: General shops lack specialized ADAS equipment and sublet the work to dealers., Quality varies widely. (Typical cost: +0% vs. baseline) - Chain Shop:
AVOID. These shops cannot handle complex electronic ADAS repairs.
Best for: Simple maintenance like oil changes and tires.
Downsides: Lack required ADAS calibration equipment., High potential for misdiagnosis. (Typical cost: -10% vs. baseline)
When to Walk Away From the Repair
If the total estimated repair cost exceeds 40-50% of your car's private-party value, consider selling the car as-is.
- Car worth $20000, fix is $1500: Fix it. The repair restores critical safety features for less than 10% of the vehicle's value.
- Car worth $8000, fix is $1500: Borderline. Get a second opinion to confirm a new camera is truly needed before proceeding.
- Car worth $4000, fix is $1500: Walk away. It is not economical to invest this much into an older vehicle for a single repair.
What Scan Tool You Need for This Code

Minimum: A scanner that reads manufacturer-specific Chassis (C-codes) from ADAS or BCM modules.
Standard $20 OBD-II readers only access engine P-codes. Code C2506 is stored in a separate module, making it invisible to basic scanners.
Budget: BlueDriver Pro Scan Tool (~$119) — Reads and clears enhanced codes from ADAS modules. Confirms the C2506 code but cannot perform calibration.
Mid-range: Foxwell NT630 Plus / iCarsoft CR MAX (~$150) — Provides full-system diagnostics and bi-directional controls to perform active tests on ADAS components.
Professional: Autel MaxiCOM MK808 / Launch X431 Series (~$450-900) — Views critical live data PIDs like 'Calibration Status' and initiates the actual ADAS camera calibration procedure.
Rent vs buy: Buy a mid-range scanner to confirm the code and check live data. Renting a basic scanner is useless as it won't read C-codes.
How to Clear the Code After You Fix It
- Perform the physical repair (replace camera, fix wiring, or replace windshield).
- Use a professional-grade scan tool to clear the C2506 fault code from the ADAS module.
- Perform the mandatory static or dynamic calibration procedure as specified by the OEM.
Drive cycle (~20 minutes): Dynamic calibration requires driving on a straight road with clear lane markings at a steady speed (30-45 mph) until the scan tool indicates success. For a simple code clear, a 20-minute drive confirms the fix.
Readiness monitors affected: This is a Chassis code and does not affect emissions readiness monitors.
Watch out for:
- Clearing the code with a scanner does not fix the problem; it returns immediately if calibration is incomplete.
- Attempting dynamic calibration in poor weather or on roads with faded markings guarantees failure.
Will This Fail Emissions / State Inspection?
No — by itself this code doesn't fail OBD inspection (but it can keep readiness monitors from setting, which causes a separate fail).
- California: Passes traditional Smog Check, but revived salvage vehicles fail the Vehicle Safety Systems Inspection (VSSI) which checks ADAS functions.
- New York: Annual safety inspections fail vehicles with illuminated ADAS warning lights on the dashboard.
- Texas: Annual safety inspections require all dashboard warning lamps to illuminate and turn off. A persistent ADAS light results in failure.
Most Commonly Affected Vehicles
- Ford Mustang Mach-E (2021-2023) — TSB 23-2137 identifies faulty coaxial cables between the camera and IPMA module as the primary cause, not the camera itself.
- Nissan Sentra (2020-2024) — TSB NTB20-061 requires reprogramming the camera control unit or modifying the mounting feet to resolve C2506 and related codes.
- Mitsubishi Outlander (2022-2024) — Mitsubishi diagnostic procedures mandate replacing the camera unit (Part 284F1W040P) if the code persists after five ignition cycles.
- Nissan Ariya (2023-2024) — TSB NTB23-077 lists C2506-49 as a fault triggered by low battery voltage during startup.
- Ford Bronco (2021-2024) — Frequently experiences loose wiring connections at the main computer, triggering 'Front Camera Fault' messages.
- Subaru Outback, Legacy, Forester (2015-2024) — The EyeSight system disables entirely if unrelated faults (like a bad brake light switch) occur. Requires full system scans.
- Chevrolet Silverado (2022-2024) — A C2506 fault completely disables the Super Cruise hands-free driving system.
- Kia K4 (2025-2025) — Identified in Kia TSB ELE384 as an active diagnostic code for camera system failures.
Manufacturer-Specific Notes
- Ford: A 'Front Camera Fault' is frequently caused by a faulty coaxial cable, not the camera. Always reference TSB 23-2137 before authorizing a camera replacement.
- Nissan: Service bulletins require physically modifying the camera's mounting feet or reprogramming the module to fix false camera malfunction codes.
- Mitsubishi: Diagnostic procedures require cycling the ignition five times. If the code remains, the official fix is immediate camera replacement.
- Subaru: EyeSight is deeply integrated. A simple DIY 12V battery replacement often triggers camera faults requiring a dealer recalibration.
Real Owner Stories
2020 Mitsubishi Outlander SE after windshield replacement
Following a windshield repair, the collision shop failed to calibrate the camera. They replaced the camera, but the new one also failed.
What they tried:
- Collision shop attempted calibration multiple times.
- Replaced the front camera unit.
- Transferred to a dealership, where the master mechanic struggled for five days to calibrate the new camera.
Outcome: The issue resolved after two weeks, highlighting extreme difficulty in calibration even for professionals.
Lesson: Calibration is exceptionally difficult. Ensure the shop uses correct OEM targets and an OEM-equivalent windshield, as aftermarket glass guarantees failure.
2023 Ford Mustang Mach-E with intermittent 'Front Camera Fault'
The 'Front Camera Fault' message appeared intermittently after hitting bumps.
What they tried:
- Dealership diagnostics found codes related to the IPMA.
- Technicians followed TSB 23-2137, pointing to faulty coaxial cables.
Outcome: Replacing the specific wiring harness resolved the fault without needing an expensive camera module.
Lesson: For Ford vehicles showing C2506 or U3000:49, insist the service center investigate TSB 23-2137 regarding coaxial cables before approving a camera replacement.
2020 Subaru Forester with random 'EyeSight Off' warnings
The EyeSight system randomly turned off and on after the owner replaced the 12V battery.
What they tried:
- Cleaned the windshield glass.
- Drove the vehicle for several days to allow the system to relearn.
Outcome: The issue resolved itself over time after several drive cycles for some, while others required a dealership recalibration.
Lesson: Subaru EyeSight is sensitive to power interruptions. After replacing the battery, temporary ADAS faults occur. If they persist, professional recalibration is necessary.
How to Prevent This Code From Triggering
- Keep the windshield area in front of the camera clean (Weekly or as needed) — Dirt, bugs, and road grime obstruct the camera's view, leading to temporary unavailability or stored fault codes.
- Avoid placing stickers or tints in the camera's line of sight (Always) — Any object or film distorts the light entering the camera, causing calibration failure.
- Use a windshield sunshade when parked in direct sunlight (During hot, sunny weather) — Prolonged exposure to intense heat accelerates the degradation of the camera's electronic components.
- Install vehicle software updates (Annually or when notified) — Firmware updates fix bugs and improve ADAS logic, preventing false fault codes.
Frequently Asked Questions
What does 'Front Camera Malfunction' mean?
The vehicle's computer detects a fault with the forward-facing ADAS camera. This disables safety features like pre-collision assist. Common causes include a dirty windshield, failed calibration, or internal hardware failure.
Do I need to recalibrate after a windshield replacement?
Yes. The camera mounts directly to the windshield glass. Even a millimeter of displacement alters its view, requiring mandatory professional recalibration to restore safety systems.
Does insurance cover ADAS calibration?
Yes, if the calibration is tied to a covered repair like a windshield replacement or collision damage. Ensure the repair shop includes the calibration line item on your claim.
Why did my ADAS calibration fail?
Calibration fails if the shop floor isn't perfectly level, lighting is incorrect, or targets are placed at the wrong distance. An aftermarket windshield with poor optical clarity also guarantees calibration failure.
Can a small windshield chip cause this fault?
Yes. A chip or crack in the camera's direct line of sight distorts the image. Manufacturers mandate recalibration if a repair occurs in this field of vision.
Can I replace the front camera myself?
No. While physically bolting in a new camera is easy, the unit remains dead until professionally calibrated. You must take the vehicle to an ADAS-certified shop with OEM targets.
How much does it cost to fix a C2506 code?
A standalone recalibration costs $250 to $600. If the camera module requires replacement, total costs including parts, labor, and mandatory calibration range from $800 to $1,500.
Why did my safety features turn off?
The computer disables automatic braking and steering as a fail-safe. It cannot trust the data from a faulty camera and shuts down to prevent dangerous, unintended vehicle maneuvers.
Can bad weather cause a C2506 code?
Heavy rain, snow, or direct sunlight temporarily blind the camera, causing an 'unavailable' message. If the C2506 code stores permanently after the weather clears, you have a hard hardware or calibration fault.
Key Takeaways
- Code C2506 disables critical safety systems like Automatic Emergency Braking, increasing your risk of a front-to-rear collision by up to 50%.
- The most common trigger is a skipped or failed ADAS calibration immediately following a windshield replacement.
- Before replacing an $800+ camera module, inspect the coaxial cables and wiring harness, a known failure point on Ford and Nissan vehicles.
- DIY repair is impossible because clearing the code requires an OEM-level scan tool and precise physical target calibration at a specialized shop.
- Always demand an OEM-equivalent windshield, as aftermarket glass with different optical thickness causes calibration to fail permanently.
Helpful Videos

The information in this article is provided for general reference and educational purposes only. Vehicle specifications, procedures, and part compatibility can vary by production date, trim level, and region. Always consult your vehicle's factory service manual and verify part numbers before purchasing or performing repairs. Safety-critical components such as airbags, seat belts, and braking systems should be installed by a qualified professional.
- 🎬 Helpful Videos
- What Does C2506 Mean?
- Can I Drive With C2506?
- Common Causes
- Symptoms
- Diagnostic Flowchart
- Common Fixes & Costs
- DIY vs Professional
- Used vs. New Parts: Buying Guide
- What Happens If You Wait — Timeline
- Cost of Not Fixing It
- Diagnosis Steps
- When This Code Triggers (Freeze-Frame Conditions)
- Related Codes
- Climate & Environmental Factors
- How to Talk to a Mechanic About This Code
- Where to Take It: Dealer vs Independent vs Chain
- When to Walk Away From the Repair
- What Scan Tool You Need for This Code
- How to Clear the Code After You Fix It
- Will This Fail Emissions / State Inspection?
- Most Commonly Affected Vehicles
- Manufacturer-Specific Notes
- Real Owner Stories
- 2020 Mitsubishi Outlander SE after windshield replacement
- 2023 Ford Mustang Mach-E with intermittent 'Front Camera Fault'
- 2020 Subaru Forester with random 'EyeSight Off' warnings
- How to Prevent This Code From Triggering
- Frequently Asked Questions
- What does 'Front Camera Malfunction' mean?
- Do I need to recalibrate after a windshield replacement?
- Does insurance cover ADAS calibration?
- Why did my ADAS calibration fail?
- Can a small windshield chip cause this fault?
- Can I replace the front camera myself?
- How much does it cost to fix a C2506 code?
- Why did my safety features turn off?
- Can bad weather cause a C2506 code?
- Key Takeaways
- 🎟️ Get 5% Off