

OBD-II Code C2302: Leveling Plausibility Error
What C2302 means, why it triggers, and how to fix it
- Code C2302 triggers when the air suspension compressor runs for over 120 seconds without reaching the target 14-15 Bar system pressure.
- The most frequent cause on Jaguar and Land Rover vehicles is a worn compressor piston ring, which is fixable with a $40 DIY rebuild kit.
- Driving with this code forces the compressor to run constantly, turning a minor leak into a $1,000+ compressor burnout failure within weeks.
- Always start diagnosis by swapping the $20 suspension relay and spraying soapy water on the air struts to locate leaks before buying expensive parts.
What Does C2302 Mean?

Code C2302 indicates the air suspension module detected a problem with the vehicle's ability to level itself. The computer commanded the system to adjust the ride height, but the process took longer than the programmed time limit. The system flags this delay as an implausible leveling event.
Technical definition: Levelling Plausibility Error. This manufacturer-specific code (primarily Jaguar, Land Rover, and Mercedes-Benz) triggers when the Air Suspension Control Module (ASM) determines the air compressor has run continuously for its maximum allowed duration (typically 120 seconds) without reaching the target ride height or reservoir pressure.
Can I Drive With C2302?
Yes, But With Caution. Yes, but limit driving to short trips under 30 mph. Continuing to drive forces the air suspension compressor to run constantly, leading to a $900-$1,500 burnout failure. Tow the vehicle immediately if it sits so low the tires rub the wheel wells.
Common Causes

- Worn Air Suspension Compressor Piston Ring (Very Common) — The PTFE piston ring inside the air compressor wears down over time. The compressor becomes weak and cannot build pressure fast enough to meet the 120-second time limit.
- Air Leak in Suspension System (Common) — Leaks in the rubber air springs, lines, or fittings force the compressor to run constantly. If the leak outpaces the compressor's output, the code triggers.
- Failing Air Suspension Relay (Common) — The relay switches the compressor on and off. A failed or 'sticky' relay prevents the compressor from running or causes it to run continuously until it burns out.
- Faulty or Seized Ride Height Sensor (Common) — Height sensors report corner elevations to the computer. A broken linkage, corroded connector, or internal 'dead spot' sends incorrect data, causing impossible leveling requests.
- Saturated Air Compressor Dryer (Less Common) — The desiccant dryer removes moisture. A saturated dryer restricts airflow, forcing the compressor to work harder and less efficiently.
- Leaking or Malfunctioning Valve Block (Uncommon) — The valve block directs air to individual springs. Internal leaks or failed solenoids prevent the system from holding pressure or leveling properly.
- Defective or Improperly Installed Air Struts (Uncommon) — A code appearing immediately after replacing air struts indicates a defective new part, a damaged air line o-ring, or a misaligned height sensor.
- Corrosion from Leaking Battery (Rare) — If the battery is located near suspension components (e.g., in the trunk), leaked acid corrodes nearby air lines or valve block wiring.
- Software Malfunction (Rare) — A software glitch in the Air Suspension Control Module causes false plausibility errors. Manufacturers occasionally release Technical Service Bulletins (TSBs) to patch this.
Symptoms

- Air Suspension Fault Warning on Dash — An amber warning light and a message like 'AIR SUSPENSION FAULT' or 'VEHICLE TOO LOW' appears on the instrument cluster.
- Vehicle is Lower Than Normal or Uneven — The vehicle sits low on one corner, one axle, or all four corners. It may appear 'stuck' and fail to raise.
- Harsh or Bumpy Ride — The system defaults to a 'hard' setting or deactivates active damping, making the ride stiff and uncomfortable.
- Compressor Runs Constantly or Not at All — The air compressor runs for several minutes without shutting off, or fails to turn on entirely due to a blown relay.
- Vehicle Sags When Parked — The vehicle drops overnight or over several hours, indicating a slow leak. Upon startup, it struggles to return to ride height.
Diagnostic Flowchart
Tap your situation to follow the diagnostic path that matches what you're seeing on this code.
Common Fixes & Costs
- Rebuild Air Compressor with a New Piston Ring Kit
— Parts: $30-$60, Labor: $150-$300, ~2.2 hr book time
(Intermediate)
Jaguar XJ (X350): OEM N/A (Component not sold by OEM) (Alt: Bagpiping Andy Kit, 4x4AirSeals Kit) - Replace Air Suspension Compressor Relay
— Parts: $15-$40, Labor: $20-$50, ~0.2 hr book time
(Beginner)
Jaguar XJ (X350): OEM C2P11192 (Alt: Bosch 0332019150 (5-pin 40A))
Land Rover Discovery 3 (LR3): OEM YWB500220 (Alt: Standard 4-pin relay)
Mercedes S-Class (W220): OEM A0025427219 (Alt: Hella 4RA933332-021) - Replace the Air Suspension Compressor
— Parts: $350-$1,200, Labor: $150-$250, ~1.8 hr book time
(DIY)
Jaguar XJ (X350): OEM C2C27702 (Alt: Arnott P-2172, WABCO 4154031120)
Land Rover Discovery 3 (LR3): OEM LR072537 (AMK) (Alt: Dunlop D4965, Arnott P-2645)
Mercedes S-Class (W220): OEM A2203200104 (Alt: Aerosus 100-00010-1, Arnott P-2830) - Replace a Leaking Air Spring/Strut
— Parts: $250-$1,500, Labor: $200-$500, ~2.5 hr book time
(Professional)
Jaguar XJ (X350): OEM C2C41349 (Front) (Alt: Arnott AS-2710)
Land Rover Discovery 3 (LR3): OEM RNB501580 (Front) (Alt: Arnott AS-2809)
Mercedes S-Class (W220): OEM A2203202438 (Front) (Alt: Arnott AS-2884) - Replace a Faulty Ride Height Sensor
— Parts: $80-$450, Labor: $100-$200, ~1.0 hr book time
(DIY)
Jaguar XJ (X350): OEM C2C2242 (Front) (Alt: Standard Motor Products)
Land Rover Discovery 3 (LR3): OEM LR020157 (Front Right) (Alt: Allmakes, Britpart)
Mercedes S-Class (W220): OEM A0105427717 (Alt: Bosch, Hella)
DIY vs Professional
- Replace Air Suspension Compressor Relay — Beginner:
Tools: Fuse puller. - Rebuild Air Compressor with a New Piston Ring Kit — Beginner:
Tools: Jack, stands, socket set, Torx bits (T30). - Replace the Air Suspension Compressor — Beginner:
Tools: Jack, stands, socket set, line wrench. - Replace a Faulty Ride Height Sensor — Beginner:
Tools: Jack, stands, socket set, trim tool. - Replace a Leaking Air Spring/Strut — Beginner:
Tools: Advanced scan tool, jack, stands, breaker bar, torque wrench, line wrenches.
Used vs. New Parts: Buying Guide
When a used part is worth it: A used compressor from a low-mileage (under 60,000 miles) collision donor saves money but carries unknown remaining lifespan risks. It is only recommended for strict budgets.
Donor-vehicle mileage cap: roughly under 60000 miles for the part to have meaningful remaining life.
Donor quality checklist:
- Verify the part number matches exactly, including superseded numbers.
- Check the donor VIN history to confirm mileage and a non-suspension salvage reason.
- Inspect for corrosion, melted electrical connectors, or cut air lines.
Decision logic:
- If The fault is diagnosed as a worn piston ring and the motor still runs → Buy a $30-$60 rebuild kit. This is the most cost-effective repair for a weak but functional compressor.
- If The vehicle is a keeper and budget allows → Buy a new OEM or high-quality aftermarket (e.g., Arnott, WABCO) compressor for the lifetime warranty and reliability.
- If Budget is strict and you are doing the labor yourself → Buy a used compressor from a reputable salvage yard, accepting the risk of premature failure.
Warranty tradeoff: Used parts offer a 30-90 day warranty. New aftermarket compressors from brands like Arnott often include a limited lifetime warranty in North America. OEM parts carry a 1-2 year warranty.
Worst-case if a used part fails: $300-$600 if a used compressor fails shortly after installation, requiring repeat labor and a replacement part.
What Happens If You Wait — Timeline
- 0-1 month: Intermittent 'Air Suspension Fault' light during cold starts. The light clears on its own. No noticeable change in ride height. Compressor run time increases slightly. (Added cost: $0)
- 1-3 months: Fault light is permanent. Ride becomes harsh as the system enters 'hard' mode. The compressor runs for its maximum 120-second timeout at every startup. The vehicle sags slightly after 8 hours. (Added cost: $50-$100 in accelerated wear on the compressor motor and relay.)
- 3-6 months: The compressor overheats from constant use. The internal piston ring is severely worn, failing to build pressure. The vehicle sags significantly overnight. Uneven tire wear begins. (Added cost: $400-$800 (The original leak has now destroyed the compressor. Potential cost for one new tire).)
- 6+ months: Catastrophic failure. The compressor motor or relay burns out completely. The vehicle is bottomed out and undrivable. Repair requires fixing the original leak AND replacing the compressor assembly. (Added cost: $900-$2,600 (Cost of a new compressor, relay, struts, and tires).)
Cost of Not Fixing It
- Immediate: A harsh, bouncy ride and compromised handling. A dedicated suspension warning light illuminates on the dashboard. (Added cost: 0)
- 0-3 months: The air compressor runs continuously to compensate for leaks, causing the motor and relay to overheat and burn out completely. (Added cost: $900-$2,600)
- 3-12 months: Driving on a sagging suspension ruins tire geometry, destroying the inner or outer edges of the tires and stressing ball joints. (Added cost: $400-$1,200)
Diagnosis Steps
- Read All Fault Codes
Use an advanced OBD-II scanner to confirm C2302. Note any accompanying codes, such as specific height sensor faults (C1A03, C1A04) or compressor circuit codes, which pinpoint the root cause.
Tools: Advanced OBD-II Scanner (Beginner) - Check the Compressor Relay and Fuses
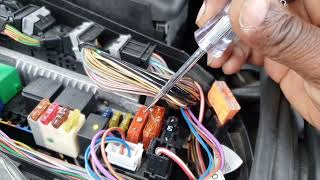
Locate the air suspension relay and main 40A fuse. Swap the relay with an identical non-critical one (like the horn). If the compressor starts working, the original relay is dead.
Tools: Owner's Manual, Fuse Puller (Beginner) - Perform a Visual Inspection and Measure Sag
Park on a level surface and measure the ride height at all four corners from the wheel center to the fender lip. Check again after 4 hours. A drop of more than 15mm confirms a significant air leak.
Tools: Tape Measure (Beginner) - The Soapy Water Test
Mix soap and water in a spray bottle. With the system pressurized, spray the air lines, valve block fittings, and the top/bottom of each air strut. Leaks reveal themselves as growing bubbles.
Tools: Spray Bottle, Soapy Water (Beginner) - Check System Pressure via Live Data
Monitor the 'Reservoir Pressure' PID on a scan tool. A healthy compressor reaches 14-15 Bar (200-220 PSI). If it runs for 2 minutes but fails to exceed 10-12 Bar, the compressor is weak.
Tools: Advanced OBD-II Scanner with Live Data (Advanced) - Inspect Ride Height Sensors and Linkage
Visually inspect the sensors on the suspension arms. Look for broken plastic linkages, bent brackets, or corroded wiring. Ensure the sensor arms move freely.
Tools: Flashlight (Intermediate) - Test the Compressor Directly
Remove the relay and use a jumper wire to connect terminals 30 and 87 in the socket. If the compressor runs when jumped but not normally, the control circuit or relay is faulty. If it runs weakly, the motor is worn.
Tools: Jumper Wire, Relay Diagram (Advanced) - Measure Compressor Current Draw
Clamp a DC ammeter on the compressor's main power wire. A healthy unit draws 8-12 amps. A draw over 15A suggests a struggling motor or clogged dryer. Under 8A indicates a weak motor.
Tools: DC Clamp-on Ammeter (Advanced) - Test Ride Height Sensor Voltage
Back-probe the sensor's signal wire with a multimeter. The 5V reference signal should change smoothly as you manually move the suspension arm. Jumpy or static voltage (0V or 5V) indicates a failed sensor.
Tools: Multimeter, Back-probe Pins (Advanced)
When This Code Triggers (Freeze-Frame Conditions)
- System State: Leveling Active (Logs when the Air Suspension Control Module commands the compressor to run to achieve a target height.)
- Compressor Run Time: > 120 seconds (Sets when the compressor runs continuously for the manufacturer-defined time limit without height sensors confirming the target level.)
- Vehicle Speed: 0-25 mph (Triggers at low speeds or startup. The compressor is often inhibited above certain speeds, making the fault most likely during city driving or immediately after ignition.)
- System Pressure: < 12 Bar (System pressure fails to exceed 10-12 Bar during the compressor cycle, indicating a weak compressor or a significant air leak.)
Related Codes
- C2303 — 'Reservoir Plausibility Error'. C2302 is a general leveling timeout, while C2303 specifically flags the reservoir failing to pressurize. Both point to a weak compressor or a major leak.
- C1A20 — 'Pressure increases too slow when filling reservoir.' This Land Rover code is functionally identical to C2302/C2303, pointing directly to a weak compressor or system leak.
- C1A27 — 'Compressor circuit fault.' Indicates an electrical problem (failed relay, bad wiring, internal motor short) rather than a pneumatic performance issue.
- 1400 — Audi/VW code for 'Control Position not Learned'. Appears if the system loses calibration, often after replacing a component or failing to use 'Jack Mode' before lifting.
Climate & Environmental Factors
- Cold Weather: Cold temperatures harden rubber air springs and seals, turning microscopic leaks into major pressure losses. Moisture in the system freezes, blocking air lines and valves.
- High Humidity: Humid air saturates the compressor's desiccant dryer rapidly. This allows water into the system, corroding the valve block internally and damaging the compressor's reed valves.
- High Altitude: Lower ambient air pressure forces the compressor to run longer to achieve the 14-15 Bar system target, increasing wear and the likelihood of a timeout error.
How to Talk to a Mechanic About This Code
Say this: "I have an 'Air Suspension Fault' warning and a C2302 code. My main symptom is [CHOOSE ONE: 'the car sags overnight' OR 'the car holds its height but the fault appears while driving']. Please start by performing a soapy water leak test and verifying compressor pressure output before quoting major parts."
This proves you understand the difference between a leak and a weak compressor, preventing a shop from immediately quoting $2,000 air struts without a logical diagnosis.
Avoid saying:
- 'My air suspension is broken, just fix it.'
- 'I don't know what's wrong, the suspension light is on.'
- 'I think I need new air shocks.'
Questions to ask before authorizing the repair:
- What was the result of the leak test? Can you show me the bubbles?
- How long does the compressor take to fill the reservoir and what peak pressure does it reach?
- Did you test the suspension relay?
- Is a wheel alignment required after this specific repair?
- What is the warranty on the parts and labor?
Where to Take It: Dealer vs Independent vs Chain
- Dealer:
Recommended only if a software update is required or warranty applies. Otherwise, an independent specialist is far more cost-effective.
Best for: Vehicles under factory warranty., Complex cases requiring manufacturer software updates (e.g., Land Rover AMK compressor upgrade).
Downsides: Highest labor rates and parts markup., Unwilling to install customer-supplied parts or perform $40 compressor rebuilds. (Typical cost: +50% vs. baseline) - Independent Shop:
Best fit. An independent European specialist sees C2302 frequently and utilizes cost-effective diagnostic shortcuts and rebuild kits.
Best for: Out-of-warranty European vehicles (Jaguar, Land Rover, Mercedes)., Cost-conscious owners wanting a thorough diagnosis., Accessing high-quality aftermarket or rebuilt parts.
Downsides: Quality varies; ensure the shop specializes in your specific European brand., May lack dealer-level software for brand-new models. (Typical cost: +0% vs. baseline) - Chain Shop:
AVOID. This diagnostic process requires specialized knowledge and tools absent from general repair chains.
Best for: Not recommended for air suspension repairs.
Downsides: Technicians lack experience with complex pneumatic systems., Lack advanced scan tools to read chassis codes, live data, or perform calibrations., High risk of misdiagnosis and unnecessary part replacement. (Typical cost: -10% vs. baseline)
When to Walk Away From the Repair
If the total estimated repair cost for the air suspension exceeds 40-50% of the car's current private-party value, consider selling the vehicle or installing a coil spring conversion kit.
- Car worth $5500, fix is $3000: Walk away. A $3,000 repair on a $5,500 car is a poor investment. Install a $1,000 coil conversion kit or sell the car.
- Car worth $8000, fix is $1200: Fix it. A $1,200 repair (new compressor and relay) is well below the threshold for an $8,000 vehicle.
- Car worth $4500, fix is $2200: Borderline. Get a second opinion. If the fix is a $40 compressor rebuild kit, do it. If it needs new struts and a compressor, walk away.
What Scan Tool You Need for This Code

Minimum: A scanner that reads manufacturer-specific Chassis ('C') codes and displays live data (pressure, sensor voltage) from the Air Suspension Control Module.
A basic $20 OBD-II reader cannot see C2302, as it only reads generic Powertrain ('P') codes. You cannot diagnose the problem or clear the fault light.
Budget: Not Recommended (~$0) — Scanners in this range cannot reliably access the specific JLR or Mercedes chassis modules needed for C2302.
Mid-range: iCarsoft LR V3.0 (for JLR) or Foxwell NT510/NT530 (~$190) — Reads and clears C2302, displays live suspension data (sensor heights, compressor pressure), and performs system tests. Ideal for DIYers.
Professional: Autel MaxiCOM MK808S or Foxwell NT809 (~$450-600) — Full bidirectional control to command the compressor and valves directly. Performs system calibrations and software-driven procedures.
Rent vs buy: Buy. You cannot rent specialized chassis scanners from auto parts stores. Owning a capable scanner is mandatory for air suspension troubleshooting.
How to Clear the Code After You Fix It
- Reconnect the battery if disconnected during repair.
- Use an advanced OBD-II scan tool capable of reading chassis ('C') codes to clear the fault from the Air Suspension Control Module.
- Start the vehicle and allow the compressor to run to achieve normal ride height.
- Lock the car and let it sit for 2-4 hours to allow the suspension module to fully reset and re-learn baseline heights.
Drive cycle (~20 minutes): C2302 does not require a specific drive cycle. The system self-tests upon startup. Drive for 20 minutes, mixing city speeds with a brief period over 30 mph, to ensure the suspension adjusts correctly and the fault stays clear.
Readiness monitors affected: None
Watch out for:
- Using a basic $20 OBD-II reader will not clear a chassis ('C') code.
- The code returns immediately if the underlying pneumatic leak or weak compressor is not fixed.
- Replacing a Land Rover Hitachi compressor with an AMK unit requires a mandatory software update to function.
Will This Fail Emissions / State Inspection?
No — by itself this code doesn't fail OBD inspection (but it can keep readiness monitors from setting, which causes a separate fail).
- General: This chassis code illuminates a dedicated suspension warning light, not the Check Engine Light (MIL). It does not cause an OBD-II emissions scan failure.
- California: While C2302 passes the OBD scan, a technician will fail the vehicle on visual inspection if it sits abnormally low, constituting a safety hazard.
- New York: Annual inspections include safety and emissions. Any illuminated dashboard warning light, including the air suspension fault, triggers a safety failure.
- Texas: The inspection procedure includes a bulb check of all warning indicators. An illuminated air suspension light causes a safety inspection failure in applicable counties.
Most Commonly Affected Vehicles
- Jaguar XJ (X350, X358) (2003-2009) — The Wabco compressor is highly prone to piston ring wear. The system sets this fault if the compressor runs for approximately 120 seconds without reaching target pressure.
- Jaguar Vanden Plas / Super V8 (2004-2009) — These XJ variants share the exact same air suspension system and vulnerabilities.
- Land Rover Discovery 3 (LR3) (2005-2009) — The original Hitachi compressor fails frequently. TSB LTB00420v3 mandates replacing failed units with an AMK compressor kit and performing a software update.
- Land Rover Range Rover Sport (2005-2013) — Shares the LR3 platform. Early models (2005-2009) use the vulnerable Hitachi compressor; later models (2010-2013) use the AMK unit. Both suffer from relay and leak issues.
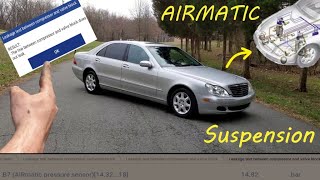
- Mercedes-Benz S-Class (W220) (1999-2006) — The AIRMATIC system is notorious for strut leaks that overwork and destroy the compressor. Valve block failures are also common.
- Audi Allroad (C5) (1999-2005) — A failing compressor blows the 40A fuse and burns out the J403 control relay. The relay must be replaced alongside the compressor.
- Porsche Cayenne (9PA) (2003-2010) — Shares air suspension with the VW Touareg. Compressor weakness and strut leaks trigger leveling faults.
Manufacturer-Specific Notes
- Jaguar: On 2003-2009 XJ models, C2302 is overwhelmingly caused by a worn PTFE piston ring in the compressor. A $40 DIY rebuild kit fixes the issue without replacing the entire unit.
- Land Rover: The frame-mounted compressor is highly susceptible to dirt and moisture. Upgrading the original Hitachi compressor to the robust AMK unit requires a new housing, bracket, and a mandatory dealer software update.
- Audi: On the C5 Allroad, replacing the J403 relay and checking the 40A fuse is critical when installing a new compressor. An old relay will immediately burn out a new compressor.
- Mercedes-Benz: The W220 AIRMATIC valve block is a frequent secondary failure point. Technicians recommend replacing the compressor, relay, and valve block as a set if a strut has leaked for an extended period.
Real Owner Stories
2007 Jaguar XJR with recurring C2302 after strut and compressor rebuild.
After rebuilding all four air struts and replacing the compressor piston ring, the fault returned within miles. The car sat level and did not sink overnight.
What they tried:
- Confirmed no leaks by unplugging the valve body overnight with no height change.
- Scan tool showed reservoir pressure building to over 16 bar, suggesting the compressor worked.
- Heard air escaping from a top seal on a 'rebuilt' front air spring only during freezing temperatures.
Outcome: The owner replaced the rebuilt front air springs with new OEM Bilstein units, resolving the leak. A subsequent compressor failure required a new WABCO unit, as the rebuild kit ultimately failed.
Lesson: Rebuilt struts can be unreliable; a temperature-dependent leak was the root cause. Cold temperatures expose leaks that seal themselves in warmer weather.
2006 Jaguar XJ8L with C2302 appearing immediately after new front struts.
After a shop replaced dropped front struts, a new C2302 code appeared immediately. The car sat level but the fault persisted.
What they tried:
- Replaced the rear struts, with no change.
- Replaced the compressor, with no change.
- Checked wiring and level sensors.
Outcome: The front height sensors and linkages were bent and misaligned during the initial strut replacement, causing the module to request impossible height adjustments.
Lesson: When a fault appears immediately after a repair, suspect component damage (like a bent height sensor), incorrect installation, or a defective new part before replacing other expensive components.
2009 Jaguar VDP bottomed out with C2302 and an audible air leak.
The vehicle was bottomed out and would not rise. The compressor ran weakly. An audible hiss of escaping air came from the compressor area for 30 seconds after turning the car off.
What they tried:
- Charged the battery.
- Live data showed the compressor could only build 6 bar of pressure before dropping.
- Identified the air bleed sound near the compressor exhaust valve.
Outcome: The compressor was worn out internally, and a significant leak existed at the compressor's outlet fitting. The entire compressor assembly required replacement.
Lesson: Listen carefully for leak locations. A healthy compressor builds 15 bar quickly; if it runs but pressure stalls at 6 bar, the compressor is the primary suspect.
How to Prevent This Code From Triggering
- Periodically inspect air springs and lines for rubbing or chafing. (Every 6 months or during tire rotation.) — Air lines rubbing against the chassis wear holes, causing leaks. Ensuring 1/2 inch of clearance around air bags prevents abrasion.
- Service or replace the compressor's air dryer desiccant. (Every 2-3 years, or more often in humid climates.) — A saturated dryer allows water into the system, corroding the valve block, damaging reed valves, and freezing in cold weather.
- Regularly clean the area around the air suspension components. (Annually or after off-road use.) — Dirt and road salt accumulate on air springs and height sensors, causing abrasion and corrosion. Hosing off components prevents buildup.
- Always replace the compressor relay when replacing the compressor. (At the time of compressor replacement.) — A failing compressor damages the contacts inside the relay. Installing a new compressor with an old relay causes premature failure of the new unit.
- Use 'Jack Mode' or pull the suspension fuse before lifting the vehicle. (Every time the vehicle is lifted off the ground.) — Lifting without deactivating the system causes the suspension to overextend and damage the air springs or vent all its air.
Frequently Asked Questions
Can I just clear the C2302 code and keep driving?
You can clear the code, but it will return immediately. The code indicates a physical pneumatic problem. Ignoring it ruins the ride quality and burns out the $900+ air compressor.
Is it safe to drive with the 'Air Suspension Fault' light on?
It is safe for short trips under 30 mph, provided the tires do not rub the wheel wells. Handling and braking distances are severely compromised. Repair it immediately to prevent catastrophic compressor failure.
What are common misdiagnosis pitfalls for C2302?
A common mistake is replacing $1,000+ air struts without a full diagnosis. The root cause is often a $40 compressor piston ring, a $20 relay, or a small air line leak. Always perform a soapy water leak test and check system pressure before replacing major components.
My car is sagging overnight. Is this related to C2302?
Yes, overnight sagging is a classic symptom of an air leak. A slow leak in an air spring forces the compressor to overwork at startup. This excessive run time wears out the compressor and triggers the C2302 timeout code.
My fault only appears in cold weather. Is this related?
Yes, cold temperatures cause rubber strut seals and o-rings to harden and shrink. This turns microscopic, undetectable leaks into larger leaks that trigger the system fault. Cold also reduces battery voltage, lowering compressor efficiency.
How do I know if it's the compressor or just a leak?
If the car sags when parked for a few hours, you have a leak. If the car holds its height perfectly but the fault appears while driving, the compressor is weak. Often, a long-term leak overworks the compressor until it fails, causing both issues simultaneously.
Can I replace the air suspension with regular coil springs?
Yes, aftermarket companies sell conversion kits to replace the air suspension with traditional steel coil springs. This permanent $1,000-$1,500 solution eliminates future air suspension repair costs. However, it removes adjustable ride height and alters the factory ride quality.
Why did the C2302 code appear right after I replaced my air struts?
The new strut might be defective, or an air line o-ring was damaged during installation. A ride height sensor or its wiring is also easily bent or pinched during strut replacement. Re-check all physical connections and sensor linkages at the repaired corner.
Key Takeaways
- Code C2302 triggers when the air suspension compressor runs for over 120 seconds without reaching the target 14-15 Bar system pressure.
- The most frequent cause on Jaguar and Land Rover vehicles is a worn compressor piston ring, which is fixable with a $40 DIY rebuild kit.
- Driving with this code forces the compressor to run constantly, turning a minor leak into a $1,000+ compressor burnout failure within weeks.
- Always start diagnosis by swapping the $20 suspension relay and spraying soapy water on the air struts to locate leaks before buying expensive parts.
Helpful Videos

The information in this article is provided for general reference and educational purposes only. Vehicle specifications, procedures, and part compatibility can vary by production date, trim level, and region. Always consult your vehicle's factory service manual and verify part numbers before purchasing or performing repairs. Safety-critical components such as airbags, seat belts, and braking systems should be installed by a qualified professional.
- 🎬 Helpful Videos
- What Does C2302 Mean?
- Can I Drive With C2302?
- Common Causes
- Symptoms
- Diagnostic Flowchart
- Common Fixes & Costs
- DIY vs Professional
- Used vs. New Parts: Buying Guide
- What Happens If You Wait — Timeline
- Cost of Not Fixing It
- Diagnosis Steps
- When This Code Triggers (Freeze-Frame Conditions)
- Related Codes
- Climate & Environmental Factors
- How to Talk to a Mechanic About This Code
- Where to Take It: Dealer vs Independent vs Chain
- When to Walk Away From the Repair
- What Scan Tool You Need for This Code
- How to Clear the Code After You Fix It
- Will This Fail Emissions / State Inspection?
- Most Commonly Affected Vehicles
- Manufacturer-Specific Notes
- Real Owner Stories
- 2007 Jaguar XJR with recurring C2302 after strut and compressor rebuild.
- 2006 Jaguar XJ8L with C2302 appearing immediately after new front struts.
- 2009 Jaguar VDP bottomed out with C2302 and an audible air leak.
- How to Prevent This Code From Triggering
- Frequently Asked Questions
- Can I just clear the C2302 code and keep driving?
- Is it safe to drive with the 'Air Suspension Fault' light on?
- What are common misdiagnosis pitfalls for C2302?
- My car is sagging overnight. Is this related to C2302?
- My fault only appears in cold weather. Is this related?
- How do I know if it's the compressor or just a leak?
- Can I replace the air suspension with regular coil springs?
- Why did the C2302 code appear right after I replaced my air struts?
- Key Takeaways
- 🎟️ Get 5% Off