

OBD-II Code C2229: Air Suspension Height Sensor Circuit Malfunction
What C2229 means, why it triggers, and how to fix it
- Code C2229 specifically flags a voltage irregularity in the air suspension ride height sensor circuit, disabling automatic leveling.
- A broken $30 plastic linkage arm is the most frequent physical cause of this code, especially if it appears immediately after hitting a pothole or completing suspension work.
- Always perform a soapy-water leak test on the air springs before buying electronic parts, as a major air leak forces the system to log false sensor codes.
- Replacing the sensor requires a mandatory post-installation ride height calibration using an advanced bidirectional scan tool, costing $150 to $250 at a shop.
What Does C2229 Mean?

Code C2229 indicates the suspension control module detects an irregular voltage signal from a ride height sensor. This sensor measures vehicle height so the system can adjust the air springs for a level ride. While it often points to the front right sensor, it applies to any corner of the vehicle.
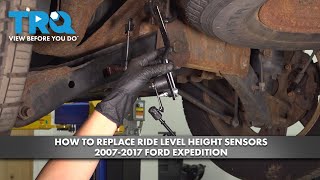
Technical definition: Manufacturers like Ford, Ram, and Jaguar define C2229 as 'Air Suspension Height Sensor Circuit Malfunction 🎬 See this walkthrough for replacing Ford Expedition ride height sensors'. The Suspension Control Module (SCM) sets this code when the sensor's voltage signal falls outside the expected 0.5V to 4.5V range, indicating an open circuit, short circuit, or internal sensor failure.
Can I Drive With C2229?
Yes, But With Caution. Yes, but ride quality and handling are severely compromised. The suspension locks in a stiff setting or sits at an incorrect height, increasing braking distances and causing abnormal tire wear. Ignoring the code causes expensive secondary damage; a faulty sensor forces the air compressor to run constantly and burn out, a $900 to $1600 repair. Drive short distances to a shop, avoiding high speeds, heavy loads, and rough roads.
Common Causes

- Broken or Disconnected Sensor Linkage Arm (Very Common) — The sensor connects to the suspension control arm via a small plastic or metal linkage. This arm becomes brittle and breaks, or gets knocked off during other suspension work, leaving the sensor unable to measure movement.
- Damaged or Corroded Wiring/Connector (Very Common) — Located near the wheels, the sensor's wiring and connector face constant exposure to water, salt, and debris. This causes corrosion on the connector pins or breaks in the wires, interrupting the 5V reference signal.
- Faulty Ride Height Sensor (Common) — Internal electronic tracks wear out over time, or the movable arm seizes from rust, causing the sensor to send erratic or dead signals to the control module.
- Air Leak in Suspension System (Common) — A leak in an air spring forces the compressor to run constantly. If the system cannot reach the target height due to the leak, the module flags a false sensor performance issue.
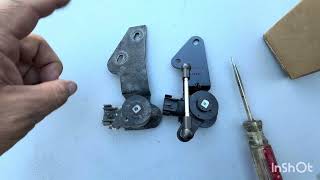
- Software or Calibration Fault (Less Common) — Ram issued TSBs (e.g., 08-051-16) to update the Air Suspension Control Module (ASCM) software, fixing false codes related to stuck height sensors in cold weather. 🎬 Watch: Replacing the Quadralift ride height sensor on a Ram 1500
- Low or Unstable Battery Voltage (Less Common) — Air suspension modules are highly sensitive to voltage drops. A weak battery (under 12.4V) triggers false C2229 codes and 'Adaptive Dynamics Fault' messages.
- Failing Suspension Control Module (SCM/VDM) (Rare) — The computer module reading the sensor fails internally. Consider this only after thoroughly testing the sensor, wiring, and battery voltage.
Symptoms

- Suspension Warning Light On — The dashboard displays a 'Check Suspension,' 'Service Air Suspension,' or 'Air Suspension Fault' warning message.
- Uneven or Sagging Vehicle Stance — The vehicle leans to one side or corner, or the entire front or rear sits lower than normal, especially after parking overnight.
- Air Compressor Runs Constantly or Not at All — Bad sensor data forces the air compressor to run continuously to level the vehicle, or the system shuts the compressor off entirely as a safety measure.
- Poor Ride Quality — The ride becomes excessively bouncy or stiff because the system defaults to the firmest setting and stops adapting to road bumps.
- Vehicle Leans or Rolls in Turns — The vehicle exhibits excessive body roll when cornering or nose-dives during braking, indicating a loss of active stability control.
Diagnostic Flowchart

Tap your situation to follow the diagnostic path that matches what you're seeing on this code.
Common Fixes & Costs
- Replace Broken Sensor Linkage Arm — Parts: $30-$80, Labor: $50-$100, ~0.5 hr book time (DIY)
- Repair or Replace Damaged Wiring/Connector — Parts: $20-$100, Labor: $100-$250, ~1.5 hr book time (Intermediate)
- Replace the Faulty Ride Height Sensor — Parts: $60-$450, Labor: $100-$200, ~1.2 hr book time (DIY)
- Update Air Suspension Control Module Software — Parts: $0, Labor: $150-$250, ~1.0 hr book time (Professional)
- Replace the Air Suspension Control Module — Parts: $200-$700, Labor: $100-$200, ~1.3 hr book time (Professional)
Used vs. New Parts: Buying Guide
When a used part is worth it: Consider a used ride height sensor only for older vehicles (>150k miles) where budget is the primary concern and you accept the risk of a shorter part lifespan.
Donor-vehicle mileage cap: roughly under 80000 miles for the part to have meaningful remaining life.
Donor quality checklist:
- Source parts from dry climates to avoid corrosion, the primary failure mode for linkages and connectors.
- Verify the exact OEM part number, as manufacturers frequently supersede versions.
- Prefer donors involved in accidents rather than those scrapped for electrical issues.
Decision logic:
- If Vehicle is less than 8 years old or has under 100K miles → Buy a new OEM or high-quality aftermarket part. Reliability is worth the cost.
- If The cost of a new part is less than $150 → Buy new. Savings from a used part are minimal compared to the risk of repeat labor.
- If Vehicle is over 10 years old and budget is very tight → A used part is viable, but ensure it includes at least a 30-day warranty.
Warranty tradeoff: Salvage yard parts offer a 30-90 day warranty. New aftermarket parts offer one-year to lifetime warranties. New OEM parts carry standard 1-2 year warranties.
Worst-case if a used part fails: $200-$400 if a used part fails shortly after installation, representing repeat labor and recalibration costs.
What Happens If You Wait — Timeline
- 0-1 month: Intermittent 'Service Air Suspension' light appears. Vehicle occasionally sits slightly uneven when parked. No significant ride quality issues are noticeable yet. (MPG impact: 0%% · Added cost: $0)
- 1-4 months: Warning light remains on constantly. The system disables manual height adjustments and locks the suspension at a stiff default setting. Uneven tire wear begins due to incorrect suspension geometry. (MPG impact: 1-3%% · Added cost: $200-$600 (premature wear on one or two tires).)
- 4-9 months: The air compressor runs excessively to compensate for bad sensor data, leading to overheating. The vehicle sags significantly at one corner. Compressor burnout risk becomes critical. (MPG impact: 3-5%% · Added cost: $800-$1,500 (full set of prematurely worn tires).)
- 9+ months: The air compressor fails completely. The vehicle drops to the bump stops, resulting in an unsafe, harsh ride. Driving with collapsed suspension destroys control arm bushings and ball joints. (MPG impact: 5-10%% · Added cost: $1,200-$2,500+ (new tires, new air compressor, relay, and damaged suspension components).)
Cost of Not Fixing It
- 0-3 months: Poor handling and a harsh ride. Incorrect suspension geometry causes accelerated and uneven tire wear, ruining a set of tires. (Added cost: $300-$1500 (premature tire replacement).)
- 3-12 months: The air suspension compressor runs excessively to compensate for faulty sensor data or air leaks, causing it to overheat and burn out. (Added cost: $900-$1600 (compressor and relay replacement).)
- 12+ months: Driving with a collapsed suspension puts excessive stress on ball joints, control arms, and wheel bearings, leading to cascading component failures. (Added cost: $1000-$2500+ (multiple suspension component failures).)
Diagnosis Steps
- Visual Inspection of Linkage and Stance
Park on a level surface. Check if one corner sits lower than the rest. Look underneath at each wheel's ride height sensor. Verify the small linkage arm is connected at both ends and unbroken. Inspect the wiring harness for obvious damage or loose connections.
Tools: Flashlight, Jack and Jack Stands (Beginner) - Scan for Codes & Check TSBs
Use an OBD-II scanner capable of reading Chassis (C) codes. Confirm C2229 is present and note secondary codes like compressor over-temp. Check for Technical Service Bulletins (TSBs) for your specific make and model, as a software update is often the required fix.
Tools: Advanced OBD-II Scanner (Beginner) - Check for Air Leaks (Soapy Water Test)
System leaks cause secondary sensor codes. Raise the vehicle to normal height. Mix soap and water in a spray bottle and heavily spray the air springs (rubber bags) and air line connections. Bubbles indicate a leak that must be fixed before replacing electronics.
Tools: Spray bottle with soapy water (Intermediate) - Test Sensor Circuit Voltage at the Connector
Disconnect the sensor's electrical connector. Using a multimeter, check for a 5V reference voltage and a solid ground coming from the vehicle's harness. A reading of 0V on the reference wire or high resistance on the ground wire confirms a wiring problem, not a bad sensor.
Tools: Digital Multimeter, Vehicle-specific wiring diagram (Intermediate) - Graph Sensor Live Data
Use a scan tool to graph the sensor's voltage PID live. Have a helper gently bounce the corner of the vehicle. A healthy sensor shows a smooth wave sweeping between ~0.5V and ~4.5V. A faulty sensor shows a sudden drop to 0V, a spike to 5V, or a flat line.
Tools: Advanced OBD-II Scanner with graphing (Intermediate) - Bench Test the Sensor
Supply 5V and ground to the removed sensor using jumper wires. Connect a multimeter (DC Volts) to the signal pin. Manually move the arm; voltage must sweep smoothly between ~0.5V and ~4.5V. Alternatively, measure resistance across the outer pins (~2 kOhms), then from the center to an outer pin while moving the arm. Sudden jumps or dead spots confirm internal failure.
Tools: Digital Multimeter, 5V power source, Jumper wires (Advanced) - Calibrate New Sensor
After replacing a sensor, you must recalibrate the system to establish the new baseline 'level' position. This requires an advanced bidirectional scan tool. Skipping this step causes the code to return immediately.
Tools: Advanced OBD-II Scanner, Measuring Tape, Level Surface (Advanced)
When This Code Triggers (Freeze-Frame Conditions)
- Vehicle Speed: 0 mph (During startup self-check; the system verifies sensor readings before raising or lowering to the default height.)
- System Voltage: 11.5-14.5V (Sets if battery voltage drops below 12.4V, as the control module is highly sensitive to voltage fluctuations.)
- Suspension Mode: Any (Normal, Aero, Off-Road) (Logs when the system attempts to change height and the sensor fails to report the expected change in position.)
- Time Since Ignition On: 1-5 minutes (Sets after a short driving period as the module performs continuous rationality checks on sensor inputs.)
Related Codes
- C15A1-00 — Unable To Obtain Desired Ride Height. A direct consequence of C2229. The system commands a height change, but the faulty sensor fails to report it, causing a timeout.
- C1562-98 — Compressor Over Temperature. A bad sensor causes the pump to run excessively and overheat. This serious secondary fault indicates the compressor is at risk of permanent failure.
- C15AA-00 — Air Leak During Vent. An erratic sensor signal confuses the module into suspecting a leak. Conversely, a real leak causes height changes that confuse the sensor.
- U0423 — Invalid Data Received From Suspension Control Module. The SCM broadcasts the bad sensor data over the network, triggering this communication code. Resolving C2229 fixes this.
Climate & Environmental Factors
- Cold Weather: Moisture within the air suspension system turns to ice in freezing temperatures, causing valves or sensor arms to stick. Ram issued TSBs specifically for cold-weather failures.
- Road Salt / Corrosion: Vehicles in the 'Salt Belt' see high failure rates. Salt and brine accelerate corrosion of electrical connector pins, wiring, and internal moving parts, causing signal loss.
- Humidity: High humidity overwhelms the system's air dryer, leading to excess moisture in air lines. This contributes to internal corrosion and freezing issues.
How to Talk to a Mechanic About This Code
Say this: "I have a 'Service Air Suspension' light and a C2229 code. The vehicle is sagging on the right rear corner. I'd like to schedule a diagnostic. Before replacing any parts, please perform a leak test with soapy water, check for relevant TSBs, and inspect the sensor linkage and wiring connector for damage or corrosion."
This directs the mechanic to follow a logical diagnostic path instead of replacing the most expensive part. It establishes you as an informed customer and focuses on common, low-cost failures first.
Avoid saying:
- 'My air suspension is broken, just fix it.'
- 'The light is on, can you just replace the sensor?'
- 'My car is bouncy, do whatever you think it needs.'
Questions to ask before authorizing the repair:
- Did you find an air leak, a bad sensor, a wiring issue, or something else?
- If the sensor needs replacement, does your estimate include the mandatory ride height calibration?
- Is this repair necessary for safety right now, or can it wait?
- What is the warranty on the parts and labor for this specific repair?
Where to Take It: Dealer vs Independent vs Chain
- Dealer:
Recommended if a known TSB requires a software update or for complex diagnostics on luxury makes. Otherwise, an independent shop is more cost-effective.
Best for: Vehicles under warranty., Repairs requiring a software update to the suspension control module (common for Ram TSBs)., Complex diagnostic issues on German luxury brands (Mercedes, Audi).
Downsides: Highest labor rates, typically 1.5-2x more than independent shops., May recommend expensive, wholesale repairs (entire air strut) when a smaller component failed. (Typical cost: +50% vs. baseline) - Independent Shop:
Best fit for most C2229 repairs. Find a well-regarded local shop, but ask specifically if they have the tools to perform a ride height calibration on your vehicle.
Best for: Out-of-warranty vehicles where cost is a major factor., Common C2229 causes like sensor replacement, linkage repair, or fixing air leaks., Shops specializing in your vehicle's brand.
Downsides: Quality varies widely; vet shops based on reviews and ASE certifications., May lack the specific software needed for calibration, requiring a sublet to the dealer. (Typical cost: +0% vs. baseline) - Chain Shop:
AVOID for C2229 diagnosis and repair. They are not equipped for the nuances of air suspension systems, especially the critical calibration step.
Best for: Simple, unrelated services like tire changes or oil changes.
Downsides: Technicians often lack specialized tools and training for air suspension diagnostics and calibration., High pressure to upsell and misdiagnose complex electronic issues. (Typical cost: -10% vs. baseline)
When to Walk Away From the Repair
If the total estimated repair cost for the air suspension exceeds 40-50% of the vehicle's current private-party market value, seriously consider selling the vehicle as-is or trading it in.
- Car worth $15000, fix is $2500: Fix it. The repair cost is significant but well below the threshold, and fixing it restores the vehicle's primary function and value.
- Car worth $8000, fix is $3500: Borderline. The cost is approaching 50% of the vehicle's value. Consider a cheaper coil spring conversion kit as an alternative to a full OEM-style repair.
- Car worth $4000, fix is $2800: Walk away. The repair cost is over 60% of the car's value. It is not economically viable to perform this repair.
What Scan Tool You Need for This Code

Minimum: An OBD-II scanner that reads and clears Chassis (C) codes. Basic $20 scanners only read Powertrain (P) codes and will show 'No Codes Found'.
A basic code reader won't see Chassis codes like C2229. You need a tool that reads live data from the suspension module to see sensor voltage output, and a bidirectional tool is required for the final calibration.
Budget: BlueDriver Pro (~$100) — Confirms the C2229 code and displays live data for the suspension height sensor voltage. It cannot perform the final ride height calibration.
Mid-range: Foxwell NT510 Elite (~$180) — With the correct manufacturer software pack, it reads C-codes, graphs live sensor data, and performs the bidirectional 'Suspension Level Calibration' required after replacing a sensor.
Professional: Autel MaxiCOM MK808S / MK900 (~$400-600) — Offers full bidirectional control for nearly all makes. Performs active tests on the air suspension compressor, graphs live data, and executes the mandatory ride height calibration.
Rent vs buy: Auto parts store loaner scanners are typically basic code readers that CANNOT read Chassis codes or perform calibration. For C2229, you must buy a capable scanner (like Foxwell or Autel) or pay a shop for diagnosis and calibration.
How to Clear the Code After You Fix It
- Use an advanced OBD-II scan tool to clear the Chassis (C) code.
- Perform the mandatory ride height calibration procedure using the scan tool.
- Perform a complete drive cycle to allow the system to self-test and ensure the fault does not return.
Drive cycle (~30 minutes): Start the engine and idle for 2-5 minutes. Drive for 15 minutes in stop-and-go city conditions. Drive for 10 minutes at a steady highway speed (55 mph). Allow the vehicle to cool completely.
Readiness monitors affected: Chassis codes do not directly affect emissions readiness monitors., Clearing the code by disconnecting the battery resets all emissions monitors, requiring a full drive cycle before an emissions test.
Before emissions retest: drive at least 100 miles to fully set monitors.
Watch out for:
- The code returns immediately if the mandatory ride height calibration is skipped after sensor replacement.
- Clearing the code without fixing the underlying mechanical or electrical fault results in an instant code return.
Will This Fail Emissions / State Inspection?
No — by itself this code doesn't fail OBD inspection (but it can keep readiness monitors from setting, which causes a separate fail).
- California: An illuminated dashboard warning light fails the safety inspection. All readiness monitors must be 'Ready' for the smog check to proceed.
- New York: A NYS safety inspection automatically fails a vehicle for any illuminated malfunction indicator light, including suspension warnings, or for visibly sagging suspension.
- Texas: The warning light fails the safety portion of the inspection. Clearing the code via battery disconnect fails the OBD-II test due to 'Not Ready' monitors.
Most Commonly Affected Vehicles
- Ram 1500 (2013-2023) — Highly prone to cold-weather freezing issues. TSB 08-051-16 addresses software bugs causing false codes. Always check the 40-amp green fuse and relay first.
- Ford Expedition (2007-2017) — Rear sensors and wiring are exposed to heavy road debris, leading to high failure rates. Part numbers are frequently superseded; verify the latest revision.
- Lincoln Navigator (2007-2017) — Shares the Expedition platform and suffers identical rear sensor and wiring harness failures.
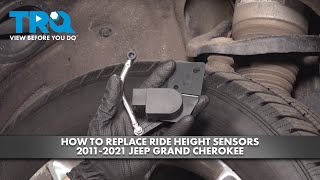
- Jeep Grand Cherokee (2011-2021) — Quadra-Lift air suspension sensors frequently fail or get disconnected during control arm replacements.
- Jaguar XJ (X350, X351, X358) (2003-2017) — TSB SSM72033 highlights that wiring and connector corrosion are the primary causes of height sensor faults on these models.
- Land Rover Discovery (LR3/LR4), Range Rover (L322) (2005-2016) — Voltage logic is inverted between front and rear sensors, which is critical to know during multimeter diagnosis.
- Mercedes-Benz S-Class, GL-Class, R-Class (2005-2016) — AIRMATIC suspension sensor arms are notorious for rusting and breaking off completely.
- Audi A8, Q7, allroad (2004-2018) — Adaptive air suspension sensors fail due to elemental exposure, leading to leveling faults and a harsh ride.
Manufacturer-Specific Notes
- General: C2229 is NOT a standardized code. While common for air suspension, on a Mitsubishi it means 'Shift Position Abnormality'. Do not confuse it with P2229, an unrelated Barometric Pressure Sensor fault.
- Ram: The system disables all adjustments and defaults to a specific ride height when this code sets. TSB 08-051-16 fixes a software bug causing false codes in cold weather.
- Ford / Lincoln: The Vehicle Dynamics Module (VDM) must be recalibrated using a compatible scan tool (like FORScan) after sensor replacement, or the suspension remains inoperative.
- Jaguar / Land Rover: TSB SSM72033 mandates checking the wiring harness and connector for corrosion or a loose latch before replacing the sensor, as connection issues are the primary culprit.
Real Owner Stories
2012 Jeep Grand Cherokee at 95K miles with C2229 after suspension work.
Immediately after replacing the front lower control arms, the 'Service Air Suspension Immediately' light came on and the Jeep was stuck in a low position.
What they tried:
- Returned to the shop that performed the repair.
- The shop re-scanned the vehicle and confirmed the C2229 code.
- Put the vehicle on the lift for a visual inspection.
Outcome: The mechanic discovered they forgot to re-attach the small plastic linkage arm to the new driver's side control arm. Reconnecting the linkage arm and clearing the code fixed the problem instantly for free.
Lesson: If code C2229 appears immediately after any suspension repair, a disconnected or broken sensor linkage arm is the absolute most likely cause. Check this first.
2010 Ford Expedition at 145K miles with rear suspension sag and C2229.
The rear of the vehicle sagged significantly overnight. The air compressor ran constantly, and a scan showed code C2229.
What they tried:
- Replaced the rear ride height sensor ($120 part), but the code returned immediately.
- Considered replacing the overworked compressor ($400+).
- Performed a soapy water leak test on the air springs.
Outcome: The owner found a large leak in the passenger-side rear air spring. The C2229 code was a secondary fault caused by the system's inability to reach the target height. Replacing the air spring assembly (~$250) resolved all issues.
Lesson: A height sensor code doesn't guarantee a bad sensor. A major air leak prevents the system from reaching its target, tricking the computer. Always perform a leak test before replacing electronics.
2008 Jaguar XJ (X358) at 85K miles with an intermittent 'Air Suspension Fault'.
The fault message appeared randomly, causing a hard ride, but disappeared after restarting. The code logged was C2302, related to C2229.
What they tried:
- A mechanic quoted over $1,200 for a new air compressor.
- Consulted a Jaguar forum and found TSB SSM72033 pointing to wiring issues.
- Inspected the height sensor connectors.
Outcome: Found a loose connector latch on the front left height sensor with visible green corrosion on the pins. Cleaning the pins with contact cleaner and securing the connector with a zip tie permanently fixed the fault for under $10.
Lesson: Wiring and connector integrity is a major failure point. Always perform a thorough visual inspection and clean electrical connectors before condemning expensive components.
2015 Ram 1500 at 110K miles with C2229 in cold weather.
The 'Service Air Suspension' light illuminated and the system disabled during single-digit temperatures. The truck would not raise or lower.
What they tried:
- Suspected a frozen air line or valve.
- Checked the 40-amp fuse and relay for the suspension system.
- Took the truck to a dealer who identified Ram TSB 08-051-16.
Outcome: The dealer performed a software update on the Air Suspension Control Module (ASCM). The $180 labor charge fixed the issue, and the code did not return in cold weather.
Lesson: For 2013-2016 Ram trucks, always check for cold-weather TSBs before replacing hardware. A software update is often the correct fix.
How to Prevent This Code From Triggering
- Inspect Sensor Linkages and Wiring During Tire Rotations (Every 6 months or 5,000-7,500 miles.) — Allows early detection of a broken plastic linkage arm, a loose connector, or a chafed wire before it causes a system failure.
- Wash the Vehicle's Undercarriage (Monthly during winter in 'Salt Belt' states; quarterly otherwise.) — Removes road salt and brine that cause corrosion on the sensor body, linkage arm, and electrical connector pins.
- Apply a Corrosion Inhibitor to Underbody Components (Once per year, before winter.) — Applying a lanolin-based spray (like Fluid Film) to suspension components and sensor bodies creates a barrier that repels moisture and salt, slowing corrosion.
- Listen for Compressor Run Time (Weekly habit.) — A healthy compressor runs for 30-60 seconds. Running longer or cycling while driving is an early warning of an air leak. Fixing small leaks prevents compressor burnout.
- Service the Air Suspension's Air Dryer (Every 2-3 years.) — Replacing saturated desiccant beads prevents moisture from causing internal corrosion in valves and stops lines from freezing in cold climates.
Frequently Asked Questions
Can I replace just one ride height sensor?
Yes, you can replace just the one that failed. Unlike shocks or tires, they do not need to be replaced in pairs.
My mechanic replaced the sensor, but the C2229 code came back. What now?
Three common reasons exist: the new sensor wasn't calibrated (a mandatory step), the actual fault lies in the wiring harness, or a weak battery is triggering false codes.
Can other suspension work, like replacing control arms, cause a C2229 code?
Yes. The small plastic linkage arm connecting the sensor to the control arm is easily damaged or left disconnected during repairs, instantly triggering this code.
What happens if I ignore code C2229?
Ignoring it leads to a harsh ride, poor handling, and ruined tires. The biggest risk is burning out the air compressor from constant running, turning a $200 fix into a $1,500 repair.
Why did my air suspension fail in the cold?
Moisture inside the air suspension system turns to ice in freezing temperatures, causing valves or sensor arms to stick. Ram trucks (2013-2016) have specific software updates to address this exact cold-weather failure.
The shop wants to replace my whole air strut, is that necessary for C2229?
Not for a C2229 code alone, which points specifically to the sensor circuit. However, if the air spring itself is leaking—a frequent root cause—replacing the complete strut assembly is the most cost-effective long-term repair.
Can a ride height sensor be bad and not throw a code?
Yes. A sensor can become miscalibrated but still operate within its normal electrical range, causing an uneven ride without setting a circuit code like C2229.
What does it mean if my suspension won't change between modes like 'Aero' or 'Off-Road'?
When the control module detects a bad sensor signal (C2229), it disables all manual and automatic height adjustments as a safety precaution, locking the system.
Is it better to convert my air suspension to traditional coil springs?
Yes, coil spring conversion kits (around $1,500) are popular for older vehicles to permanently eliminate recurring air suspension failures. You lose adjustable ride height but gain long-term reliability and lower maintenance costs.
Key Takeaways
- Code C2229 specifically flags a voltage irregularity in the air suspension ride height sensor circuit, disabling automatic leveling.
- A broken $30 plastic linkage arm is the most frequent physical cause of this code, especially if it appears immediately after hitting a pothole or completing suspension work.
- Always perform a soapy-water leak test on the air springs before buying electronic parts, as a major air leak forces the system to log false sensor codes.
- Replacing the sensor requires a mandatory post-installation ride height calibration using an advanced bidirectional scan tool, costing $150 to $250 at a shop.
Helpful Videos

The information in this article is provided for general reference and educational purposes only. Vehicle specifications, procedures, and part compatibility can vary by production date, trim level, and region. Always consult your vehicle's factory service manual and verify part numbers before purchasing or performing repairs. Safety-critical components such as airbags, seat belts, and braking systems should be installed by a qualified professional.
- 🎬 Helpful Videos
- What Does C2229 Mean?
- Can I Drive With C2229?
- Common Causes
- Symptoms
- Diagnostic Flowchart
- Common Fixes & Costs
- Used vs. New Parts: Buying Guide
- What Happens If You Wait — Timeline
- Cost of Not Fixing It
- Diagnosis Steps
- When This Code Triggers (Freeze-Frame Conditions)
- Related Codes
- Climate & Environmental Factors
- How to Talk to a Mechanic About This Code
- Where to Take It: Dealer vs Independent vs Chain
- When to Walk Away From the Repair
- What Scan Tool You Need for This Code
- How to Clear the Code After You Fix It
- Will This Fail Emissions / State Inspection?
- Most Commonly Affected Vehicles
- Manufacturer-Specific Notes
- Real Owner Stories
- 2012 Jeep Grand Cherokee at 95K miles with C2229 after suspension work.
- 2010 Ford Expedition at 145K miles with rear suspension sag and C2229.
- 2008 Jaguar XJ (X358) at 85K miles with an intermittent 'Air Suspension Fault'.
- 2015 Ram 1500 at 110K miles with C2229 in cold weather.
- How to Prevent This Code From Triggering
- Frequently Asked Questions
- Can I replace just one ride height sensor?
- My mechanic replaced the sensor, but the C2229 code came back. What now?
- Can other suspension work, like replacing control arms, cause a C2229 code?
- What happens if I ignore code C2229?
- Why did my air suspension fail in the cold?
- The shop wants to replace my whole air strut, is that necessary for C2229?
- Can a ride height sensor be bad and not throw a code?
- What does it mean if my suspension won't change between modes like 'Aero' or 'Off-Road'?
- Is it better to convert my air suspension to traditional coil springs?
- Key Takeaways
- 🎟️ Get 5% Off