

OBD-II Code C1731: Air Suspension Front Right Circuit Malfunction
What C1731 means, why it triggers, and how to fix it
- Code C1731 flags an electrical open or short circuit in the front right suspension damping actuator or solenoid.
- Always test the actuator's resistance (typically 1-13 Ohms) and verify connector voltage before replacing a $500+ strut assembly.
- A sagging front right corner indicates a pneumatic air leak, which overworks the compressor and triggers this secondary electrical code.
- Fix C1731 within 30 days to restore safe braking distances and prevent burning out the $700+ air suspension compressor.
What Does C1731 Mean?

C1731 means the vehicle's suspension control module detects an electrical problem in the front right air spring's solenoid or damping actuator circuit. This indicates an open circuit (broken wire), a short circuit (wire grounding out), or an out-of-spec resistance reading. The module disables pressure or damping control for that corner, triggering a warning light and stiffening the ride.
Technical definition: The SAE/ISO definition for C1731 is 'Front Damping Force Control Actuator RH Circuit Malfunction'. The code sets when the control module detects an open or short circuit for a specified duration (e.g., >1 second) or consecutive attempts (e.g., 8 times) when operating the front right actuator. The module verifies circuit integrity via voltage feedback or resistance; readings outside the expected range log the fault.
Can I Drive With C1731?
Yes, But With Caution. Yes, but with significant caution. Driving short distances to a repair shop is safe, but handling, stability, and braking are compromised. Ignoring the issue causes cascading failures, such as burning out the air compressor (a $500-$1500 repair) or damaging tires from improper ride height. Avoid long trips, high speeds, and heavy loads entirely.
Common Causes

- Failed Air Spring Solenoid / Damping Actuator (Very Common) — The electronic solenoid valve or damping force actuator, often integrated into the air strut, 🎬 Watch: How to replace the air strut solenoid valve. develops an internal open or short circuit, triggering the electrical fault.
- Damaged or Corroded Wiring/Connector (Common) — Exposed to moisture and movement, the wiring harness leading to the front right strut chafes against the frame, or connector pins corrode, causing high resistance or a broken circuit.
- Leaking Air Spring (Air Bag) (Common) — A persistent pneumatic leak forces the air compressor to run excessively. This overheats the compressor, relay, and solenoid valves, leading to secondary electrical fault codes like C1731.
- Poor Ground Connection (Less Common) — A corroded or loose ground point for the suspension control module on the frame rail causes intermittent electrical issues and circuit codes.
- Intermittent Short/Open in Harness (Less Common) — Partially broken wires inside intact insulation cause faults only under specific conditions, like turning the steering wheel or hitting a bump.
- Faulty Air Suspension Control Module (Rare) — The control module itself fails internally. This is uncommon and should only be diagnosed after exhaustively testing all wiring, connectors, and the actuator.
Symptoms

- Suspension Warning Light — A 'Check Air Suspension', 'Check AVS System', or similar warning light illuminates on the instrument cluster.
- Harsh or Bouncy Ride — The front right corner feels excessively stiff or bouncy because the damping actuator is stuck in a fixed, default setting.
- Vehicle Sagging in One Corner — The front right corner sits lower than the others. This indicates a concurrent air leak, which often occurs alongside electrical faults.
- Nosedive During Braking or Body Roll in Turns — The vehicle exhibits excessive nosedive when braking or increased body roll when turning, as the compromised corner cannot counteract forces.
- Air Compressor Runs Constantly or Not At All — If a related leak is present, the compressor runs continuously. If the fault is in a primary power circuit, the compressor fails to run entirely.
Diagnostic Flowchart

Tap your situation to follow the diagnostic path that matches what you're seeing on this code.
Common Fixes & Costs
- Replace Front Right Air Spring/Strut Assembly — Parts: $250-$900, Labor: $150-$400, ~1.5 hr book time (Intermediate)
- Repair Wiring Harness or Connector — Parts: $20-$100, Labor: $150-$500, ~2.5 hr book time (Professional)
- Replace Air Suspension Solenoid/Actuator Only — Parts: $150-$600, Labor: $150-$400, ~2 hr book time (Intermediate)
- Convert to Conventional Coil Spring Suspension — Parts: $400-$900, Labor: $300-$600, ~4 hr book time (Intermediate)
- Replace Air Suspension Control Module — Parts: $300-$1000, Labor: $150-$300, ~1.5 hr book time (Professional)
DIY vs Professional
- Replace Front Right Air Spring/Strut Assembly — Beginner:
Tools: Floor jack, jack stands, comprehensive socket/wrench set, torque wrench, scan tool to depressurize system. - Repair Wiring Harness or Connector — Beginner:
Tools: Multimeter, wire cutters/strippers, soldering iron or quality crimping tool, heat gun, weatherproof connectors. - Convert to Conventional Coil Spring Suspension — Beginner:
Tools: Floor jack, jack stands, heavy-duty socket set, torque wrench.
Used vs. New Parts: Buying Guide
When a used part is worth it: Buying a used air strut is highly discouraged. The internal damper, seals, and electronic solenoid are wear items. A used part has an unknown history and no warranty. It only makes sense as a temporary, last-resort option on a very old vehicle with a tight budget.
Donor-vehicle mileage cap: roughly under 40000 miles for the part to have meaningful remaining life.
Donor quality checklist:
- Verify the donor vehicle was not scrapped for suspension failure.
- Inspect the rubber air bag for cracks, perishing, or abrasions.
- Check for signs of oil leakage from the strut body, indicating internal seal failure.
- Ensure the electrical connector and wiring pigtail are intact.
Decision logic:
- If The part is a complex electronic/pneumatic assembly like an air strut → Buy a new OEM or reputable aftermarket part. Labor costs to replace a failed used part negate initial savings.
- If Budget is the primary concern → Consider a new aftermarket complete strut assembly, which is cheaper than OEM and includes a new spring and mount.
- If Long-term reliability is the goal → Buy a new OEM part or a high-quality aftermarket equivalent from a brand with a strong warranty (e.g., Arnott, Bilstein).
Warranty tradeoff: Used parts: Sold 'as-is' or with a 30-day warranty. Aftermarket new: 1-year to limited lifetime warranty. OEM new: 1-2 year warranty.
Worst-case if a used part fails: $400-$800 if used part fails after install (repeat labor + new part).
What Happens If You Wait — Timeline
- 0-1 month: Code C1731 sets. The suspension warning light illuminates. The front right ride becomes noticeably harsh or stiff as the actuator defaults to a fixed setting. (MPG impact: 0%% · Added cost: $0)
- 1-3 months: Vehicle handling degrades. You experience excessive nosedive during braking and body roll in turns. If an air leak is present, the compressor runs frequently. (MPG impact: 0-1%% · Added cost: $0)
- 3-6 months: If a leak is the root cause, the overworked air compressor overheats and burns out. The vehicle sags consistently. (MPG impact: 1-2%% · Added cost: $600-$1500 (Cost to replace the burned-out air suspension compressor).)
- 6+ months: Driving on a collapsed spring causes accelerated, uneven front right tire wear and severely stresses control arm bushings and ball joints, leading to premature failure. (MPG impact: 2-5%% · Added cost: $850-$2500+ (Cost of a new compressor, tire, and suspension parts).)
Cost of Not Fixing It
- Immediate (0-1 month): Compromised vehicle handling, harsh ride, and increased braking distance. This is a safety concern during emergency maneuvers. (Added cost: Negligible)
- 1-6 months: If a related air leak is present, the air compressor runs excessively and burns out. (Added cost: $500-$1500)
- 6+ months: Driving on a collapsed corner causes premature tire wear and damages suspension components like control arms and ball joints. (Added cost: $250-$1000+)
Diagnosis Steps
- Scan for All Fault Codes
Use a professional-grade OBD-II scanner capable of reading Chassis (C-codes). Confirm C1731 is active and document any other codes (e.g., height sensors, compressor), as they provide critical diagnostic context.
Tools: OBD-II Scanner (with Chassis/ABS capability) (Beginner) - Check Fuses and Relays
Consult the owner's manual to locate the fuses and relays for the 'Air Suspension' or 'Suspension Control Module'. Visually inspect the fuses and swap the relay with an identical one (like the horn) to quickly test its function.
Tools: Owner's Manual, Fuse Puller (Beginner) - Thorough Visual Inspection
Raise the vehicle safely. Inspect the front right air strut, focusing on the wiring harness and connector. Look for chafed wires, melted plastic, green/white corrosion on pins, and ensure the harness is not rubbing against moving parts.
Tools: Flashlight, Safety Glasses, Jack and Jack Stands (Beginner) - Test Solenoid/Actuator Resistance
Disconnect the component's electrical connector. Use a multimeter set to Ohms (Ω) to measure resistance across the actuator pins. Compare to the manufacturer's spec (e.g., 12.0-12.8 Ω for Toyota, 1-3 Ω for GM MagneRide). 'OL' indicates an open circuit; near-zero indicates a short.
Tools: Multimeter, Vehicle-Specific Service Manual (Intermediate) - Check Voltage and Ground at Connector
With the actuator disconnected and ignition on (engine off), test the harness-side connector. Check for battery voltage on the power wire and continuity to ground on the ground wire. A lack of voltage or bad ground points to a wiring or module problem.
Tools: Multimeter, Vehicle-Specific Wiring Diagram (Intermediate) - Perform a Bidirectional Active Test
Using a bidirectional scan tool, command the front right actuator to operate (e.g., 'Damper Step FR' on Toyota). You should hear a distinct click. This definitively tests the control module, wiring, and actuator in one step.
Tools: Bidirectional Scan Tool (e.g., Techstream, Autel, Snap-on) (Advanced) - Perform a 'Wiggle Test' for Intermittent Faults
If static tests pass, set your multimeter to measure resistance on the actuator circuit. Carefully wiggle and flex the wiring harness at common stress points near the strut. A sudden jump in resistance indicates a hidden wire break.
Tools: Multimeter, Alligator Clips (Advanced) - Check for Voltage Drop and Scope the Circuit
Perform a voltage drop test on the power and ground sides while under load. A drop >0.5V indicates high resistance. Use an oscilloscope to view the voltage/amperage pattern; a ragged waveform points to a circuit fault.
Tools: Multimeter, Oscilloscope, Wiring Diagram (Professional)
When This Code Triggers (Freeze-Frame Conditions)
- System Voltage: 10-15V (Ignition ON, during system self-check.)
- Component Command State: Actuator Commanded ON/OFF (During active test or when the module attempts to change damping settings.)
- Fault Type: Open Circuit or Short Circuit (Detected via voltage feedback or resistance monitoring.)
- Fault Duration / Repetition: > 1 second (open) / 8 consecutive times (short) (The module confirms the fault before setting the code.)
Related Codes
- C1732, C1733, C1734 — Identical circuit malfunction codes for the other corners: Front Left (C1732), Rear Right (C1733), and Rear Left (C1734).
- C1725 — C1731 is an ELECTRICAL fault. C1725 is a PNEUMATIC fault (front failed to raise). A leak causing C1725 overworks the solenoid, leading to C1731.
- C1830 — Points to the Air Suspension Compressor Relay Circuit. A fault causing C1731 (like a leak) makes the compressor run constantly, burning out the relay and triggering C1830.
- C1782 — Indicates a Power Source Voltage Malfunction for the suspension ECU. Must be diagnosed first, as it prevents the module from correctly diagnosing sub-circuits.
Climate & Environmental Factors
- Cold Weather: Cold temperatures cause air to contract, lowering pressure and causing the vehicle to sag. Moisture within air lines freezes, causing blockages. Rubber and plastic components become brittle and prone to cracking.
- Road Salt / High Humidity: Saltwater spray is highly corrosive and attacks electrical components. It seeps into connectors and ground points, causing corrosion that leads to high resistance or short circuits, directly triggering C1731.
How to Talk to a Mechanic About This Code
Say this: "I have a suspension warning light and a C1731 code. I'd like to schedule a diagnostic to test the front right strut circuit. Please check for wiring issues, connector corrosion, and test the actuator's resistance before recommending a full strut replacement."
Signals you understand C1731 is a circuit code, directing the technician to perform a proper diagnosis (testing wires/connectors) instead of immediately quoting the most expensive part.
Avoid saying:
- 'My suspension is broken, how much to fix it?'
- 'The car is riding rough, can you just replace the shock?'
- 'I have a C1731, just put a new strut in.'
Questions to ask before authorizing the repair:
- What were the resistance (Ohm) readings from the actuator, and what is the manufacturer's specification?
- Did you find voltage and a good ground at the connector for the strut?
- Is the problem in the wiring harness or the strut assembly itself?
- If the strut needs replacement, what is the warranty on the new part and your labor?
- Are there any other related codes in the system?
Where to Take It: Dealer vs Independent vs Chain
- Dealer:
Recommended for complex luxury brands or if the issue is suspected to be the control module, which requires dealer programming.
Best for: Vehicles under warranty, Complex brands like BMW, Mercedes-Benz, or Land Rover with proprietary diagnostic software, When an independent shop cannot solve the problem
Downsides: Highest labor rates, Defaults to replacing entire expensive assemblies rather than repairing wires (Typical cost: +50% vs. baseline) - Independent Shop:
Best fit for most common vehicles. Find an ASE-certified shop confident in diagnosing chassis and electrical codes, not just changing parts.
Best for: Most out-of-warranty vehicles (Ford, GM, Toyota, etc.), Shops with good reviews mentioning electrical or suspension diagnostics, Cost-conscious owners
Downsides: Quality and diagnostic equipment vary greatly, Lacks specific tools for brand-specific active suspension tests (Typical cost: +0% vs. baseline) - Chain Shop:
AVOID for diagnosing C1731. This is an advanced electrical/chassis fault. The risk of misdiagnosis and being oversold is very high.
Best for: Simple, unrelated maintenance like oil changes or tires.
Downsides: Technicians lack advanced diagnostic training for complex chassis codes, High pressure to sell parts; recommends replacing all four struts unnecessarily, Likely to misdiagnose the electrical issue (Typical cost: -10% vs. baseline)
When to Walk Away From the Repair
If the estimated repair cost for the suspension system exceeds 40-50% of your car's current private-party value, pause and reconsider.
- Car worth $8000, fix is $4200: Walk away. The repair is over 50% of the car's value. Consider selling as-is or trading it in. For older SUVs, a coil conversion kit is a cheaper alternative.
- Car worth $15000, fix is $1800: Fix it. This is well below the threshold and is a reasonable cost to maintain a valuable vehicle's safety and performance.
- Car worth $4000, fix is $1500: Borderline. The cost approaches 40%. Get a second opinion and confirm no other major repairs are needed soon before proceeding.
What Scan Tool You Need for This Code

Minimum: A scanner that reads Chassis (C-codes) and accesses the Air Suspension Control Module. Basic engine code readers will NOT see C1731.
A $20 engine code reader cannot communicate with the suspension module. You will see 'No Codes Found' while the suspension warning light is on. Proper diagnosis requires reading C-codes.
Budget: BlueDriver Pro (~$100) — Reads and clears chassis codes (like C1731) for many domestic and import brands. Allows you to see the code and definition, which is the first critical step.
Mid-range: Foxwell NT510 Elite (~$180) — Provides full system diagnostics and bidirectional control (active tests) for many brands. Allows you to command the suspension actuator to operate, confirming if the part is responsive.
Professional: Autel MaxiCOM MK808 / MK906BT (~$500-1200) — Offers full OEM-level diagnostics, bidirectional control, access to special functions like suspension calibration, and detailed live data graphing.
Rent vs buy: If this is a one-time fix, auto parts stores rent scanners, but ensure their tool reads Chassis/ABS codes. Buying a mid-range scanner is a good investment, saving a $150 diagnostic fee.
How to Clear the Code After You Fix It
- Reconnect any disconnected components and the vehicle battery.
- Use a compatible OBD-II scan tool to access the Chassis module and select the 'Clear DTCs' function.
- Perform a system self-test or an active test with the scan tool to confirm the repair and ensure the code does not return.
Drive cycle (~15 minutes): A specific drive cycle is not required for a C-code. After clearing the code, a 10-15 minute drive with varied speeds (city and highway) is sufficient for the suspension module to re-run internal checks. Ensure conditions that previously set the fault (e.g., hitting a bump, turning) are met to verify the fix.
Readiness monitors affected: None. C1731 is a chassis code and does not affect emissions-related readiness monitors.
Watch out for:
- Disconnecting the battery does not clear the code from the module's memory.
- The code returns immediately if the underlying electrical fault (bad wire, faulty actuator) is not repaired.
Will This Fail Emissions / State Inspection?
No — by itself this code doesn't fail OBD inspection (but it can keep readiness monitors from setting, which causes a separate fail).
- California: C1731 does NOT cause a smog check failure. Smog inspections focus on powertrain (P-codes) and the Check Engine Light.
- New York: Does not cause OBD-II emissions failure. However, a visible and severe suspension defect (sagging corner) fails the annual safety inspection.
- Texas: As of 2025, annual safety inspections are no longer required for most non-commercial vehicles. Emissions inspections only test for emissions-related faults. C1731 will not cause a failure.
Most Commonly Affected Vehicles
- Ford Expedition (2003-2017) — Extremely common. Failures are often the solenoid, air spring leaks, or the compressor.
- Lincoln Navigator (2003-2017) — Shares the problematic air suspension system with the Expedition. Diagnosis and failure points are identical.
- Chevrolet / GMC Tahoe, Suburban, Yukon, Escalade (2000-2020) — Prevalent on models with Autoride (Z55) or Magnetic Ride Control (Z95). The code points to the actuator within the shock absorber.
- Toyota Sequoia (Platinum), Land Cruiser (2008-2022) — Affects models with Adaptive Variable Suspension (AVS) or Active Height Control (AHC). C1731 relates to the 'Front Height Control Gate Solenoid Valve Circuit'.
- Lexus GX460 / LX470 / LX570 (2003-2023) — Uses sophisticated AVS/AHC systems. The actuator motor on top of the front strut is a known failure point.
- Hyundai Genesis / Equus (2009-2016) — Indicates a fault in the front right Continuous Damping Control (CDC) actuator circuit. System calibration is required after replacement.
- BMW X5 (E70, F15), 7-Series (F01/F02) (2007-2018) — Applies to vehicles with Electronic Damper Control (EDC). The wiring in the wheel well is a common failure point due to constant flexing.
- Jaguar / Land Rover XJ, Range Rover, Discovery (2004-2016) — Circuit faults are common. Severe wheel misalignment causes steering angle sensor conflicts, triggering general suspension faults.
Manufacturer-Specific Notes
- Ford / Lincoln: On 2003-2017 models, the air solenoid is integrated into the air spring assembly, forcing replacement of the entire unit for an electrical fault.
- Toyota / Lexus: On AHC/AVS systems, the code refers to the actuator motor on top of the strut. A common misdiagnosis is replacing the entire strut when only the small motor failed.
- General Motors: On MagneRide (Z95) vehicles, fluid contains metallic particles that align under magnetic force. A failure in the shock's internal coil sets this code. Aftermarket replacements use resistors to 'trick' the module.
- Hyundai: On Genesis/Equus models, the system requires a 'height sensor calibration' or 'variant coding' procedure using a scan tool after replacing a strut or module.
Real Owner Stories
2014 Lexus GX460 at 100k+ miles
Owner noticed a 1-inch lean to the passenger side. A mechanic scanned codes C1731 (Front Right) and C1732 (Front Left).
Outcome: The high quote led the owner to question the repair. The discussion revealed the lean is a pneumatic leak, while C1731 is an electrical fault. Both required addressing.
Lesson: Distinguish between the electrical fault (C1731) causing a stiff ride and a pneumatic leak causing a lean. High-cost quotes for actuator replacement are common, making independent diagnosis crucial.
2015 GMC Yukon Denali with ~100k miles
Owner noticed oil drips on the garage floor after parking for a week. The ride remained acceptable, but the leak indicated failure.
Outcome: Replaced the leaking factory strut with an aftermarket Arnott SK-3354 assembly. The plug-and-play replacement resolved the issue and the code.
Lesson: For MagneRide systems, a physical fluid leak from the strut body is a definitive sign of internal failure that triggers circuit codes. Catching it early prevents sudden loss of ride control.
2000 Ford Expedition XLT
The rear truck sagged, the air compressor failed to turn on, and the 'Check Suspension' light illuminated.
Outcome: Frustrated by diagnostic costs, the owner installed a Monroe coil spring conversion kit (Part #90005) for $210, permanently eliminating the air suspension.
Lesson: On older SUVs, converting to a reliable coil spring suspension is a highly cost-effective, permanent solution to recurring electrical or pneumatic faults.
How to Prevent This Code From Triggering
- Wash Undercarriage and Suspension Components (Monthly, or more often in winter) — Removes road salt and grime that trap moisture against electrical connectors and ground points, preventing the corrosion that causes open/short circuits.
- Visually Inspect Air Bags and Wiring Harnesses (Every oil change) — Identifies chafed wires or small cracks in rubber air springs before they become major leaks or electrical failures.
- Apply Dielectric Grease to Connectors (Any time a connector is disconnected) — Creates a non-conductive barrier that seals out moisture and oxygen, preventing pin corrosion on exposed suspension components.
Frequently Asked Questions
Can I just replace the one broken air spring?
Yes, you can replace a single failed component. However, suspension parts wear at similar rates, so replacing them in pairs (both fronts) ensures balanced handling and predictable performance. This prevents the opposite side from failing shortly after and saves on future alignment costs.
My car is leaning on the front right. Is the C1731 code the cause?
Not directly. C1731 is an electrical code for the damping actuator circuit, while a lean is a pneumatic problem caused by an air leak. Diagnose the lean using soapy water on the air bag separately from the electrical fault, even though they often occur together.
Is it expensive to fix code C1731?
It ranges from a $200 wiring repair to over $2,000 for dual MagneRide shock replacements. A single Ford Expedition air spring replacement averages $700-$900 at a shop. Always test the wiring before authorizing a full strut replacement to avoid unnecessary costs.
What's the most common misdiagnosis for C1731?
The most common mistake is replacing the expensive air strut assembly without performing electrical checks. C1731 points to a circuit fault, meaning the issue is often a broken wire or corroded connector. A technician must verify wiring and ground integrity with a multimeter before condemning the strut.
What happens if I ignore this code?
Ignoring C1731 causes a harsh, unstable ride and increases braking distances, creating a significant safety risk. If a related air leak is present, the compressor runs continuously and burns out, adding $500-$1500 to the repair bill. Continued driving also accelerates tire wear and damages control arm bushings.
Can I fix code C1731 myself?
Diagnosing the electrical circuit requires a multimeter and automotive wiring knowledge. Replacing the air strut assembly is a manageable DIY job for experienced home mechanics with a floor jack and torque wrench. Always disconnect the battery and depressurize the air system before starting work.
Should I convert to traditional coil springs instead of fixing the air suspension?
Coil conversions are a cost-effective, permanent solution for older vehicles facing high air suspension repair costs. These kits replace the complex air system with durable coil struts, eliminating future C1731 codes entirely. You lose auto-leveling features, but kits usually include modules to disable dashboard warning lights.
Can a bad wheel alignment cause code C1731?
No, a bad alignment does not cause a C1731 electrical circuit fault. However, on advanced systems like Land Rover, severe misalignment causes the steering angle sensor to send conflicting data. This triggers general suspension warning lights, but not a specific actuator circuit code like C1731.
Key Takeaways
- Code C1731 flags an electrical open or short circuit in the front right suspension damping actuator or solenoid.
- Always test the actuator's resistance (typically 1-13 Ohms) and verify connector voltage before replacing a $500+ strut assembly.
- A sagging front right corner indicates a pneumatic air leak, which overworks the compressor and triggers this secondary electrical code.
- Fix C1731 within 30 days to restore safe braking distances and prevent burning out the $700+ air suspension compressor.
Helpful Videos
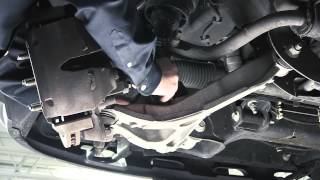
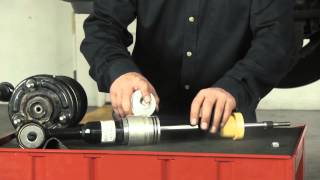
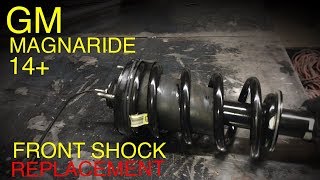
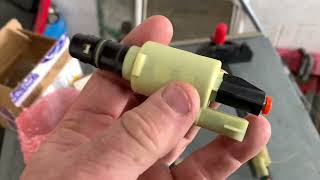

The information in this article is provided for general reference and educational purposes only. Vehicle specifications, procedures, and part compatibility can vary by production date, trim level, and region. Always consult your vehicle's factory service manual and verify part numbers before purchasing or performing repairs. Safety-critical components such as airbags, seat belts, and braking systems should be installed by a qualified professional.
- 🎬 Helpful Videos
- What Does C1731 Mean?
- Can I Drive With C1731?
- Common Causes
- Symptoms
- Diagnostic Flowchart
- Common Fixes & Costs
- DIY vs Professional
- Used vs. New Parts: Buying Guide
- What Happens If You Wait — Timeline
- Cost of Not Fixing It
- Diagnosis Steps
- When This Code Triggers (Freeze-Frame Conditions)
- Related Codes
- Climate & Environmental Factors
- How to Talk to a Mechanic About This Code
- Where to Take It: Dealer vs Independent vs Chain
- When to Walk Away From the Repair
- What Scan Tool You Need for This Code
- How to Clear the Code After You Fix It
- Will This Fail Emissions / State Inspection?
- Most Commonly Affected Vehicles
- Manufacturer-Specific Notes
- Real Owner Stories
- 2014 Lexus GX460 at 100k+ miles
- 2015 GMC Yukon Denali with ~100k miles
- 2000 Ford Expedition XLT
- How to Prevent This Code From Triggering
- Frequently Asked Questions
- Can I just replace the one broken air spring?
- My car is leaning on the front right. Is the C1731 code the cause?
- Is it expensive to fix code C1731?
- What's the most common misdiagnosis for C1731?
- What happens if I ignore this code?
- Can I fix code C1731 myself?
- Should I convert to traditional coil springs instead of fixing the air suspension?
- Can a bad wheel alignment cause code C1731?
- Key Takeaways
- 🎟️ Get 5% Off