

C1717 on 2010-2019 Jaguar XJ: Parking Aid Sensor Fault Explained
The code C1717 is not officially defined for the 2010-2019 Jaguar XJ (X351). However, on the previous generation, it indicated a front parking sensor circuit fault. The most likely issue is a failed front parking sensor, damaged wiring in the bumper, or a sensor that has been physically knocked out of place. Expect to pay $150-$300 for a professional repair.
- The definition for C1717 on a 2010-2019 XJ is not confirmed, but evidence from older models points to a fault with the front left center parking sensor.
- Common symptoms include a 'Parking Aid Not Available' warning and a long, continuous beep.
- The most likely cause is a single failed parking sensor, which can be diagnosed by listening for a faint clicking sound from each sensor.
- Repair requires removing the front bumper cover to access the sensors and wiring.
What's Unique About the 2010-2019 Jaguar XJ
The primary challenge with code C1717 on the 2010-2019 Jaguar XJ is the lack of a confirmed definition for this specific (X351) platform. While the code points to the parking aid system on older models, owners of the X351 more commonly report generic 'Parking Aid Not Available' messages rather than this specific DTC. Problems often stem from the sensors' exposed location in the front bumper, making them susceptible to damage from minor impacts, water intrusion, and corrosion. The entire system is disabled if a single component fails.
Symptoms You May Notice
- "Parking Aid Not Available" or "Parking system fault" message on the instrument cluster or touchscreen.
- A long, continuous beep (approximately 3 seconds) when selecting Reverse or when the ignition is first switched on.
- The parking aid system does not produce any audible beeps when approaching an obstacle.
- The parking aid button on the touchscreen may flash and then turn off.
- Visual indicators for the parking system on the camera display may not appear.
- In some cases, the system may work intermittently, for example, functioning correctly in wet conditions but failing when dry.
- Replacing the wrong sensor. It is crucial to identify the specific faulty sensor through diagnostic codes or by listening for the clicking sound before replacement.
Most Likely Causes
- Faulty Front Parking Sensor 🔴 High Probability The ultrasonic sensors are located in the front bumper, making them vulnerable to damage from road debris, minor parking impacts, and water intrusion from rain or car washes. The internal electronics of the sensor can fail over time.
How to confirm: A technician can use a Jaguar-specific diagnostic tool to read live data from each sensor. A simpler DIY method is to activate the system (key on, engine off, in Reverse) and listen closely to each sensor in a quiet environment. A healthy sensor will emit a faint, high-pitched clicking or buzzing sound. The faulty sensor will be silent. 🎬 Watch: How to diagnose your faulty parking sensors Swapping the suspect sensor with a known good one from another position is another effective diagnostic step.
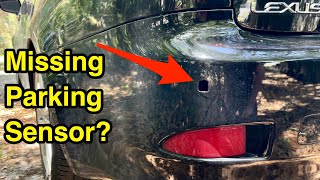
Typical fix: Replace the faulty parking sensor. 🎬 Watch: How to replace a missing parking sensor This requires removing the front bumper cover for access. The new sensor will need to be paint-matched to the bumper.
Est. part cost: $25-$70 - Damaged Wiring or Connector 🟡 Medium Probability The wiring harness for the sensors runs inside the bumper cover and is susceptible to damage, chafing, or corrosion, especially at the connector plugs. The small pins inside the connectors can corrode from moisture, and the weather seal can become compressed, leading to a poor connection.
How to confirm: With the bumper cover removed, visually inspect the wiring harness leading to the front sensors for any breaks, chafing, or corrosion on the connector pins. Squeeze the connector hard when re-seating it to ensure the weather seal compresses and the locking tab engages fully. Use a multimeter to check for continuity and voltage at the sensor connector.
Typical fix: Repair the damaged section of the wiring harness or replace the connector plug. In severe cases, the entire front bumper harness may need replacement.
Est. part cost: $10-$150 - Sensor Physically Dislodged ⚪ Low Probability A minor impact can sometimes push a sensor out of its mounting bracket inside the bumper without breaking it, causing it to give false readings. One owner reported a sensor being loose in its housing.
How to confirm: Visually inspect the sensors from the outside. If one appears pushed in or loose, it has likely been dislodged from its internal bracket.
Typical fix: Remove the bumper cover and securely clip the sensor back into its mounting bracket. If the bracket is broken, it may need to be repaired or replaced.
Est. part cost: $0-$20
Rare But Worth Checking
- Faulty Parking Aid Module (PAM): While rare, the control module itself can fail. This should only be considered after all sensors and wiring have been thoroughly checked and confirmed to be in good working order. On the X351, the module is located at the base of the front left A-pillar, requiring removal of the scuff plate and cowl side trim panel for access.
Diagnosis Steps
- Verify the complaint. Note the specific warning messages and symptoms, such as the 'Parking Aid Not Available' message and a long beep.
- Scan the Parking Aid Module (PAM) for fault codes using a Jaguar-compatible diagnostic tool. A generic OBD-II scanner may not be able to communicate with this module.
- If C1717 or another sensor-specific code is present, identify which sensor is indicated (e.g., Left Hand Front Center).
- Activate the parking aid system (ignition on, engine off, in Reverse). Listen closely to each of the front sensors for a faint clicking/buzzing noise. The silent sensor is likely the faulty one.
- Gain access to the front bumper sensors. This requires removing the front wheels and wheel arch liners to access the bumper retaining bolts.
- Carefully remove the front bumper cover. 🎬 See this step-by-step bumper removal walkthrough It's recommended to have a second person to help avoid scratching the paint. There are screws at the top, sides (behind the wheel liners), and underneath.
- Inspect the suspect sensor and its connector for physical damage, corrosion, or if it has been pushed out of its holder.
- Inspect the wiring harness for any visible damage.
- If no visible damage is found, swap the suspect sensor with an adjacent sensor and re-scan for codes. If the fault code follows the sensor, the sensor is bad. If the fault code stays in the original position, the problem is in the wiring.
- Replace the faulty component (sensor or wiring repair). Ensure new sensors are painted to match the vehicle.
- Reassemble the bumper, clear the fault codes, and test the system to confirm the repair.
Parts You'll Likely Need
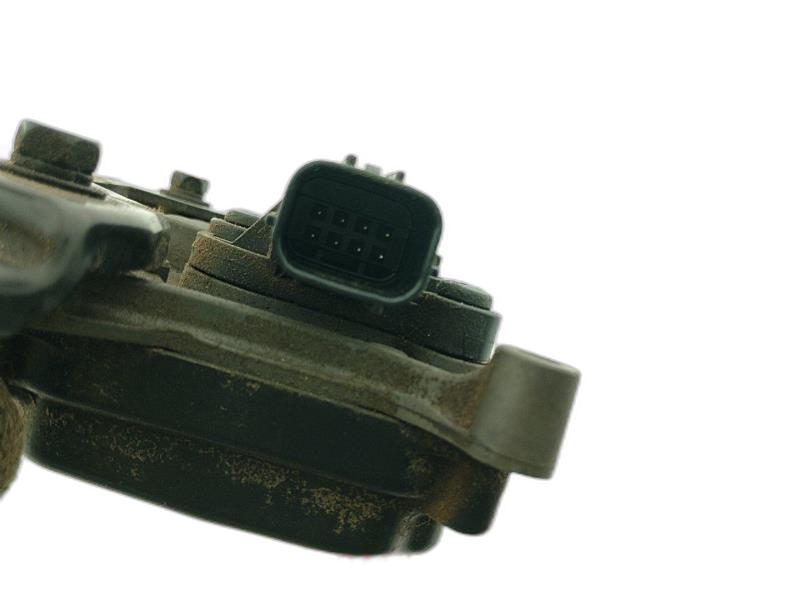
- Front Parking Distance Sensor
(OEM #C2Z22810)— This is the most common failure point for parking aid system faults due to its exposed location and vulnerability to impact and moisture.
Trusted brands: Jaguar (OEM), Vemo, Hella, Eurospare, Autopart Premium
OEM price range: $60-$90
Aftermarket price range: $20-$50
Mechanic-Grade Diagnostic Values
- Sensor Connector Voltage Check — expected: The 3-pin connector should have approximately 12V on the power wire and less than 0.5V (good ground) on the ground wire with the ignition on.. Failure: Absence of 12V power or high voltage/resistance on the ground wire points to a wiring issue rather than a sensor failure.
- Voltage Drop Test on PAM Ground — expected: Less than 0.1 volts between the PAM ground wire and the battery negative terminal when the system is active.. Failure: A reading higher than 0.1-0.2 volts indicates high resistance in the ground circuit, which can cause module malfunction.
Scan Tool Commands That Help
- Jaguar SDD (Symptom Driven Diagnostics): Live Data Monitoring / Datalogger — To view the real-time distance being reported by each individual parking sensor. A faulty sensor will show no reading, an erratic reading, or a fixed value that doesn't change as an object approaches. This is the most accurate way to pinpoint a failed sensor without physical inspection.
- Jaguar SDD (Symptom Driven Diagnostics): Service Functions - Parking Aid Tests — To run a self-test on the Parking Aid Module (PAM) and command individual system components to activate. This can help differentiate between a sensor, wiring, or module fault.
Wiring & Ground Locations
- Parking Aid Module (PAM) Ground — The PAM is located at the base of the front left (driver's side in LHD) A-pillar. The ground point is typically a stud on the chassis in this same area, shared with other components.. A poor ground connection at this point can cause the entire parking aid system to malfunction or behave erratically, potentially setting various fault codes. This should be checked if multiple sensors appear to fail simultaneously or if the fault is intermittent.
- Front Bumper Harness Connector — There is a main connector for the front bumper harness located just in front of the left front tire, behind the wheel arch liner.. This connector is a common point for corrosion or damage due to its exposed location. A fault here can disable all front parking sensors. A visual inspection for corrosion or pushed-out pins is recommended during diagnosis.
Real Owner Repair Stories
- JaguarForums.com (2011 Jaguar XJ Supercharged) — "Parking Aid Not Available" message and a long beep when selecting reverse. System worked intermittently, often functioning correctly in the rain.
❌ Tried (didn't work) Initial assumption was a faulty sensor.
✅ What actually fixed it The owner identified a loose sensor in its housing. The ultimate fix required removing the bumper cover to properly reseat the sensor. The intermittent functionality in rain suggested a poor connection that was temporarily improved by moisture. - YouTube Mechanic Video (Jaguar (model unspecified but with similar sensor design)) — "Parking sensor issue" warning on the dash.
❌ Tried (didn't work) Simply pushing the dislodged sensor back in from the outside.
✅ What actually fixed it Upon inspection behind the wheel arch liner, a wire was found broken right at the sensor connector. The connector itself showed signs of corrosion. The fix involved cutting off the old corroded plug and splicing the wires directly, which resolved the fault. - JaguarForums.com (on an older but relevant X308 model) (2003 Jaguar XJ8) — Familiar 10-second tone on reverse, indicating a parking aid fault.
❌ Tried (didn't work) Assuming the sensor or module had failed and needed replacement.
✅ What actually fixed it The owner found that the electrical connectors were not fully seated on the sensors. The white silicone weather seal inside the connector was preventing the locking tab from engaging. The fix was to remove each sensor, squeeze the connector on HARD until the tab clicked, and then reinstall the sensor. This restored full system functionality without replacing any parts.
OEM Part Supersession History
C2Z11733→C2Z22810— Standard component revision for improved durability or manufacturing efficiency. No functional difference reported.
Heads up: Both are straight-connector types and are interchangeable for the front bumper positions on the X351.
Model Year Variations Within This Range
- 2016-2019: The 2016 model year facelift introduced the InControl Touch Pro infotainment system and more advanced driver assistance features. While the basic ultrasonic sensors remained similar, models equipped with semi-autonomous Park-Assist and 360° surround cameras have a more complex control module and software integration. A fault on these later models could potentially be software-related within the infotainment or camera systems, not just a simple sensor/wiring issue.
Diagnostic Flowchart
Other Known Issues on This Vehicle
Issues unrelated to this code that are worth knowing about as an owner of this generation:
- 5.0L V8 Timing Chain Tensioner & Guide Wear 🔴 High — Common, especially on 2010-2012 models. A key symptom is a metallic rattle for 2-5 seconds on a cold start. Failure can be catastrophic. (Ref: JLR issued TSBs like LTB00474NAS3 and SSM 71932 acknowledging premature wear.)
- Premature Water Pump Failure (V8 & V6 Petrol) 🔴 High — Very common, can fail at low mileage (<20,000 miles). Symptoms include a low coolant warning, the smell of coolant after a drive, or visible leaks near the front of the engine.
- Air Suspension Faults 🟠 Medium — Common as the vehicle ages. Symptoms include an 'Air Suspension Fault' message, the vehicle leaning or sagging to one corner, or a noisy air compressor. Leaking air struts are a frequent cause.
- Cracked Plastic Coolant Pipes (V8 & V6 Petrol) 🟠 Medium — The plastic coolant pipes and header tank can become brittle and crack with age, leading to coolant leaks.
- Sticky Interior Buttons 🟡 Low — Widespread on earlier models (approx. 2010-2015). The soft-touch coating on buttons on the center console and steering wheel degrades and becomes sticky. Owners have found that makeup remover wipes can effectively clean off the residue. (Ref: A TSB was issued for this issue covering models up to VIN V83459.)
- Sunroof Frame Corrosion / Creaking 🟡 Low — Reported on earlier models. The metal frame of the sunroof can corrode, and the mechanism can develop creaks. (Ref: Jaguar has a bulletin on this repair.)
Used vs. New Parts: Buying Guide for This Vehicle
When a used part is the smart pick: A used front bumper wiring harness is a good option if the original is physically damaged (e.g., from an accident), as it is primarily wires and connectors. A used Parking Aid Module (PAM) is also a reasonable choice, as they have a low failure rate and are significantly cheaper than new.
Donor-vehicle mileage cap: roughly under 80000 miles for the part to have meaningful remaining life.
What to inspect on the donor part:
- For wiring harnesses, inspect for any cuts, abrasions, or previous repairs (look for non-factory tape or splices).
- Check all connector plugs for corrosion, bent pins, or broken locking tabs.
- For a PAM, ensure the part number matches exactly and there is no evidence of water damage to the casing or pins.
Aftermarket brands forum-validated for this vehicle:
- Hella
- Vemo
- Bosch (if available)
Brands owners have reported issues with on this vehicle:
- Unnamed, no-brand sensors from online marketplaces can have high failure rates and may not be calibrated correctly, leading to inaccurate distance readings.
Real Owner Stories
Aggregated from forums and TSBs cited above. Mileages and costs reflect what owners reported in those sources.
2011 Jaguar XJ
Symptoms: The owner experienced a 'Parking Aid Not Available' message accompanied by a long, continuous beep when the system was activated.
What fixed it: The owner confirmed that a sensor was faulty by listening for the clicking sound. The repair required removing the bumper to replace the sensor.
Source hint: https://www.jaguarforums.com/forum/xj-x351-53/changing-rear-parking-sensor-236893/
2012 Jaguar XJ
Symptoms: The owner needed to access the parking sensors and discussed the difficulty of the repair process.
What fixed it: Confirmed that while the front bumper cover removal is easier with the wheels off, it is possible to perform the removal with the wheels on to access the sensor harness.
Source hint: https://www.jaguarforums.com/forum/xj-x351-53/front-bumper-removal-12-xj-229202/
2011 Jaguar XJ
Symptoms: The owner was troubleshooting the parking system and could not locate the control module.
What fixed it: The Parking Aid Module (PAM) was located at the base of the front left A-pillar, as confirmed by workshop manual documents.
Source hint: https://www.jaguarforums.com/forum/xj-x351-53/2011-xj-parking-aid-module-where-161405/
Related OBD-II Codes
Frequently Asked Questions
My 2011 XJ is showing 'Parking Aid Not Available' and a long beep. Do I really have to take the bumper off to fix it?
Which specific replacement sensor part number is used for the XJ and its platform mates like the XF?
Is there a TSB for the sticky interior buttons on my early model XJ?
My 5.0L V8 XJ has a metallic rattle on cold starts; is this related to the parking sensor code?
Can I use a standard OBD-II scanner to diagnose the C1717 code on my XJ?
Why does my parking system only fail when it's dry but work when it's wet?
Helpful Videos


We Have This Part in Stock



The information in this article is provided for general reference and educational purposes only. Vehicle specifications, procedures, and part compatibility can vary by production date, trim level, and region. Always consult your vehicle's factory service manual and verify part numbers before purchasing or performing repairs. Safety-critical components such as airbags, seat belts, and braking systems should be installed by a qualified professional.
- Jaguar XJ:
- 🎬 Helpful Videos
- 🛍️ Shop This Part
- What's Unique About the 2010-2019 Jaguar XJ
- Symptoms You May Notice
- Most Likely Causes
- Rare But Worth Checking
- Diagnosis Steps
- Parts You'll Likely Need
- Mechanic-Grade Diagnostic Values
- Scan Tool Commands That Help
- Wiring & Ground Locations
- Real Owner Repair Stories
- OEM Part Supersession History
- Model Year Variations Within This Range
- Diagnostic Flowchart
- Other Known Issues on This Vehicle
- Used vs. New Parts: Buying Guide for This Vehicle
- Real Owner Stories
- 2011 Jaguar XJ
- 2012 Jaguar XJ
- 2011 Jaguar XJ
- Related OBD-II Codes
- Frequently Asked Questions
- 🎟️ Get 5% Off