

C1717 on 2011-2018 Bentley Continental GT: Ride Height Sensor Fault
While not officially documented for Bentley, code C1717 on the shared VW/Audi platform points specifically to a fault with a ride height level sensor or its associated circuit. On the 2011-2018 Continental GT, this code will trigger a 'Suspension Fault' warning and likely indicates a failure of a ride height sensor, its plastic linkage rod, or the wiring connector, requiring diagnosis with a Bentley-compatible scan tool to confirm the location.
- The definition of C1717 on a Bentley Continental GT is not publicly documented, but strong evidence from its VW Phaeton platform mate indicates a ride height sensor circuit fault.
- It is a manufacturer-specific chassis code related to the air suspension system.
- The most common causes are a failed ride height sensor, a broken plastic linkage rod, or a corroded electrical connector.
- The only reliable way to diagnose this code is to use a Bentley/VAG-specific diagnostic scan tool (like ODIS/VCDS).
- After replacing a sensor, the suspension system must be recalibrated.
What's Unique About the 2011-2018 Bentley Continental GT
The second-generation Bentley Continental GT uses a sophisticated, computer-controlled air suspension system based on the Volkswagen Group D1 platform (shared with the VW Phaeton and, in principle, with the Audi A8). This system's complexity means that while generic OBD-II scanners can read a 'C' code, they cannot provide the specific Bentley/VAG definition. The critical link is the shared architecture with the Phaeton, where C1717 is a known issue tied to the failure-prone plastic ride height sensor linkages 🎬 See how to fix a broken sensor linkage. Diagnosis requires a VAG-compatible tool (like VAS/ODIS or VCDS) to read the manufacturer-specific code and pinpoint which sensor is faulting.
Symptoms You May Notice
- "Suspension Fault" or "Chassis System Fault" message on the dashboard.
- Vehicle sitting lower than normal on one or more corners, especially after being parked.
- Noticeably harsh, stiff, or bouncy ride quality.
- Air compressor running more frequently or for longer than usual.
- Vehicle ride height is visibly uneven or 'lopsided'.
- A hissing sound may be heard from a corner of the vehicle if the fault is accompanied by an air leak.
- Vehicle corner stuck in an abnormally high position.
- Assuming the air strut/shock is bad when only the ride height sensor or its linkage has failed.
- Replacing the air compressor when the root cause is a leak in a strut or line causing the compressor to overwork and burn out.
Most Likely Causes
Rare But Worth Checking
- Weak vehicle battery or faulty battery fuse causing multiple spurious electronic faults.
- Failure of the suspension control module (J197).
- Software glitch requiring a module update or recalibration.
Diagnosis Steps
- Scan the vehicle with a Bentley-compatible diagnostic tool (VAS, ODIS, VCDS, or high-end Autel) to confirm C1717 and get the manufacturer-specific description, which should point to a specific sensor location (e.g., 'Left Front').
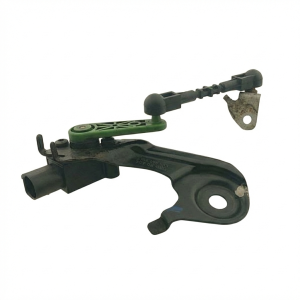
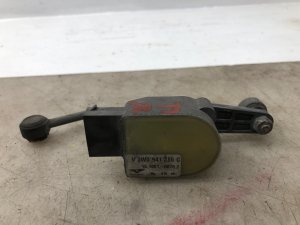
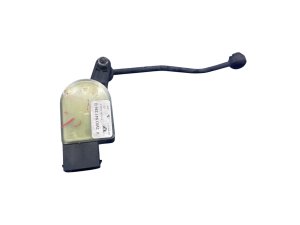
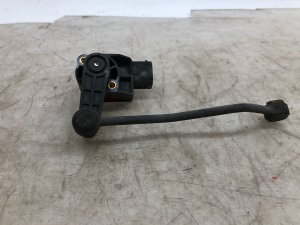
- Perform a visual inspection of the ride height sensor and its linkage on the corner indicated by the scan tool. The sensor is a small box with an arm connected to the lower control arm by a short plastic rod. Look for a snapped or disconnected rod.
- Inspect the electrical connector at the sensor for signs of corrosion, moisture, or damage. Clean the connector and apply dielectric grease if corrosion is present.
- Using the scan tool, access the Level Control Module (Address 34) and monitor live data from Measuring Value Blocks (MVB) 004 and 005. While observing the values, use a floor jack to slowly raise and lower the suspect corner. The height value for that corner should change smoothly. A stuck, erratic, or non-responsive value indicates a faulty sensor or wiring.
- If the linkage and wiring appear intact but the sensor signal is faulty, test the sensor wiring. Based on VAG diagrams, the 4-pin connector typically has a 5V supply, a sensor ground, a signal wire, and a signal ground. Check for 5V and good ground at the connector. Note: These are inductive sensors, so a simple resistance check is not a valid test method.
- If a leak is suspected (e.g., the vehicle is sagging), use a soapy water solution to spray the air struts, lines, and valve block connections to check for bubbles, which indicate a leak.
- Do not replace parts based on speculation. The diagnostic data from a proper scan tool is essential for an accurate repair.
Parts You'll Likely Need
- Ride Height Level Sensor
- Ride Height Sensor Linkage Rod
Related Codes That Often Appear With This One
- 01780 —
- 01400 —
- 01575 —
Technical Service Bulletins (TSBs) & Recalls
- TPI 2053492/8: A Technical Product Information bulletin that details the procedure for finding air leaks in the suspension system, noting that a drop in suspension does not automatically mean a faulty air spring and guiding technicians to check pipes, unions, and the valve block.
- TPI 2059172/4: Details a potential issue where the Chassis Control Module (J197) software needs an update if it becomes unresponsive to calibration attempts after a repair.
Mechanic-Grade Diagnostic Values
- Suspension System Pressure (Live Data) — expected: 6.0 - 10.0 bar is ideal. At least 4.0 - 6.0 bar is required for the system to function.. Failure: Pressure below 4.0 bar indicates a weak compressor or a significant leak.
- Ride Height Sensor Output (Live Data) — expected: A changing value (in mm) that corresponds smoothly to the corner being raised or lowered with a jack.. Failure: A value that is stuck, jumps erratically, or does not change while the suspension is physically moved indicates a failed sensor, linkage, or wiring issue.
- Standard Ride Height Calibration Target — expected: Approximately 395mm (front) and 394mm (rear), measured from the center of the wheel to the fender arch.. Failure: N/A - this is a target value for calibration, not a diagnostic reading.
Hidden / Shadow Codes Worth Checking
- 01780: Sensor for Vehicle Levelling. This is the specific VAG fault that a generic C1717 code often represents. It may be accompanied by text like 'Mechanical Failure' or 'Open or Short to Plus'. (see via VCDS (VAG-COM), ODIS, or equivalent professional VAG-compatible scan tool.)
- 455683: Sensor for Ride-Height (mechanical failure). This is another VAG-specific code indicating the system believes a sensor has failed mechanically, which can be triggered by an incorrect calibration attempt or a binding linkage. (see via VCDS (VAG-COM), ODIS, or equivalent professional VAG-compatible scan tool.)
Scan Tool Commands That Help
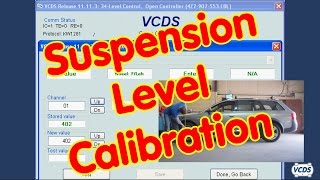
- VCDS (VAG-COM): Suspension Level Control Calibration 🎬 Watch this step-by-step suspension level calibration guide (Adaptation - Function 10) — This is mandatory after replacing a ride height sensor or any major suspension component. It teaches the control module the new baseline height for each corner.
- VCDS (VAG-COM): Security Access (Function 16) - Code 31564 — This code must be entered into the Level Control module (Address 34) to enable the Adaptation/Calibration function.
- VCDS (VAG-COM): Security Access (Function 16) - Code 08367 — This code enables Basic Settings, which allows for manual actuation of the system, such as charging or venting individual axles or the accumulator for testing purposes.
- VCDS (VAG-COM): Adaptation Channel 05 - Set value to '1' — This is the final, critical step of the calibration procedure. After entering the measured heights for channels 1-4, you must go to channel 5 and save a value of '1' to write the new calibration to the module. Failing to do this will cause the calibration to fail and may leave the system in a fault state.
Wiring & Ground Locations
- J197 - Level Control System Control Module — Located behind the rear left-side quarter panel trim, accessible after removing the rear seat squab.. This is the brain of the system. All sensor signals are sent here. Water ingress or connector failure at this module can cause various suspension faults.
- G78/G289 - Front Ride Height Sensors — Mounted to the chassis/subframe with a plastic linkage arm connecting to the lower control arm at each front wheel.. These are the sensors that directly report front ride height. The 4-pin connector is the primary point for electrical testing.
- J197 Connector T121al (Phaeton/Touareg Diagram) — This is the main 121-pin connector on the control module.. Based on platform-mate wiring diagrams, specific pins correspond to each sensor (e.g., Pins for G78/G289). This allows for end-to-end continuity testing of the sensor wiring from the module itself.
- Ground Connection 366 / 387 / 397 — These are internal harness ground connections shown on Touareg wiring diagrams for the J197 module. The main chassis ground point is often in the luggage compartment or under a front seat.. A poor ground connection for the control module or sensors can cause erratic readings and intermittent faults that mimic a sensor failure.
Real Owner Repair Stories
- YouTube video on a VW Phaeton (platform mate) (2005 Volkswagen Phaeton) — Car sitting too low on one corner, suspension fault light.
❌ Tried (didn't work) Initial assumption was a failed sensor or air leak.
✅ What actually fixed it The ball joint on the ride height sensor had seized from rust. This put stress on the plastic linkage arm, causing it to pop off the ball. The sensor itself was still good. Replacing the entire sensor and link assembly (which included a new, free-moving ball joint) resolved the issue. - YouTube video on an Audi A8 D4 (platform mate) (2014 Audi A8) — Front suspension very low, error for 'left front level control system'.
❌ Tried (didn't work) Replacing the front right ride height sensor did not fix the problem.
✅ What actually fixed it After replacing the sensor on the right side, the problem persisted. Upon closer inspection, the linkage arm on the *left* side (the one originally indicated by the code) had also popped off its ball joint. Popping the linkage back on fixed the problem, indicating a cascading or dual failure. - Ross-Tech Forum user (2005 Bentley Continental GT) — Level control system was disabled after disconnecting the battery to replace the emergency brake module. Could not communicate with the level control module (Address 34) with ignition on, only with engine running.
❌ Tried (didn't work) Attempting to diagnose the suspension system directly.
✅ What actually fixed it The problem was traced to a fuse for the second (house) battery that had been pulled due to a parasitic drain issue. Reinstating the fuse allowed proper communication with the suspension module and resolved the fault codes. - 6SpeedOnline Forum user (2005 Bentley Continental GT) — 'Level Fault Workshop' message, car not maintaining correct height.
❌ Tried (didn't work) Replacing the solenoid valve block., Multiple visits to different service agents.
✅ What actually fixed it The final resolution required multiple steps: a full VCDS level calibration was performed, and then the residual pressure holding valves on the front struts were found to be damaged and were replaced. This combination of electronic calibration and replacing a secondary mechanical part fixed the issue.
OEM Part Supersession History
3W0941285C→3W0941285E (unconfirmed)— Part revision, likely for improved material or sealing.
Heads up: While physically similar, mounting brackets and linkage lengths can vary slightly between part numbers and vehicle corners. Always verify the exact part number from the old sensor or by VIN before ordering.
Model Year Variations Within This Range
- 2016-2018: A facelift in 2016 introduced revised front/rear bumpers, new wheel designs, and minor interior changes. The W12 engine received a power increase and cylinder deactivation. However, there is no evidence of significant changes to the core air suspension hardware (sensors, struts, compressor) or control logic that would alter the diagnosis of code C1717.
Diagnostic Flowchart
Other Known Issues on This Vehicle
Issues unrelated to this code that are worth knowing about as an owner of this generation:
- Turbocharger Oil Starvation (4.0T V8 & W12) 🔴 High — A well-known issue caused by a fine-mesh oil strainer getting clogged, leading to turbo failure. More common on the 4.0T V8 but also affects the W12. (Ref: An updated, less restrictive strainer is the recommended fix.)
- Brittle and Cracking Vacuum Lines (W12) 🔴 High — Plastic vacuum lines become brittle from engine heat cycles and crack, causing boost leaks and rough running. Repair often requires engine removal.
- Water Ingress and Module Damage 🔴 High — Blocked scuttle panel or sunroof drains cause rainwater to leak into the cabin, typically the passenger footwell, destroying expensive electronic control modules located there.
- Air Suspension Strut and Compressor Failure 🟠 Medium — Air struts develop leaks with age, causing the car to sag. This forces the compressor to overwork and eventually fail. A common issue after 5-8 years.
- Coolant Leaks (W12) 🟠 Medium — Leaks can develop from various plastic pipes, O-rings, and the water-cooled alternator. Often slow leaks that are hard to trace in the packed engine bay.
- High-Level (Third) Brake Light Failure 🟡 Low — The center high-mounted brake light is known to fail more frequently than other lights on the vehicle.
Used vs. New Parts: Buying Guide for This Vehicle
When a used part is the smart pick: A used OEM sensor is a very reasonable choice for this repair. The original VAG parts are generally robust, and failure is often mechanical (linkage) rather than electronic. A used part from a lower-mileage donor vehicle can offer significant cost savings over a new dealer part.
Donor-vehicle mileage cap: roughly under 80000 miles for the part to have meaningful remaining life.
What to inspect on the donor part:
- MUST verify the OEM part number stamped on the sensor body matches your original part exactly. Front/Rear and Left/Right are different.
- CRITICAL: Inspect the plastic linkage arm and its ball sockets for any cracks, stress marks, or brittleness. If the link is broken, the sensor is useless unless you can swap your old link onto it.
- Check the metal ball stud for rust or seizure. It should pivot smoothly. A seized ball joint is a common root cause of failure.
- Inspect the electrical connector pins to ensure they are straight, clean, and free of any green or white corrosion.
OEM-only on this vehicle (don't cheap out):
- Suspension Control Module (J197) - Due to software and coding requirements, a used module may not be compatible. This part should be purchased new and programmed by a dealer or specialist.
Aftermarket brands forum-validated for this vehicle:
- Arnott: Widely cited in forums as a reliable, high-quality alternative to OEM for air suspension components, including sensors and struts.
- Aerosus: Another known aftermarket supplier for European air suspension systems.
Brands owners have reported issues with on this vehicle:
- Unbranded, no-name sensors from online marketplaces should be avoided. Forum users report higher failure rates and inconsistent quality with cheap, non-OEM-branded electronic parts. A tested, used OEM part is often a better choice than a new, cheap aftermarket one.
Real Owner Stories
Aggregated from forums and TSBs cited above. Mileages and costs reflect what owners reported in those sources.
2012 Bentley Continental GT 4.0L V8
Symptoms: The owner noticed a 'Suspension Fault' message and the vehicle was sitting lower than normal on one corner after being parked. The air compressor was also running more frequently than usual.
What fixed it: Inspection revealed a broken plastic linkage rod for the ride height sensor. Replacing the linkage resolved the height discrepancy and the fault code.
Source hint: pistonheads.com general discussions on air suspension failures and common faults
2011 Bentley Continental GT W12
Symptoms: The vehicle displayed a 'Chassis System Fault' and one corner was stuck in an abnormally high position. Live data showed a non-responsive height value for that corner.
What fixed it: The ride height level sensor had suffered an internal electrical failure. Replacing the sensor with a used OEM unit from a donor vehicle restored functionality.
Source hint: Volkswagen Phaeton platform-mate diagnostic patterns
Related OBD-II Codes
Frequently Asked Questions
My Bentley is sagging after being parked; does TPI 2053492/8 mean I need new air struts?
I replaced a suspension component but cannot calibrate the system. Is there a software fix for the 2011-2018 Continental GT?
Can I use parts from a VW Phaeton to fix a C1717 code on my Continental GT?
Are there any aftermarket brands recommended for Bentley air suspension repairs?
Is it better to buy a cheap new sensor online or a used OEM one for my Bentley?
Could my C1717 suspension fault be related to a battery issue?
Helpful Videos
We Have This Part in Stock



The information in this article is provided for general reference and educational purposes only. Vehicle specifications, procedures, and part compatibility can vary by production date, trim level, and region. Always consult your vehicle's factory service manual and verify part numbers before purchasing or performing repairs. Safety-critical components such as airbags, seat belts, and braking systems should be installed by a qualified professional.
- Bentley Continental GT:
- 🎬 Helpful Videos
- 🛍️ Shop This Part
- What's Unique About the 2011-2018 Bentley Continental GT
- Symptoms You May Notice
- Most Likely Causes
- Rare But Worth Checking
- Diagnosis Steps
- Parts You'll Likely Need
- Related Codes That Often Appear With This One
- Technical Service Bulletins (TSBs) & Recalls
- Mechanic-Grade Diagnostic Values
- Hidden / Shadow Codes Worth Checking
- Scan Tool Commands That Help
- Wiring & Ground Locations
- Real Owner Repair Stories
- OEM Part Supersession History
- Model Year Variations Within This Range
- Diagnostic Flowchart
- Other Known Issues on This Vehicle
- Used vs. New Parts: Buying Guide for This Vehicle
- Real Owner Stories
- 2012 Bentley Continental GT 4.0L V8
- 2011 Bentley Continental GT W12
- Related OBD-II Codes
- Frequently Asked Questions
- 🎟️ Get 5% Off