

OBD-II Code C1715: Right Front Suspension Position Sensor Circuit Malfunction
What C1715 means, why it triggers, and how to fix it
- Code C1715 indicates a voltage or circuit fault in the right front suspension position sensor, disabling electronic suspension adjustments.
- Visually inspect the right front wheel well first; a broken plastic linkage arm or corroded wiring connector causes over 60% of these faults.
- Never ignore this code; driving with a failed sensor forces the air compressor to run continuously, leading to a $900+ compressor burnout within months.
- Replacing the sensor often requires a mandatory ride height calibration using an advanced bidirectional OBD-II scanner to clear the code permanently.
What Does C1715 Mean?
Code C1715 means the engine control unit (ECU) detects a problem with the right front wheel's ride height sensor. This sensor tells the computer the suspension's current height. When the signal is lost, erratic, or incorrect, the computer cannot adjust the electronic shocks or air suspension properly and illuminates a suspension warning light on the dashboard.
Technical definition: C1715 indicates the Suspension Control Module (SCM) detects out-of-range voltage or a circuit fault from the right front suspension position sensor. The module sets the code if the sensor's power circuit voltage is too high (above 5.5V) or too low (below 4.3V), or if the signal voltage is out of range (e.g., above 4.7V or below 0.3V) for more than one second.
Can I Drive With C1715?
Yes, But With Caution. Yes, but vehicle stability and handling are compromised. The suspension defaults to a stiff or soft setting, causing a harsh or bouncy ride. Drive cautiously for short distances; ignoring the issue is unsafe and costly. Prolonged driving causes premature tire wear and forces the air compressor to run constantly, leading to a burnout that costs $900-$1,500 to replace. Uneven tire wear requires a new set of tires, adding $400-$1,200 to the repair bill.
Common Causes
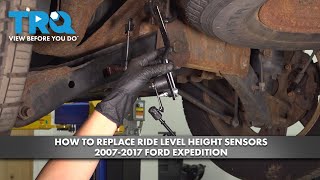
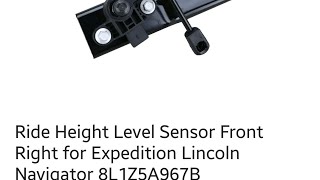
- Broken or Disconnected Sensor Linkage (Very Common) — The sensor connects to the control arm via a small plastic or metal linkage. 🎬 Watch: How to replace the front ride height sensor This arm breaks, bends, or pops off its mounting points, causing the sensor to read an incorrect height.
- Damaged or Corroded Wiring/Connector (Very Common) — Located in the wheel well, the sensor's wiring is exposed to water and road salt. Wires fray and connector pins corrode, causing a bad or intermittent signal.
- Failed Ride Height Sensor (Very Common) — The sensor fails internally from age, moisture intrusion, or constant vibration, stopping the correct signal transmission even with intact wiring.
- Leaking Air Strut or MagneRide Shock (Common) — A leaking air spring or failed magnetic shock causes the right front corner to sag. Severe sag pushes the sensor's reading out of its normal operating range, triggering the code. This is the primary root cause on GM vehicles. 🎬 See how to diagnose GM ride control messages
- Improperly Seated Connector (GM) (Common) — On GM vehicles with Magnetic Ride Control, the 90-degree electrical connector on top of the shock absorber partially disconnects or loses internal contact, triggering intermittent faults.
- Failed or Improper Calibration (Less Common) — After replacing suspension components, the system requires calibration. Skipping this procedure causes the control module to store C1715 because the sensor's baseline reading is incorrect.
- Failed Suspension Control Module (Rare) — The suspension control computer fails internally. Suspect this only after confirming the sensor, wiring, and calibration are correct.
Symptoms
- Suspension Warning Light — A 'Service Suspension System,' 'Check Suspension,' or 'Chassis Stabilization Malfunction' message illuminates on the dashboard.
- Uneven Ride Height — The front right corner of the vehicle sits noticeably lower or higher than the other corners, especially after parking overnight.
- Harsh or Bouncy Ride — Without a valid sensor signal, the electronic suspension defaults to a very firm or very soft fail-safe setting.
- Air Compressor Runs Excessively — The air suspension compressor runs continuously trying to compensate for the false height reading, leading to premature compressor burnout.
- Poor Handling and Braking — Incorrect ride height compromises stability. The vehicle nose-dives when stopping or feels unstable at highway speeds, increasing stopping distances.
- Clunking or Banging Noises — A broken and dangling sensor linkage arm makes metallic or plastic clunking sounds as it hits suspension parts while driving.
Diagnostic Flowchart
Tap your situation to follow the diagnostic path that matches what you're seeing on this code.
Common Fixes & Costs
- Replace the Ride Height Sensor and/or Linkage — Parts: $50-$270, Labor: $78-$170, ~1.2 hr book time (DIY)
- Repair Damaged Wiring or Connector — Parts: $10-$50, Labor: $100-$300, ~1.5 hr book time (Intermediate)
- Replace Leaking Air Strut or Magnetic Shock Absorber — Parts: $400-$1,200+, Labor: $150-$300, ~2.5 hr book time (Professional)
- Replace the Air Suspension Compressor — Parts: $700-$1,200, Labor: $150-$250, ~1.8 hr book time (Intermediate)
- Replace the Suspension Control Module — Parts: $600-$1000+, Labor: $90-$170, ~1.0 hr book time (Professional)
Used vs. New Parts: Buying Guide
When a used part is worth it: For a simple ride height sensor, buying used rarely makes sense due to the low cost of new aftermarket parts and the unknown remaining life of a used part. Considering a used part is only logical for very high-cost OEM components like a complete MagneRide strut assembly or a control module, and only from a low-mileage, accident-damaged donor vehicle.
Donor-vehicle mileage cap: roughly under 60000 miles for the part to have meaningful remaining life.
Donor quality checklist:
- Verify the part number matches exactly.
- For sensors, avoid parts from the Rust Belt or high-corrosion areas.
- Ensure the donor vehicle was not scrapped due to a related suspension or electrical failure.
Decision logic:
- If The part is a ride height sensor or linkage. → Buy a new OEM or reputable aftermarket part. The cost savings of a used part are minimal and not worth the risk of premature failure.
- If The part is an expensive MagneRide shock or control module AND the vehicle is older with high mileage. → A used part from a low-mileage donor is a budget-conscious option, but accept the risk of a shorter lifespan and limited warranty.
- If The part is electronic and critical to vehicle safety and operation. → Favor new OEM or high-quality aftermarket parts for reliability and warranty.
Warranty tradeoff: Used parts from a salvage yard typically offer a 30-90 day warranty on the part only, not labor. New aftermarket sensors often have a 1-year to limited lifetime warranty. New OEM parts carry a manufacturer's warranty (typically 1-2 years).
Worst-case if a used part fails: 200-400. If a used or cheap aftermarket sensor fails shortly after installation, you pay for the replacement part and the labor to install it all over again.
What Happens If You Wait — Timeline
- 0-1 month: Suspension warning light is on. Ride feels harsh or bouncy as the system defaults to a fixed damper setting. Handling is compromised, especially during cornering or braking. (MPG impact: 0-2%% · Added cost: $0)
- 1-4 months: The air compressor begins to run excessively as it tries to correct a perceived height issue that isn't real, or tries to fight a real leak caused by a sagging corner. Uneven tire wear starts to become visible. (MPG impact: 2-5%% · Added cost: $50-$150 in wasted fuel and early tire wear.)
- 4-8 months: Significant, uneven tire wear develops, requiring premature replacement of one or more tires. The air compressor motor is now under severe strain from constant use. (MPG impact: 3-7%% · Added cost: $400-$1,200 for a new set of tires due to cupping or edge wear.)
- 8+ months: The overworked air suspension compressor burns out completely. The vehicle is now stuck at an incorrect ride height and will not raise. This is a critical failure requiring a much more expensive repair. (MPG impact: 3-7%% · Added cost: $1,000-$2,500 to replace the burnt-out compressor and fix the original sensor fault.)
Cost of Not Fixing It
- 0-1 month: Degraded ride quality (harsh or bouncy), compromised handling and braking stability, and uneven headlight aim. (Added cost: 0)
- 1-6 months: Accelerated and uneven tire wear due to improper suspension height and alignment. The air suspension compressor runs excessively, leading to premature wear. (Added cost: 400-1200)
- 6+ months: Complete failure of the air suspension compressor from being overworked. Potential damage to other suspension components due to prolonged operation outside of design parameters. (Added cost: 1000-2500)
Diagnosis Steps
- Read the Trouble Codes
Use an OBD-II scanner capable of reading Chassis (C-codes) to confirm C1715 is active. Note any other related suspension codes, as they pinpoint the problem (e.g., C1725, C1796).
Tools: OBD-II Scanner (with Chassis support) (Beginner) - Check for TSBs and Calibration Requirements
Before inspecting parts, check for manufacturer Technical Service Bulletins (TSBs) related to C1715. Note if your vehicle requires a ride height calibration after repairs.
Tools: Online Service Information (Beginner) - Visually Inspect the Sensor and Linkage
Safely raise the front of the vehicle and locate the sensor on the right front control arm or strut assembly. Look for a broken sensor body, a disconnected linkage arm, or heavy corrosion.
Tools: Jack, Jack Stands, Flashlight (Beginner) - Inspect the Wiring Harness and Connector
Trace the wiring from the sensor back as far as you can. Look for cuts, chafing, or melted sections. Unplug the connector and check for green or white corrosion on the pins.
Tools: Flashlight (Intermediate) - Check Live Data
Use an advanced scan tool to read live data from the suspension module. Watch the voltage reading for the 'Right Front Height Sensor' while a helper gently bounces the corner of the vehicle. The reading must change smoothly. If it is stuck, jumps erratically, or reads 0, the sensor or circuit is faulty.
Tools: Advanced OBD-II Scanner (Intermediate) - Test the Circuit with a Multimeter
With the sensor unplugged and the key on, test for reference voltage and a good ground at the connector. Most systems use a 3-wire sensor; you must find a 5-volt reference (4.5V-5.5V), a ground (<1 Ohm), and a signal wire.
Tools: Digital Multimeter, Vehicle-Specific Wiring Diagram (Advanced) - Perform a Sensor Voltage Output Test (Bench Test)
If the reference and ground are good, test the sensor's output directly. Provide a 4.5V source to the removed sensor. The signal wire must read approximately 2.0-2.5V when the sensor arm is level and change smoothly between ~0.9V and ~2.3V as you move the arm. A stuck or jumping reading indicates a bad sensor.
Tools: Digital Multimeter, 3x 1.5V Batteries in series or Power Probe (Advanced) - Check Harness Continuity
With both the sensor and the Suspension Control Module disconnected, check for continuity on each of the three wires between the sensor connector and the module connector. Each wire must have less than 1.0 Ohm of resistance.
Tools: Digital Multimeter, Vehicle-Specific Wiring Diagram (Advanced)
When This Code Triggers (Freeze-Frame Conditions)
- Vehicle Speed: 15-55 mph (The fault is often detected during city or highway driving, not necessarily at idle.)
- Sensor Signal Voltage: < 0.3V or > 4.7V (The code triggers when the signal voltage from the sensor is stuck, intermittent, or goes outside the expected range for more than one second.)
- System Status: Active / On (The suspension control module must be active, which it is whenever the vehicle is on.)
- Malfunction Frequency Counter: > 1 (The fault must be detected more than once in a drive cycle to move from a 'pending' to a 'logged' state, which illuminates the warning light.)
Related Codes
- C1716 — This is the identical code but for the Left Front (LH) sensor. Diagnosis is the same, but focused on the driver's side wheel. Seeing both C1715 and C1716 together points towards a shared power/ground issue or a control module fault.
- C1717 — This code indicates a fault with a Rear Acceleration Sensor. If seen with C1715, it suggests a wider system problem, but they are independent circuits.
- C1796 — This is a 'Test Mode DTC' for the Right Front Acceleration Sensor. It sets when the control module runs a self-test and does not see the sensor's signal change as expected, confirming a hard fault in the circuit.
- C1725 — On Ford vehicles, this code means 'Air Suspension Front Pneumatic Failure.' It is a secondary code caused by C1715. The module logs C1725 because it detects a failure to raise the vehicle due to the missing height signal. Fix C1715 first.
Climate & Environmental Factors
- Road Salt / Corrosion: Vehicles operated in regions that use road salt during winter see a much higher failure rate for this code. Salt accelerates the corrosion of the sensor's electrical connector pins and seizes the mechanical linkage arm, causing it to break.
- Cold Weather / Moisture: In cold climates, moisture that gets past seals in the air suspension system freezes. This blocks air lines or damages valve blocks, indirectly causing height sensor codes. Plastic components also become brittle in extreme cold, increasing breakage risk.
- High Humidity: High humidity environments overwhelm the air suspension's dryer system, allowing moisture into the air lines. This moisture leads to internal corrosion and electrical issues in sensors over time.
How to Talk to a Mechanic About This Code
Say this: "I have a 'Service Suspension' light and a C1715 code. I'd like to schedule a diagnostic. Can you please start by visually inspecting the right front sensor linkage, wiring, and connector? If it's a GM with MagneRide, please also check the shock for fluid leaks before quoting a new sensor."
This signals you've done your research and directs the technician to the most common and cheapest-to-fix causes first. It prevents them from immediately quoting an expensive part without performing a basic, logical diagnosis, saving you from paying for a part you might not need.
Avoid saying:
- 'My suspension light is on, can you just fix it?'
- 'I think I need a new suspension sensor.' (This is diagnosing, not describing symptoms)
- 'Just do whatever you think is best.'
Questions to ask before authorizing the repair:
- Did you find a broken linkage, corroded connector, or damaged wiring?
- If you are recommending a new sensor, did you confirm it has proper power and ground, and that the live data signal is stuck or erratic?
- If you are recommending a new shock absorber, is there visible fluid leakage from the old one?
- Does this repair require a ride height calibration, and is that included in the quote?
Where to Take It: Dealer vs Independent vs Chain
- Dealer:
A safe but expensive choice. Best if your vehicle is newer and known to require a specific calibration procedure that an independent shop's tools might not support.
Best for: Vehicles under warranty, Complex manufacturer-specific electronic issues, Repairs that require mandatory software updates or calibration with proprietary tools.
Downsides: Typically highest labor rates and part costs., Defaults to replacing larger assemblies rather than pinpointing smaller, individual failed components. (Typical cost: +50% vs. baseline) - Independent Shop:
Best fit for most out-of-warranty vehicles. An experienced independent technician has likely seen this exact problem many times and can diagnose it efficiently without the dealer price tag.
Best for: Out-of-warranty vehicles where cost is a factor., Common problems with known solutions (like C1715 on Fords or GMs)., Shops specializing in your vehicle's brand (e.g., a Euro car specialist).
Downsides: Quality and diagnostic capability vary greatly. Vet shops by reviews and certifications., May not have the very latest manufacturer-specific tools for calibration on brand-new models. (Typical cost: +0% vs. baseline) - Chain Shop:
High risk. While they might be able to replace a sensor, they are less likely to perform the detailed electrical diagnosis required for an intermittent fault. Avoid for this type of electronic chassis work.
Best for: Simple, high-volume jobs like tires, brakes, and oil changes.
Downsides: Technician skill varies dramatically., High pressure to upsell services leads to misdiagnosis (e.g., selling shocks and sensors when only a wiring pigtail is needed). (Typical cost: -10% vs. baseline)
When to Walk Away From the Repair
If the estimated repair cost for the C1715 fault and any related necessary repairs exceeds 50% of your car's private-party market value, it's time to seriously consider alternatives.
- Car worth $5000, fix is $2200: Walk away. The repair cost is a huge percentage of the vehicle's value. Sell as a 'mechanic's special' or trade it in, disclosing the issue.
- Car worth $15000, fix is $450: Fix it. This is a relatively minor cost to restore the safety and function of a more valuable vehicle.
- Car worth $8000, fix is $3000: Borderline. The repair is approaching the 40-50% threshold. Get a second opinion to confirm the diagnosis and cost before proceeding. If the root cause is a major component like a failed module and compressor, it may not be economically viable.
What Scan Tool You Need for This Code
Minimum: A scanner that can read Chassis (C) codes. Basic $20 readers that only show Powertrain (P) codes will NOT see C1715.
A standard code reader reports 'No Codes Found' because it cannot communicate with the Suspension Control Module. You need a tool that explicitly supports reading ABS, Airbag (SRS), and Chassis systems to even see the C1715 code.
Rent vs buy: Most auto parts store loaner tools are basic P-code readers and will not work. You cannot effectively diagnose this code with a free rental tool. If you plan to DIY, buying a capable scanner like the BlueDriver or Foxwell is a necessary investment.
How to Clear the Code After You Fix It
- Perform the physical repair (e.g., replace sensor).
- Use an OBD-II scan tool capable of reading Chassis codes to clear the C1715 fault from the Suspension Control Module.
- If required by the manufacturer, perform a ride height calibration using the scan tool.
- Perform a drive cycle to confirm the fix and allow the system to self-test.
Drive cycle (~20 minutes): Start the vehicle and let it idle for 2 minutes. Drive in a mix of city conditions (25-40 mph) for 10-15 minutes, including several stops and turns. Drive at a steady highway speed (55-60 mph) for 5 minutes. The goal is to make the suspension travel through its full range.
Readiness monitors affected: This is a Chassis (C-code), so it does not directly affect emissions readiness monitors like Catalyst or O2 sensors.
Before emissions retest: drive at least 50 miles to fully set monitors.
Watch out for:
- Simply disconnecting the battery does not clear the code from the Suspension Control Module.
- If the code returns immediately, it indicates the root cause was not fixed or a calibration is required.
- Forgetting to perform the ride height calibration on vehicles that require it is the most common reason for the fix to fail.
Will This Fail Emissions / State Inspection?
No — by itself this code doesn't fail OBD inspection (but it can keep readiness monitors from setting, which causes a separate fail).
- California: A C1715 code itself will not fail the OBD-II portion of the smog check, which focuses on powertrain (P-codes) and emissions monitors. However, the illuminated 'Service Suspension' light causes a failure during the visual inspection portion of the test.
- New York: The NYS inspection includes a check of the suspension system. An illuminated suspension warning light is a direct failure of the safety inspection. The vehicle cannot pass until the fault is repaired and the light is extinguished.
- Texas: In counties requiring an emissions test, the test includes an OBD-II scan. While a C-code is not an automatic emissions failure, the associated warning light on the dashboard causes the vehicle to fail the overall safety inspection.
Most Commonly Affected Vehicles
- Ford Expedition (2003-2017) — Extremely common for the plastic sensor linkage to break or pop off. The sensor and wiring are also prone to corrosion.
- Lincoln Navigator (2003-2017) — Shares the same failure-prone air suspension system as the Expedition. Air leaks and sensor linkage failures are the top causes.
- Cadillac / GMC / Chevrolet Escalade, Yukon Denali, Tahoe, Suburban (2007-2020) — Vehicles with Magnetic Ride Control (RPO Z95) often set this code when the MagneRide shock itself leaks fluid and fails. Poorly seated connectors at the top of the shocks are also a known issue.
- Lexus GX470 / LX470 / LX570 (2002-2015) — Models with Adaptive Variable Suspension (AVS) or Active Height Control (AHC) set this code frequently. A bouncy ride indicates failed AHC globes, not just a sensor.
- BMW 5-Series (F10), 7-Series, X5 (2010-2020) — Often presents as a 'Chassis Stabilization Malfunction' warning. The cause is frequently a failed 'vertical acceleration sensor' mounted to the strut.
- Ford F-150 (2018-2022) — Models equipped with Continuously Controlled Damping (CCD) adaptive suspension use the same sensor system as the Expedition and are prone to similar failures. Lifting the suspension without sensor relocation brackets triggers this code.
- Volkswagen Touareg (2004-2017) — Models equipped with factory air suspension experience ride height sensor failures, leading to suspension faults and uneven ride height.
- Land Rover Range Rover, Range Rover Sport (2005-2021) — Air suspension faults are very common. A C1715-type code is triggered by a faulty height sensor, air leaks, wiring issues, or a failing compressor.
Manufacturer-Specific Notes
- Ford / Lincoln: The plastic sensor linkage arm is a major weak point. It often pops off or breaks. A common DIY fix is to re-attach the arm and secure it with a zip tie.
- Toyota / Lexus: On some models, the front acceleration sensor is integrated into the suspension control ECU itself. After replacing any height sensor or the ECU, a 'Vehicle Height Offset Calibration' must be performed with a scan tool like Techstream.
- General Motors (Cadillac/GMC/Chevrolet): A 'Service Suspension System' message is frequently caused by a leaking MagneRide shock, not the sensor. Look for oily fluid residue on the shock body. Also, check for poorly seated electrical connectors at the top of the shocks.
- Land Rover / Range Rover: Suspension faults are extremely common and cascade quickly. A height sensor fault is often a symptom of an air leak elsewhere in the system causing a corner to drop and pushing the sensor 'out of range'.
Real Owner Stories
2007 Lincoln Navigator, 155K miles - The Easy Fix
Owner noticed the front right corner of the vehicle was sagging after being parked overnight. 'Service Suspension' light was on.
What they tried:
- Initially suspected a leaking air spring.
- Performed a visual inspection and found the small plastic linkage arm connecting the ride height sensor to the control arm had popped off its ball stud.
Outcome: Re-attached the linkage arm by hand. To prevent it from popping off again, they secured it with a zip tie. The suspension immediately aired up to the correct height and the code was cleared. Total cost: less than $1.
Lesson: Always perform a thorough visual inspection first. On Ford/Lincoln SUVs, the plastic sensor linkage is a known weak point and often the simplest cause of a C1715 code.
2015 Cadillac Escalade, 110K miles - A Misdiagnosis Story
'Service Suspension System' message appeared intermittently, especially after hitting bumps. The ride felt harsh. Code C1715 was stored.
What they tried:
- Assuming the sensor was bad, the owner replaced the right front ride height sensor ($180 part). The code returned within a day.
- Next, they suspected a wiring issue and spent hours testing continuity, finding no faults.
- Finally took it to a dealer who immediately noticed oily fluid covering the body of the right front MagneRide shock absorber.
Outcome: The actual problem was a leaking magnetic shock absorber. The leak caused the corner to sag, which pushed the sensor's reading out of its valid range, triggering the C1715 code. Replacing the shock (~$950 part + labor) and performing a ride height calibration fixed the issue permanently.
Lesson: On GM vehicles with MagneRide, C1715 is frequently a symptom of a failed shock absorber, not the sensor itself. Always inspect the shock body for fluid leaks before replacing the sensor.
2010 Lexus GX470, 140K miles - Intermittent Electrical Gremlin
Suspension warning light came on randomly, sometimes staying on for days, then disappearing. The ride height seemed normal, but the ride was occasionally bouncy. Codes C1715 and C1796 were found.
What they tried:
- Replaced the sensor, but the intermittent fault continued.
- A mechanic checked live data and saw the sensor voltage drop to zero for a split second when the wiring harness was wiggled.
- Closer inspection of the connector pigtail revealed corrosion inside one of the pin sockets that wasn't visible from the outside.
Outcome: The mechanic replaced the sensor's pigtail connector ($40 part) by soldering in a new one. The connection became stable, the voltage drop disappeared, and the code did not return.
Lesson: For intermittent faults, the problem is often in the wiring or connector, not the component itself. Wiggling the harness while watching live data is an effective way to locate a loose connection or internal corrosion.
How to Prevent This Code From Triggering
- Periodically Clean the Sensor and Linkage (Every 15,000 miles or annually) — Use a low-pressure hose to wash away road salt, mud, and debris from the sensor body, connector, and moving linkage. This prevents corrosive buildup and stops grime from causing the mechanical arm to bind and break.
- Inspect Air Springs and Lines for Leaks (Annually) — A slow leak in an air spring or line forces the compressor to run more often, leading to premature failure. Periodically spraying air springs and fittings with soapy water reveals small leaks before they become major problems.
- Apply Dielectric Grease to Electrical Connectors (Whenever connectors are disconnected for service) — Applying a small amount of dielectric grease to the connector seal helps block moisture and road salt from getting to the electrical pins, preventing the corrosion that causes intermittent signals and high resistance faults.
- Avoid Driving Through Deep Water (Daily habit) — Submerging the suspension components forces water past seals in connectors and the sensor itself, leading to short circuits and internal corrosion.
- Ensure Proper Ride Height Calibration After Alignment (After every wheel alignment) — If suspension angles are changed during an alignment, the baseline reading of the height sensor is thrown off. On vehicles requiring it, performing a ride height calibration ensures the system's zero point is correct, preventing the module from thinking there's a fault.
Frequently Asked Questions
Can a bad ride height sensor damage the air compressor?
Yes. If a bad sensor provides incorrect data, the control module commands the compressor to run constantly to correct a perceived height issue. This continuous operation causes the compressor to overheat and burn out, resulting in a $900+ repair.
How much does it cost to fix a 'Service Suspension' light?
Repair costs range from $30 for a simple broken linkage on a Ford to $150-$450 for a sensor replacement. However, if the light is on due to a failed MagneRide shock on a Cadillac or a burnt-out air compressor, the repair easily exceeds $1,000. Always diagnose the root cause before buying parts.
Does a new ride height sensor need to be calibrated?
It depends on the vehicle. Older systems rarely require calibration, but modern vehicles (like newer Fords, BMWs, and Lexus models) require a ride height calibration using an advanced scan tool after sensor replacement. Skipping this step causes the code to return immediately.
Why does my scanner show a different meaning for C1715?
The same code number applies to different systems depending on the manufacturer. For example, C1715 sometimes shows as a 'Torque Converter Clutch' issue on a Nissan if read by a generic scanner. Ensure your scanner reads codes specifically from the Chassis Control Module (CCM) or Suspension Control Module (SCM).
Can I fix a C1715 code myself?
Yes, replacing a ride height sensor or linkage is a DIY-friendly repair. The components are accessible in the wheel well and require basic hand tools to replace in about an hour. However, you need an advanced scanner if your vehicle requires post-repair calibration.
Will clearing the C1715 code make it go away?
No. Clearing the code turns the warning light off temporarily, but it returns as soon as the computer detects the fault again, usually within minutes. You must fix the underlying mechanical or electrical problem to keep the light off.
Why is my suspension warning light on but the car rides fine?
The fault is likely intermittent. A loose wiring connection acts up on certain bumps, or the sensor is in the early stages of failure. The computer stores the code and illuminates the light to warn you before complete failure occurs.
Key Takeaways
- Code C1715 indicates a voltage or circuit fault in the right front suspension position sensor, disabling electronic suspension adjustments.
- Visually inspect the right front wheel well first; a broken plastic linkage arm or corroded wiring connector causes over 60% of these faults.
- Never ignore this code; driving with a failed sensor forces the air compressor to run continuously, leading to a $900+ compressor burnout within months.
- Replacing the sensor often requires a mandatory ride height calibration using an advanced bidirectional OBD-II scanner to clear the code permanently.
Helpful Videos

The information in this article is provided for general reference and educational purposes only. Vehicle specifications, procedures, and part compatibility can vary by production date, trim level, and region. Always consult your vehicle's factory service manual and verify part numbers before purchasing or performing repairs. Safety-critical components such as airbags, seat belts, and braking systems should be installed by a qualified professional.
- 🎬 Helpful Videos
- What Does C1715 Mean?
- Can I Drive With C1715?
- Common Causes
- Symptoms
- Diagnostic Flowchart
- Common Fixes & Costs
- Used vs. New Parts: Buying Guide
- What Happens If You Wait — Timeline
- Cost of Not Fixing It
- Diagnosis Steps
- When This Code Triggers (Freeze-Frame Conditions)
- Related Codes
- Climate & Environmental Factors
- How to Talk to a Mechanic About This Code
- Where to Take It: Dealer vs Independent vs Chain
- When to Walk Away From the Repair
- What Scan Tool You Need for This Code
- How to Clear the Code After You Fix It
- Will This Fail Emissions / State Inspection?
- Most Commonly Affected Vehicles
- Manufacturer-Specific Notes
- Real Owner Stories
- 2007 Lincoln Navigator, 155K miles - The Easy Fix
- 2015 Cadillac Escalade, 110K miles - A Misdiagnosis Story
- 2010 Lexus GX470, 140K miles - Intermittent Electrical Gremlin
- How to Prevent This Code From Triggering
- Frequently Asked Questions
- Can a bad ride height sensor damage the air compressor?
- How much does it cost to fix a 'Service Suspension' light?
- Does a new ride height sensor need to be calibrated?
- Why does my scanner show a different meaning for C1715?
- Can I fix a C1715 code myself?
- Will clearing the C1715 code make it go away?
- Why is my suspension warning light on but the car rides fine?
- Key Takeaways
- 🎟️ Get 5% Off