

OBD-II Code C1505: Steering Angle Sensor Malfunction
What C1505 means, why it triggers, and how to fix it
- Code C1505 disables your vehicle's Traction and Stability Control systems because the computer cannot verify the steering wheel's exact position.
- Over 70% of C1505 codes require a simple electronic recalibration rather than a new part, especially following a wheel alignment or battery replacement.
- Driving with C1505 is mechanically safe but highly dangerous in wet or icy conditions, as the vehicle loses its primary electronic skid-prevention capabilities.
- Fixing this code requires a bi-directional OBD-II scanner capable of performing a 'zero-point calibration' to reset the sensor's baseline to 0 degrees.
What Does C1505 Mean?

Code C1505 indicates the main computer (ECU) detects an illogical or missing signal from the Steering Angle Sensor (SAS). This sensor tracks the exact angle and direction of the steering wheel. When the computer receives bad data—such as the steering wheel showing a sharp turn while the wheel speed sensors indicate the car is driving straight—it triggers C1505 and disables stability and traction control as a failsafe.
Technical definition: The ABS/ESC control module detects a mismatch between the Steering Angle Sensor output and the vehicle's actual trajectory. This fault triggers when the sensor's signal remains static during a turn, or indicates a turn while wheel speed and yaw rate sensors confirm the vehicle is traveling straight.
Can I Drive With C1505?
Yes, But With Caution. Yes, but with extreme caution. Code C1505 disables your vehicle's Traction Control and Electronic Stability Control (ESC). While the car remains mechanically drivable and will not suffer engine or drivetrain damage, driving without these safety systems significantly increases your risk of a skid or spin-out during emergency maneuvers or in slippery conditions. Limit driving to short trips to a repair shop.
Common Causes

- Improper Steering Angle Sensor Calibration (Very Common) — The sensor requires a 'zero point' calibration to establish the straight-ahead position. This calibration is frequently lost after a wheel alignment, battery replacement, or steering column repair.
- Poor Wheel Alignment (Common) — An incorrect wheel alignment leaves the steering wheel off-center when driving straight. Holding the wheel at an angle creates a permanent mismatch between the SAS reading and the vehicle's actual trajectory, triggering the fault.
- Faulty Steering Angle Sensor (SAS) (Common) — The sensor fails internally from age, friction wear, or heat, resulting in a complete loss of signal or erratic voltage readings.
- Damaged or Incorrectly Installed Clock Spring (Less Common) — The SAS is often integrated with the clock spring. A damaged or misaligned clock spring—commonly ruined by spinning the steering wheel while the steering rack is disconnected—destroys the sensor.
- Damaged Wiring or Loose Connections (Less Common) — The wiring harness connecting the sensor to the control module becomes frayed, corroded, or disconnected, interrupting the 5V reference or signal return.
- Low Battery Voltage or Charging System Fault (Uncommon) — A weak battery or failing alternator drops system voltage below operating thresholds, causing the ABS/ESC modules to behave erratically and generate false C1505 codes.
- Faulty ABS / Stability Control Module (Rare) — The ABS or Stability Control module fails internally and misinterprets a perfectly valid sensor signal. This requires module replacement and reprogramming.
- CAN Bus Communication Error (Rare) — A fault in the CAN bus network prevents the sensor's signal from reaching the control module. This is almost always accompanied by 'U' (communication) codes.
Symptoms

- Traction Control or Stability Control (ESC/VSC) Light is On — The system disables itself as a failsafe because it cannot rely on the steering angle data.
- ABS Light is On — The Anti-lock Braking System (ABS) relies on stability control data. A steering angle fault often forces the ABS module to disable itself.
- Stiff or Heavy Steering — Vehicles with electronic power steering use SAS input to determine assist levels. A faulty signal forces the system into a default low-assist mode, making the steering feel heavy.
- Car Pulls to One Side — This symptom points to the root cause—a bad wheel alignment—which subsequently triggers the C1505 code.
- Other Warning Lights (e.g., Adaptive Headlights) — Systems like adaptive headlights rely on the SAS to track turns. A fault triggers warning lights for these auxiliary systems.
Diagnostic Flowchart
Tap your situation to follow the diagnostic path that matches what you're seeing on this code.
Common Fixes & Costs
- Steering Angle Sensor Recalibration — Parts: $0, Labor: $75-$175, ~0.8 hr book time (Professional)
- Four-Wheel Alignment and Recalibration — Parts: $0, Labor: $150-$300, ~2.0 hr book time (Professional)
- Replace Steering Angle Sensor
— Parts: $150-$400, Labor: $150-$500, ~2.5 hr book time
(Professional)
Toyota Camry (2007-2011): OEM 89245-06040 (Alt: Duralast SU17323)
Lexus ES350 (2007-2012): OEM 89245-52030 (Alt: Refurbished OEM)
Subaru Outback (2010-2014): OEM 27549AL000 (Alt: Various) - Replace Clock Spring Assembly — Parts: $200-$600, Labor: $150-$500, ~2.5 hr book time (Professional)
- Repair Damaged Wiring — Parts: $10-$50, Labor: $100-$250, ~1.5 hr book time (Intermediate)
Used vs. New Parts: Buying Guide
When a used part is worth it: Buying a used steering angle sensor is rarely recommended due to its electronic nature and unknown history. It only makes sense for older, high-mileage vehicles where the cost of a new OEM part is prohibitive.
Donor-vehicle mileage cap: roughly under 60000 miles for the part to have meaningful remaining life.
Donor quality checklist:
- Ensure the part number is an exact match.
- Only buy from reputable sellers offering a warranty and return policy.
- Avoid parts from vehicles with deployed airbags, as the electrical shock damages related components.
- Verify the donor vehicle was not scrapped due to electrical or flood damage.
Decision logic:
- If The sensor is integrated with the clock spring → Buy new. The clock spring is a wear item and crucial for airbag function.
- If Vehicle is less than 10 years old → Buy new (OEM or high-quality aftermarket) to ensure reliability and compatibility.
- If Budget is the primary concern on an older vehicle → A used part from a low-mileage, accident-free donor is a viable, but risky, option.
Warranty tradeoff: Used parts typically have a 30-90 day warranty. New aftermarket parts often come with a 1-year or limited lifetime warranty. New OEM parts carry the manufacturer's warranty.
Worst-case if a used part fails: $250-$600 if a used part fails after installation, requiring repeat labor for diagnosis and replacement.
What Happens If You Wait — Timeline
- Immediate: Code C1505 is set. ABS and ESC/VSC warning lights illuminate. The vehicle's stability and traction control systems are disabled. (MPG impact: 0%% · Added cost: $0 (Safety risk is the primary concern))
- 1-6 months: If the root cause is a bad alignment, uneven tire wear begins. The inner or outer edges of the tires wear down significantly faster. (MPG impact: 0-2%% · Added cost: $150-$400 in wasted tire life.)
- 6-12 months: Severe uneven tire wear forces premature tire replacement. Continued driving with poor alignment puts chronic stress on suspension components. (MPG impact: 2-5%% · Added cost: $400-$1,200 for a new set of tires.)
- 12+ months: Vehicle fails state safety inspections. Chronic stress on the suspension leads to the failure of a tie rod or ball joint. (MPG impact: 2-5%% · Added cost: $1000-$2500+ (Cost of new tires plus replacing worn suspension components).)
Cost of Not Fixing It
- Immediate: Disabled Traction Control and Electronic Stability Control (ESC), significantly increasing the risk of losing control in an emergency maneuver or slippery conditions. (Added cost: N/A (Safety Risk))
- 0-6 months: If the root cause is a bad alignment, accelerated and uneven tire wear occurs, requiring premature tire replacement. (Added cost: $300-$1200)
- 6+ months: Continued driving with a bad alignment causes secondary stress and wear on suspension components like tie rods and ball joints. (Added cost: $400-$1000+)
Diagnosis Steps

- Read Codes and Review Live Data
Use a bi-directional OBD-II scanner to confirm C1505. Navigate to the Steering Angle Sensor live data PID. With the wheels straight, the reading must be 0° (± 2.5°). Turn the wheel lock-to-lock; the reading must change smoothly without jumping or freezing.
Tools: Bi-directional OBD-II Scanner (Beginner) - Perform a Visual and Physical Inspection
Check if the steering wheel is physically centered when driving straight. If crooked, a wheel alignment is mandatory. Inspect battery terminals for corrosion, as low voltage triggers false codes.
Tools: Flashlight, Battery Tester (Beginner) - Attempt a Steering Angle Sensor Calibration
Access the ABS/ESC special functions menu on your scanner. Execute the 'Steering Angle Sensor Calibration' or 'Zero-Point Reset'. This resolves the code if triggered by a battery change or minor alignment shift.
Tools: Bi-directional OBD-II Scanner (Intermediate) - Check for Technical Service Bulletins (TSBs)
Search for TSBs related to C1505 for your specific vehicle. Manufacturers frequently release software updates or specific recalibration procedures for known SAS issues.
Tools: Internet Access (Beginner) - Get a Professional Four-Wheel Alignment
If calibration fails or the steering wheel is off-center, perform a professional four-wheel alignment. The shop MUST perform the SAS recalibration as the final step, or the code will return immediately.
Tools: Professional Alignment Rack (Professional) - Test Sensor Voltage and Ground
Access the SAS connector. Using a multimeter, verify the 5V reference voltage from the control module and check the ground wire for less than 0.5 ohms of resistance. Missing voltage indicates a wiring or module issue.
Tools: Multimeter, Service Manual, Trim Removal Tools (Advanced) - Test Analog Sensor Signal Voltage
Back-probe the signal wires at the sensor connector. As you turn the wheel, voltages must change smoothly. Identical or stuck voltages indicate shorted wires or a failed sensor.
Tools: Multimeter, Service Manual, Back-probe Kit (Advanced) - Analyze the Sensor Signal with an Oscilloscope
Connect an oscilloscope to the sensor's signal wire. Turn the steering wheel and look for a clean, consistent waveform. Glitches, dropouts, or a flat line confirm a failed sensor or wiring fault.
Tools: Oscilloscope, Service Manual (Advanced) - Inspect Wiring and Replace the Sensor/Clock Spring Assembly
Disconnect the battery and remove the steering wheel and airbag following service manual safety procedures. Replace the steering angle sensor or integrated clock spring assembly. You MUST calibrate the new sensor after installation.
Tools: Socket Set, Torque Wrench, Trim Removal Tools, Bi-directional OBD-II Scanner (Advanced)
When This Code Triggers (Freeze-Frame Conditions)
- Vehicle Speed: 20-65 mph (The code sets when the vehicle is moving and a discrepancy is detected between steering input and vehicle direction.)
- Steering Angle Sensor Signal: Unchanging or incorrect value (The fault triggers if the sensor signal doesn't change while turning, or indicates a turn while driving straight.)
- Yaw Rate / G-Sensor: Indicating a turn (The ECU compares the steering angle to the yaw rate sensor; a mismatch sets the code.)
- System Voltage: 9-14V (Typically set when system voltage is normal; however, low voltage causes erratic module behavior and triggers this code secondarily.)
Related Codes
- C1290 — This Toyota/Lexus specific code means the 'Zero Point' calibration is lost. C1290 directly causes C1505. Performing a zero-point calibration resolves both codes.
- C1506 — On Mitsubishi vehicles, C1505 indicates a logic fault, while C1506 indicates an internal hardware failure. If both are present, diagnose C1506 first.
- C1231 — A generic code for a Steering Angle Sensor Circuit fault. C1231 points to an electrical problem (broken wire, short), whereas C1505 points to an illogical signal.
- C0051 — Indicates the steering wheel position sensor signal is out of range. Often triggered by a major discrepancy between the sensor's reading and the vehicle's actual direction.
Climate & Environmental Factors
- Extreme Temperatures & Humidity: Prolonged exposure to extreme heat cycles or high humidity accelerates internal corrosion and circuit board failure within the sensor.
How to Talk to a Mechanic About This Code
Say this: "I have a C1505 code and my traction control light is on. I'd like to schedule a diagnostic, but please start by checking the sensor's live data and attempting a recalibration before quoting a full sensor replacement. I'd also like to know if an alignment check is part of your diagnostic process."
This signals you understand the most common fix is calibration, not expensive part replacement. It directs the shop to perform the cheapest repairs first, preventing immediate upsells.
Avoid saying:
- 'My traction control light is on, can you just fix it?'
- 'I think I need a new steering sensor.'
- 'Just do whatever you think is necessary.'
Questions to ask before authorizing the repair:
- Did you check the live data from the sensor? Does the angle change smoothly when the wheel is turned?
- If you are recommending a new sensor, have you already tried to recalibrate the current one and confirmed it failed?
- If you're recommending a wheel alignment, does your quoted price include the mandatory electronic steering angle sensor recalibration afterward?
- Can you confirm you've checked the battery and charging system to rule out a voltage issue?
- What is the warranty on the recommended parts and labor?
Where to Take It: Dealer vs Independent vs Chain
- Dealer:
A safe but expensive choice. Recommended if you suspect a complex electronic issue beyond a simple calibration or sensor swap.
Best for: Vehicles under warranty, Complex European brands (e.g., BMW, Mercedes) with proprietary diagnostic software, Cases where multiple, complex electronic modules are failing simultaneously
Downsides: Highest labor rates, typically 1.5-2x more than independent shops., Defaults to replacing an entire assembly (e.g., steering column) instead of a smaller component. (Typical cost: +50% vs. baseline) - Independent Shop:
Best fit for most situations. A reputable independent shop offers the best balance of expertise and value. Ensure they can perform the calibration.
Best for: Out-of-warranty vehicles where cost is a factor., Diagnosing and fixing common codes like C1505 on most makes., Shops with good reviews mentioning electrical or diagnostic capabilities.
Downsides: Quality and equipment vary widely. You must vet the shop to ensure they have a bi-directional scan tool capable of SAS calibration. (Typical cost: +0% vs. baseline) - Chain Shop:
Use with caution. Acceptable for a wheel alignment if you confirm beforehand that they will recalibrate the steering angle sensor as the final step. Risky for initial diagnosis.
Best for: The wheel alignment portion of the repair ONLY.
Downsides: Technician skill varies dramatically; they may perform the alignment but be unable to perform the mandatory SAS calibration., High pressure to upsell services. May misdiagnose the issue. (Typical cost: -10% vs. baseline)
When to Walk Away From the Repair
If the estimated repair cost exceeds 40-50% of the car's private-party value, seriously consider selling or trading in the vehicle.
- Car worth $4000, fix is $150: Fix it. A simple recalibration is a minor cost.
- Car worth $4000, fix is $800: Fix it. The repair is 20% of the car's value and restores a critical safety system.
- Car worth $2500, fix is $1500: Walk away. The repair cost is 60% of the car's value. It is not economically sensible.
What Scan Tool You Need for This Code

Minimum: A bi-directional scan tool with the ability to perform 'Steering Angle Sensor (SAS) Calibration' or 'Zero-Point Reset' for your specific vehicle make.
A basic $20-$50 code reader only tells you the C1505 code exists. It CANNOT read the live steering angle data needed for diagnosis, nor can it perform the calibration required to complete the repair.
Budget: BlueDriver Pro Scan Tool (~$100) — Excellent for diagnosis. It reads and graphs live steering angle sensor data, allowing you to see if the sensor is responding. However, it does NOT have the bi-directional capability to perform the SAS calibration itself.
Mid-range: Foxwell NT510 Elite / NT614E (~$150) — The ideal DIY level. These scanners offer bi-directional control, including the specific 'Steering Angle Sensor Calibration' function for a wide range of vehicles, in addition to reading live data.
Professional: Autel MaxiCOM MK808 / MaxiSys Series (MS906) (~$500-1200) — Provides full, professional-level bi-directional control for SAS calibration on nearly all makes and models. These tools offer comprehensive diagnostics and are what a professional independent shop uses.
Rent vs buy: You cannot rent the required tool. Free loaner tools from auto parts stores are basic readers and will not perform the SAS calibration. If this is a one-time fix, it is more cost-effective to pay a shop $75-$175 for the calibration service.
How to Clear the Code After You Fix It
- Perform required repair (e.g., alignment, sensor replacement).
- Perform Steering Angle Sensor calibration/zero-point reset using a bi-directional scan tool.
- Use the scan tool to clear the C1505 and any related fault codes from the ABS/ESC module.
- Perform a short test drive, including left and right turns, to confirm the light does not return.
Drive cycle (~15 minutes): A specific emissions drive cycle is not required for a C-code. After repair and calibration, a 15-minute test drive with varied speeds and turns verifies the fix. If the battery was disconnected, a full OBD-II drive cycle is needed to reset emissions readiness monitors.
Readiness monitors affected: This is a Chassis code ('C') and does not directly affect emissions readiness monitors., If the battery is disconnected during repair, all emissions monitors will reset to 'Not Ready'.
Before emissions retest: drive at least 50 miles to fully set monitors.
Watch out for:
- Forgetting to perform the mandatory SAS calibration after an alignment or part replacement guarantees the code returns immediately.
- Simply clearing the code with a scanner without fixing the root cause results in the code returning instantly.
- Using a basic code reader that cannot perform the SAS calibration function.
Will This Fail Emissions / State Inspection?
Yes — this code typically fails an OBD-II emissions inspection.
- California: An illuminated ABS or ESC warning light is an automatic failure of the safety inspection portion of the smog check.
- New York: Recent regulations make an illuminated ABS or ESC light grounds for inspection failure.
- Texas: The annual safety inspection requires that the ABS and ESC warning lights function correctly. An illuminated light indicates a fault and fails the inspection.
Most Commonly Affected Vehicles
- Toyota Camry (2007-2011) — Extremely common to require a 'zero point calibration' after any steering, suspension, or battery work. A recall (NHTSA 15V144) for a faulty EPS ECU affected some 2015 models.
- Lexus All models (2005-2015) — Shares the same sensitive system as Toyota. Calibration is mandatory after alignment. On models like the ES350, it often appears with code C1290.
- Subaru Outback, Forester (2010-2017) — Sensor failure and calibration issues are frequent. Often appears with code C0071. Aftermarket steering wheel installations are a known trigger.
- Mitsubishi Mirage, Galant, Endeavor (2004-2017) — For the 2014-2017 Mirage, a service newsletter specifically recommends erasing the code and recalibrating as the first and often final fix.
- Dodge/Ram Ram 1500 (2013-2018) — Frequently triggered by a poor wheel alignment causing an off-center steering wheel.
- BMW X5 (F15), 3-Series (F30) (2012-2018) — Requires sensor calibration with diagnostic software (like ISTA+) after battery replacement or alignment. The F15 X5 is particularly sensitive.
- Hyundai / Kia Elantra, Optima, Sorento (2010-present) — On models with Motor Driven Power Steering (MDPS), this code often appears with C1260 or C2412. Calibration is performed through the MDPS module menu.
- Chevrolet Corvette (C5) (1997-2004) — The sensor is integrated with the clock spring. Turning the steering wheel while the steering rack is disconnected destroys the clock spring, leading to this code.
Manufacturer-Specific Notes
- Toyota / Lexus: A 'Zero Point Calibration' is mandatory after a wheel alignment. On older models, this can be done without a scan tool by jumping specific pins on the OBD-II port with a paperclip.
- Mitsubishi: The sensor is integrated with the column switch assembly. Erasing the DTC and recalibrating the sensor is the recommended first step and often fixes the issue without replacing parts.
- Ford / Mazda: This code is rarely used for the steering angle sensor. A P-code, P1505, refers to an Idle Air Control (IAC) system malfunction, which is an entirely different engine issue.
- General Motors (GM): The SAS is part of the clock spring assembly. When replacing it, you must ensure the front wheels are straight and the new clock spring is centered to avoid immediate damage.
Real Owner Stories
2010 Toyota Camry - The Classic Misdiagnosis
VSC and ABS lights appeared. Owner scanned the codes and found C1505 and C1290. Assuming the sensor was bad, they ordered a new one.
What they tried:
- Replaced the steering angle sensor themselves. Lights remained on.
- Took the car to a mechanic who immediately identified the C1290 code as the root cause: lost 'Zero Point Calibration'.
Outcome: The mechanic performed a zero-point calibration using a professional scan tool in under 30 minutes. The codes cleared and did not return. The original sensor was perfectly fine.
Lesson: If C1290 is present with C1505 on a Toyota/Lexus, the problem is calibration, not a faulty part. Attempt calibration before spending money on a new sensor.
2012 Subaru Outback - The Post-Alignment Surprise
Immediately after getting a four-wheel alignment and new tires, the ABS and traction control lights came on. The steering wheel was perfectly straight.
What they tried:
- Owner returned to the tire shop.
- The shop technician used their scan tool to perform a Steering Angle Sensor recalibration.
Outcome: Recalibration fixed the issue instantly. The alignment changed the steering's center point, and the computer needed an electronic update to match the new mechanical alignment.
Lesson: Always insist the shop performs an SAS recalibration as the final step of any wheel alignment. It is a mandatory procedure on modern cars.
2009 Honda Accord - The Intermittent Electrical Gremlin
ESC and ABS lights came on intermittently during long drives. The car felt unstable when the lights were on. No other codes were present.
What they tried:
- A mechanic checked live data and saw the steering angle sensor signal occasionally freeze while turning.
- They attempted recalibration, but the code returned.
- The mechanic inspected the wiring harness in the steering column.
Outcome: The mechanic found a partially frayed wire at the sensor's connector. Repairing the wire cost $150 and permanently solved the problem.
Lesson: An intermittent signal failure not fixed by calibration is often a wiring issue. A visual inspection of the harness prevents the unnecessary expense of replacing a functional sensor.
2013 Ram 1500 - The Pothole-Induced Problem
After hitting a large pothole, the ESC light came on and the steering wheel was visibly crooked when driving straight.
What they tried:
- Owner correctly suspected an alignment issue and took the vehicle to an alignment shop.
Outcome: A full four-wheel alignment corrected the off-center steering wheel. The shop then performed the mandatory SAS recalibration. Total cost was $200, resolving the C1505 code.
Lesson: A significant impact knocks the wheel alignment out of spec, directly causing the C1505 code. The fix is a proper alignment followed by calibration.
How to Prevent This Code From Triggering
- Insist on SAS Calibration After Every Alignment (Every wheel alignment service) — Ensures the sensor's electronic 'zero point' matches the new mechanical alignment of the wheels, preventing the most common cause of C1505.
- Perform Regular Wheel Alignments (Every 1-2 years or after hitting a major pothole/curb) — Prevents gradual changes in alignment from causing the steering wheel to go off-center, which creates a data mismatch that triggers the code.
- Test Battery and Charging System Health (Annually after the battery is 3+ years old) — A weak battery provides unstable voltage, causing sensitive ABS/ESC control modules to malfunction and generate false fault codes.
- Use Caution During Steering/Suspension DIY Repairs (During relevant repairs) — Avoids damaging the delicate clock spring and integrated sensor. Never allow the steering wheel to spin freely while the steering rack is disconnected.
Frequently Asked Questions
Can I fix code C1505 myself?
Yes, if the cause is a lost calibration and you own a bi-directional scanner capable of performing the reset. However, replacing the sensor is an advanced job requiring airbag removal and post-installation calibration, which is not recommended for beginners.
Will clearing the code make it go away?
No. C1505 is a 'hard fault' indicating an ongoing problem. The control module re-runs its check immediately, and the code returns upon driving until the root cause is fixed and the system is recalibrated.
Why did this code appear right after I got new tires or an alignment?
The alignment shop centered the steering wheel mechanically but failed to perform the mandatory electronic recalibration of the steering angle sensor. The car's computer now sees a conflict between the sensor's reading and the direction of travel.
Is the steering angle sensor the same as the clock spring?
No, but they are often housed in the same assembly. The clock spring is a rotary electrical connector for the airbag, while the SAS measures rotation. A faulty clock spring can damage the SAS, and they are frequently replaced together.
How much does it cost to fix C1505?
A simple recalibration at a shop costs between $75 and $175. A four-wheel alignment plus calibration is typically $150-$300, while full sensor replacement ranges from $300 to over $800.
What is the biggest misdiagnosis for C1505?
The most common mistake is replacing the steering angle sensor when it only needs recalibration. Always perform a wheel alignment check and attempt a sensor calibration before condemning the sensor.
Can a bad battery cause a C1505 code?
Yes. Low system voltage from a weak battery causes malfunctions in electronic modules, including the ABS/ESC system. If you have multiple unrelated electronic fault codes along with C1505, test the battery first.
What does 'Zero Point Calibration' mean?
Zero Point Calibration teaches the vehicle's computer systems the baseline value for the steering angle and yaw rate sensors when the vehicle is stationary with the wheels straight. It establishes the 0-degree reference point the stability control system uses for all calculations.
Key Takeaways
- Code C1505 disables your vehicle's Traction and Stability Control systems because the computer cannot verify the steering wheel's exact position.
- Over 70% of C1505 codes require a simple electronic recalibration rather than a new part, especially following a wheel alignment or battery replacement.
- Driving with C1505 is mechanically safe but highly dangerous in wet or icy conditions, as the vehicle loses its primary electronic skid-prevention capabilities.
- Fixing this code requires a bi-directional OBD-II scanner capable of performing a 'zero-point calibration' to reset the sensor's baseline to 0 degrees.
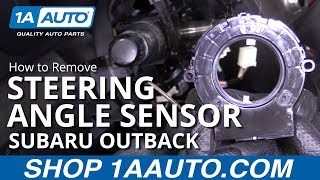
Helpful Videos



The information in this article is provided for general reference and educational purposes only. Vehicle specifications, procedures, and part compatibility can vary by production date, trim level, and region. Always consult your vehicle's factory service manual and verify part numbers before purchasing or performing repairs. Safety-critical components such as airbags, seat belts, and braking systems should be installed by a qualified professional.
- 🎬 Helpful Videos
- What Does C1505 Mean?
- Can I Drive With C1505?
- Common Causes
- Symptoms
- Diagnostic Flowchart
- Common Fixes & Costs
- Used vs. New Parts: Buying Guide
- What Happens If You Wait — Timeline
- Cost of Not Fixing It
- Diagnosis Steps
- When This Code Triggers (Freeze-Frame Conditions)
- Related Codes
- Climate & Environmental Factors
- How to Talk to a Mechanic About This Code
- Where to Take It: Dealer vs Independent vs Chain
- When to Walk Away From the Repair
- What Scan Tool You Need for This Code
- How to Clear the Code After You Fix It
- Will This Fail Emissions / State Inspection?
- Most Commonly Affected Vehicles
- Manufacturer-Specific Notes
- Real Owner Stories
- 2010 Toyota Camry - The Classic Misdiagnosis
- 2012 Subaru Outback - The Post-Alignment Surprise
- 2009 Honda Accord - The Intermittent Electrical Gremlin
- 2013 Ram 1500 - The Pothole-Induced Problem
- How to Prevent This Code From Triggering
- Frequently Asked Questions
- Can I fix code C1505 myself?
- Will clearing the code make it go away?
- Why did this code appear right after I got new tires or an alignment?
- Is the steering angle sensor the same as the clock spring?
- How much does it cost to fix C1505?
- What is the biggest misdiagnosis for C1505?
- Can a bad battery cause a C1505 code?
- What does 'Zero Point Calibration' mean?
- Key Takeaways
- 🎟️ Get 5% Off