

C1451 on 2018-2023 Jeep Wrangler: 'Service Axle Locker System' Causes and Fixes
On a 2018-2023 Jeep Wrangler (JL) or Gladiator (JT), code C1451, especially C1451-11, almost always points to a failed rear axle locker position sensor. This is a very common and well-documented issue, often caused by gear oil seeping into and shorting the sensor. The official fix is a sensor replacement kit from Mopar (part #68544629AA) per TSB 03-002-24, while a popular, quicker alternative is an aftermarket bypass harness from brands like Z-Automotive.
- Code C1451 on a JL Wrangler or JT Gladiator almost certainly means the rear axle locker position sensor has failed due to internal oil contamination.
- This is a known design flaw covered by manufacturer TSB 03-002-24.
- You have two primary repair paths: an official Mopar sensor replacement (part #68544629AA) which is labor-intensive, or a quick and popular aftermarket bypass harness that plugs in externally.
- The vehicle is safe to drive with the code, but the lockers will not work, and the dash warning will persist.
What's Unique About the 2018-2023 Jeep WRANGLER

The Jeep Wrangler JL and Gladiator JT Rubicon models use Dana 44 AdvanTEK axles (M210 front, M220 rear) with electronic locking differentials. The position sensors for this system are located inside the differential housing, submerged in gear oil. A critical design flaw allows gear oil, often contaminated with fine metallic particles from normal gear wear, to penetrate the sensor's housing. This contamination shorts out the internal electronics of the sensor, causing the failure. The problem is so common that Jeep issued Technical Service Bulletin 03-002-24 and a specific repair kit. Initially, dealers were replacing entire axle assemblies due to the lack of a specific part, highlighting the severity and frequency of the issue.
Diagnostic Flowchart

Tap your situation to follow the diagnostic path that matches what you're seeing on this vehicle.
Generation note: This guide is specific to the 2018-2023 Jeep Wrangler JL and 2020-2023 Jeep Gladiator JT generations. The 2018 model year was a transition period and also included the previous 'JK' generation, which uses a different axle design. The C1451 code and its associated sensor failure are a well-documented issue on the JL/JT platform with Dana AdvanTEK axles.
Symptoms You May Notice

- "Service Axle Locker System" message on the instrument cluster.
- Blinking indicator light on the axle lock dashboard switch, even when not attempting to use the lockers.
- Inability to engage or disengage the rear (or front) axle locker.
- Check engine light or other warning lamps may be illuminated.
- The warning message may appear intermittently at first, often during braking or acceleration, before becoming permanent.
- Replacing the axle lock switch on the dashboard. The switch itself is rarely the cause of the problem; the fault almost always lies at the axle.
- Replacing the locker actuator/solenoid. The actuator itself is generally robust; the sensor that reports its position is the component that fails. The actuator is also not sold separately from the entire axle assembly, making this a very costly and incorrect diagnosis.
Most Likely Causes

- Failed Rear Axle Locker Position Sensor 🔴 High Probability The sensor is a Hall effect type located inside the differential, and it is not adequately sealed from the factory. Gear oil, along with metallic 'fuzz' from normal gear wear, wicks into the sensor's electronics, causing a short circuit. This is a widely acknowledged design flaw.
How to confirm: A diagnostic scan will show code C1451-11 (Short to Ground) or C1451-15 (Open Circuit). Given the prevalence of this issue, the presence of the code and symptoms makes a failed sensor the presumptive cause. Upon removal, oil can often be seen weeping from the sensor's body.
Typical fix: The official fix is to replace the sensor using Mopar's Axle Locker Sensor Kit (Part No. 68544629AA). This requires opening the differential. Some DIY owners proactively 'pot' the new sensor by filling its seams with epoxy (like 3M DP270) before installation to prevent future oil intrusion.
Est. part cost: $120-$350 - Damaged Wiring Harness or Connector 🟡 Medium Probability The wiring harness leading to the axle sensor is exposed to the elements, road debris, and can be snagged or stretched during off-roading, especially on lifted vehicles. Corrosion can also develop in the external connector or the pass-through connector on the differential housing.
How to confirm: Visually inspect the wiring harness from the vehicle frame down to the connector on the differential housing. Check for chafed wires, corrosion in the connector pins, or a loose connection. A forum member reported a dealer found a break in the wiring near the connector that was not visible until the harness was opened.
Typical fix: Repair the damaged section of wire or replace the connector pigtail. The differential pass-through connector is also replaceable (Mopar Part No. 68400411AA).
Est. part cost: $15-$100
Rare But Worth Checking
- Faulty Drivetrain Control Module (DTCM): This is extremely rare. Before suspecting the control module, the sensor, wiring, and pass-through connector should be exhaustively ruled out by a qualified technician. Some owners have had modules replaced only to find the problem was a simple wiring short.
Diagnosis Steps
- Read the Diagnostic Trouble Codes (DTCs) with an OBD-II scanner capable of reading chassis codes. Confirm C1451 and note the specific sub-code (e.g., -11 for short to ground, -15 for open circuit).
- Thoroughly inspect the wiring harness from the frame to the rear axle. Check the main connector for damage, corrosion, or pushed-out pins. Follow the harness and look for any signs of chafing, melting, or stretching, especially near suspension components.
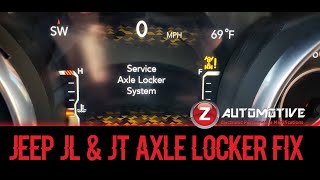
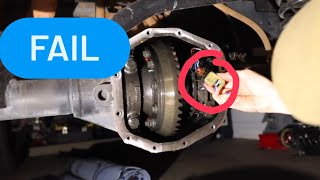
- If the wiring appears intact, the simplest and most conclusive next step for many owners is to install a sensor bypass harness. These modules plug in externally between the main harness and the axle. If installing the bypass clears the code and restores locker function, it 🎬 See how to install a Z-Locker bypass for a quick fix. definitively confirms the internal sensor or its immediate wiring has failed.
- If a bypass does not resolve the issue, the problem may lie in the external vehicle-side harness or, rarely, the DTCM. At this point, testing for power and ground at the harness connector with a multimeter is recommended.
- For a professional repair, a technician will follow the procedure in TSB 03-002-24, which involves testing the circuit before opening the differential to replace the sensor with kit 68544629AA.
Parts You'll Likely Need
- Axle Locker Sensor Kit
(OEM #68544629AA)— This is the official Mopar part kit released per TSB 03-002-24 to fix the known issue. It contains five sensors, though only one is needed per axle. This allows for finding a compatible sensor, as there are reported manufacturing variances.
Trusted brands: Mopar
OEM price range: $125-$320
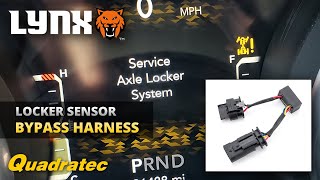
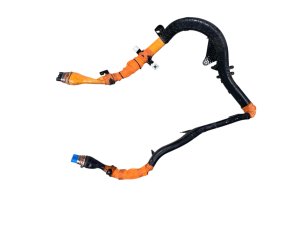
Aftermarket price range: N/A - Axle Locker Sensor Bypass Harness — A very popular, fast, and effective fix that bypasses the faulty internal sensor entirely. It plugs in externally in minutes and sends a 'good' signal to the computer, restoring locker functionality without needing to open the differential. It's often recommended to keep one in the glove box as a trail-side fix.
Trusted brands: Z-Automotive Z-Locker-OEM, Lynx Performance Locker Sensor Bypass, Quadratec
OEM price range: N/A
Aftermarket price range: $150-$200 - Differential Pass-Through Connector
(OEM #68400411AA)— If the leak is severe, oil can contaminate the main pass-through connector on the differential housing itself, requiring replacement. This part is often replaced along with the sensor as a precautionary measure.
Trusted brands: Mopar
OEM price range: $20-$30
Aftermarket price range: N/A
Related Codes That Often Appear With This One
- C144D — This is the equivalent code for the front axle locker position sensor (C144D-11, C144D-64, etc.). The front and rear sensors are identical and fail for the same reason. It is common for one to fail, and the other to fail months later, or for both to be faulty simultaneously.
Technical Service Bulletins (TSBs) & Recalls
- 03-002-24 (January 23, 2024): Supersedes 03-003-22. Applies to 2018-2023 Wrangler (JL) and Gladiator (JT). Addresses MIL illumination and DTC C1451-11 caused by a failed axle locker sensor. Instructs technicians to use service kit 68544629AA for repair and explicitly states *not* to replace the entire axle assembly.
Platform-Specific Known Issues
- A Technical Service Bulletin (TSB 03-002-24), released January 23, 2024, specifically addresses code C1451-11 ('Service Axle Locker System') for the 2018-2023 Wrangler and Gladiator by replacing the failed axle locker sensor with a new service kit.
- The failure is so common that before the sensor kit (68544629AA) was available, dealers were replacing entire axle assemblies under warranty, often with long wait times due to parts shortages.
- The issue can occur even on low-mileage, stock vehicles that have never been used off-road, as the failure is due to a design/manufacturing flaw (oil intrusion) rather than abuse.
- Some owners have taken a DIY approach called 'potting', where they drill small holes in the sensor casing, flush it with alcohol, and then fill it with a non-conductive epoxy to permanently seal the electronics from oil.
Mechanic-Grade Diagnostic Values
- Rear Axle Locker Connector Pinout — expected: The 4-pin connector on the differential housing has two separate circuits. Pins 1 & 4 are for the locker actuator solenoid (higher current), while pins 2 & 3 are for the Hall effect position sensor (low current signal).. Failure: A short-to-ground (C1451-11) or open circuit/short-to-power (C1451-15) on the sensor circuit (pins 2 & 3) is the typical failure. Testing would involve checking for 5V reference, ground, and a changing signal voltage on the sensor pins as the locker is commanded on and off with a scan tool.
Hidden / Shadow Codes Worth Checking
- C1451-11: Rear Differential Position Sensor Circuit Short To Ground. This is the most common variant cited in the official TSB. (see via A professional-grade OBD-II scanner capable of reading Chassis/DTCM codes, such as the dealer WiTech tool or advanced aftermarket scanners.)
- C1451-15: Rear Differential Position Sensor Circuit Short to Battery or Open. This indicates an open circuit or a short to a power source, which can be caused by the same internal sensor failure or a wiring issue. (see via A professional-grade OBD-II scanner capable of reading Chassis/DTCM codes.)
Scan Tool Commands That Help
- wiTECH, Launch, Autel, Foxwell or similar: DTCM Actuation Test / Bidirectional Control — To diagnose the system, a technician can use a bidirectional scan tool to command the rear locker solenoid to engage. Simultaneously, they would monitor the live data from the locker position sensor. If the solenoid clicks but the sensor's status does not change from 'Unlocked' to 'Locked', it strongly indicates a failed sensor or sensor circuit, not a failed actuator.
- wiTECH: Reprogram DTCM — In some cases, Jeep releases software updates for the Drivetrain Control Module (DTCM). If a diagnostic path leads to a potential module issue, ensuring the DTCM has the latest software is a necessary step before module replacement.
Wiring & Ground Locations
- Drivetrain Control Module (DTCM) — Located behind the rear seat trim panel. Access typically requires removing the rear seats to remove the large, one-piece trim panel.. This is the control module that receives the signal from the axle locker sensor. Any diagnosis of a wiring harness issue requires checking for continuity between the axle connector and the connector at the DTCM.
- G916A — A primary body ground point shown in wiring diagrams.. The locker sensor circuit requires a clean ground reference to function. While the sensor return is wired back to the DTCM, checking main body and chassis grounds is a standard step in diagnosing any electrical fault, as a poor ground can cause floating voltages and erratic behavior.
- Axle Connector (C430/C431 equivalent) — The 4-pin connector on the differential housing itself, which connects the internal axle wiring to the main vehicle harness.. This is the primary point of external inspection and testing. It is where a bypass harness is installed and where a technician would use a multimeter to test the vehicle-side harness and the axle-side sensor circuit.
Real Owner Repair Stories
- jlwranglerforums.com user (2022 Jeep Rubicon JLU, 37,000 miles) — Rear-axle locker caution light on dash, flashing yellow locker switch, off-road page showed rear axle as locked (it was not). The issue was intermittent at first and then became permanent.
❌ Tried (didn't work) Initial dealership visit when the light was off yielded no codes. The problem returned.
✅ What actually fixed it The dealership diagnosed code C1451-11. They performed the repair according to TSB 03-002-24, replacing the sensor with kit 68544629AA and also replacing the pass-through connector 68400411AA. The user was shown the old sensor, which was full of oil. The repair took several days due to parts ordering and technician availability. - Jeep Gladiator Forum user (Jeep Gladiator Rubicon (JTR)) — Flashing locker light on the dash and rear locker button.
❌ Tried (didn't work) The user had proactively re-geared and potted their original sensors in 2021. Two years later, the light started to appear intermittently.
✅ What actually fixed it The user installed a Z-Automotive 'Z-Locker-OEM' bypass harness. This resolved the intermittent light and restored full locker functionality, even though the internal sensor had been previously potted.
When the Usual Fixes Don't Work
- While proactively 'potting' the sensor with epoxy is a popular DIY attempt to prevent oil intrusion, it is not a guaranteed permanent fix. At least one owner reported that their locker warning light began to flash intermittently two years after they had potted their sensors. The issue was ultimately and successfully resolved by installing an aftermarket bypass harness, which suggests the potted sensor still failed over time.
OEM Part Supersession History
TSB 03-003-22→TSB 03-002-24— The new TSB was updated to include a new market, model year, and a new DTC.
Heads up: TSB 03-003-22 should be disregarded in favor of the newer 03-002-24 bulletin.
Model Year Variations Within This Range
- 2018 - 2022 (before 11/24/2022): TSB 03-002-24 applies to vehicles built on or before November 24, 2022. This implies that vehicles manufactured after this date may have received an updated, more robust sensor from the factory, potentially reducing the failure rate for later model years. However, failures on 2023+ models are still possible.
Helpful Videos
We Have This Part in Stock

The information in this article is provided for general reference and educational purposes only. Vehicle specifications, procedures, and part compatibility can vary by production date, trim level, and region. Always consult your vehicle's factory service manual and verify part numbers before purchasing or performing repairs. Safety-critical components such as airbags, seat belts, and braking systems should be installed by a qualified professional.
- Jeep WRANGLER:
- 🎬 Helpful Videos
- 🛍️ Shop This Part
- What's Unique About the 2018-2023 Jeep WRANGLER
- Diagnostic Flowchart
- Symptoms You May Notice
- Most Likely Causes
- Rare But Worth Checking
- Diagnosis Steps
- Parts You'll Likely Need
- Related Codes That Often Appear With This One
- Technical Service Bulletins (TSBs) & Recalls
- Platform-Specific Known Issues
- Mechanic-Grade Diagnostic Values
- Hidden / Shadow Codes Worth Checking
- Scan Tool Commands That Help
- Wiring & Ground Locations
- Real Owner Repair Stories
- When the Usual Fixes Don't Work
- OEM Part Supersession History
- Model Year Variations Within This Range
- 🎟️ Get 5% Off