

OBD-II Code C1440: Brake Pressure Sensor Signal Mismatch
What C1440 means, why it triggers, and how to fix it
- Code C1440 disables your ABS and stability control because the computer sees high brake pressure (over 40 PSI) while the brake pedal switch reads 'Off'.
- On 2009 and newer Ford trucks, the most common fix is replacing or rebuilding the entire ABS Hydraulic Control Unit (HCU) because the internal pressure sensor fails.
- Always check live scan tool data before replacing parts; a reading above 275 kPa (40 PSI) with your foot off the pedal confirms a pressure sensor or hydraulic fault.
- On 1998-2005 Ford and Lincoln models, replace the $20 external brake pressure switch on the master cylinder before assuming the ABS module is bad.
- If C1440 appears immediately after replacing a brake caliper or line, perform an automated ABS Service Bleed with a bidirectional scan tool to purge trapped air.
What Does C1440 Mean?

Code C1440 means the ABS module detects a critical disagreement between two brake signals. The brake pedal position switch reports your foot is off the brake, but the brake pressure sensor simultaneously reports significant pressure in the brake lines. Because this conflict is illogical, the computer shuts down the ABS and stability control systems as a safety precaution.
Technical definition: The formal SAE/OBD-II definition is "Pressure Transducer Main/Primary Signal Faulted." The ABS module detects that the internal brake pressure transducer signal contradicts the brake pedal switch position. The self-test fails if hydraulic pressure exceeds 275 kPa (40 PSI) when the brake pedal is not applied.
Can I Drive With C1440?
Yes, But With Caution. Yes, but with extreme caution and for short distances only. Your primary hydraulic brakes function, but the complete loss of the Anti-lock Braking System (ABS) and Stability/Traction Control is a significant safety degradation. Without ABS, your wheels lock during a panic stop, increasing stopping distance and causing a loss of steering control. The disabled stability control increases the risk of a skid or rollover during an emergency maneuver. Stop driving and repair the vehicle immediately.
Common Causes

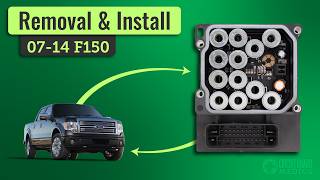
- Internal failure of the ABS Hydraulic Control Unit (HCU) (Very Common) — On 2009+ vehicles, the brake pressure sensor is an integral, non-serviceable part of the ABS hydraulic unit. When it fails, it reports a false high-pressure reading, requiring replacement or rebuilding of the entire HCU assembly. 🎬 See this walkthrough on how to remove and install the ABS module.
- Faulty brake pressure switch (on master cylinder) (Common On Older Vehicles) — On late 1990s to mid-2000s Ford trucks and SUVs, a separate, serviceable brake pressure switch mounts on the master cylinder. This switch fails and sends incorrect signals, offering a much cheaper fix than an HCU replacement.
- Sticking or dragging brake caliper (Common) — A brake caliper that fails to release maintains real, residual pressure in the brake lines. The sensor accurately reads this pressure, but because your foot is off the pedal, it creates the signal mismatch that triggers the code.
- Air in the brake lines or contaminated fluid (Less Common) — Air trapped in the hydraulic system, especially within the ABS module, causes pressure regulation problems and inconsistent sensor readings. This typically occurs after brake system repairs and requires an automated ABS service bleed. 🎬 Watch: Step-by-step guide to performing a proper ABS brake system bleed.
- Faulty or mismatched replacement ABS module (Rare) — Installing a used ABS electronic control unit onto an old hydraulic block creates a hardware mismatch that triggers this code. The electronic and hydraulic components must be installed as a matched pair and programmed to the vehicle's VIN.
- Faulty or improperly installed aftermarket trailer brake controller (Rare) — Improperly wired aftermarket trailer brake controllers corrupt the brake pedal position signal sent to the ABS module, causing the computer to register a conflict.
- Faulty Replacement Master Cylinder (Rare) — A defective aftermarket master cylinder fails to hold pressure correctly or introduces air into the hydraulic system, leading to erratic pressure readings by the ABS module.
- Corroded wiring or poor connection at ABS module (Rare) — Road salt and moisture corrode the wiring harness or connector pins at the ABS module. This high resistance disrupts the pressure sensor signal, requiring a visual inspection and voltage drop test.
Symptoms

- ABS warning light is on — The computer illuminates the light immediately upon detecting the fault during its initial self-test.
- Stability/Traction Control light is on — Messages like "Service Advancetrac" or a blinking car icon indicate the stability control system is disabled, as it relies on the same pressure data.
- "Check Brake System" message appears — The vehicle's main information display shows a specific text warning to check the braking system.
- Cruise control is inoperative — The cruise control system disables automatically because it cannot reliably determine if the brakes are being applied.
- Park Brake light is on — The red "Brake" or "Park" warning light illuminates alongside ABS lights to indicate a general brake system fault.
Diagnostic Flowchart
Tap your situation to follow the diagnostic path that matches what you're seeing on this code.
Common Fixes & Costs
- Replace the ABS Hydraulic Control Unit (HCU) — Parts: $800-$1800, Labor: $300-$500, ~2.5 hr book time (Professional)
- Send ABS Module for Repair — Parts: $0, Labor: $250-$600, ~1.5 hr book time (DIY)
- Replace Master Cylinder Brake Pressure Switch — Parts: $20-$50, Labor: $50-$100, ~0.5 hr book time (DIY)
- Replace Brake Calipers and Perform Brake Service — Parts: $150-$400, Labor: $200-$400, ~2 hr book time (Intermediate)
- Perform ABS Service Bleed — Parts: $20, Labor: $100-$200, ~1 hr book time (Intermediate)
Used vs. New Parts: Buying Guide
When a used part is worth it: A used ABS module makes sense for older, high-mileage vehicles where the cost of a new OEM part ($1200+) is prohibitive. Source a tested part with a warranty from a reputable seller.
Donor-vehicle mileage cap: roughly under 120000 miles for the part to have meaningful remaining life.
Donor quality checklist:
- Match part numbers EXACTLY. Modules from the same year differ between 2WD/4WD or engine types.
- Buy from a reputable auto recycler that tests the part and offers at least a 90-day warranty.
- Avoid parts from flood-damaged or rust-belt vehicles.
Decision logic:
- If The vehicle is newer and the budget allows → Buy a new OEM part for maximum reliability and warranty.
- If A remanufacturing service is available for your specific module → Choose remanufacturing. It is cheaper than new, avoids programming issues, and often includes a lifetime warranty.
- If Vehicle is >10 years old and budget is the primary concern → A tested used part is a reasonable gamble, provided you can program it.
Warranty tradeoff: Used parts typically have a 30-90 day warranty. Remanufactured services offer a lifetime warranty. New OEM parts carry a 1-2 year warranty.
Worst-case if a used part fails: $300-$600 if a used part is bad or incompatible, requiring repeat labor and programming.
What Happens If You Wait — Timeline
- 0-1 month: Code C1440 is set, and ABS/Stability Control lights are constantly on. No other symptoms are perceived. (MPG impact: 0%% · Added cost: $0)
- 1-6 months (if caused by dragging caliper): The brake pads and rotor on the affected wheel wear unevenly and at an accelerated rate. A slight drop in fuel economy occurs due to the constant drag. (MPG impact: 1-5%% · Added cost: $150-$500 for premature replacement of pads and rotor on one wheel.)
- 6-12 months (if caused by dragging caliper): The dragging caliper generates significant heat, warping the brake rotor and boiling the brake fluid. The excessive heat breaks down the grease in the wheel bearing. (MPG impact: 5-10%% · Added cost: $200-$400 for a new caliper, in addition to pads and rotor.)
- 12+ months (if caused by dragging caliper): A severely dragging caliper causes catastrophic failure of the wheel bearing due to prolonged overheating. The caliper's seals fail completely, leading to fluid leaks. (MPG impact: 10-15%% · Added cost: $500-$1000+ to replace the caliper, rotor, pads, and the heat-damaged wheel bearing hub assembly.)
Cost of Not Fixing It
- Immediate: Loss of ABS and Stability/Traction Control. Increased risk of skidding, loss of control, and longer stopping distances in emergency braking situations. (Added cost: Negligible in parts, but potential for accident-related costs is high.)
- 1-6 months: If the cause is a dragging caliper, it leads to accelerated and uneven wear of brake pads and rotors on the affected wheel. (Added cost: $150-$500 for new pads and rotor.)
- 6+ months: A severely dragging caliper overheats, causing the wheel bearing grease to break down and damaging the caliper seals. (Added cost: $300-$700 for caliper and wheel bearing replacement.)
Diagnosis Steps

- Verify Code and Check for Related Codes
Use an advanced OBD-II scanner capable of reading ABS codes to confirm C1440. Document all codes and freeze frame data before clearing.
Tools: Advanced OBD-II Scanner (Beginner) - Analyze Live Data with a Scan Tool
Access the ABS module live data stream. Monitor 'Brake Pedal Position' and 'Brake Pressure'. With the engine running and your foot OFF the brake, pressure should be near zero. A reading above 275 kPa (40 PSI) confirms a sensor or hydraulic fault.
Tools: Advanced OBD-II Scanner (Intermediate) - Rule Out Mechanical Issues
Safely raise the vehicle and spin the wheels by hand with the transmission in neutral. A wheel that is difficult to turn indicates a stuck caliper maintaining residual pressure.
Tools: Jack and jack stands (Intermediate) - Test the Brake Pedal Switch
While watching live data, press and release the brake pedal. The Brake Pedal Position PID must switch cleanly from 'Off' to 'On'. Have a helper confirm the brake lights illuminate.
Tools: Advanced OBD-II Scanner, helper (Intermediate) - Perform 'Tap Test' on External Sensor (If Equipped)
On older vehicles with an external master cylinder sensor, watch live pressure data and lightly tap the sensor with a wrench handle. Erratic pressure changes confirm a faulty sensor.
Tools: Scan Tool, small hammer or wrench handle (Intermediate) - Perform an ABS Service Bleed
If the code appeared immediately after replacing a hydraulic brake component, air is trapped in the HCU. Run the automated 'ABS Service Bleed' function on your scan tool to purge the air.
Tools: Advanced OBD-II Scanner, brake fluid, brake bleeding tools (Advanced) - Perform a Visual Inspection
Check the brake fluid level and inspect for leaks around the master cylinder and ABS module. Ensure the main ABS wiring connector is secure and free of green or white corrosion.
Tools: Flashlight (Beginner) - [PRO TIP] Test Sensor Circuit Voltage
Back-probe the external pressure sensor connector. Verify the 5V reference and near 0V ground. The signal wire voltage must be <0.5V with no brake pressure and increase smoothly as the pedal is pressed.
Tools: Digital Multimeter, back-probe kit (Advanced) - [PRO TIP] Analyze Sensor Scope Pattern
Connect a lab scope to the sensor's signal wire. The signal must be a clean, flat DC voltage line (0.25-0.5V) that rises smoothly with pedal pressure. A noisy pattern or stuck voltage proves the sensor failed.
Tools: Automotive Oscilloscope (Professional)
When This Code Triggers (Freeze-Frame Conditions)
- Engine Coolant Temp: 180-200°F (82-93°C) (Fully warmed up)
- RPM: 0 or 800-1200 (During initial self-test at key-on, or at idle shortly after starting)
- Vehicle Speed: < 5 mph (The code sets during the ABS module's power-on self-test before the vehicle reaches cruising speed.)
- Brake Pedal Status: Off / Not Applied (The fault is detected when the pressure sensor reads high while the brake pedal switch is off.)
Related Codes
- C116A — This code for 'ABS Pressure Transducer / Brake Switch Mismatch' is a direct companion to C1440. They are set by the same internal ABS module self-test and are functionally identical.
- C1963 — This code for 'Stability Control Inhibit Warning' is a secondary code triggered as a direct result of C1440. Resolve C1440 first and this code clears automatically.
- C1296 — This code for 'Brake Fluid Pressure Sensor Circuit' points to a similar sensor fault within the ABS module. Diagnosis is identical to C1440.
- U0121 — This code for 'Lost Communication With ABS Control Module' indicates the ABS module is failing electronically and cannot communicate on the CAN bus.
Climate & Environmental Factors
- High Humidity / Road Salt (Rust Belt): Road salt and moisture corrode the ABS module's electrical connector pins, leading to high resistance and signal faults. It also causes brake line fittings to seize to the HCU, making replacement extremely difficult and increasing repair costs.
- Cold Weather: Thermal contraction of electronic components and solder joints on a failing ABS module pushes borderline components past their failure threshold, causing the C1440 fault to appear more frequently in winter.
How to Talk to a Mechanic About This Code
Say this: "I have an ABS light on and my scanner is showing code C1440. I understand this often points to the ABS module's pressure sensor, but I'd like you to first check the live brake pressure data with the pedal off and inspect for any dragging calipers before quoting a module replacement."
This signals to the shop that you are an informed customer. It directs them to perform a specific, logical diagnosis, preventing them from immediately jumping to the most expensive repair.
Avoid saying:
- My ABS light is on, can you fix it?
- My brakes feel weird.
- Just replace the ABS module.
Questions to ask before authorizing the repair:
- What was the brake pressure reading on the scan tool with the pedal released?
- Did you check if all the wheels spin freely to rule out a dragging caliper?
- If you are recommending an ABS module replacement, is that for a new OEM, remanufactured, or used part?
- Does the replacement module require programming to my vehicle's VIN, and is that cost included in your quote?
Where to Take It: Dealer vs Independent vs Chain
- Dealer:
A safe but very expensive option. They fix it correctly but at a premium. A good fallback if you cannot find a qualified independent shop.
Best for: Vehicles still under warranty., Complex cases requiring guaranteed access to proprietary software for programming a new module.
Downsides: Highest cost, typically 1.5-2x the labor rate of an independent shop., More likely to recommend a brand new, expensive OEM part over more affordable rebuilt options. (Typical cost: +75% vs. baseline) - Independent Shop:
The best fit for most owners. A reputable independent shop with good diagnostic equipment handles this repair effectively and works with you on cost-saving measures.
Best for: Out-of-warranty vehicles where cost is a major factor., Owners who want flexibility in using remanufactured or used parts.
Downsides: Shop capabilities vary widely. You must verify they have a scan tool that reads live ABS data and performs the ABS service bleed. (Typical cost: +0% vs. baseline) - Chain Shop:
Avoid for diagnosing C1440. They are not well-equipped for the initial electronic diagnosis this code requires.
Best for: Simple brake jobs like pads and rotors.
Downsides: Technicians often lack the advanced diagnostic training for complex electrical codes like C1440., May not have the necessary scan tools to perform an ABS service bleed or program a new module., High risk of misdiagnosis, leading to unnecessary part replacement. (Typical cost: -10% vs. baseline)
When to Walk Away From the Repair
If the estimated repair cost exceeds 40-50% of the car's private-party value, pause and carefully consider your options.
- Car worth $5000, fix is $2800: Walk away. The repair cost is nearly 60% of the vehicle's value. It is not financially sound to proceed.
- Car worth $15000, fix is $2800: Fix it. The cost is less than 20% of the vehicle's value. This is a significant but reasonable repair for a vehicle of this value.
- Car worth $8000, fix is $800: Fix it, without question. This repair is only 10% of the car's value and restores a critical safety system.
What Scan Tool You Need for This Code

Minimum: A scan tool that reads manufacturer-specific ABS codes and displays LIVE DATA from the ABS module.
A basic $20 code reader cannot access the ABS module. Loaner tools from parts stores typically cannot read live ABS data or perform service functions. You MUST be able to see the live brake pressure reading.
Budget: FORScan with OBDLink EX Adapter (~$80) — For Ford owners, this provides dealer-level diagnostics. It allows you to view live brake pressure data, perform the ABS Service Bleed procedure, and program a new or used module.
Mid-range: Autel MaxiCheck MX808S / ANCEL FD500 (~$150-380) — These handheld scanners read ABS codes, display live data streams, and perform the ABS Service Bleed function. The ANCEL FD500 is specifically tailored for Ford vehicles.
Professional: Innova 5610 / XTOOL D7 (~$500-800) — These prosumer bidirectional tools offer module programming, active tests to command individual components, and wider vehicle coverage.
Rent vs buy: Buy. Store loaner tools are inadequate for this job. For a Ford owner facing a C1440, the FORScan/OBDLink EX combination pays for itself by avoiding a single diagnostic fee at a shop.
How to Clear the Code After You Fix It
- Perform the repair.
- If hydraulic lines were opened, perform a full manual brake bleed followed by a scan tool-activated ABS Service Bleed.
- Use an OBD-II scan tool to clear codes from the ABS module.
- Perform a short test drive including at least one stop from over 25 mph to allow the system to self-test.
Drive cycle (~15 minutes): An ABS-specific drive cycle is not required. The system performs a self-test upon startup and as soon as the vehicle begins moving. The warning lights extinguish immediately if the repair is successful.
Readiness monitors affected: Not applicable. ABS codes do not affect emissions readiness monitors.
Watch out for:
- Forgetting to perform the ABS service bleed after replacing a hydraulic component.
- Clearing the code without fixing the root cause; the fault returns immediately on the next self-test.
- Installing a used ABS module without reprogramming it with the vehicle's 'As-Built' data.
Will This Fail Emissions / State Inspection?
No — by itself this code doesn't fail OBD inspection (but it can keep readiness monitors from setting, which causes a separate fail).
- California: An illuminated ABS light does NOT cause a smog check failure. However, salvaged vehicles fail the required 'Brake and Lamp Inspection' with an active ABS fault.
- New York: An illuminated ABS light causes an immediate failure of the annual safety inspection.
- Texas: In counties requiring emissions testing, an illuminated ABS light is NOT a cause for failure.
Most Commonly Affected Vehicles
- Ford F-150 (2009-2014) — Extremely common issue where the internal pressure transducer in the HCU fails. The repair requires replacing or rebuilding the entire ABS HCU assembly.
- Ford Explorer (1998-2005) — Prone to failure of the external brake pressure switch located on the master cylinder. This is a simple, inexpensive fix compared to later models.
- Ford F-250 / F-350 Super Duty (2009-2016) — Shares the same ABS system design as the F-150 and suffers from the identical HCU internal sensor failures.
- Ford E-Series (E-150, E-250, E-350) (2008-2014) — These vans use a similar ABS setup and set the C1440 code due to HCU faults or external sensor faults.
- Toyota Tacoma, Prius, Camry Hybrid (2004-2015) — CRITICAL: On Toyotas, C1440 means 'Steering Angle Sensor Unusual Bank Angle Detected' or 'ECT Sensor Circuit High Input'. A manufacturer-specific diagnosis is essential.
- Lincoln Aviator (2003-2005) — Features the serviceable external brake pressure switch on the master cylinder, making for a much simpler repair than an HCU replacement.
- Jaguar X-Type (2001-2009) — Sets C1440 for pressure sensor faults. Often traced to a faulty replacement master cylinder introducing air into the system.
- Volkswagen Jetta, Golf, Passat (2006-2014) — ABS faults are frequently caused by a rusted magnetic reluctor ring on the wheel bearing hub or a faulty wheel speed sensor, which must be inspected first.
Manufacturer-Specific Notes
- Ford: On most Fords from 2009 onward, the pressure sensor is integrated into the ABS Hydraulic Control Unit (HCU). Fixing the sensor requires replacing or repairing the entire HCU.
- Ford / Lincoln / Mazda (Older): TSB BPI 13-01 addresses an intermittent ABS light with code C1440 on models like the 1998-2005 Ford Explorer. It points to a faulty external brake pressure transducer on the master cylinder. This switch was part of NHTSA recall 05S28 for causing underhood fires.
- Toyota / Lexus: The meaning of C1440 is completely different. On Toyotas, C1440 means 'Steering Angle Sensor Unusual Bank Angle Detected'. You must use a high-quality scanner that provides the correct manufacturer-specific definition.
- Jaguar: On the X-Type, a faulty aftermarket master cylinder introduces air into the system, which the DSC module interprets as a pressure signal fault, logging C1440.
Real Owner Stories
2012 Ford F-150 with 3.5L EcoBoost
ABS, stability control, and brake warning lights appeared. Scan tool showed brake pressure at 8700 kPa with foot off the pedal.
What they tried:
- Initially diagnosed as a failed HCU, but the owner deferred the expensive repair.
- Later, a caliper seized, prompting the owner to replace all four calipers, rotors, and pads.
Outcome: After replacing all calipers and performing an ABS service bleed, the C1440 code cleared. The sticking caliper caused residual pressure, triggering the fault.
Lesson: Even if live data points to a failed HCU pressure sensor, rule out mechanical issues like a dragging caliper before committing to a costly HCU replacement.
2014 Ford F-150 4x4 with 51,000 miles
ABS and traction control lights came on intermittently during the winter, showing code C1440.
What they tried:
- Replaced the ABS HCU with a low-mileage used unit, which solved the problem for a few months.
- The code and lights began to return randomly.
Outcome: The owner was left with the same recurring problem, indicating a faulty used part.
Lesson: A used part is a gamble. It highlights the tradeoff between the lower cost of used parts and the higher reliability of a new or professionally rebuilt unit.
2014 Ford F-150
ABS and "Service Advancetrack" lights on, code C1440 present.
What they tried:
- The owner purchased a used ABS assembly and swapped only the electronic module to avoid bleeding the brakes.
- This cleared the original codes but introduced C1440.
- The owner re-matched the original electronic module with its original hydraulic unit and reinstalled the complete assembly.
Outcome: After reinstalling the matched pair and properly bleeding the brakes, the C1440 code was resolved.
Lesson: The electronic module and the hydraulic control unit (HCU) are a matched pair. Swapping just the electronic part from a donor unit causes a mismatch and triggers this code.
2013 Ford F-150 after DIY brake work
After replacing a brake caliper, the ABS, parking brake, and brake system lights came on with codes C1440 and C116A.
What they tried:
- The owner triple-checked the wheel speed sensor connection.
- Planned to re-bleed the entire brake system.
Outcome: Air was trapped in the ABS module (HCU) after the caliper replacement. The required fix was an automated 'ABS Service Bleed' using a capable scan tool.
Lesson: If C1440 appears immediately after a brake component replacement, the cause is air trapped in the HCU. Perform an ABS service bleed first.
How to Prevent This Code From Triggering
- Flush brake fluid every 2-3 years or 30,000 miles. (Every 2-3 years) — Brake fluid absorbs moisture over time. This moisture causes corrosion inside the sensitive solenoids and passages of the ABS module, leading to mechanical and electrical failures.
- Service brake caliper slide pins during every brake job. (Every brake pad replacement) — Cleaning and lubricating the slide pins ensures the caliper releases fully, preventing residual brake pressure and a common mechanical cause of C1440.
- Periodically inspect and clean ABS module electrical connectors. (Every 5 years or if working nearby) — Corrosion builds up on connector pins, creating high resistance and causing signal faults. Applying dielectric grease seals out moisture.
- Regularly wash the vehicle's undercarriage. (Seasonally, especially in winter) — Washing away road salt reduces the corrosive environment around the ABS module, prolonging its life and preventing seized fittings.
Frequently Asked Questions
Can I just replace the sensor instead of the whole ABS module?
On most modern Ford vehicles (2009+), no. The pressure sensor is built inside the sealed hydraulic unit. On older Fords and Lincolns (early 2000s), the sensor is a separate, screw-in switch on the master cylinder that costs under $50.
Will clearing the code fix the problem?
No. C1440 is a hard fault that the ABS module tests for every time you start the car. The code and warning lights return immediately until the underlying mechanical or electrical issue is repaired.
I just did a brake job and now these lights are on. What happened?
Air was introduced into the system and is trapped in the ABS hydraulic unit. A standard manual bleed cannot remove it. You must use a scan tool to perform the 'ABS Service Bleed' procedure to cycle the pump and purge the air.
I replaced my ABS module with a used one and now I have C1440. Why?
The ABS assembly consists of a matched hydraulic control unit (HCU) and electronic module. Swapping only the electronic module onto your old hydraulic unit creates a mismatch that triggers C1440. You must install the complete matched assembly from the donor vehicle and program it to your VIN.
Why did my cruise control stop working?
The cruise control system needs to know if you press the brakes so it can disengage instantly. When the computer cannot trust the brake system signals, it disables cruise control as a safety feature.
A shop quoted me $2,500 to fix this. Is that a rip-off?
Not necessarily. A brand new ABS Hydraulic Control Unit from a dealer costs $1,800-$2,200 for the part alone. You save significant money by using a remanufactured part or sending your original unit out for repair.
Can a bad battery or alternator cause code C1440?
No. This code is caused by a specific, logical mismatch between the brake switch and pressure sensor signals, not a general power supply problem. Ensure the battery is healthy, but focus diagnosis on the brake system.
My brake lights work fine. Does that rule out the brake pedal switch?
No. Brake pedal switches have multiple internal contacts—one for the brake lights and a separate one for the ABS module. Watching the 'BPP' PID on a scan tool is the only way to confirm the computer sees the signal.
Key Takeaways
- Code C1440 disables your ABS and stability control because the computer sees high brake pressure (over 40 PSI) while the brake pedal switch reads 'Off'.
- On 2009 and newer Ford trucks, the most common fix is replacing or rebuilding the entire ABS Hydraulic Control Unit (HCU) because the internal pressure sensor fails.
- Always check live scan tool data before replacing parts; a reading above 275 kPa (40 PSI) with your foot off the pedal confirms a pressure sensor or hydraulic fault.
- On 1998-2005 Ford and Lincoln models, replace the $20 external brake pressure switch on the master cylinder before assuming the ABS module is bad.
- If C1440 appears immediately after replacing a brake caliper or line, perform an automated ABS Service Bleed with a bidirectional scan tool to purge trapped air.
Helpful Videos

The information in this article is provided for general reference and educational purposes only. Vehicle specifications, procedures, and part compatibility can vary by production date, trim level, and region. Always consult your vehicle's factory service manual and verify part numbers before purchasing or performing repairs. Safety-critical components such as airbags, seat belts, and braking systems should be installed by a qualified professional.
- 🎬 Helpful Videos
- What Does C1440 Mean?
- Can I Drive With C1440?
- Common Causes
- Symptoms
- Diagnostic Flowchart
- Common Fixes & Costs
- Used vs. New Parts: Buying Guide
- What Happens If You Wait — Timeline
- Cost of Not Fixing It
- Diagnosis Steps
- When This Code Triggers (Freeze-Frame Conditions)
- Related Codes
- Climate & Environmental Factors
- How to Talk to a Mechanic About This Code
- Where to Take It: Dealer vs Independent vs Chain
- When to Walk Away From the Repair
- What Scan Tool You Need for This Code
- How to Clear the Code After You Fix It
- Will This Fail Emissions / State Inspection?
- Most Commonly Affected Vehicles
- Manufacturer-Specific Notes
- Real Owner Stories
- 2012 Ford F-150 with 3.5L EcoBoost
- 2014 Ford F-150 4x4 with 51,000 miles
- 2014 Ford F-150
- 2013 Ford F-150 after DIY brake work
- How to Prevent This Code From Triggering
- Frequently Asked Questions
- Can I just replace the sensor instead of the whole ABS module?
- Will clearing the code fix the problem?
- I just did a brake job and now these lights are on. What happened?
- I replaced my ABS module with a used one and now I have C1440. Why?
- Why did my cruise control stop working?
- A shop quoted me $2,500 to fix this. Is that a rip-off?
- Can a bad battery or alternator cause code C1440?
- My brake lights work fine. Does that rule out the brake pedal switch?
- Key Takeaways
- 🎟️ Get 5% Off