

OBD-II Code C1425: Open in Stop Lamp Switch Circuit
The Ultimate 2024 Guide to Diagnosing and Fixing C1425
- Code C1425 triggers when the ABS module detects a continuous open circuit in the brake light switch wiring for 0.3 to 3 seconds.
- Replacing the $15-$60 4-wire brake light switch resolves this code in over 80% of cases, especially on Toyota and Lexus vehicles.
- A blown 10-amp 'STOP' or 'ECU-IG' fuse causes this code instantly, making a 2-minute fuse box check the mandatory first diagnostic step.
- Installing aftermarket LED tail lights without a 1K-ohm load resistor drops circuit resistance, tricking the ECU into setting a false C1425 code.
- Driving with C1425 disables critical safety systems like ABS and Vehicle Stability Control, significantly increasing rear-end collision risk and liability.
What Does C1425 Mean?

Code C1425 indicates the Skid Control ECU (which manages Anti-lock Brakes) detects a break or 'open' in the brake light switch circuit. The computer relies on this circuit to verify brake pedal application. Without a clear signal, it assumes the input is unreliable, illuminates dashboard warning lights, and disables ABS and Vehicle Stability Control (VSC) as a safety precaution.
Technical definition: The official SAE/ISO definition for C1425 is "Open in Stop Lamp Switch Circuit." The Skid Control ECU sets this code when it detects an open circuit on the stop light signal input line (STP) or its ground line for 0.3 to 3 seconds while the ignition is on and system voltage is between 9.5V and 17.4V.
Can I Drive With C1425?
No — Do Not Drive. No. The primary risk is non-functional brake lights, a severe safety hazard that causes rear-end collisions. Driving with broken brake lights is illegal and results in traffic fines. Furthermore, critical safety systems like the Anti-lock Braking System (ABS) and Vehicle Stability Control (VSC) are disabled, significantly reducing vehicle stability during emergency maneuvers. In an accident, you will likely be found at fault, and your insurance claim can be denied for operating a vehicle with a known safety defect.
Common Causes

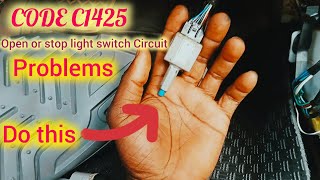
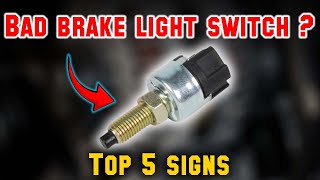
- Defective Brake Light Switch (Very Common) — The brake light switch (stop lamp switch) is the most frequent culprit. Located at the top of the brake pedal arm, its internal mechanical and electrical contacts wear out over time, leading to inconsistent signals or outright failure. 🎬 Learn how 2-pin and 4-pin brake light switches work.
- Blown Fuse (Common) — A blown fuse for the brake light circuit (labeled 'STOP') or a related computer module (labeled 'ECU-IG' or 'AM1') cuts power, creating an open circuit. This is a simple fix, but requires checking all related fuses in both the cabin and engine bay.
- Damaged Wiring, Connectors, or Grounds (Common) — Frayed wires, corroded connectors, or shorts to the chassis ground interrupt the circuit. This frequently occurs near the pedal due to movement, or at the fuse box and ABS module connectors due to water intrusion.
- Aftermarket LED Tail Light Installation (Less Common) — Replacing stock incandescent brake light bulbs with aftermarket LED bulbs triggers C1425 on many Toyota models. The lower electrical resistance of LED bulbs tricks the Skid Control ECU into reading an open circuit.
- Incorrectly Installed or Adjusted Brake Light Switch (Less Common) — If a new switch is installed without the correct clearance to the brake pedal arm, it fails to actuate properly. The ECU interprets this lack of signal change as an open circuit.
- Burnt Out Brake Light Bulbs (Rare) — If multiple or all brake light bulbs burn out simultaneously, the resulting change in total circuit resistance is high enough for the control module to interpret it as an open circuit.
- Faulty ABS/Skid Control ECU (Rare) — The Anti-Lock Brake System (ABS) computer module itself fails. If the internal circuit that monitors the brake switch signal burns out, it sets this code even if the switch, wiring, and fuses are perfect.
Symptoms

- ABS and/or Traction/Stability Control (VSC) Light On — The computer illuminates these warning lights because it cannot trust the brake signal, a critical input for these safety systems.
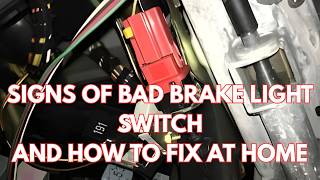
- Brake Lights Not Working — Brake lights fail to illuminate when pressing the pedal, creating a major rear-end collision risk. 🎬 See why you shouldn't ignore these brake switch symptoms.
- Inability to Shift Out of Park — Vehicles with automatic transmissions require a valid brake pedal signal to activate the shift interlock solenoid, allowing the gear shifter to move out of 'Park'.
- Push Button Start Issues — Push-button start systems require a signal from the brake switch to confirm the pedal is depressed before allowing the engine to crank.
- Cruise Control Inoperative — The cruise control system disables itself as a safety protocol. It requires a reliable signal from the brake switch to disengage automatically during braking.
- Brake Lights Stay On — If the switch fails in a 'closed' position or the pedal stopper pad breaks, brake lights remain on constantly, draining the battery.
Diagnostic Flowchart
Tap your situation to follow the diagnostic path that matches what you're seeing on this code.
Common Fixes & Costs
- Replace Brake Light Switch — Parts: $15-$60, Labor: $60-$150, ~0.7 hr book time (DIY)
- Replace Blown Fuse — Parts: $1-$5, Labor: $0-$20, ~0.2 hr book time (DIY)
- Repair Wiring or Connector — Parts: $5-$30, Labor: $120-$300, ~1.5 hr book time (Intermediate)
- Adjust Brake Light Switch — Parts: $0, Labor: $30-$60, ~0.3 hr book time (DIY)
- Install Load Resistor for LED Brake Lights — Parts: $10-$25, Labor: $50-$100, ~0.8 hr book time (Intermediate)
- Repair or Replace ABS Control Module — Parts: $150-$1200, Labor: $150-$350, ~2.0 hr book time (Professional)
Used vs. New Parts: Buying Guide
When a used part is worth it: It never makes sense to buy a used brake light switch. It is a low-cost wear item critical for safety. The labor cost for installation outweighs any savings.
Donor-vehicle mileage cap: roughly under 10000 miles for the part to have meaningful remaining life.
Donor quality checklist:
- Not recommended. Only consider a part from a very low-mileage vehicle wrecked for non-electrical reasons.
Decision logic:
- If The part is a brake light switch. → Buy a new OEM or high-quality aftermarket part. The $15-$60 cost is negligible compared to the safety risk.
- If Budget is extremely tight. → Still buy new. A used part fails quickly, requiring you to pay for labor a second time.
Warranty tradeoff: New aftermarket parts carry a 1-year to lifetime warranty. Used parts from a salvage yard have a 30-90 day warranty that does not cover labor.
Worst-case if a used part fails: $100-$200 to pay for labor a second time plus the cost of a new switch.
What Happens If You Wait — Timeline
- Immediate: Code C1425 sets. ABS, VSC, and BRAKE warning lights illuminate. Safety systems like ABS, traction control, and stability control are disabled. (MPG impact: 0%% · Added cost: $0)
- 0-1 week: Driver experiences inability to shift from Park, inoperative cruise control, and a potential no-start condition on push-button start vehicles. The primary safety risk of non-functional brake lights is constant. (MPG impact: 0%% · Added cost: $0 - $250 (Cost of a traffic ticket or tow service if unable to shift from Park).)
- 1 week - 2 months: If the switch fails in the 'on' position, brake lights remain illuminated constantly, leading to a drained battery and a no-start condition. (MPG impact: 0%% · Added cost: $150 - $400 (Cost of a new battery and roadside assistance).)
- 2+ months: The vehicle fails state safety inspections. The ultimate cost is the high probability of an at-fault accident due to disabled safety systems or non-functional brake lights. (MPG impact: 0%% · Added cost: $500 - $15,000+ (Insurance deductible, increased premiums, or full liability in a rear-end collision).)
Cost of Not Fixing It
- Immediate: Extreme safety hazard. Brake lights fail, leading to a high risk of a rear-end collision. Critical safety systems (ABS, VSC, Traction Control) are disabled. (Added cost: Traffic tickets, at-fault accident liability, and denied insurance claims.)
- 0-3 Months: Operational issues like being unable to shift from park or use cruise control. If the switch fails in the 'on' position, it drains the battery. (Added cost: $100-$300 for a new battery or jump start service.)
- 3+ Months: The vehicle fails mandatory state safety inspections. The constant, high-stakes risk of causing an accident due to non-functional safety equipment remains. (Added cost: The cost of an accident, ranging from minor repairs to a total loss.)
Diagnosis Steps

- Check Brake Light Function
Have an assistant stand behind the vehicle while you press and release the brake pedal. Confirm if the brake lights illuminate and extinguish correctly. If they fail, it strongly suggests a fuse, bulb, or switch issue.
Tools: An assistant or a reflective surface (Beginner) - Inspect All Related Fuses
Consult your owner's manual to locate the fuse boxes. Inspect fuses labeled 'STOP', 'STOP LP', 'ECU-IG', or 'ABS'. Use a multimeter for a definitive continuity test. A blown fuse is the fastest, cheapest fix.
Tools: Fuse puller, owner's manual, multimeter (Beginner) - Scan for Codes and View Live Data
Use an OBD-II scanner to confirm C1425. Access 'Live Data' and monitor the parameter for the brake switch (e.g., 'Stop Light SW'). The status must change from 'OFF' to 'ON' as you press the pedal. If it doesn't, the ECU is not receiving the signal.
Tools: OBD-II Scanner with ABS Live Data capability (Beginner) - Visually Inspect the Brake Light Switch and Wiring
Locate the brake light switch on the brake pedal arm under the dashboard. Look for physical damage, a loose connector, or corrosion. Wiggle the connector to see if it triggers a change on your scanner.
Tools: Flashlight (Intermediate) - Test for Power at the Brake Light Switch
Disconnect the switch's electrical connector. Using a multimeter set to DC Volts, test the power supply wire. With the ignition on, you must see battery voltage (approx. 12V). On 4-wire switches, test both separate power feeds.
Tools: Multimeter, vehicle repair manual (Intermediate) - Test the Brake Light Switch for Continuity
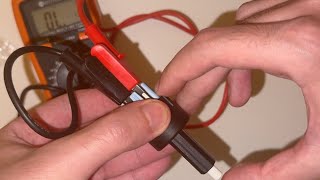
With the switch unplugged, use a multimeter set to Ohms. Test the switch terminals. The reading must change from open (no continuity) to closed (near zero ohms) when the plunger is pressed and released. Test both circuits on a 4-wire switch.
Tools: Multimeter, vehicle repair manual (Advanced) - [PRO TIP] Test Signal Voltage at the ABS/VSC Control Module
Locate the ABS/VSC module. Carefully back-probe the 'STP' (Stop Signal) input wire at the module's connector. Measure voltage to ground. It must read below 1.5V with the pedal released and rise to 8V-14V when depressed. If voltage changes at the switch but not here, the wiring is broken.
Tools: Multimeter with back-probe pins, vehicle repair manual (Advanced) - [PRO TIP] Perform a Voltage Drop Test on the Ground Circuit
Place one multimeter lead on the negative battery terminal and the other on the ground wire at the brake light switch connector. With the circuit energized, the reading must be under 0.1V (100mV). Higher readings indicate high resistance in the ground path.
Tools: Multimeter (Advanced)
When This Code Triggers (Freeze-Frame Conditions)
- Ignition Status: ON (The ECU performs this check exclusively when the ignition is on.)
- System Voltage (IG1 Terminal): 9.5V - 17.4V (The code only sets if the system voltage is within the normal operating range.)
- Fault Duration: 0.3 - 3 seconds (The ECU must detect a continuous open circuit for this duration before setting the code.)
- Brake Pedal Position: Released (Switch OFF) (The ECU performs this open circuit check when it expects the switch to be off but cannot get a coherent signal from the circuit.)
Related Codes
- C1249 — An identical code for 'Open in Stop Light Switch Circuit'. On many Toyota/Lexus vehicles, C1249 and C1425 point to the exact same fault and use the same diagnostic procedure.
- C1380 — Means 'Stop Light Control Relay Malfunction'. If C1380 appears with C1425, it strongly suggests the vehicle uses a stop light relay, and the relay itself is the primary focus.
- C1201 — Indicates a general 'Engine Control System Malfunction'. It is a secondary code set by the Engine Control Module because the ABS module detected C1425 and went offline. Always diagnose C1425 first.
- P0571 — A generic powertrain code for 'Brake Switch "A" Circuit Malfunction'. It confirms multiple vehicle systems see a problem with the brake switch signal.
Climate & Environmental Factors
- High Humidity / Salt Belt Regions: Moisture and road salt accelerate corrosion on wiring connectors, ground points, and fuse box terminals. This increases circuit resistance, triggering C1425.
- Extreme Cold: In freezing temperatures, plastic components like the brake light switch housing and wire insulation become brittle, leading to cracks and internal wire breaks.
How to Talk to a Mechanic About This Code
Say this: "I have an ABS light on and my scanner shows code C1425 for the stop lamp switch circuit. I've already confirmed whether the brake lights are working. I'd like to book a diagnostic appointment to test the brake light switch and its circuit."
This signals you have done your research and pinpoints the likely issue. It focuses the technician's efforts on the correct system, preventing a broad, expensive diagnostic process.
Avoid saying:
- 'My ABS light is on, can you fix it?' (Too vague, invites costly diagnosis).
- 'Just replace the brake light switch.' (Assumes the fix; it could be a simple fuse, leading you to pay for unnecessary parts).
- 'Do whatever you think is best.' (Gives the shop a blank check).
Questions to ask before authorizing the repair:
- Did you test the switch itself for continuity?
- Did you check for power and ground at the switch connector?
- If the switch is good, where in the circuit did you find the open or short?
- Can you show me the old part?
- What is the warranty on the parts and labor for this repair?
Where to Take It: Dealer vs Independent vs Chain
- Dealer:
Recommended only if initial diagnosis by an independent shop fails or if a faulty ECU is confirmed. Overkill for a simple switch replacement.
Best for: Vehicles still under warranty., Complex electrical issues requiring specialized tools like Toyota's Techstream., Cases where a faulty ABS module is strongly suspected.
Downsides: Highest labor rates., Defaults to replacing entire assemblies rather than repairing wiring. (Typical cost: +50% vs. baseline) - Independent Shop:
Best fit. An experienced independent mechanic diagnoses and fixes a C1425 efficiently and cost-effectively.
Best for: Out-of-warranty vehicles., This specific code, which is a straightforward diagnosis for competent technicians., Cost-conscious owners.
Downsides: Diagnostic skill varies. Look for ASE certifications. (Typical cost: +0% vs. baseline) - Chain Shop:
Use with caution. Acceptable if you are certain it's just the brake light switch. Avoid for electrical diagnosis.
Best for: Simple jobs like replacing a fuse if you've already diagnosed it yourself.
Downsides: Technician skill varies dramatically., High pressure to upsell services., Lacks advanced diagnostic tools for in-depth electrical work. (Typical cost: -10% vs. baseline)
When to Walk Away From the Repair
If the estimated repair cost exceeds 40-50% of the car's private-party value, seriously consider selling or trading in the vehicle.
- Car worth $5000, fix is $2500: Walk away. The repair cost is 50% of the car's value. Use this money as a down payment on a reliable vehicle.
- Car worth $15000, fix is $800: Fix it. The repair cost is a small fraction of the car's value and restores critical safety functions.
- Car worth $3000, fix is $250: Fix it. A $250 repair for a new brake light switch is well worth it to keep a functional vehicle on the road.
What Scan Tool You Need for This Code

Minimum: An OBD-II reader that reads and clears Anti-lock Braking System (ABS) codes.
A basic $20 check engine light scanner will NOT see ABS codes like C1425. You need a tool specifically advertised with ABS capability.
Budget: BlueDriver Pro (~$100) — Reads and clears ABS codes. Provides access to live data, allowing you to watch the 'Stop Light SW' parameter change from ON to OFF as you press the brake.
Mid-range: Foxwell NT510 Elite / NT630 Plus (~$150) — Provides manufacturer-specific diagnostics for ABS codes and offers bidirectional control to command the ABS module to perform tests.
Professional: Autel MaxiCOM MK808 / XTOOL D8S (~$500-800) — Offers full OE-level diagnostics, advanced bidirectional controls, and performs 'Zero Point Calibration' if the ABS module needs replacement.
Rent vs buy: Auto parts stores scan ABS codes for free, which is a great first step. However, to view live data or clear the code after a DIY repair, you must buy your own scanner.
How to Clear the Code After You Fix It
- Use an OBD-II scan tool with ABS capability to clear the Diagnostic Trouble Code (DTC).
- Turn the ignition off, then start the engine.
- Depress and release the brake pedal several times to force the ECU to re-check the circuit.
- Use the scan tool to re-read codes and confirm C1425 has not returned.
Drive cycle (~10 minutes): A specific drive cycle is not required. Starting the vehicle and pressing the brake pedal a few times is sufficient for the Skid Control ECU to verify the repair. A short test drive with several stops confirms the fix.
Readiness monitors affected: This code does not affect engine emissions readiness monitors. However, an illuminated ABS warning light causes an automatic failure of state safety inspections.
Watch out for:
- Clearing the code without performing a repair causes the code to return immediately upon pressing the brake pedal.
- If the ABS/Skid Control ECU is replaced, a 'Zero Point Calibration' must be performed with a compatible scan tool.
Will This Fail Emissions / State Inspection?
Yes — this code typically fails an OBD-II emissions inspection.
- California: An illuminated ABS warning light causes a vehicle to fail its safety inspection. Brake lights are a required check.
- New York: An illuminated ABS warning light is grounds for safety inspection failure. Functioning brake lights are a mandatory inspection point.
- Texas: An active DTC like C1425 or an illuminated warning light causes a failure during the OBD-II emissions scan required in 17 counties.
Most Commonly Affected Vehicles
- Toyota Tacoma (2016-2023) — Extremely common on 3rd generation Tacomas. It is often the first sign of a failing brake light switch.
- Toyota Highlander (2008-2019) — Commonly associated with a faulty brake light switch. Models from 2013-2017 are highly susceptible to the aftermarket LED light issue.
- Toyota Camry (2012-2017) — The code appears with others if the brake switch fails. A failing wire in the harness is also a frequent cause.
- Toyota Land Cruiser / Prado (2010-2020) — These vehicles often present C1425 and C1380 together, pointing to a failure in the stop lamp switch or its associated relay circuit.
- Toyota Fortuner (2016-2022) — A known issue on this platform, typically pointing to the stop light switch circuit or a related wiring fault.
- Toyota Hilux (2016-2021) — Triggered by switch failure or wiring issues, such as a wire shorting to the body after being pinched.
- Lexus IS, ES, RX, GX (2006-2015) — Lexus vehicles share the same system design as Toyota. This code is a common indicator of a stop lamp switch circuit failure.
- Mitsubishi Pajero / Montero, L200 / Triton (2001-2015) — Diagnosis often leads to a faulty brake light switch or a blown 'ECU' fuse that supplies the ignition signal to the switch.
Manufacturer-Specific Notes
- Toyota/Lexus: The 4-wire brake switch is a key feature. Two wires power the brake lights (constant 12V), and two send a separate signal to the Skid Control ECU (ignition-on 12V). A failure in the ECU-side triggers C1425 even if the brake lights work perfectly.
- Toyota: A Technical Service Bulletin (TSB) exists for 2013-2017 models where aftermarket LED brake lights cause C1425. The official fix is installing a 1K ohm, 1/2 watt resistor in parallel with the stop lamp circuit.
- Mitsubishi: A very common cause is a blown ignition-related fuse (labeled 'ECU'). This fuse provides the signal voltage to the 4-wire brake switch. Technicians check this fuse before testing the switch.
Real Owner Stories
2016 Toyota Tacoma at 75K miles
ABS, Brake, and Traction Control lights illuminated suddenly. The brake lights worked correctly, but the truck wouldn't shift out of Park without the manual override.
What they tried:
- Checked all fuses, finding them intact.
- Scanned the vehicle, returning code C1425.
- Ordered a new OEM brake light switch based on forum advice.
Outcome: Replaced the OEM brake light switch (part #84340-69025) in 15 minutes. After clearing the code, all warning lights extinguished. Total cost was under $50.
Lesson: On 3rd Gen Tacomas, if you get C1425 and your brake lights still work, the dual-circuit brake light switch is the overwhelmingly likely culprit. Replace it before paying diagnostic fees.
2014 Toyota Highlander with intermittent warning lights
Dashboard warning lights (ABS, LDA) appeared intermittently. The code cleared but always returned days later.
What they tried:
- Suspected a failing ABS module.
- Inspected a recently installed aftermarket trailer hitch wiring harness.
- Found significant green corrosion inside the trailer plug from water intrusion.
Outcome: Disconnected the faulty trailer wiring harness. After cleaning the vehicle-side connector and clearing codes, C1425 never returned. The short was in the aftermarket wiring.
Lesson: If the fault is intermittent, inspect recent modifications. Aftermarket trailer wiring is a common source of shorts and open circuits that trigger C1425.
2008 Mitsubishi Pajero with C1425
ABS and traction control lights were on, cruise control failed, and brake lights were inoperative.
What they tried:
- Assumed the brake light switch failed.
- Checked the interior fuse box first.
- Discovered a blown 10A fuse labeled 'ECU-IG'.
Outcome: Replacing the blown 'ECU-IG' fuse immediately restored brake lights and cruise control. The fuse, not the switch, was the root cause.
Lesson: Always check all related fuses (STOP, ECU, ABS) before replacing parts. A blown ignition-related fuse cuts power to the ECU side of the switch.
2015 Toyota with aftermarket LED tail lights
Immediately after installing LED brake light bulbs, the ABS light illuminated, cruise control stopped working, and C1425 was stored.
What they tried:
- Reinstalled original incandescent bulbs, which cleared the problem.
- Found a Technical Service Bulletin (TSB) for the issue.
- Purchased a load resistor.
Outcome: Installed a 1K ohm, 1/2 watt resistor in parallel with the stop lamp circuit. The resistor mimics the electrical load of an incandescent bulb, satisfying the ABS module's circuit check.
Lesson: If C1425 appears right after installing LED bulbs, the bulbs are the cause. You must revert to stock bulbs or install the correct load resistors.
How to Prevent This Code From Triggering
- Clean and protect electrical connectors. (Every 2-3 years or during brake service.) — Applying dielectric grease to the brake light switch connector and trailer harnesses prevents moisture intrusion and corrosion, the primary causes of open circuits.
- Inspect the brake pedal stopper pad. (During any under-dash inspection.) — The small plastic pad on the brake pedal arm contacts the switch. These pads become brittle and disintegrate, causing the switch to remain activated and drain the battery.
- Avoid overloading the brake light circuit. (When adding accessories.) — Adding high-power auxiliary brake lights or improperly wired trailer lights exceeds the amperage capacity of the switch or fuse, leading to premature failure.
Frequently Asked Questions
Can I just clear the C1425 code?
You can clear the code with a scanner, but it returns almost immediately if the underlying electrical fault is not repaired. Clearing the code does not fix the problem.
Is it safe to drive with a C1425 code?
No. Your brake lights might not work, creating an extreme rear-end collision hazard. Additionally, your Anti-lock Braking System (ABS) and Vehicle Stability Control (VSC) are disabled.
My brake lights work, but I still have the C1425 code. Why?
This is a classic symptom on Toyota and Lexus vehicles. The brake light switch is a dual-function device with four wires. One circuit controls the brake lights, while a separate circuit reports to the ABS/VSC computers. The computer-side of the switch fails independently, triggering C1425 while leaving the lights functional.
Why does my brake light switch have four wires instead of two?
A four-wire switch provides redundancy and separate signals for different systems. Two wires power the primary brake lights, while the other two send a verifiable signal to the ABS and cruise control modules. This secondary circuit confirms the driver's actions for modern safety systems.
Can aftermarket LED brake lights cause code C1425?
Yes. The computer is calibrated for the electrical resistance of standard incandescent bulbs. LED bulbs have much lower resistance, which the computer misinterprets as an open circuit, triggering code C1425.
My C1425 code is intermittent. What causes that?
An intermittent C1425 points to a failing brake light switch with worn internal contacts, a loose electrical connector, or a wire rubbing against the chassis that shorts out over bumps.
What are the most common mistakes when diagnosing C1425?
The biggest mistake is replacing the brake light switch without checking for blown ECU fuses first. Secondly, failing to properly adjust the new switch causes the code to return immediately.
How much does it cost to fix code C1425?
A blown fuse costs under $5 to replace. The most common repair, replacing the brake light switch, costs $75 to $210 at a professional shop. Wiring repairs average $120 to $300, while a rare ABS module replacement exceeds $1,500.
Key Takeaways
- Code C1425 triggers when the ABS module detects a continuous open circuit in the brake light switch wiring for 0.3 to 3 seconds.
- Replacing the $15-$60 4-wire brake light switch resolves this code in over 80% of cases, especially on Toyota and Lexus vehicles.
- A blown 10-amp 'STOP' or 'ECU-IG' fuse causes this code instantly, making a 2-minute fuse box check the mandatory first diagnostic step.
- Installing aftermarket LED tail lights without a 1K-ohm load resistor drops circuit resistance, tricking the ECU into setting a false C1425 code.
- Driving with C1425 disables critical safety systems like ABS and Vehicle Stability Control, significantly increasing rear-end collision risk and liability.
Helpful Videos

The information in this article is provided for general reference and educational purposes only. Vehicle specifications, procedures, and part compatibility can vary by production date, trim level, and region. Always consult your vehicle's factory service manual and verify part numbers before purchasing or performing repairs. Safety-critical components such as airbags, seat belts, and braking systems should be installed by a qualified professional.
- 🎬 Helpful Videos
- What Does C1425 Mean?
- Can I Drive With C1425?
- Common Causes
- Symptoms
- Diagnostic Flowchart
- Common Fixes & Costs
- Used vs. New Parts: Buying Guide
- What Happens If You Wait — Timeline
- Cost of Not Fixing It
- Diagnosis Steps
- When This Code Triggers (Freeze-Frame Conditions)
- Related Codes
- Climate & Environmental Factors
- How to Talk to a Mechanic About This Code
- Where to Take It: Dealer vs Independent vs Chain
- When to Walk Away From the Repair
- What Scan Tool You Need for This Code
- How to Clear the Code After You Fix It
- Will This Fail Emissions / State Inspection?
- Most Commonly Affected Vehicles
- Manufacturer-Specific Notes
- Real Owner Stories
- 2016 Toyota Tacoma at 75K miles
- 2014 Toyota Highlander with intermittent warning lights
- 2008 Mitsubishi Pajero with C1425
- 2015 Toyota with aftermarket LED tail lights
- How to Prevent This Code From Triggering
- Frequently Asked Questions
- Can I just clear the C1425 code?
- Is it safe to drive with a C1425 code?
- My brake lights work, but I still have the C1425 code. Why?
- Why does my brake light switch have four wires instead of two?
- Can aftermarket LED brake lights cause code C1425?
- My C1425 code is intermittent. What causes that?
- What are the most common mistakes when diagnosing C1425?
- How much does it cost to fix code C1425?
- Key Takeaways
- 🎟️ Get 5% Off