

OBD-II Code C1420: Varies by Manufacturer
What C1420 means, why it triggers, and how to fix it
- Code C1420 indicates a failed yaw rate sensor on Toyota/Lexus vehicles, but points to a steering torque sensor failure on Hondas.
- Never replace a Toyota or Lexus yaw sensor without first performing a zero-point calibration, which costs $60-$180 and often permanently clears the code.
- On Honda Civics, inspect the steering rack wiring harness for rodent damage before authorizing a $1,000+ steering rack replacement.
- Driving a Honda with C1420 disables power steering, requiring immense physical effort to turn the wheel and making emergency maneuvers highly dangerous.
- A bidirectional OBD-II scanner costing $150-$200 is required to perform the mandatory sensor calibrations after replacing parts for this code.
What Does C1420 Mean?

The C1420 code signals a chassis control system failure, but its exact definition depends on your vehicle's manufacturer. For Toyota and Lexus, it indicates a malfunctioning acceleration sensor within the stability control system. For Honda, it points to a failing torque sensor in the electric power steering system. Because it is a manufacturer-specific code, standard OBD-II readers often misinterpret it.
Technical definition: For Toyota/Lexus, C1420 is 'Acceleration Sensor Malfunction', triggered when the skid control ECU detects a sustained difference of more than 0.4 G between the sensor's two internal circuits for over 60 seconds while stationary. For Honda, it is 'Main Torque Sensor and Sub Torque Sensor Incorrect Correlation', triggered when the EPS module receives conflicting data from the two steering torque sensors during wheel rotation.
Can I Drive With C1420?
Yes, But With Caution. For Toyota/Lexus, driving is possible but your Vehicle Stability Control (VSC) and ABS are disabled, increasing skid risk in emergency maneuvers. Some Hyundai models with a similar yaw sensor issue were recalled for unintended braking, highlighting a severe safety risk. For Honda, driving is extremely difficult and unsafe due to the total loss of power steering assist, requiring significant physical effort to turn the wheel.
Common Causes

- Damaged Steering Rack Wiring (Honda) (Very Common) — On Honda vehicles, the wiring harness leading to the steering rack's torque sensor is a known weak point. It is frequently chewed by rodents attracted to the soy-based wire insulation or damaged by road debris.
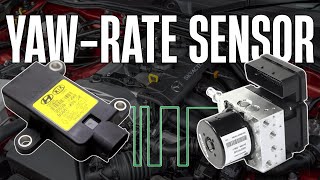
- Faulty Yaw Rate and Acceleration Sensor (Toyota/Lexus) (Very Common) — This is the most frequent cause for Toyota and Lexus vehicles. The sensor, which measures the vehicle's rotation and G-forces, fails internally and sends irrational data to the ECU.
- Missing Calibration or Improper Installation (Common) — After replacing a yaw rate sensor, steering angle sensor, or performing suspension repairs, the sensor system must be calibrated. If this 'zero point calibration' is skipped, or if the sensor is not installed perfectly flat, 🎬 See how to perform a Toyota/Lexus VSC zero point calibration. the system sets a fault code.
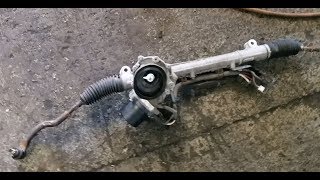
- Failed Steering Rack Torque Sensor (Honda) (Common) — The torque sensor, which detects steering wheel movement, fails internally. On many Honda models, this sensor is integrated into the steering rack assembly, requiring the entire rack to be replaced. 🎬 Watch this walkthrough on replacing a Honda electric steering rack.
- Water Intrusion and Corrosion (Toyota/Lexus) (Less Common) — The yaw rate sensor is often located under a front seat or the center console. Spilled liquids, clogged sunroof drains, or flood damage introduce moisture, corroding the sensor's pins and internal electronics.
- Low or Weak Battery Voltage (Less Common) — A weak or failing battery causes voltage drops during startup, leading to false codes being set by sensitive electronic modules like the VSC or EPS controller. Always verify battery health before replacing expensive sensors.
- Failed ABS/VSC Control Module (Uncommon) — In rare instances, the sensor and wiring are intact, but the main ABS/VSC control module (ECU) that interprets the sensor's data fails. This is a last-resort diagnosis.
Symptoms

- Hard or Stiff Steering (Honda) — On Honda vehicles, a failure in the electric power steering torque sensor causes the power assist to shut off as a fail-safe, making the steering wheel extremely difficult to turn.
- VSC or Traction Control Light Illuminated (Toyota/Lexus) — The dashboard displays a warning light related to the vehicle's stability or traction control system, indicating the system is disabled.
- ABS Light Illuminated — The Anti-lock Braking System (ABS) light illuminates, as it relies on data from the stability control system to function correctly.
- Erratic or Unintended Braking (Toyota/Lexus/Hyundai) — A faulty yaw rate sensor sends incorrect signals that cause the stability control system to activate inappropriately, leading to sudden, unexpected braking on one or more wheels.
- Unstable Handling During Turns — Because the stability control system is disabled, the vehicle feels less stable and more prone to skidding during sharp turns or on uneven roads.
Common Fixes & Costs
- Perform Zero Point Calibration — Parts: $0, Labor: $60-$180, ~0.8 hr book time (DIY)
- Repair Damaged Wiring (Honda) — Parts: $10-$50, Labor: $150-$450, ~2.0 hr book time (Intermediate)
- Replace Yaw Rate and Acceleration Sensor (Toyota/Lexus) — Parts: $350-$1,200, Labor: $100-$200, ~1.5 hr book time (Intermediate)
- Replace Steering Rack Assembly (Honda) — Parts: $500-$1,500, Labor: $350-$600, ~4.0 hr book time (Professional)
- Replace ABS/VSC Control Module — Parts: $800-$2,500, Labor: $150-$300, ~1.5 hr book time (Professional)
Used vs. New Parts: Buying Guide
When a used part is worth it: For Toyota/Lexus, a used yaw rate sensor from a reputable salvage yard is cost-effective for older vehicles. For Honda, a used steering rack is viable if it comes from a low-mileage vehicle and includes a warranty.
Donor-vehicle mileage cap: roughly under 80000 miles for the part to have meaningful remaining life.
Donor quality checklist:
- Verify the exact part number matches.
- Ensure the donor vehicle was not a flood or fire victim.
- Check steering racks for physical damage or torn boots.
- Purchase from a seller offering at least a 90-day warranty.
Decision logic:
- If The part is a sensor and the labor to replace it is high → Favor a new OEM or high-quality aftermarket part to avoid repeat labor costs.
- If The vehicle is over 10 years old and the budget is tight → A warrantied used part is an acceptable risk.
- If The part is a complete steering rack assembly → A professionally remanufactured unit with a long warranty offers the best balance of cost and reliability.
Warranty tradeoff: Used parts typically come with a 30-90 day part-only warranty. Aftermarket new parts often have a 1-year to limited lifetime warranty. Labor is rarely covered.
Worst-case if a used part fails: $500-$1000 if a used steering rack or sensor fails after the warranty period, requiring a second repair.
What Happens If You Wait — Timeline
- Immediate: Honda: Power steering assist is lost, making steering extremely heavy. Toyota/Lexus: VSC, TRAC, and ABS warning lights illuminate, disabling active safety systems. (MPG impact: 0%% · Added cost: $0)
- 0-1 month: Honda: Driving without power steering poses a severe safety risk during emergency maneuvers. Toyota/Lexus: The risk of a loss-of-control accident increases significantly without ESC intervention. (MPG impact: 0%% · Added cost: $0 (Direct), but accident risk cost is high.)
- 1-6 months: Continued driving without stability control leads to uneven tire wear as the system cannot correct for minor slips. The ongoing risk of an accident persists. (MPG impact: 0-1%% · Added cost: $50-$150 (Accelerated tire wear))
- 6+ months: There is no evidence that a faulty yaw or torque sensor causes cascading mechanical failures. The primary 'cost' is realized if a crash occurs that the active safety systems could have prevented. (MPG impact: 0%% · Added cost: $2,000 - $15,000+ (Potential cost of an accident))
Cost of Not Fixing It
- Immediate: For Honda, loss of power steering makes the vehicle extremely difficult and dangerous to steer. For Toyota/Lexus, ABS and VSC systems are disabled, increasing the risk of skidding. (Added cost: Potential for accident-related costs.)
- Short Term (Weeks to Months): Continued driving without stability control leads to uneven tire wear as the system cannot correct for minor slips. (Added cost: $50-$150 in accelerated tire wear.)
- Long Term (6+ months): The primary long-term cost is the ongoing safety risk. The disabled safety systems represent a significant liability in an emergency. (Added cost: Negligible direct financial cost, but significant ongoing safety risk.)
Diagnosis Steps

- Identify Manufacturer & Read All Codes
Determine your vehicle's manufacturer to isolate the system (Toyota/Lexus = Acceleration Sensor; Honda = Steering Torque Sensor). Use an OBD-II scanner to read all Chassis (C-prefix) and Network (U-prefix) codes. On Toyota/Lexus, look for U0123 or U0124. On Honda, look for C1422 or C0051.
Tools: Advanced OBD-II Scanner (Beginner) - Inspect Steering Rack Wiring (Honda)
Safely raise the front of the vehicle and thoroughly inspect the wiring harness going to the electric power steering rack. Look for chewed wires from rodents, corrosion on connectors, or chafing against chassis components.
Tools: Jack, jack stands, flashlight (Intermediate) - Inspect Sensor Installation (Toyota/Lexus)
Visually inspect the Yaw Rate and Acceleration sensor located under the center console or front seat. Ensure it sits perfectly flat, is free of debris underneath, and the mounting bolts are tightened to the specified torque (typically 5-7 ft-lbs).
Tools: Socket set, trim removal tools (Intermediate) - Analyze Sensor Live Data
Using a scan tool, monitor the sensor outputs. For Honda, observe the 'Main Torque' and 'Sub Torque' voltages. At rest, they should be ~2.5V. When turning the wheel, one voltage must rise while the other falls. For Toyota, the 'Acceleration Sensor' PID must read near 0 G when stationary on a level surface.
Tools: Advanced OBD-II scan tool with live data (Advanced) - Test Sensor Circuit Voltage and Ground
Back-probe the sensor connector with a multimeter. Verify a 5V reference, a solid ground (less than 100mV), and battery voltage on the power wire. A loss of power, ground, or reference voltage points to a wiring or ECU issue, not a failed sensor.
Tools: Multimeter, wiring diagram (Advanced) - Perform a Zero Point Calibration
Use a professional-grade scan tool to perform the zero point calibration for the yaw rate sensor (Toyota/Lexus) or torque sensors (Honda). This resets the sensor's baseline on a level surface and is mandatory after replacing parts or performing suspension work.
Tools: Professional scan tool or jumper wire (Advanced) - Perform a CAN Bus Health Check
If communication codes like U0123/U0124 are present, check the CAN bus health. With the battery disconnected, measure resistance between Pin 6 and Pin 14 on the OBD-II port. A reading of 60 ohms indicates intact wiring; 120 ohms suggests a broken wire or offline module.
Tools: Multimeter (Professional)
When This Code Triggers (Freeze-Frame Conditions)
- Vehicle State (Toyota): Stationary (The VSC ECU runs a self-test when stopped. A persistent difference between the sensor's internal circuits triggers the code.)
- Vehicle State (Honda): Ignition ON, steering wheel turned (The EPS module monitors torque sensors after ignition ON. The code sets immediately if signals do not correlate when the wheel is turned.)
- Torque Sensor Voltage (Honda): One signal at 0V or both not opposing (During a turn, one sensor's voltage rises from ~2.5V and the other falls. If one is stuck at 0V or they don't oppose, the code triggers.)
- System Voltage: 9-14V (The code sets reliably when the battery provides normal operating voltage. Low voltage during startup sets false codes.)
Related Codes
- C1420 vs. C1422 (Honda) — C1420 indicates conflicting data between the main and sub torque sensors. C1422 points specifically to a dead 'sub' torque sensor circuit, strongly suggesting a wiring break or internal sensor failure.
- C1420 vs. U0123 / U0124 (Toyota/Lexus) — C1420 means the ECU receives irrational data from the yaw sensor. U0123/U0124 indicate a total loss of communication, pointing to a wiring problem (power, ground, CAN bus) or a completely dead sensor.
- C1420 vs. C0051-54 (Honda) — C1420 relates to the steering torque sensor measuring driver effort. C0051 relates to the steering angle sensor measuring rotational position. If C0051-54 is present, perform the steering angle sensor calibration first.
- C1420 vs. C1282 / C1283 (Hyundai) — These codes are functionally equivalent to Toyota's C1420, indicating a yaw rate sensor signal fault. This cross-manufacturer comparison highlights how critical a functioning yaw sensor is to vehicle safety.
Climate & Environmental Factors

- Cold Weather / Seasonal Changes: Rodents seek shelter in warm engine bays during colder months, increasing the risk of them chewing on the soy-based wiring insulation used in Honda steering racks.
- Humidity / Water Exposure: High humidity, clogged sunroof drains, or liquid spills inside the cabin lead to moisture intrusion in the yaw rate sensor (located under the center console in Toyota/Lexus models), causing corrosion and failure.
- Ambient Temperature During Repair (Honda): When performing a torque sensor neutral position reset on many Honda models, the ambient engine bay temperature must be above 68°F (20°C), or the relearn cycle fails to complete.
How to Talk to a Mechanic About This Code
Say this: "I have a C1420 code on my [Toyota/Lexus/Honda]. For a Toyota/Lexus: 'Please check if a zero-point calibration is needed before quoting a new yaw sensor, as the light appeared after a recent alignment.' For a Honda: 'Before quoting a steering rack replacement, please perform a detailed inspection of the wiring harness for any signs of rodent damage.'"
This language signals that you have researched the specific failure modes for your vehicle. It directs the technician to check the most common and least expensive fixes first, saving you diagnostic time and money.
Avoid saying:
- 'Just fix whatever's wrong'
- 'My check engine light is on, can you look at it?'
- 'Whatever you recommend'
Questions to ask before authorizing the repair:
- For Toyota/Lexus: Did you view the live sensor data? Is the acceleration sensor reading off-zero while the car is stationary?
- For Toyota/Lexus: If the sensor is replaced, does the quote include the mandatory zero-point calibration?
- For Honda: Did you find physical damage to the wiring? Can it be repaired instead of replacing the whole rack?
- For Honda: If no wiring damage is found, what did the live data for the main and sub torque sensors show when the wheel was turned?
- What is the warranty on the parts and labor for this repair?
Where to Take It: Dealer vs Independent vs Chain
- Dealer:
Best for: Vehicles under warranty (basic, extended, or CPO), Newer models (2020+) where independent shops lack updated tools, Confirming eligibility for TSBs (like Honda's 'sticky steering' TSB 23-037)
Downsides: Highest labor rates, Less willing to perform a wiring repair on a Honda, preferring to replace the entire steering rack (Typical cost: +50% vs. baseline) - Independent Shop:
Best overall fit for out-of-warranty vehicles, provided you find a reputable shop specializing in your car's brand. Their familiarity with common issues saves you money.
Best for: Out-of-warranty vehicles where cost is a major factor, Shops specializing in Toyota/Lexus or Honda, Getting a wiring harness repaired on a Honda
Downsides: Quality and expertise vary greatly, Must confirm they have a professional scan tool capable of performing the zero-point calibration (Typical cost: +0% vs. baseline) - Chain Shop:
Avoid for this repair. They are not equipped for the diagnostic complexity or calibration procedures required. There is a high risk of misdiagnosis.
Best for: Reading the initial code for free
Downsides: Technicians lack specialized training for complex chassis codes., Unlikely to have the manufacturer-specific software to perform zero-point calibration., High pressure to upsell common services like alignments, which will not fix this code. (Typical cost: -10% vs. baseline)
When to Walk Away From the Repair
If the estimated repair cost exceeds 50% of the car's private-party value, seriously consider selling or trading it in instead of repairing it.
- Car worth $8000, fix is $450: Fix it. A wiring repair on a Honda is a small fraction of the car's value.
- Car worth $6000, fix is $950: Fix it. A yaw sensor replacement on a Toyota/Lexus is well below the threshold.
- Car worth $5000, fix is $2500: Borderline. A full steering rack replacement on a Honda is 50% of the vehicle's value. Get a second opinion to ensure a wiring repair isn't possible.
- Car worth $3000, fix is $1400: Walk away. The repair cost is nearly 50% of the car's value. It is not a sound investment on an older vehicle.
What Scan Tool You Need for This Code
Minimum: A scanner that reads and clears ABS/VSC/EPS (Chassis) codes and displays live sensor data for those systems.
A basic $20 code reader only checks for engine codes (P-prefix) and won't see chassis codes like C1420. To diagnose this issue, you must see live data from the specific sensor to confirm its failure. For a complete DIY repair, the tool must perform the 'zero point calibration' service function.
Budget: Innova 1000 / BlueDriver Pro (~$100) — Reads and clears ABS/SRS/VSC codes and displays live data, allowing you to see the sensor readings. Sufficient for diagnosis but cannot perform the final zero-point calibration.
Mid-range: Foxwell NT510 Elite / Innova 5610 (~$180) — Bidirectional scanners that offer manufacturer-specific functions. They read live data and perform the necessary 'zero point calibration' or 'steering angle sensor' relearn procedures, allowing for a complete DIY repair.
Professional: Autel MaxiCOM MK808 / Launch Creader Elite (~$450-800) — Provides full, dealer-level diagnostics. Performs all necessary calibrations, active tests, and accesses all vehicle modules.
Rent vs buy: Auto parts store rental tools are basic code readers and will NOT work for this job. For a one-time fix, paying a shop 0.5-1.0 hour of labor for diagnosis and calibration is more cost-effective than buying a mid-range scanner.
How to Clear the Code After You Fix It
- Reconnect battery if disconnected for repair.
- Use an OBD-II scan tool to clear the Chassis (C) trouble codes.
- Perform Zero Point Calibration if a sensor or steering/suspension component was replaced.
- Perform the specific drive cycle to confirm the fix.
Drive cycle (~20 minutes): For Toyota/Lexus VSC, a short drive on a level surface including a few turns is sufficient. For Honda EPS, turn the ignition off and on, then turn the steering wheel lock-to-lock several times to confirm the fix.
Readiness monitors affected: This is a Chassis code, which does not directly affect emissions readiness monitors., Clearing C-codes with some scan tools clears all codes, resetting emissions monitors.
Before emissions retest: drive at least 50 miles to fully set monitors.
Watch out for:
- Forgetting to perform the mandatory Zero Point Calibration causes the code to return immediately.
- Clearing the code without fixing the underlying issue results in the code returning quickly.
- Assuming a generic drive cycle is enough; Honda systems require turning the wheel lock-to-lock to verify the repair.
Will This Fail Emissions / State Inspection?
No — by itself this code doesn't fail OBD inspection (but it can keep readiness monitors from setting, which causes a separate fail).
- California: An illuminated ABS or stability control light is not an automatic failure for the smog check, but the vehicle fails a separate safety inspection.
- New York: An illuminated ABS warning light is grounds for failure of the annual safety inspection.
- Texas: The annual safety inspection includes checking for an illuminated ABS warning light. If the light is on, the vehicle fails.
Most Commonly Affected Vehicles
- Toyota 4Runner (2003-2010) — Prone to yaw rate and acceleration sensor failures. Part numbers differ between early and later models; verify the correct part for your specific year.
- Toyota Corolla (2009-2013) — Commonly experiences C1420 due to acceleration sensor malfunction. Do not confuse this electronic fault with the mechanical steering clunk common to this generation.
- Lexus LS460 (2009-2017) — Yaw rate sensor failure is a known issue. AWD and RWD models use different sensor part numbers.
- Honda Civic (2016-2022) — Highly susceptible to C1420 from rodent-damaged steering torque sensor wiring. 🎬 Watch: Diagnosing Honda Civic power steering codes and wiring issues. Honda TSB 23-037 also addresses 'sticky steering' on 2022-2023 models.
- Lexus IS250 / IS350 (2006-2015) — These models frequently have issues with the yaw rate sensor, which is located under the passenger seat, making it vulnerable to damage from spills or water leaks.
- Hyundai Elantra (2011-2012) — Subject to a major safety recall (NHTSA #15V-871) for an identical issue setting codes C1282/C1283. The fault involves an erratic yaw sensor signal causing unintended braking.
- Nissan Pathfinder (2005-2012) — Known to have issues with wheel speed or camshaft sensors that cause VDC/SLIP lights to illuminate, mimicking stability system failure symptoms.
- Subaru Outback (2010-2014) — Experiences failures of the steering angle sensor (setting code C0071), which is integral to the VDC stability control system and requires calibration after replacement.
Manufacturer-Specific Notes
- Toyota/Lexus: Toyota issued TSB BR001-04 highlighting that a common cause of VSC lights after service is not a failed part, but the failure to perform a zero point calibration after replacing a sensor or performing suspension work.
- Honda: Rodents are notoriously attracted to the soy-based wiring insulation used in the steering torque sensor harness. Thoroughly inspect the wiring for chew marks before condemning the expensive steering rack.
- Toyota/Lexus: The floor-mounted location of the yaw rate sensor makes it highly vulnerable to water damage from spilled drinks or leaking sunroof drains. Corrosion on the connector pins is a common cause of failure.
Real Owner Stories
2018 Honda Civic - The Rodent Story
The owner of a nearly new Civic found all dashboard lights illuminated and experienced a total loss of power steering.
Outcome: The dealer diagnosed rodent damage to the wiring harness. The repair was covered by comprehensive insurance after a $300 deductible, avoiding a full steering rack replacement.
Lesson: On modern Hondas, rodent damage is a frequent cause of C1420. Thoroughly inspect wiring before assuming a major component failure, and consider preventive measures like capsaicin-laced tape.
2009 Lexus IS250 - The Easy Fix
VSC and ABS lights appeared immediately after the owner had new tires installed and a wheel alignment performed at a national tire chain.
Outcome: An independent shop specializing in Toyota/Lexus confirmed no parts had failed. They performed a zero point calibration using a scan tool for $75. The lights went off and stayed off.
Lesson: If code C1420 appears immediately after suspension or alignment work, the cause is a missed zero point calibration. Do not replace the expensive yaw rate sensor until this procedure is completed.
How to Prevent This Code From Triggering
- Apply Rodent-Deterrent Tape to Wiring (Honda) (Once, or after any wiring repair) — Honda sells a special electrical tape (Part # 4019-2317) treated with capsaicin. Rodents are repelled by the spicy taste, preventing them from chewing on the soy-based wire insulation.
- Clean Sunroof Drains Annually (Toyota/Lexus) (Once per year, especially if parked under trees) — Clogged sunroof drains cause water to overflow and leak into the cabin, dripping onto the floor-mounted yaw rate sensor and causing corrosion and failure.
- Insist on Zero Point Calibration After Service (After any alignment or suspension work) — Preventing a false C1420 code on a Toyota/Lexus is as simple as ensuring your mechanic performs the zero point calibration after any service that changes the vehicle's ride height or steering angle.
- Practice Smart Parking (Daily habit) — Rodents are less likely to approach vehicles parked in open, well-lit areas away from vegetation or trash cans. Parking in a sealed garage is the most effective prevention.
Frequently Asked Questions
What is a Yaw Rate and Acceleration Sensor?
It is a small electronic device that tells the car's computer how much it is turning (yaw) and how quickly it is accelerating or decelerating (G-force). This information is critical for the Vehicle Stability Control (VSC) and ABS to work correctly, helping to prevent skids by applying individual brakes.
What is a Steering Torque Sensor?
This sensor measures how much force, and in which direction, you apply to the steering wheel. It tells the Electric Power Steering (EPS) motor how much assistance to provide, making steering feel easy and natural. It uses two internal sensors for redundancy and to verify the accuracy of the input.
What are common misdiagnosis pitfalls for C1420?
For Toyota/Lexus, a common mistake is replacing the sensor without first checking for improper installation or failing to perform the required 'zero point calibration' afterward. For Honda, the biggest pitfall is replacing the entire expensive steering rack without first thoroughly inspecting the wiring harness for common rodent damage. Failing to check for a weak battery first causes unnecessary repairs, as low voltage triggers false codes.
Can a bad alignment cause code C1420?
A bad alignment itself does not directly cause code C1420. However, an alignment is often performed after suspension work, during which the yaw rate sensor might be disturbed. If the steering wheel is not centered after an alignment, it causes other stability control codes, but typically not C1420.
My mechanic says the zero point calibration requires a special tool, but I saw a jumper wire method online. Does that work?
For some older Toyota and Lexus models, a manual zero point calibration is performed by jumping specific pins in the OBD-II port and following a precise sequence. However, newer models and all Honda vehicles require a compatible professional scan tool to perform the calibration. Attempting the wrong procedure or jumping the wrong pins causes permanent damage to the vehicle's electronics.
Can I replace the sensor myself?
For Toyota/Lexus, if the sensor is accessible under the center console, a DIY replacement is possible for someone with intermediate skills. However, it requires a 'zero point calibration' afterward using a bidirectional scan tool. For Honda, the sensor is integrated into the steering rack, requiring significant mechanical work and a subsequent wheel alignment, making it a professional-only job.
Is this repair covered by an extended warranty?
Yes, a failed yaw rate sensor or steering rack is a mechanical breakdown covered by most comprehensive extended warranties. If you have a Vehicle Service Agreement (VSA) from Toyota or a third party, this repair is covered subject to your deductible. Components of the Toyota Safety Sense system are also covered under the basic 3-year/36,000-mile warranty.
Will clearing the code fix the problem?
No, clearing the code only turns off the warning light temporarily. The underlying physical or electronic problem still exists. The code returns as soon as the computer runs its self-check and detects the same fault.
Key Takeaways
- Code C1420 indicates a failed yaw rate sensor on Toyota/Lexus vehicles, but points to a steering torque sensor failure on Hondas.
- Never replace a Toyota or Lexus yaw sensor without first performing a zero-point calibration, which costs $60-$180 and often permanently clears the code.
- On Honda Civics, inspect the steering rack wiring harness for rodent damage before authorizing a $1,000+ steering rack replacement.
- Driving a Honda with C1420 disables power steering, requiring immense physical effort to turn the wheel and making emergency maneuvers highly dangerous.
- A bidirectional OBD-II scanner costing $150-$200 is required to perform the mandatory sensor calibrations after replacing parts for this code.
Helpful Videos


The information in this article is provided for general reference and educational purposes only. Vehicle specifications, procedures, and part compatibility can vary by production date, trim level, and region. Always consult your vehicle's factory service manual and verify part numbers before purchasing or performing repairs. Safety-critical components such as airbags, seat belts, and braking systems should be installed by a qualified professional.
- 🎬 Helpful Videos
- What Does C1420 Mean?
- Can I Drive With C1420?
- Common Causes
- Symptoms
- Common Fixes & Costs
- Used vs. New Parts: Buying Guide
- What Happens If You Wait — Timeline
- Cost of Not Fixing It
- Diagnosis Steps
- When This Code Triggers (Freeze-Frame Conditions)
- Related Codes
- Climate & Environmental Factors
- How to Talk to a Mechanic About This Code
- Where to Take It: Dealer vs Independent vs Chain
- When to Walk Away From the Repair
- What Scan Tool You Need for This Code
- How to Clear the Code After You Fix It
- Will This Fail Emissions / State Inspection?
- Most Commonly Affected Vehicles
- Manufacturer-Specific Notes
- Real Owner Stories
- 2018 Honda Civic - The Rodent Story
- 2009 Lexus IS250 - The Easy Fix
- How to Prevent This Code From Triggering
- Frequently Asked Questions
- What is a Yaw Rate and Acceleration Sensor?
- What is a Steering Torque Sensor?
- What are common misdiagnosis pitfalls for C1420?
- Can a bad alignment cause code C1420?
- My mechanic says the zero point calibration requires a special tool, but I saw a jumper wire method online. Does that work?
- Can I replace the sensor myself?
- Is this repair covered by an extended warranty?
- Will clearing the code fix the problem?
- Key Takeaways
- 🎟️ Get 5% Off