

C1391 on 2012-2016 Toyota Prius C: Brake Booster & Actuator Leak Causes and Fixes
Code C1391 on a 2012-2016 Prius C almost always means the brake booster and master cylinder assembly is failing due to an internal leak. This is a well-documented, common failure. The only reliable fix is to replace the entire brake booster/actuator and pump assembly. This is a critical safety repair costing approximately $2,100-$3,600 at a professional shop.
- C1391 on a Prius C is a critical safety code indicating a failure in the brake booster system.
- The cause is almost always an internal leak in the brake booster/master cylinder assembly, a known issue for this vehicle.
- Symptoms include a triad of dashboard warning lights (BRAKE, ABS, TRAC) and a frequently cycling pump noise from the engine bay.
- The correct repair is to replace the brake booster assembly and often the pump, a costly job that requires specialized tools for bleeding and calibration.
- This is not a DIY-friendly repair due to the safety-critical nature of the brake system and the need for electronic calibration.
What's Unique About the 2012-2016 Toyota PRIUS C

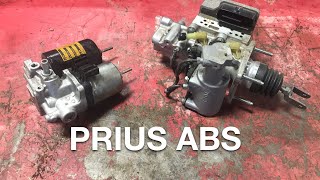
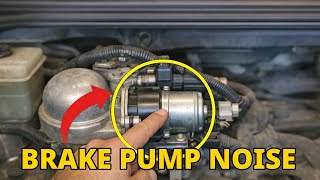
The Prius C, like other Toyota hybrids, uses a sophisticated brake-by-wire system. Unlike conventional cars that use engine vacuum for power assist, the Prius uses an electric pump to pressurize an accumulator. This entire system—booster, pump, master cylinder, and control module (actuator)—is integrated. The internal seals within this actuator assembly are a known failure point that degrade over time, leading directly to code C1391. 🎬 Watch: Hear the specific buzzing noise caused by internal leaks. Toyota has acknowledged this issue through multiple Technical Service Bulletins (TSBs) and even a Customer Support Program, highlighting its prevalence.
Diagnostic Flowchart

Tap your situation to follow the diagnostic path that matches what you're seeing on this vehicle.
Symptoms You May Notice

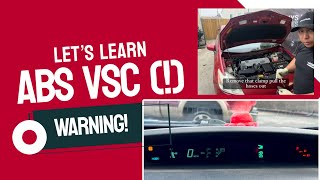
- Multiple warning lights on the dashboard, including BRAKE, ABS, and Traction Control (skid light).
- A "Check VSC" message may appear on the multi-function display.
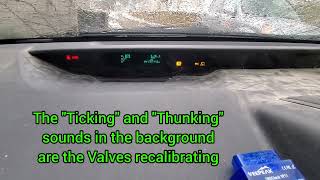
- A buzzing or whirring noise from the engine bay (the brake pump) that cycles on and off every few seconds, even when not applying the brakes. This is the most definitive symptom.
- A soft, spongy, or less responsive brake pedal.
- Increased effort required to stop the vehicle, as the power assist is failing.
- Loss of regenerative braking capability.
- Replacing only the brake master cylinder
- Replacing only the brake booster pump
- Assuming a low brake fluid level is the cause without checking for codes. The fluid level typically remains normal with this internal leak.
- Mistaking the issue for a faulty brake fluid level sensor.
Most Likely Causes

- Internal Leak in Brake Booster / Actuator Assembly 🔴 High Probability As documented in multiple Toyota TSBs (e.g., T-SB-0028-21, T-SB-0024-19), the internal seals within the brake booster actuator assembly are known to degrade over time, causing a small, internal brake fluid leak that leads to a loss of stored pressure. This is a widespread, recognized defect across many Toyota hybrid models.
How to confirm: The presence of code C1391, often accompanied by C1252, C1253, or C1256, is the primary confirmation. A mechanic can use a stethoscope to listen for a hissing sound from the actuator assembly between pump cycles, indicating a leak. The most telling symptom is the brake pump running every 5-20 seconds with the car in the 'Ready' state and the brake pedal not being pressed. Using a scan tool like Techstream, a technician can monitor the accumulator pressure sensor voltage; a rapid drop with the pump off confirms the leak.
Typical fix: Replace the entire brake booster and master cylinder assembly (actuator) and the brake booster pump assembly. The two components are replaced together as per Toyota's repair procedures. The system must then be bled and calibrated using a Toyota-specific scan tool like Techstream.
Est. part cost: $1500-$2200
Rare But Worth Checking
- Failing Brake Booster Pump Motor: While less common than the internal leak, the electric motor that drives the pump can fail. However, this typically presents with different codes related to pump motor performance (like C1252) rather than an accumulator leak, though they often appear together as the pump is overworked.
- ABS Control Module Electrical Fault: In very rare cases, a fault within the ABS control module's electronics could incorrectly interpret sensor data. However, the mechanical symptoms like the pump running constantly usually point away from a purely electrical issue.
Diagnosis Steps
- Connect a professional OBD-II scanner capable of reading Toyota-specific chassis codes (e.g., Toyota Techstream).
- Confirm the presence of C1391. Note any other codes like C1252, C1253, or C1256.
- Turn the vehicle to the 'Ready' state without pressing the brake pedal.
- Listen for the brake booster pump under the hood. If it runs for a few seconds, stops, and then repeats the cycle every 5-20 seconds, this is a strong indicator of a pressure leak.
- Check the brake fluid level. While the leak is internal, it's a standard check. The level is usually normal.
- Using a stethoscope on the brake actuator/booster assembly, listen for a faint hissing sound between pump cycles. This can help pinpoint the internal leak.
- Using a scan tool like Techstream, monitor the live data for 'Accumulator Pressure Sensor'. A rapid drop in pressure when the pump is not running confirms the leak. The normal voltage reading with the pump off should be stable between 3.2 and 4.0 V.
- Given the overwhelming evidence from TSBs and owner experiences, if C1391 is present with the audible pump cycling, the diagnosis is almost certainly a failed brake booster/master cylinder assembly.
Parts You'll Likely Need
- Brake Booster and Master Cylinder Assembly
(OEM #47050-52311, 47050-52240, 47050-52220 (Verify by VIN). Also sold as kits 04000-23152, 04000-23252, 04000-23352, 04000-23452.)— This is the core component that fails internally, causing the pressure leak that triggers code C1391. Toyota TSBs call for its replacement.
Trusted brands: Toyota (OEM)
OEM price range: $1000-$1500
Aftermarket price range: Not Recommended - Brake Booster Pump Assembly
(OEM #47070-52020 (Verify by VIN). Also sold as kit 04006-74152.)— Always replaced along with the booster/master cylinder assembly as a preventative measure and per Toyota's official repair procedure. It has been overworked due to the leak and may fail soon after.
Trusted brands: Toyota (OEM)
OEM price range: $700-$900
Aftermarket price range: Not Recommended
Related Codes That Often Appear With This One
- C1252 — Hydro-Booster Pump Motor Fault. This code often appears with C1391 as the pump motor is over-worked from trying to compensate for the accumulator leak.
- C1253 — Hydro-Booster Pump Motor Relay Fault. Similar to C1252, this indicates a problem in the pump's electrical circuit, often triggered by the same root cause of the pump running constantly.
- C1256 — Low Pressure in Accumulator. This code is very similar to C1391 and directly points to the same failure of the system to hold hydraulic pressure.
Technical Service Bulletins (TSBs) & Recalls
- T-SB-0028-21: Specifically addresses C1391 on 2012-2014 Prius C models due to an internal brake fluid leak in the booster assembly.
- T-SB-0024-19: Covers other Prius models but describes the identical failure mode and codes (C1391, C1252, etc.) caused by an internal leak.
- 24TE01: General bulletin mentioning C1391 as verification for internal brake booster malfunctions.
- TSB000824: Notes that C1391 and related codes may be caused by a small internal brake fluid leak.
- T-SB-0079-18: An earlier TSB for 2010 Prius models describing the same issue, showing the long history of this failure mode.
Platform-Specific Known Issues
- Toyota issued multiple Technical Service Bulletins (TSBs) for this exact issue, including T-SB-0028-21 which specifically covers the 2012-2014 Prius C.
- Toyota also initiated Customer Support Programs (like ZJB, 20TE07, 21TE01, 23TE07) to extend warranty coverage for this specific failure. These programs typically had a primary coverage period and a secondary coverage of 10 years or 150,000 miles from the date of first use. Most have now expired for the 2012-2016 model years based on time.
- Owner complaints frequently mention the sudden onset of warning lights and the high cost of repair, with dealer quotes often ranging from $2,800 to over $4,000.
- The repair requires specialized software (Toyota Techstream) to perform the brake bleeding and calibration procedures correctly, making a DIY repair extremely difficult and risky.
Mechanic-Grade Diagnostic Values
- Accumulator Pressure Sensor Voltage (ACC PRESS SENS 1) — expected: 3.2 to 4.0 V with pump motor stopped and system pressurized.. Failure: Voltage drops rapidly without brake application, indicating a leak.
- Skid Control ECU Power Supply (+BS, +BM pins) — expected: 11 to 14 V at all times.. Failure: Voltage below 11V indicates a power supply issue to the module.
- Skid Control ECU Ground (GND1, GND2 pins) — expected: Below 1 Ω resistance to body ground.. Failure: High resistance indicates a bad ground connection, which can cause erratic behavior.
- CAN Bus Resistance at Skid Control ECU connector — expected: 54 to 69 Ω between CANH and CANL pins with ignition off.. Failure: Resistance outside this range indicates a problem on the CAN communication bus.
Hidden / Shadow Codes Worth Checking
- 591: This is a detailed sub-code for C1391, specifically indicating 'Accumulation performance is deteriorated'. It confirms the issue is with the actuator's ability to hold pressure, not an external leak. (see via Toyota Techstream or an equivalent advanced diagnostic scanner in the detailed DTC data screen.)
Scan Tool Commands That Help
- Toyota Techstream: Chassis / ABS/VSC/TRC / Utility / Reset Memory — This function is required to clear stored calibration data for the linear solenoid valve before installing a new brake actuator assembly.
- Toyota Techstream: Chassis / ABS/VSC/TRAC / Utility / ECB Utility / Linear Valve Offset — This performs the initialization and calibration of the new linear solenoid valves within the actuator. It must be done after replacement. Failure to perform this step will result in a non-functional brake system and code C1345.
- Toyota Techstream: Chassis / ABS/VSC/TRC / Air Bleeding — This is the mandatory, electronically controlled procedure for bleeding the brake system after replacing the actuator or pump. It has specific modes like 'Usual air bleeding' or 'ABS actuator has been replaced' that must be followed precisely.
- Toyota Techstream: Chassis / ABS/VSC/TRAC / Utility / Zero Point Calibration — After the actuator replacement and linear valve calibration, the yaw rate and acceleration sensor must also be calibrated to ensure VSC (Vehicle Stability Control) functions correctly.
- Toyota Techstream: Chassis / ABS/VSC/TRC / Utility / Zero Down — This is a safety procedure used *before* starting the repair to safely depressurize the accumulator, preventing high-pressure fluid spray when disconnecting lines.
Wiring & Ground Locations
- Skid Control ECU (Brake Actuator Assembly) — Located in the left rear of the engine compartment, under the inverter assembly.. This is the central component. Its connector (often designated A19, A78, or similar) is where power, ground, and CAN bus signals must be verified.
- GND1 / GND2 Pins — On the Skid Control ECU connector (e.g., pins 13 & 26 or 1 & 32 depending on the specific diagram). These ground to the chassis nearby.. A poor ground connection can cause a variety of electrical faults within the ABS module, though it is a much rarer cause for C1391 than the mechanical failure of the actuator itself.
- +BS / +BM / IG1 Pins — On the Skid Control ECU connector (e.g., pins 1, 14, 20 or 46 depending on the diagram).. These are the primary power supply pins for the module. Loss of voltage here would cause a complete loss of function, not just a leak code, but they are critical checkpoints in a no-communication scenario.
Real Owner Repair Stories
- Reddit user on r/prius (2009 Toyota Prius) — VSC, BRAKE, and ABS lights came on simultaneously. Extremely hard brake pedal with near-total loss of braking. Brake actuator motor was completely silent after the lights appeared.
❌ Tried (didn't work) Swapping the brake relay in the engine bay fuse box.
✅ What actually fixed it The primary cause was a failed brake actuator, but this failure caused a secondary problem: a blown main fusible link in the engine bay fuse box. The final fix required replacing both the brake actuator assembly AND the fusible link. The user notes that the actuator had likely been failing for a year (constantly running) and eventually drew too much current, blowing the fuse. - PriusChat user (2010 Toyota Prius) — ABS, VSC, and BRAKE lights on with code C1391.
✅ What actually fixed it The user confirmed their vehicle was eligible for Toyota's Customer Support Program (ZJB) for the brake actuator failure. The Toyota dealer replaced the brake booster and inverter free of charge under the extended warranty program. - PriusChat user (Year not specified, Gen 2 Prius) — Codes C1345 (Linear Solenoid Valve Offset Learning Undone) & C1368 after replacing the actuator.
❌ Tried (didn't work) Attempting the Linear Solenoid Valve Calibration with Techstream, which repeatedly failed.
✅ What actually fixed it The calibration failure was caused by the 12V auxiliary battery voltage dropping too low during the procedure. The fix was to connect a jumper battery from another running car to maintain a stable voltage (13.75V) during the calibration, which then completed successfully.
OEM Part Supersession History
47050-52220→47050-52240, then 47050-52311— Part revisions and improvements by the manufacturer to address the internal leak failure mode.
Heads up: Always verify the correct part number with the vehicle's VIN. While the parts are generally interchangeable within the generation, using the latest revision is highly recommended.
Model Year Variations Within This Range
- 2015-2016: Models from May 2015 onward are specified to use brake actuator part number 47050-52311 from the factory. Earlier models (2012-2015) may have been built with previous part numbers (e.g., 47050-52220, 47050-52240) but the current replacement for all years is typically the latest revision.
Helpful Videos
We Have This Part in Stock


The information in this article is provided for general reference and educational purposes only. Vehicle specifications, procedures, and part compatibility can vary by production date, trim level, and region. Always consult your vehicle's factory service manual and verify part numbers before purchasing or performing repairs. Safety-critical components such as airbags, seat belts, and braking systems should be installed by a qualified professional.
- Toyota PRIUS C:
- 🎬 Helpful Videos
- 🛍️ Shop This Part
- What's Unique About the 2012-2016 Toyota PRIUS C
- Diagnostic Flowchart
- Symptoms You May Notice
- Most Likely Causes
- Rare But Worth Checking
- Diagnosis Steps
- Parts You'll Likely Need
- Related Codes That Often Appear With This One
- Technical Service Bulletins (TSBs) & Recalls
- Platform-Specific Known Issues
- Mechanic-Grade Diagnostic Values
- Hidden / Shadow Codes Worth Checking
- Scan Tool Commands That Help
- Wiring & Ground Locations
- Real Owner Repair Stories
- OEM Part Supersession History
- Model Year Variations Within This Range
- 🎟️ Get 5% Off