

C1391 on 2011-2015 Lexus CT HYBRID: Brake Actuator Leak Causes and Fixes
Code C1391 on a 2011-2015 Lexus CT200h indicates an internal leak in the brake booster and actuator assembly. This is a critical safety failure requiring immediate attention. The only reliable fix is a complete replacement of the integrated brake booster, master cylinder, and pump assembly. This is a very expensive repair, often costing between $2,500 and $4,300 at a shop, though some independent shops may perform the repair for less.
- Code C1391 on a 2011-2015 Lexus CT200h is a critical safety alert that means the brake actuator assembly is failing due to an internal leak.
- Do not drive the vehicle. There is a significant risk of reduced braking power or outright brake failure.
- The only correct repair is to replace the entire brake booster and actuator assembly, which is a very costly part.
- This is a widely recognized failure for this platform, and Lexus previously offered a warranty extension (Customer Support Program 21LE01) which has likely expired for most vehicles.
- Due to the safety-critical nature and the need for specialized bleeding procedures, this repair should be performed by a qualified professional service.
- Listen for a frequent buzzing sound from the engine bay when the car is on; this is the most common symptom confirming the issue.
What's Unique About the 2011-2015 Lexus CT HYBRID

The Lexus CT200h uses a sophisticated electro-hydraulic braking system (ECB), not a traditional vacuum brake booster. This system relies on an electric pump and an accumulator to provide braking power. While efficient, the integrated brake actuator assembly on this platform is known to develop internal seal failures over time. This specific failure mode is the direct cause for code C1391 and is so common that Lexus issued Customer Support Programs (CSPs) to address it for all model years from 2011-2017.
Diagnostic Flowchart
Tap your situation to follow the diagnostic path that matches what you're seeing on this vehicle.
Symptoms You May Notice

- Multiple warning lights on the dashboard, including 'Brake', 'ABS', and 'TRAC'. [L-SB-0009-21]
- A 'Check VSC' message displayed. [LSB000824]
- A frequent, repetitive buzzing or humming noise from the engine bay (under the hood, driver's side). This is the brake pump running every few seconds to compensate for the pressure loss. A normal system holds pressure for hours.
- A soft, spongy, or unresponsive brake pedal that may suddenly feel different during a stop.
- Increased stopping distance required to slow the vehicle.
- In some cases, a hissing sound can be heard from the actuator assembly immediately after the pump stops running, which is the sound of the pressure leaking internally.
- Replacing only the brake accumulator or pump motor
- Replacing individual wheel speed sensors
- Attempting to fix the issue by simply bleeding the brakes without replacing the faulty unit
- Mistaking the warning lights for a simple worn brake pad issue.
Most Likely Causes

- Internal Failure of the Brake Booster and Actuator Assembly 🔴 High Probability As documented in Lexus TSBs L-SB-0009-21 and LSB000824, the internal seals inside the actuator assembly are prone to failure. This causes a small internal brake fluid leak that prevents the accumulator from holding pressure. This is a known design flaw affecting numerous 🎬 Watch a detailed walkthrough of the booster replacement on this platform. Toyota and Lexus hybrid models from this era.
How to confirm: The presence of code C1391, especially when accompanied by codes C1252, C1253, or C1256, is a strong confirmation. The most definitive symptom is listening for the pump cycling on and off every 5-30 seconds at idle. A mechanic can use a scan tool like Toyota Techstream to monitor the 'Accumulator Pressure Sensor' live data; a rapid pressure drop confirms the internal leak. A functional system should show a pressure sensor voltage between 3.2-4.0V when charged.
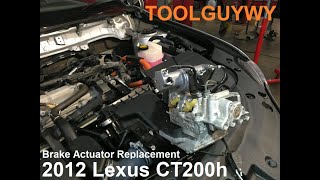
Typical fix: The entire brake booster and master cylinder pump assembly must be replaced as a single unit. 🎬 Watch this step-by-step guide on replacing the CT200h brake actuator. The system then requires a specialized, lengthy bleeding procedure using a diagnostic scan tool.
Est. part cost: $900-$2000
Rare But Worth Checking
- Brake Skid Control ECU Failure: While possible, this is far less common than the mechanical failure of the actuator assembly. A forum user on ClubLexus noted that if the actuator pressure sensor voltage is within the normal range (3.2-4.0V) but the code persists, the ECU could be the culprit. This should only be considered after the actuator has been thoroughly evaluated and external leaks have been ruled out.
- External Brake Fluid Leak: An external leak in a brake line or at a caliper could theoretically cause a loss of pressure. However, this is highly unlikely to be the cause of C1391 on this vehicle, as the leak is almost always internal to the actuator. An external leak would also be accompanied by a visible drop in the brake fluid reservoir level and potential fluid drips under the car, which are not characteristic of this specific code.
Diagnosis Steps

- Confirm the presence of C1391 and any related codes (C1252, C1253, C1256) using an OBD-II scanner capable of reading ABS/Chassis codes.
- Turn the vehicle to the 'ON' or 'READY' position without depressing the brake pedal. Listen for a buzzing/pumping noise from the driver's side of the engine compartment. If it cycles every 5-30 seconds, this is a classic sign of an accumulator pressure leak.
- While listening to the pump cycle, observe the brake fluid reservoir. You may see the fluid level dip slightly as the pump runs and then rise back up as the pressure leaks back into the reservoir. The overall level will not drop.
- Visually inspect all external brake lines and connections for any signs of fluid leaks to rule out a simple external issue, though this is rarely the cause.
- For advanced diagnosis, use a tool like Toyota Techstream to perform a 'Zero Down' test to depressurize the system and then monitor the 'Accumulator Pressure Sensor' live data. A rapid drop in voltage/pressure after the pump cycles off confirms the internal leak.
- Given the high probability of actuator failure on this model, the presence of the code and the audible pump cycling is usually sufficient for diagnosis.
Parts You'll Likely Need
- Brake Booster and Master Cylinder Pump Assembly
(OEM #47210-76121, 47210-76040, 47210-76100, 47210-76121)— This is the complete integrated unit that fails internally, causing the pressure leak. It is not serviceable and must be replaced as a whole assembly. The part number may vary by model year, but 47210-76121 is a commonly cited number for the assembly.
Trusted brands: Lexus (Genuine OEM), Aisin (OEM Manufacturer), Used/Salvage (e.g., from eBay)
OEM price range: $1200-$2200
Aftermarket price range: $800-$1500 (Used or Remanufactured)
Related Codes That Often Appear With This One
- C1252 — This code indicates a 'Brake Booster Pump Motor On Time Abnormally Long,' which is a direct result of the C1391 leak causing the pump to run constantly to try and build pressure.
- C1253 — This code points to a 'Brake Booster Pump Motor Relay Malfunction,' which can be triggered by the excessive cycling and electrical load caused by the pressure leak.
- C1256 — This code means 'Accumulator Low Pressure,' which is the direct condition that C1391 (the leak) causes. These codes are all listed together in Lexus TSBs as pointing to the same root cause.
Technical Service Bulletins (TSBs) & Recalls
- L-SB-0009-21: Notes that brake, ABS, and/or TRAC lights with codes C1391, C1252, C1256, or C1253 may be caused by a small internal brake fluid leak in the brake booster assembly.
- LSB000824: Re-confirms the same issue and associated DTCs, pointing to an internal brake fluid leak as the cause.
- Customer Support Program 21LE01: Details a warranty extension for this specific failure on 2011-2013 models, covering approximately 49,500 vehicles.
- Customer Support Program 24LE01: Details a warranty extension for the same failure on 2014-2017 models, covering approximately 43,800 vehicles.
Platform-Specific Known Issues
- Lexus acknowledged this widespread problem by issuing Customer Support Program (CSP) 21LE01 for 2011-2013 models. This program extended the warranty coverage for the brake booster and pump assembly. Primary coverage ended Nov 30, 2022, with secondary coverage for 10 years or 150,000 miles from the date of first use.
- Lexus later issued CSP 24LE01, extending similar coverage to 2014-2017 models. Its primary coverage runs until March 31, 2025, regardless of mileage, with a secondary coverage of 10 years/150,000 miles.
- Many owners have expressed frustration online after being denied coverage because their vehicle exceeded the 10-year time limit, even if it was well under the 150,000-mileage limit, leading to numerous NHTSA complaints.
- A Reddit user on r/CT200h reported a dealer quote of $4,300 for the repair, while another user in the same thread found an independent hybrid specialist who performed the job for $3,200. Another owner reported a $2,500 estimate.
Mechanic-Grade Diagnostic Values
- Accumulator Pressure Sensor 1 (ACC PRESS SENS 1) Voltage — expected: 3.2 to 4.0 V with the pump motor stopped and no braking applied.. Failure: A rapid voltage drop below 3.2V within 30 seconds of the pump stopping indicates a significant internal leak. The pump will cycle on when voltage drops to around 3.15V.
- Skid Control ECU Ground Resistance — expected: Below 1 Ω. Failure: Resistance above 1 Ω indicates a poor ground connection, which can cause erratic ECU behavior and false codes.
Hidden / Shadow Codes Worth Checking
- C1391 / INF 591: This detail code specifies that the 'Accumulation performance is deteriorated' due to improper sealing inside the actuator, a gas pressure drop inside the accumulator, or a leak in a pressure-boosting valve. (see via Toyota Techstream or a compatible high-level diagnostic scanner that can read manufacturer-specific detail codes.)
- C1391 / INF 351: This detail code specifies that the 'Accumulator pressure sensor input reduction rate exceeds the specification before braking and while the pump motor is not operating'. This directly confirms the accumulator's inability to hold pressure. (see via Toyota Techstream or an equivalent advanced, dealer-level scan tool.)
Scan Tool Commands That Help
- Toyota Techstream: Air Bleeding (Usual / Master Cylinder / Actuator) — This is a mandatory, multi-step procedure required after replacing the brake booster/actuator assembly. It electronically controls the pump and valves to properly purge all air from the new component. Failure to perform this step will result in a non-functional or dangerous brake system.
- Toyota Techstream: Zero Down — This utility is used to completely depressurize the accumulator. It is a necessary first step before performing certain diagnostic tests or manual bleeding procedures on the front brakes.
- Toyota Techstream: ECB Invalid — This function disables the electronically controlled braking system to allow for traditional, manual bleeding of the front brakes after the system has been depressurized using the 'Zero Down' command.
- Toyota Techstream: Reset Memory — Used to clear stored DTCs and calibration data after a repair is completed. The system will then require initialization and calibration of the linear solenoid valve.
Wiring & Ground Locations
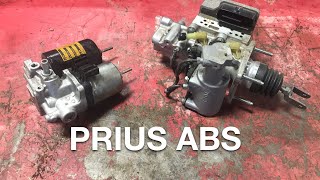
- Skid Control ECU w/ Actuator Assembly — Located in the engine compartment, on the driver's side, against the firewall.. This is the main component that fails. All relevant sensor inputs and pump motor controls are integrated into this assembly. Its connectors (A60) and grounds are critical for proper operation.
- Ground Points GND1, GND2 — These are the primary ground connections for the Skid Control ECU. On the main connector (A78/A79 on similar models), these are pins 13 and 26. A wiring diagram for the specific vehicle should be consulted to confirm pin locations. A general ground distribution diagram shows a ground point for the actuator assembly located at the right front of the engine compartment.. A poor or corroded ground connection can cause incorrect voltage readings from the pressure sensor or erratic operation of the ECU, potentially leading to a misdiagnosis. Verifying ground integrity (resistance below 1 Ω) is a key diagnostic step.
Real Owner Repair Stories
- PriusChat user 'FjDubs' (2012 Lexus CT200h) — Brake accumulator pump running every 3 seconds for 3 seconds at a time. Code C1391 present. No external fluid leaks.
❌ Tried (didn't work) Listening for a hissing sound with a stethoscope (none was heard)., Checking for external leaks (none found).
✅ What actually fixed it The user concluded that the brake booster assembly (actuator) needed to be replaced, as this is the most common failure point and contains the internal valves and sensors. The outcome of the replacement was confirmed as the correct fix in the thread.
OEM Part Supersession History
47210-76040, 47270-47030→47210-76100, 47210-76121, and others— Part numbers are frequently updated by the manufacturer to reflect design revisions or changes in the included components (e.g., master cylinder kit vs. full assembly).
Heads up: It is critical to use a part number compatible with the specific model year. While some part numbers from a Prius V may be shared, always verify fitment using the vehicle's VIN. TSB L-SB-0008-24 lists multiple new part numbers (e.g., 04003-22176, 04003-22276) that correspond to specific original part numbers (e.g., 47050-76100, 47050-76120), indicating a complex supersession chain.
Model Year Variations Within This Range
- 2014-2015 (Facelift vs. Pre-Facelift): The 2014 model year introduced a facelift with changes including a stiffer chassis due to expanded use of body adhesive, revised suspension tuning for better stability, and minor CVT tweaks. While the fundamental brake system design and the C1391 fault remained the same, these chassis changes could affect ride and handling characteristics. The Customer Support Programs were also split between pre-facelift (2011-2013) and post-facelift (2014-2017) models.
Helpful Videos


The information in this article is provided for general reference and educational purposes only. Vehicle specifications, procedures, and part compatibility can vary by production date, trim level, and region. Always consult your vehicle's factory service manual and verify part numbers before purchasing or performing repairs. Safety-critical components such as airbags, seat belts, and braking systems should be installed by a qualified professional.
- Lexus CT HYBRID:
- 🎬 Helpful Videos
- What's Unique About the 2011-2015 Lexus CT HYBRID
- Diagnostic Flowchart
- Symptoms You May Notice
- Most Likely Causes
- Rare But Worth Checking
- Diagnosis Steps
- Parts You'll Likely Need
- Related Codes That Often Appear With This One
- Technical Service Bulletins (TSBs) & Recalls
- Platform-Specific Known Issues
- Mechanic-Grade Diagnostic Values
- Hidden / Shadow Codes Worth Checking
- Scan Tool Commands That Help
- Wiring & Ground Locations
- Real Owner Repair Stories
- OEM Part Supersession History
- Model Year Variations Within This Range
- 🎟️ Get 5% Off