

OBD-II Code C1391: Abnormal Leak in Accumulator
What C1391 means, why it triggers, and how to fix it
- Code C1391 indicates a critical high-pressure leak in the power brake system that requires an immediate tow.
- Expect to see the Brake, ABS, and VSC dashboard lights illuminate alongside a distinct buzzing pump noise from the engine bay every 5 to 30 seconds.
- This failure plagues 2004-2015 Toyota and Lexus hybrids, specifically the Prius, Camry Hybrid, and RX/LS models.
- Replacing the brake actuator and booster pump costs $2,500 to $4,500 and requires a bi-directional scan tool for mandatory electronic calibration.
- Test the 12V auxiliary battery before authorizing major repairs, as voltage drops below 11V falsely trigger this code.
What Does C1391 Mean?

Code C1391 indicates the Skid Control ECU detected a rapid pressure drop in the brake accumulator. The accumulator stores high-pressure brake fluid generated by an electric pump to provide power braking assist. This internal leak prevents the system from maintaining the pressure required for safe stopping.
Technical definition: The official SAE/ISO definition for C1391 is "Accumulator Leak Malfunction." The Skid Control ECU triggers this code when accumulator brake fluid pressure decreases faster than a predefined threshold while the pump motor is off and the brake pedal is released. This confirms a significant internal leak in the brake actuator or booster pump.
Can I Drive With C1391?
No — Do Not Drive. Driving with code C1391 is extremely dangerous. This code indicates a critical failure within the power braking system, which causes a sudden and significant increase in stopping distance or a complete loss of braking assist. The vehicle must be towed to a repair facility immediately.
Common Causes

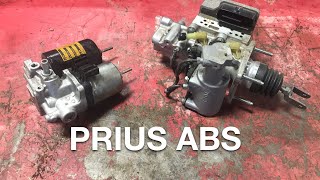
- Failing Brake Actuator / Accumulator Assembly (Very Common) — Internal seals within the brake actuator assembly degrade, causing high-pressure fluid to leak back into the reservoir. On most affected vehicles, the actuator, accumulator, pump, and ABS module form a single, non-serviceable unit requiring complete replacement. 🎬 See this step-by-step brake booster and actuator replacement walkthrough
- Failing Brake Booster Pump Motor (Common) — The electric motor responsible for pressurizing the accumulator wears out. If it fails to build pressure fast enough to compensate for an actuator leak, it triggers this code alongside C1252.
- Failing or Weak 12V Auxiliary Battery (Rare) — A weak 12V battery failing to supply 11-14V prevents the brake booster pump from reaching target pressure. The ECU misinterprets this low pressure as a leak. Always test the 12V battery before replacing expensive brake components.
- Improper Brake Bleeding Procedure (Less Common) — Failing to use the manufacturer's required electronic bleeding procedure (e.g., Toyota Techstream) after a brake service traps air in the actuator assembly. 🎬 Watch: How to perform the electronic brake bleeding procedure Trapped air compresses differently than fluid, mimicking a pressure leak.
- Installation of Faulty Used Parts (Less Common) — Replacing a failed actuator with a salvage yard part frequently causes immediate comebacks. Due to the nearly 100% failure rate of early OEM designs, used replacements usually contain the exact same internal leak.
- External Brake Fluid Leak (Rare) — A severed brake line, ruptured hose, or blown caliper seal causes rapid system pressure loss. This presents with visible fluid puddles and a dropping reservoir level.
- Faulty Skid Control ECU or Pressure Sensor (Very Rare) — The Skid Control ECU or integrated accumulator pressure sensor malfunctions and falsely reports a leak. Verify this by observing live sensor voltage with an advanced scan tool.
Symptoms

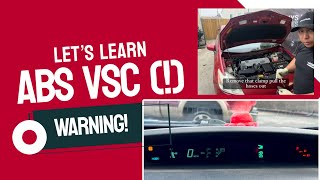
- Multiple Dashboard Warning Lights — The main BRAKE warning light (red), ABS, and VSC (Vehicle Stability Control) or slip indicator illuminate simultaneously.
- Pump Motor Runs Constantly or Frequently — A distinct buzzing or humming noise from the engine bay cycles on and off every 5 to 30 seconds while the car is stationary and brakes are untouched.
- Spongy, Hard, or Inconsistent Brake Pedal — The brake pedal feel changes dramatically, becoming either soft and squishy or extremely hard to press due to lost power assist.
- Longer Stopping Distances — The vehicle requires significantly more distance to reach a complete stop due to the loss of hydraulic braking assist.
- Chirping or 'Squawking' Noise When Braking — An audible chirp or squawk emits from the actuator assembly during braking. This early warning sign of failing internal seals often precedes the C1391 code by several months.
Diagnostic Flowchart
Tap your situation to follow the diagnostic path that matches what you're seeing on this code.
Common Fixes & Costs
- Full Brake System Replacement (Actuator and Pump) — Parts: $1800-$2700 (OEM parts), Labor: $800-$1400, ~6 hr book time (Professional)
- Replace Brake Actuator / Accumulator Assembly — Parts: $1200-$1800 (OEM), Labor: $600-$1000, ~4.5 hr book time (Professional)
- Replace Brake Booster Pump Assembly — Parts: $600-$900 (OEM), Labor: $300-$500, ~2.5 hr book time (Professional)
- Replace 12V Auxiliary Battery — Parts: $180-$300, Labor: $50-$100, ~0.5 hr book time (DIY)
- Perform Electronic Brake Bleed and Calibration — Parts: $20-$40 (Fluid), Labor: $150-$300, ~1.5 hr book time (Professional)
Used vs. New Parts: Buying Guide
When a used part is worth it: Purchasing a used brake actuator is strongly discouraged due to the nearly 100% failure rate of early OEM designs.
Donor-vehicle mileage cap: roughly under 40000 miles for the part to have meaningful remaining life.
Donor quality checklist:
- Source from a low-mileage vehicle via a reputable hybrid parts specialist.
- Ensure the part number exactly matches the original unit.
- Demand at least a 6-12 month warranty.
Decision logic:
- If The vehicle's value justifies the repair and safety is the top priority. → Buy a new OEM part. It is the only way to ensure reliability.
- If The vehicle is very old with high mileage and budget is the primary constraint. → A used part is a high-risk gamble; demand a 6-12 month warranty.
- If Aftermarket (e.g., Dorman, Cardone) parts are considered. → Proceed with caution; long-term reliability is questionable.
Warranty tradeoff: Used parts: 30-90 day warranty. New Aftermarket: 1-3 year warranty. New OEM: 12-month/12,000-mile warranty.
Worst-case if a used part fails: $800-$1400 labor cost repeated if a used or faulty aftermarket part fails after the warranty period.
What Happens If You Wait — Timeline
- First Occurrence: Dashboard lights (BRAKE, ABS, VSC) illuminate. A buzzing/whirring sound from the engine bay begins, cycling every 30-60 seconds. Brake pedal may feel normal or slightly soft. (MPG impact: 0%% · Added cost: $0)
- Days to Weeks: The internal leak worsens. The pump cycle becomes much more frequent, running every 5-20 seconds. A hissing sound may be audible between pump cycles. The brake pedal feels spongy and may vibrate. (MPG impact: 0%% · Added cost: $0 (but pump is rapidly wearing out))
- Weeks to a Few Months: The brake booster pump motor burns out from constant operation. The buzzing sound stops, but the warning lights remain. The brake pedal becomes extremely hard to press, and stopping distances increase dramatically as all power assist is lost. (MPG impact: 0%% · Added cost: $600-$900 (Cost to replace the now-failed pump in addition to the actuator))
- Immediate to Months: Catastrophic failure. A complete and sudden loss of hydraulic pressure assist occurs while driving, potentially leading to an accident. The constant cycling damages the pump motor relay, adding another failed component to the repair bill. (MPG impact: 0%% · Added cost: $1400+ (Cost of pump, actuator, and potentially a relay, plus potential accident-related costs))
Cost of Not Fixing It
- Immediate: Catastrophic loss of power braking assist, leading to a hard pedal and dramatically increased stopping distance. (Added cost: Potential for accident-related costs.)
- Days to Weeks: The brake booster pump motor burns out from constant operation. (Added cost: $600-$900)
- Weeks to Months: The pump motor relay fails due to excessive cycling. (Added cost: $50-$150)
Diagnosis Steps

- Confirm Code and Document All Related Codes
Use an ABS-compatible OBD-II scanner to confirm C1391. Document secondary codes like C1252, C1253, and C1256, which confirm a failing actuator system.
Tools: OBD-II Scanner (ABS/VSC compatible) (Beginner) - Check 12V Battery Health
Test the 12V auxiliary battery with a multimeter. A weak battery resting below 12.4V causes voltage-related codes and must be ruled out before condemning hydraulic components.
Tools: Multimeter or Battery Tester (Beginner) - Perform the 'Pump Cycle' Listening Test
Turn the vehicle to the 'ON' or 'READY' position and listen to the engine bay. A healthy pump runs briefly and stays off for hours. A pump cycling every 30 seconds or less confirms a severe pressure leak.
Tools: None (Beginner) - Isolate the Leak with a Mechanic's Stethoscope
If the pump cycles frequently, use a mechanic's stethoscope to listen to the brake actuator and booster pump bodies while the pump is off. A distinct hissing sound pinpoints the internal leak's exact location.
Tools: Mechanic's Stethoscope (Intermediate) - Inspect for External Leaks
Inspect all brake lines, hoses, and calipers for visible fluid leaks. Check the wiring harness and connectors at the brake actuator assembly for corrosion or damage.
Tools: Flashlight (Intermediate) - PRO TIP: Monitor Accumulator Pressure Sensor Voltage
Access the ABS Data List using a bi-directional scan tool. Observe the 'ACC Press Sens' live data. A rapid voltage drop from ~3.8V to below 3.2V in under 30 seconds definitively proves a critical internal leak.
Tools: Advanced Bi-Directional Scan Tool (e.g., Techstream) (Advanced) - PRO TIP: Perform a Solenoid Active Test
Command specific solenoids (e.g., SMC1, SMC2) using the scan tool's 'Active Test' menu while monitoring wheel cylinder pressure. An uncommanded pressure increase at any wheel cylinder isolates the internal leak to that specific valve circuit.
Tools: Advanced Bi-Directional Scan Tool (e.g., Techstream) (Advanced) - PRO TIP: Attempt Linear Valve Offset Calibration
Initiate the 'Linear Valve Offset Calibration' utility with a scan tool. If the process fails and the pump stops cycling constantly, the actuator is definitively at fault.
Tools: Advanced Bi-Directional Scan Tool (e.g., Techstream) (Advanced) - PRO TIP: Verify ECU Power and Ground
Back-probe the Skid Control ECU connector with a multimeter. Verify power supply pins (+BS, +BM) show 11V-14V and ground pins (GND1, GND2) show below 1.0 Ω resistance.
Tools: Multimeter, Wiring Diagram (Advanced)
When This Code Triggers (Freeze-Frame Conditions)
- Brake Pump Motor: OFF (Fault detected when the pump is not running.)
- Brake Pedal Status: Not Applied (System expects stable pressure when the brakes are untouched.)
- Accumulator Pressure: Dropping Rapidly (Sensor voltage drops faster than the predefined threshold.)
- Vehicle Speed: 0 mph (Code often sets when stationary in 'Ready' mode.)
Related Codes
- C1256 — Triggered when accumulator pressure drops below a critical minimum threshold. Seeing C1391 and C1256 together confirms a severe leak.
- C1252 — The ECU detects the pump motor running excessively to compensate for the pressure loss caused by the C1391 leak.
- C1253 — Constant pump cycling overheats and damages the pump's relay, causing this electrical fault alongside hydraulic codes.
- C1203 — Appears after replacing a faulty brake actuator if the system is not properly calibrated using the 'Linear Solenoid Valve Offset Learning' procedure.
Climate & Environmental Factors
- Heat and Humidity: Heat and humidity accelerate degradation of internal rubber seals within the brake actuator, contributing to premature failure in southern climates.
How to Talk to a Mechanic About This Code
Say this: "I have a C1391 code and the brake pump cycles every 15 seconds. I need a quote to replace the brake actuator and pump. Please confirm you use Techstream for the electronic brake bleed and linear valve offset calibration."
Establishes you understand the complex electronic procedures required, preventing shops from attempting the job without proper equipment.
Avoid saying:
- 'My brake light is on.'
- 'I hear a weird buzzing noise.'
- 'Can you just clear the code for me?'
Questions to ask before authorizing the repair:
- Does your quote include replacing both the brake actuator and the booster pump, and if so, why?
- Are you using new, OEM Toyota parts, or are they aftermarket or used? What is the warranty on the parts and labor?
- Can you confirm the final price includes the labor for the mandatory electronic brake bleed and linear solenoid valve calibration?
- Have you checked my VIN for any active Customer Support Programs from Toyota that might cover this repair?
Where to Take It: Dealer vs Independent vs Chain
- Dealer:
Recommended, especially for checking warranty coverage first. While expensive, they have direct access to Toyota's Techstream software and the most experience with this specific, common failure.
Best for: Vehicles potentially covered by an active Customer Support Program (CSP), Owners who prioritize a guaranteed correct repair with OEM parts and a nationwide warranty
Downsides: Highest cost, often quoting $3,000-$4,600 for the full repair., May be unwilling to install customer-supplied or non-OEM parts. (Typical cost: +50% vs. baseline) - Independent Shop:
Best fit for out-of-warranty repairs, IF you can find a reputable independent shop that specializes in hybrids. Their labor rates are lower, and they may be more flexible with parts, but the burden is on you to vet their capabilities for this complex electronic brake system repair.
Best for: Out-of-warranty vehicles where cost is a major factor., Shops that specialize in Toyota/Lexus or hybrid vehicles.
Downsides: Quality and experience vary greatly. You MUST verify they have a bi-directional scan tool capable of Toyota-specific ABS bleeding and calibration., May not be aware of the latest TSBs or CSPs. (Typical cost: +0% vs. baseline) - Chain Shop:
AVOID. This is not a standard brake job. The specific software and procedural requirements for replacing the actuator and performing the calibration are beyond the scope of most chain repair shops.
Best for: Simple maintenance like oil changes or conventional brake pad replacement.
Downsides: Generally lack the specialized bi-directional scan tools and training required for Toyota's electronically controlled braking (ECB) system., High risk of an incorrect repair, such as a simple brake bleed without the electronic procedure, which will not fix the C1391 code. (Typical cost: -10% vs. baseline)
When to Walk Away From the Repair
If the estimated repair cost of $2,500-$4,500 exceeds 50-70% of the car's private-party value, you should seriously consider selling the vehicle as-is or trading it in.
- Car worth $5000, fix is $3300: Borderline. The repair cost is ~66% of the car's value. Get a second opinion from an independent hybrid specialist before authorizing.
- Car worth $10000, fix is $3000: Fix it. The repair is 30% of the vehicle's value and will restore a critical safety system, securing the car's usability for years to come.
- Car worth $3000, fix is $2800: Walk away. The repair cost is over 90% of the car's value. It is not economically viable.
What Scan Tool You Need for This Code
Minimum: A bi-directional scan tool with specific software for Toyota/Lexus that can perform the 'ABS Bleed' or 'Air Bleeding' utility and the 'Linear Solenoid Valve Offset Calibration'.
A basic OBD-II reader can only read and clear the code. It CANNOT perform the mandatory electronic procedures required after replacing the brake actuator. Attempting this repair without the correct scanner will result in a complete failure of the new part to function, and the warning lights will return immediately.
Budget: MINI VCI Cable with Techstream Software (~$50) — This is a clone of the dealer tool. It provides full access to Toyota's Techstream software on a laptop, allowing for all required diagnostic and calibration functions. However, it can be difficult to install and may require a dedicated older laptop to run correctly.
Mid-range: Foxwell NT630 Plus / Autel AL619 (~$150) — These handheld scanners offer ABS code reading and the 'Auto Bleed' function for many vehicles, including Toyota. They are a good choice for confirming the code and performing the bleed procedure, but may lack the specific 'Linear Valve Offset Calibration' function. Verify model-specific capabilities before buying.
Professional: Autel MaxiCOM MK808 / Launch X431 Series (~$500-1200) — These are professional-grade, bi-directional tablets that offer full OE-level functionality. They reliably perform all necessary steps: reading live data, activating the ABS pump, performing the automated electronic bleed, and executing the final linear valve calibration.
Rent vs buy: You cannot rent the required bi-directional tool from a standard auto parts store. If you are attempting a one-time DIY repair, the budget VCI/Techstream cable is the most cost-effective option. If you plan to service modern cars regularly, investing in a professional-grade Autel or Launch scanner is worthwhile.
How to Clear the Code After You Fix It
- Perform electronic 'Air Bleeding' procedure with a bi-directional scan tool (e.g., Techstream).
- Perform 'Linear Solenoid Valve Offset Calibration' with the scan tool.
- Use the scan tool to clear all diagnostic trouble codes.
- Perform a test drive to confirm the brake pedal feels correct and no warning lights return.
Drive cycle (~15 minutes): The concept of a traditional emissions 'drive cycle' does not apply to the ABS system. After the repair and calibration, a 15-minute test drive with several stops is sufficient to verify the repair. The code will return almost immediately if the repair was unsuccessful or performed incorrectly.
Readiness monitors affected: None
Watch out for:
- Clearing the code with a basic scanner fails; the lights return within minutes.
- Skipping the mandatory electronic bleeding and calibration procedures guarantees the code will return.
Will This Fail Emissions / State Inspection?
No — by itself this code doesn't fail OBD inspection (but it can keep readiness monitors from setting, which causes a separate fail).
- California: An illuminated ABS or BRAKE light will not cause a failure of the emissions-only 'smog check'. However, the vehicle will fail any inspection that includes a safety check component.
- New York: NYS safety inspections require all dashboard warning lights to be off. An illuminated BRAKE or ABS light is an automatic failure.
- Texas: The annual safety inspection requires that the service brake system is operational. An illuminated brake warning light indicates a fault and will result in a failure of the safety inspection.
Most Commonly Affected Vehicles

- Toyota Prius (Gen 2, Gen 3) (2004-2015) — The most notorious vehicle for C1391. Toyota's warranty extension ZJB covered this issue but has expired for most vehicles based on age.
- Toyota Camry Hybrid (2007-2017) — Highly susceptible to identical actuator failures. TSB-0041-14 specifically addressed this issue for 2007-2011 models.
- Toyota Highlander Hybrid (2006-2019) — Customer Support Program ZKC extended the warranty for 2008-2010 models. CSP 24TE01 currently covers 2014-2016 models.
- Toyota Prius C (2012-2017) — TSB-0028-21 and Customer Support Program 24TE01 address internal brake booster leaks for 2015-2017 models.
- Lexus RX 400h / RX 450h (2006-2015) — Uses a nearly identical brake-by-wire system to the Highlander Hybrid and suffers the same C1391 failures.
- Lexus HS 250h (2010-2012) — Based on the Prius platform, this model suffers from premature brake actuator and accumulator failure.
- Lexus LS 460 (2013-2017) — Lexus TSB L-SB-0009-23 lists C1391 as a primary diagnostic code and mandates actuator replacement.
- Lexus GS 450h (2007-2011) — Shares the fundamental brake actuator design with other Toyota/Lexus hybrids and experiences identical accumulator leaks.
Manufacturer-Specific Notes
- Toyota/Lexus: This code is exceptionally common on Toyota and Lexus hybrid models due to the flawed design of early Electronically Controlled Braking (ECB) systems. The failure is almost always an internal, non-serviceable leak.
- Toyota/Lexus: Toyota and Lexus issued multiple Technical Service Bulletins and 'Customer Support Programs' (CSPs) to provide targeted warranty extensions for this exact failure.
- Toyota/Lexus: While early CSPs (like ZJB and ZG1) have expired, CSP 24TE01 / 24LE01 covers certain 2014-2017 models until March 31, 2025, regardless of mileage. Always check VIN coverage at a dealership.
- Toyota/Lexus: Repairing this system absolutely requires a specialized, bi-directional scan tool like Toyota Techstream. Skipping the mandatory electronic bleeding and 'Linear Solenoid Valve Offset Calibration' guarantees the codes will return immediately.
Real Owner Stories
2009 Toyota Prius at 150K miles - Dealer vs. Independent Repair
Owner was diagnosed with C1391 at a trusted Toyota dealer and quoted $3,300 for the repair. The car's value was estimated at only $1,000-$2,000, creating a difficult decision.
Outcome: Forum members advised that $3,300 was high and a reputable independent shop could likely perform the repair for $2,000-$2,500.
Lesson: Get a quote from a trusted independent hybrid shop before making a decision; dealer prices often exceed the vehicle's value.
2010 Toyota Prius at 169K miles - Ignored Symptoms Lead to Unsafe Condition
After the ABS, Brake, and slip indicator lights came on with a recurring whirring sound, the owner ignored the symptoms for four months because the car seemed to brake normally.
Outcome: Other owners strongly advised immediate repair, explaining that when the system fully fails, braking power is severely compromised. Delaying the repair allowed the pump to wear out from constant use, adding $1,000+ to the final bill.
Lesson: Ignoring the leak forces the pump to burn out, adding $1,000+ to the repair bill.
2010 Toyota Prius - Misdiagnosis with a Used Part
A user acquired a 2010 Prius with C1391. The previous owner had already replaced the brake actuator with a used part, but the problem persisted.
Outcome: The user concluded that the used actuator installed by the previous owner was also faulty. The constant cycling and codes returned.
Lesson: Used actuators usually contain the exact same internal leak as the original, leading to a repeat failure and wasted labor costs.
2011 Toyota Prius at 178K miles - DIY Repair Success
Faced with a C1391 code and a potential $1,200 DIY parts cost, the owner debated repairing the car or selling it.
Outcome: The DIYer successfully replaced both the actuator and booster pump for around $1,500 in parts, saving significantly on labor. The process took a full weekend.
Lesson: DIY is possible but requires a full weekend, exact parts, and specialized software.
How to Prevent This Code From Triggering
- Replace brake fluid every 2-3 years or 30,000 miles (Every 2-3 years) — Brake fluid is hygroscopic, meaning it absorbs moisture from the air over time. This moisture leads to internal corrosion of the delicate solenoid valves and seals within the brake actuator, contributing to premature failure.
- Use the correct specification of brake fluid (e.g., DOT3, DOT 5.1 non-silicone) (At every fluid change) — Using the manufacturer-specified fluid ensures chemical compatibility with the system's seals and components.
- Ensure the 12V auxiliary battery is healthy (Annual testing) — The Electronically Controlled Brake (ECB) system relies on a stable power supply. A weak or failing 12V battery provides low voltage to the pump motor, causing it to work harder, run longer, and potentially overheat.
- Address minor brake system issues promptly (As needed) — Issues like sticking caliper slide pins or old brake hoses force the hydraulic system to work harder. In a complex ECB system, any added stress accelerates wear on the central actuator and pump components.
Frequently Asked Questions
Is it safe to drive with code C1391?
No, it is extremely unsafe. The code signifies a critical failure in the power braking system. You will experience a sudden loss of braking ability and dramatically increased stopping distances, requiring an immediate tow.
Why is the repair for C1391 so expensive?
The root cause is the failure of the complex, integrated brake actuator assembly, which costs $1,200-$1,800 for the OEM part alone. Extensive labor and specialized calibration procedures bring total costs to $2,500-$4,500.
Can I just clear the code and keep driving?
Clearing the code will not fix the physical hydraulic leak. The warning lights and symptoms will return within minutes of starting the car as the system loses pressure.
My mechanic wants to replace the actuator and the pump. Is that necessary?
Often, yes. Code C1391 indicates an actuator leak, which forces the pump to overwork and eventually burn out. Replacing both components simultaneously prevents a repeat failure and saves on overlapping labor costs.
I replaced the brake actuator but the code came back. Why?
The mandatory electronic brake bleeding and linear valve calibration were likely not performed correctly with a bi-directional scan tool. Alternatively, a faulty used part containing the same internal leak was installed.
Is this problem covered by a recall on my Toyota or Lexus?
This issue was covered by time- and mileage-limited 'Customer Support Programs' rather than safety recalls. While most older programs have expired, newer ones like 24TE01 remain active for specific 2014-2017 models.
What is that buzzing or whirring sound I hear every 10 seconds?
That sound is the electric brake booster pump. Hearing it cycle repeatedly every few seconds confirms the accumulator is leaking pressure, forcing the pump to constantly run to compensate.
Can a bad 12V battery cause code C1391?
Yes. A weak 12V battery failing to provide 11V to the brake pump prevents it from reaching target pressure. The ECU misinterprets this failure to pressurize as a leak, setting code C1391.
Key Takeaways
- Code C1391 indicates a critical high-pressure leak in the power brake system that requires an immediate tow.
- Expect to see the Brake, ABS, and VSC dashboard lights illuminate alongside a distinct buzzing pump noise from the engine bay every 5 to 30 seconds.
- This failure plagues 2004-2015 Toyota and Lexus hybrids, specifically the Prius, Camry Hybrid, and RX/LS models.
- Replacing the brake actuator and booster pump costs $2,500 to $4,500 and requires a bi-directional scan tool for mandatory electronic calibration.
- Test the 12V auxiliary battery before authorizing major repairs, as voltage drops below 11V falsely trigger this code.
Helpful Videos

The information in this article is provided for general reference and educational purposes only. Vehicle specifications, procedures, and part compatibility can vary by production date, trim level, and region. Always consult your vehicle's factory service manual and verify part numbers before purchasing or performing repairs. Safety-critical components such as airbags, seat belts, and braking systems should be installed by a qualified professional.
- 🎬 Helpful Videos
- What Does C1391 Mean?
- Can I Drive With C1391?
- Common Causes
- Symptoms
- Diagnostic Flowchart
- Common Fixes & Costs
- Used vs. New Parts: Buying Guide
- What Happens If You Wait — Timeline
- Cost of Not Fixing It
- Diagnosis Steps
- When This Code Triggers (Freeze-Frame Conditions)
- Related Codes
- Climate & Environmental Factors
- How to Talk to a Mechanic About This Code
- Where to Take It: Dealer vs Independent vs Chain
- When to Walk Away From the Repair
- What Scan Tool You Need for This Code
- How to Clear the Code After You Fix It
- Will This Fail Emissions / State Inspection?
- Most Commonly Affected Vehicles
- Manufacturer-Specific Notes
- Real Owner Stories
- 2009 Toyota Prius at 150K miles - Dealer vs. Independent Repair
- 2010 Toyota Prius at 169K miles - Ignored Symptoms Lead to Unsafe Condition
- 2010 Toyota Prius - Misdiagnosis with a Used Part
- 2011 Toyota Prius at 178K miles - DIY Repair Success
- How to Prevent This Code From Triggering
- Frequently Asked Questions
- Is it safe to drive with code C1391?
- Why is the repair for C1391 so expensive?
- Can I just clear the code and keep driving?
- My mechanic wants to replace the actuator and the pump. Is that necessary?
- I replaced the brake actuator but the code came back. Why?
- Is this problem covered by a recall on my Toyota or Lexus?
- What is that buzzing or whirring sound I hear every 10 seconds?
- Can a bad 12V battery cause code C1391?
- Key Takeaways
- 🎟️ Get 5% Off