

OBD-II Code C1365: Brake Accumulator Pressure Sensor Malfunction
What C1365 means, why it triggers, and how to fix it
- Code C1365 disables your ABS and Vehicle Stability Control, significantly increasing stopping distances and making the vehicle unsafe to drive.
- The accumulator pressure sensor is permanently sealed inside the brake actuator assembly, requiring a full $1,500+ unit replacement when it fails.
- Never replace the actuator without first checking the 5V reference voltage at the Skid Control ECU to rule out a simple wiring fault.
- After installing a new actuator, you must use a bidirectional scanner to perform an electronic brake bleed and linear solenoid valve calibration, or the C1365 code will return immediately.
What Does C1365 Mean?

Your car's main computer detected an abnormal electrical signal from the accumulator pressure sensor. This sensor measures the high-pressure brake fluid stored for your anti-lock brake (ABS) and stability control (VSC) systems. An incorrect signal means the computer cannot verify that enough brake pressure is available for emergency stops, forcing the system into a failsafe mode.
Technical definition: For Toyota and Lexus vehicles, C1365 is defined as 'Accumulator Pressure Sensor Malfunction'. The Skid Control ECU sets this code when it detects the sensor's output voltage is outside its expected operating range. This triggers if the voltage drops below 0.25V, exceeds 4.53V, or remains completely static during system operation.
Can I Drive With C1365?
No — Do Not Drive. This code indicates a serious problem with the brake system's ability to maintain hydraulic pressure. Driving is dangerous because your brakes will perform unpredictably. The anti-lock brake (ABS) and stability control (VSC) systems are disabled, leading to a hard brake pedal and significantly increased stopping distances.
Common Causes

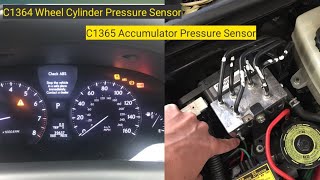
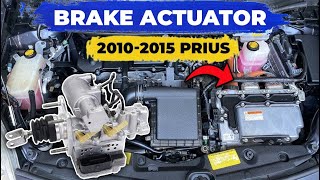
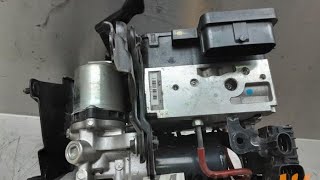
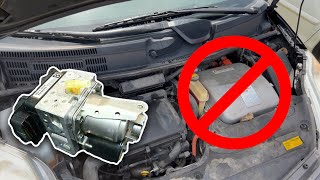
- Failed Brake Actuator Assembly (Internal Sensor/Circuit Failure) (Very Common) — The accumulator pressure sensor is permanently built into the brake actuator (ABS pump/module). Internal circuit board shorts or broken solder joints cause erratic voltage readings. Because the sensor is not sold separately, you must replace the entire actuator unit. 🎬 Watch: How to tell if your hybrid brake actuator is failing
- Faulty Skid Control ECU (Common) — The computer module that reads the sensor's signal fails. The sensor and wiring remain intact, but the computer misinterprets the data and triggers the code.
- Wiring Harness or Connector Damage (Less Common) — A broken wire, corroded pin, or loose connector between the brake actuator and the control module interrupts the sensor's signal, causing the voltage to spike or drop out of range.
- Improper Post-Repair Procedures or Faulty Replacement Part (Less Common) — After replacing a brake actuator, you must bleed the system using a bidirectional scan tool (like Techstream) to remove all air. Manual bleeding leaves trapped air, causing pressure fluctuations that trigger C1365 even with a new part. Installing a defective used actuator also causes this.
- Internal Hydraulic Leak (Rare) — A small internal leak within the brake actuator prevents the accumulator from holding pressure. The sensor correctly reports this low pressure, triggering the fault code.
- Low 12-Volt Battery Voltage (Rare) — A weak 12-volt battery causes widespread electrical issues and triggers false codes in sensitive electronic modules, including the brake control system.
Symptoms

- Multiple Dashboard Warning Lights — The ABS, Brake, and VSC or Traction Control warning lights illuminate simultaneously.
- Audible Warning Alarm — A continuous or intermittent warning buzzer sounds inside the cabin to alert the driver of a critical brake failure.
- Constant Pump Motor Noise — A buzzing or groaning noise emits from the engine bay, even without pressing the brakes, as the ABS pump motor runs continuously to compensate for detected pressure loss. 🎬 Listen: Common buzzing and groaning noises from a failing ABS actuator
- Change in Brake Pedal Feel — The brake pedal becomes unusually hard to press, feels spongy, or is unresponsive.
- Brake Malfunction Message — A 'Brake Malfunction' or 'Check VSC System' message appears on the vehicle's information display.
Diagnostic Flowchart

Tap your situation to follow the diagnostic path that matches what you're seeing on this code.
Common Fixes & Costs
- Replace Brake Actuator Assembly — Parts: $1100-$1800, Labor: $400-$700, ~5.0 hr book time (Professional)
- Install a Used or Refurbished Actuator — Parts: $400-$900, Labor: $400-$700, ~5.0 hr book time (Professional)
- Replace Skid Control ECU — Parts: $500-$1500, Labor: $100-$200, ~1.5 hr book time (Professional)
- Repair Wiring Harness or Connector — Parts: $5-$50, Labor: $100-$300, ~2.5 hr book time (Intermediate)
- Replace 12V Battery — Parts: $150-$350, Labor: $25-$50, ~0.5 hr book time (DIY)
DIY vs Professional
- Replace Brake Actuator Assembly — Beginner: No
Tools: Bidirectional scan tool (e.g., Toyota Techstream), full socket set, flare nut wrenches, torque wrench, brake fluid, catch bottle. - Repair Wiring Harness or Connector — Beginner: No
Tools: Multimeter, wiring diagrams, wire strippers, crimpers, soldering iron, heat shrink, replacement pins. - Replace Skid Control ECU — Beginner: No
Tools: Socket set, trim removal tools, bidirectional scan tool for programming. - Replace 12V Battery — Beginner: Yes
Tools: Basic hand tools (socket set or wrenches).
Used vs. New Parts: Buying Guide
When a used part is worth it: A used brake actuator makes sense when the vehicle has over 150,000 miles, the $1,500+ budget for a new OEM part is unfeasible, and you can source a part from a low-mileage donor with a warranty.
Donor-vehicle mileage cap: roughly under 80000 miles for the part to have meaningful remaining life.
Donor quality checklist:
- Verify the donor vehicle was not in a front-end collision.
- Match the part number exactly. Superseded part numbers are common.
- Purchase from a reputable seller offering at least a 90-day warranty.
- Avoid parts from flood-damaged or rust-belt vehicles.
Decision logic:
- If Vehicle is under 100K miles and you plan to keep it long-term → Buy a new OEM part. It provides the longest-term reliability and a 1-year warranty.
- If Vehicle is over 150K miles and budget is the primary concern → A used part from a low-mileage donor is a reasonable gamble, but be prepared for it to fail sooner than a new part.
- If A reputable remanufacturing service is available for your specific module → This is a good middle ground, offering a repaired and tested unit with a warranty for less than a new part.
Warranty tradeoff: Used parts typically offer a 30-90 day warranty covering only the part, not the labor for a second installation. New OEM parts come with a 12-month/12,000-mile warranty.
Worst-case if a used part fails: $500-$800 if a used part fails after installation, as you pay for labor a second time plus another replacement part.
What Happens If You Wait — Timeline
- Immediate (First Occurrence): ABS, Brake, and VSC lights illuminate, accompanied by a loud warning buzzer. Brakes feel hard or spongy, and stopping power is significantly reduced. (MPG impact: 0%% · Added cost: $0)
- Days to Weeks of Continued Driving: The ABS pump motor runs almost continuously to build pressure against an internal leak or faulty sensor reading. This excessive operation causes the motor to overheat and wear out its brushes. (MPG impact: 0-5% (On hybrids, due to disabled regenerative braking)% · Added cost: $0 (but the chance for a simpler wiring or ECU fix is eliminated))
- Weeks to Months: The ABS pump motor completely burns out. There is no hydraulic assistance, and the brake pedal becomes extremely hard to press. (MPG impact: 0-5%% · Added cost: $1500-$4000+ (A full actuator replacement is now guaranteed.))
- Catastrophic Failure: Complete and sudden loss of braking ability. This happens at any time once the initial warnings appear. (MPG impact: N/A% · Added cost: $5000 - $1,000,000+ (Cost of a major accident))
Cost of Not Fixing It
- Immediate: Total loss of ABS and Vehicle Stability Control (VSC). The vehicle is unsafe to drive, with unpredictable brake performance. (Added cost: N/A)
- Days to Weeks: The ABS pump motor runs excessively to compensate for pressure loss, causing it to burn out. This guarantees the entire actuator assembly requires replacement. (Added cost: $1500-$3500)
- 1+ Months: Complete failure of the primary braking system. The pedal becomes extremely hard to press, dramatically increasing stopping distances and accident risk. (Added cost: Cost of an at-fault collision.)
Diagnosis Steps
- Read Fault Codes and Freeze Frame Data
Use an advanced OBD-II scanner capable of reading chassis ('C') codes. Note C1365 and any sub-codes (INF codes) to see what the vehicle was doing when the code set.
Tools: Advanced OBD-II Scanner (Beginner) - Check 12V Battery Voltage
Use a multimeter to check the 12V battery with the car off (should be ~12.6V) and running (~13.7-14.7V). A weak battery causes incorrect fault codes in sensitive electronic systems.
Tools: Multimeter (Beginner) - Analyze Live Sensor Data (Pro Tip)
View the live data stream for the 'Accumulator Pressure Sensor' (PID: PACC). With the ignition on, voltage should be 3.2V to 4.0V (Gen 2 Prius) or 2.9V to 4.2V (RAV4). A value stuck below 0.4V or above 4.5V confirms a sensor or circuit failure.
Tools: Advanced OBD-II Scanner (Intermediate) - Isolate the Fault by Disconnecting the Actuator
If live data shows a stuck voltage, disconnect the main connector at the brake actuator. If the scanner value jumps to 0V or 5V, the wiring and ECU are good, confirming the fault is internal to the actuator.
Tools: Advanced OBD-II Scanner (Advanced) - Check for Internal Pressure Hold
Observe the accumulator pressure sensor voltage in live data. Press and release the brake pedal to run the pump, then let the vehicle sit. A steady voltage drop of more than 0.2V over 30 seconds indicates an internal hydraulic leak.
Tools: Advanced OBD-II Scanner (Intermediate) - Visually Inspect Wiring and Connectors
Inspect the wiring harness at the brake actuator and Skid Control ECU. Look for broken connector locks, backed-out pins, or corrosion.
Tools: Flashlight (Beginner) - Verify Sensor Reference Voltage at ECU
Backprobe the Skid Control ECU connector. Check the 5V reference voltage (VCM) supplied to the pressure sensor. It must be between 4.75V and 5.25V.
Tools: Multimeter, Wiring Diagram (Advanced) - Test Harness Continuity
Disconnect connectors from the actuator and ECU. Measure resistance on the pressure sensor wires (VCM, PAC1, E). Resistance must be below 1 Ω for continuity and above 10 kΩ when checking for shorts to ground.
Tools: Multimeter, Wiring Diagram (Advanced)
When This Code Triggers (Freeze-Frame Conditions)
- Accumulator Pressure Sensor Voltage (PACC): < 0.25V or > 4.53V (The ECU detects the sensor voltage is outside the normal operating range for more than 0.05 seconds.)
- Sensor Supply Voltage (VCM): < 4.7V or > 5.3V (The voltage supplied to the sensor from the ECU is out of range, indicating a power supply or ECU issue.)
- Brake Pedal Status: Not Pressed (The code sets during a system self-test when the vehicle is powered on, not necessarily during a braking event.)
Related Codes
- C1364 — Wheel Cylinder Pressure Sensor. Located in the same actuator assembly. Seeing C1364 and C1365 together confirms an internal actuator failure, ruling out external wiring issues.
- C1256 — Accumulator Low Pressure. C1365 means the sensor is faulty, prompting the ECU to set C1256 as a precaution because it cannot trust the pressure reading. Fix C1365 first.
- C1246 — Master Cylinder Pressure Sensor. When C1246, C1364, and C1365 appear together, the entire brake actuator assembly has catastrophically failed internally.
- C1201 — Engine Control System Malfunction. The brake system fault is so critical that it notifies the Engine Control Module (ECM), which stores C1201 to indicate a fault signal from another system.
Climate & Environmental Factors
- Heat and Humidity: High heat and humidity accelerate the degradation of the sensitive electronics and seals within the brake actuator assembly.
- Cold Weather: Brake fluid viscosity changes in extreme cold, but the system operates within a wide temperature range. No direct link to C1365 exists.
How to Talk to a Mechanic About This Code
Say this: "I have a C1365 code on my vehicle. Before replacing the entire brake actuator, please check the live data for the accumulator pressure sensor voltage and inspect the wiring harness connector to the actuator for any backed-out pins."
This signals that you understand the common failure is the expensive actuator, but you want the shop to perform due diligence by checking for less common wiring faults before committing to the most expensive repair.
Avoid saying:
- 'My brake light is on, can you fix it?'
- 'I hear a buzzing noise, just replace whatever is broken.'
- 'The internet says I need a new brake actuator.'
Questions to ask before authorizing the repair:
- What was the accumulator pressure sensor voltage reading from the scan tool? Was it out of the normal range?
- Did you inspect the connector and wiring at the actuator and ECU? Were there any signs of damage or corrosion?
- Does your quote include the electronic brake bleeding procedure and the linear solenoid valve calibration required by the manufacturer?
- What is the warranty on the new actuator part and the labor for this repair?
Where to Take It: Dealer vs Independent vs Chain
- Dealer:
Recommended but expensive. They possess the exact manufacturer-specific scan tool (Techstream) required for the mandatory post-repair calibrations.
Best for: Vehicles still under a manufacturer or extended warranty., Complex cases where a previous repair at an independent shop failed., Owners who prioritize a guaranteed fix with OEM parts.
Downsides: Highest labor rates and part markups, often resulting in quotes from $2,500 to $3,500+., Unwilling to install customer-supplied or used parts. (Typical cost: +50% vs. baseline) - Independent Shop:
Best fit for most out-of-warranty owners. A good independent shop specializing in Toyota/Lexus performs this repair correctly for significantly less than a dealer.
Best for: Out-of-warranty vehicles where the owner is cost-conscious., Shops that specialize in Toyota/Lexus or hybrid vehicles.
Downsides: You MUST confirm they have a professional bidirectional scan tool capable of performing the Toyota-specific electronic ABS bleed and calibrations., Quality varies greatly; vet the shop's reputation. (Typical cost: +0% vs. baseline) - Chain Shop:
AVOID. This is a complex, safety-critical repair beyond the scope of chain shops that focus on routine maintenance.
Best for: Not recommended for this repair.
Downsides: Technicians lack the specialized tools required for electronic brake system bleeding and calibration on these specific hybrid/luxury vehicles., High risk of misdiagnosis or improper post-repair procedures. (Typical cost: -10% vs. baseline)
When to Walk Away From the Repair
If the estimated repair cost exceeds 50% of the car's private-party value, consider selling the car as-is.
- Car worth $4500, fix is $2500: Walk away. The repair cost is over 55% of the car's value. It is not economically sensible to invest this much into an older vehicle.
- Car worth $8000, fix is $2800: Borderline. The repair is 35% of the car's value. If the rest of the car is in excellent condition, it is worth fixing. Get a second opinion from an independent shop.
- Car worth $15000, fix is $3000: Fix it. The repair is 20% of the car's value, which is well below the walk-away threshold for a newer vehicle.
What Scan Tool You Need for This Code

Minimum: A bidirectional scan tool that reads Chassis ('C') codes and performs manufacturer-specific ABS bleeding and linear solenoid valve calibrations for Toyota/Lexus.
A basic $20-$50 code reader CANNOT diagnose or fix this issue. It won't read ABS codes, view live sensor data, or perform the mandatory electronic ABS bleed required after replacing the actuator.
Budget: BlueDriver Pro (~$100) — Reads and clears C1365 and displays live sensor data, but lacks the bidirectional control needed for the mandatory ABS bleed procedure.
Mid-range: Foxwell NT510 Elite (with Toyota software) (~$160) — Offers full system diagnostics, live data, and the bidirectional capability to perform the critical ABS bleed service function for Toyota/Lexus.
Professional: Autel MaxiCOM MK808 / MX808S (~$450-550) — Professional-grade tablet scanner that easily performs the ABS bleed, linear solenoid valve calibrations, and all required resets.
Rent vs buy: You cannot rent a tool with the required bidirectional capabilities from a typical auto parts store. Buying a mid-range tool like the Foxwell NT510 Elite is the most cost-effective option.
How to Clear the Code After You Fix It
- Reconnect the 12V battery if disconnected.
- Use a bidirectional OBD-II scan tool to clear the 'C' codes from the ABS/VSC module.
- Perform the manufacturer-specific electronic brake bleeding procedure using the scan tool.
- Perform the 'Linear Solenoid Valve Calibration' and 'Yaw Rate Sensor Zero Point Calibration' using the scan tool.
- Road test the vehicle at 20+ mph to confirm the lights remain off.
Drive cycle (~15 minutes): Drive straight ahead on a level surface at 20 mph or more for a few minutes. The system performs self-checks upon startup and initial driving.
Readiness monitors affected: This is a chassis code (C-code) and does not affect emissions readiness monitors.
Watch out for:
- Using a basic OBD-II reader that cannot access or clear chassis (C) codes.
- Failing to perform the mandatory linear solenoid valve calibration after replacing the actuator causes the code to return immediately.
- Clearing the code without fixing the hardware fault results in the immediate return of the warning lights.
Will This Fail Emissions / State Inspection?
No — by itself this code doesn't fail OBD inspection (but it can keep readiness monitors from setting, which causes a separate fail).
- California: The illuminated 'Brake' warning light causes a failure of the Vehicle Safety Systems Inspection (VSSI) required for salvage titles. For a standard smog check, an ABS light alone does not cause a failure.
- New York: An illuminated ABS warning light is grounds for rejection during the annual safety inspection.
- Texas: The red 'Brake' warning light being on is cause for rejection during the safety inspection.
Most Commonly Affected Vehicles
- Lexus LS460 (2007-2017) — Actuator failure is a widely documented issue leading to code C1365. Part numbers have been updated multiple times; use the latest available part.
- Toyota Prius (2004-2009) — The second-generation Prius is well-known for brake actuator failures. Toyota issued a warranty extension (SB0032-16) for this issue.
- Toyota Highlander Hybrid (2006-2013) — The integrated actuator assembly is a common point of failure, often preceded by a loud, repetitive buzzing noise.
- Lexus GS450h (2007-2011) — Shares a similar braking system design with other affected Toyota/Lexus models, making it prone to the same accumulator sensor faults.
- Toyota Camry Hybrid (2007-2011) — The hybrid braking system's actuator is a known failure point that causes this code to appear.
- Lexus RX400h (2006-2008) — Shares the same failure-prone integrated brake actuator assembly as the Highlander Hybrid of the same era.
- Toyota RAV4 Hybrid (2019-2021) — Requires replacement of the 'brake booster with master cylinder assembly', the component name for the actuator on this model.
Manufacturer-Specific Notes
- Toyota / Lexus: The accumulator pressure sensor is integrated into the brake actuator assembly and is not sold separately. Replacing it requires a specialized scan tool to bleed the brakes and perform linear solenoid valve calibration.
- Lexus: Lexus issued Warranty Enhancement Program ZLG for 2007-2012 LS 460 models, extending brake actuator coverage to 10 years or 150,000 miles.
- Toyota: Toyota issued Customer Support Program ZJB for 2010-2015 Prius models to cover internal malfunctions of the brake booster and pump assemblies for 10 years or 150,000 miles.
- Toyota / Lexus: The diagnostic procedure differentiates the fault based on INF sub-codes. For example, INF code 211 points to a sensor power supply issue, while INF 215 indicates the sensor voltage is stuck.
Real Owner Stories
2008 Toyota Prius with C1365 after actuator replacement
Owner replaced the brake actuator with a new OEM part. After 200 miles, C1365 appeared. Live data showed the sensor voltage at 4.23V, outside the 3.2V-4.0V range.
What they tried:
- Re-ran the Techstream brake bleed procedure.
- Re-ran the linear offset and yaw calibrations.
- Verified the actuator connector was clean and secure.
Outcome: The high, out-of-spec voltage reading confirmed an internal part failure rather than a wiring issue. The 'new' OEM actuator was defective.
Lesson: Even new OEM parts fail. Always check live data after a repair. A sensor voltage above 4.0V points directly to a hardware problem.
Lexus LS460 with C1364 and C1365 after new actuator install
A mechanic installed a new brake actuator, but warning lights and a loud pump noise persisted, with codes C1364 and C1365 present.
What they tried:
- Initially assumed the new actuator was faulty.
- Inspected the wiring harness connectors and found broken plastic locking tabs.
- Discovered two pins had backed out of the main actuator connector.
Outcome: The mechanic repaired the connector pins and secured the connectors, resolving the fault codes without replacing the actuator again.
Lesson: Always inspect wiring and connectors carefully. A loose or backed-out pin mimics a complete part failure, leading to expensive misdiagnosis.
2009 Toyota Prius at 75K miles with intermittent C1365
Brake failure warnings appeared intermittently after driving in heavy rain. Live data showed the accumulator pressure sensor voltage at 4.37V.
What they tried:
- Cleaned the wheels, suspecting a wheel speed sensor issue.
- Cleared codes with Techstream, but the fault returned immediately.
Outcome: The low pressure reading pointed to a real problem. The final diagnosis was a failing brake actuator assembly.
Lesson: Do not dismiss intermittent brake warnings. An out-of-spec voltage reading from a critical sensor is a sign of imminent part failure.
How to Prevent This Code From Triggering
- Change brake fluid at manufacturer-recommended intervals (typically every 30,000 miles or 3 years) (Every 3 years) — Brake fluid absorbs moisture over time. This moisture causes internal corrosion of the delicate solenoids, seals, and electronic components within the ABS actuator, leading to premature failure.
- Address brake fluid leaks immediately (As needed) — Any leak introduces air and contaminants while reducing hydraulic pressure, forcing the ABS pump motor to work harder and run more often.
- Adopt smooth braking habits (Daily habit) — Avoiding frequent, hard, last-second braking reduces the overall workload on the ABS pump and actuator assembly.
- Ensure the 12V battery is healthy and connections are clean (Annual check) — The electronically controlled brake system relies on stable voltage. A weak 12V battery provides inconsistent power, leading to false error codes.
Frequently Asked Questions
Can I replace the C1365 sensor by itself?
No. The accumulator pressure sensor is permanently built into the brake actuator assembly. You must replace the entire actuator unit to fix a faulty sensor.
Is it safe to drive with code C1365?
No. This code indicates a critical failure in the hydraulic brake pressure system. Your anti-lock brakes and stability control are disabled, and regular braking power is severely reduced.
Why is the repair for code C1365 so expensive?
The most common cause is a failed brake actuator assembly, which costs over $1,100 for the part alone. The repair also requires specialized bidirectional scan tools to bleed and calibrate the new unit.
My mechanic replaced the brake actuator, but the code came back. What now?
The most likely culprits are an improper electronic bleeding procedure that left air in the system, or a persistent wiring harness issue. A faulty used or refurbished replacement part also causes immediate code return.
What is a linear solenoid valve calibration?
This is a mandatory software procedure performed with a diagnostic tool after replacing the brake actuator. It allows the ECU to learn the characteristics of the new solenoid valves. Skipping this step results in poor brake performance and returning fault codes.
I hit the brake pump motor and the warning lights went away temporarily. What does that mean?
Tapping the pump motor temporarily jars the electric motor's worn brushes into making contact, allowing it to build pressure. This strongly suggests the pump motor inside the actuator is failing and requires replacement.
Can I clear the code to make the warning lights go away?
You can clear the code with a scanner, but it returns almost immediately because the computer detects the same fault during its self-check. Clearing the code does not fix the underlying dangerous problem.
Key Takeaways
- Code C1365 disables your ABS and Vehicle Stability Control, significantly increasing stopping distances and making the vehicle unsafe to drive.
- The accumulator pressure sensor is permanently sealed inside the brake actuator assembly, requiring a full $1,500+ unit replacement when it fails.
- Never replace the actuator without first checking the 5V reference voltage at the Skid Control ECU to rule out a simple wiring fault.
- After installing a new actuator, you must use a bidirectional scanner to perform an electronic brake bleed and linear solenoid valve calibration, or the C1365 code will return immediately.
Helpful Videos

The information in this article is provided for general reference and educational purposes only. Vehicle specifications, procedures, and part compatibility can vary by production date, trim level, and region. Always consult your vehicle's factory service manual and verify part numbers before purchasing or performing repairs. Safety-critical components such as airbags, seat belts, and braking systems should be installed by a qualified professional.
- 🎬 Helpful Videos
- What Does C1365 Mean?
- Can I Drive With C1365?
- Common Causes
- Symptoms
- Diagnostic Flowchart
- Common Fixes & Costs
- DIY vs Professional
- Used vs. New Parts: Buying Guide
- What Happens If You Wait — Timeline
- Cost of Not Fixing It
- Diagnosis Steps
- When This Code Triggers (Freeze-Frame Conditions)
- Related Codes
- Climate & Environmental Factors
- How to Talk to a Mechanic About This Code
- Where to Take It: Dealer vs Independent vs Chain
- When to Walk Away From the Repair
- What Scan Tool You Need for This Code
- How to Clear the Code After You Fix It
- Will This Fail Emissions / State Inspection?
- Most Commonly Affected Vehicles
- Manufacturer-Specific Notes
- Real Owner Stories
- 2008 Toyota Prius with C1365 after actuator replacement
- Lexus LS460 with C1364 and C1365 after new actuator install
- 2009 Toyota Prius at 75K miles with intermittent C1365
- How to Prevent This Code From Triggering
- Frequently Asked Questions
- Can I replace the C1365 sensor by itself?
- Is it safe to drive with code C1365?
- Why is the repair for code C1365 so expensive?
- My mechanic replaced the brake actuator, but the code came back. What now?
- What is a linear solenoid valve calibration?
- I hit the brake pump motor and the warning lights went away temporarily. What does that mean?
- Can I clear the code to make the warning lights go away?
- Key Takeaways
- 🎟️ Get 5% Off