

OBD-II Code C1342: Hydraulic Brake System Malfunction (Front Left)
What C1342 means, why it triggers, and how to fix it
- Code C1342 flags a critical hydraulic failure in the front left brake, rendering the vehicle completely unsafe to drive.
- A failed brake actuator assembly causes over 80% of C1342 codes in Toyota and Lexus hybrids, requiring a $2,000+ replacement.
- Improperly retracting caliper pistons during a routine brake job triggers false C1342 codes, requiring a scan-tool reset and bleed.
- Always fix voltage (C1241) or pressure sensor (C1364) codes first, as these electronic faults frequently trigger a false C1342 hydraulic code.
- Verify your manufacturer's specific code definitions; Ford uses B1342 for ABS module failure, while Hyundai uses C1342 for a TPMS sensor fault.
What Does C1342 Mean?

Code C1342 means the Skid Control ECU detects abnormal hydraulic pressure in the front left brake circuit. The vehicle cannot properly control braking force on that wheel, making stops unpredictable. This immediately triggers the ABS, VSC, and brake warning lights.
Technical definition: Hydraulic System Malfunction (FL). The skid control ECU monitors wheel cylinder hydraulic pressure via sensors. DTC C1342 sets when the ECU detects a malfunction in the pressure increase or decrease performance for the front left wheel. Causes include internal actuator failure, fluid leaks, or air in the lines.
Can I Drive With C1342?
No — Do Not Drive. This code flags a critical hydraulic failure in your front left brake. The brake pedal will become dangerously soft or unpredictably hard, severely compromising your ability to stop. Tow the vehicle to a repair location.
Common Causes

- Failed Brake Actuator / ABS Pump Assembly (Very Common) — This is the most frequent cause in Toyota and Lexus hybrids. Internal failures, such as debris blocking a solenoid valve, a small fluid leak, or a burnt pump motor, directly trigger C1342.
- Improperly Performed Brake Service (Common) — Pushing caliper pistons back without using the required electronic service mode sends a pressure spike to the Skid Control ECU. This is the leading cause of false C1342 codes after DIY brake jobs.
- Air in the Brake Lines (Common) — Air introduced during brake pad or caliper replacement creates a spongy pedal and prevents correct pressure buildup. The ECU detects this pressure variance and sets the code.
- Low or Leaking Brake Fluid (Common) — A leak in the front left brake line or a low master cylinder fluid level causes an immediate loss of hydraulic pressure.
- Extremely Worn or Seized Brake Components (Less Common) — Severely worn pads force the caliper piston to overextend, causing pressure vibrations. A seized front left caliper prevents proper pressure release.
- Damaged Wiring or Loose Connectors (Less Common) — Corroded connectors or damaged wiring at the ABS actuator cause intermittent signal loss, which the ECU interprets as a hydraulic fault.
- Faulty Skid Control ECU (Rare) — The computer module controlling the brake system fails internally. Diagnose this only after ruling out the actuator, wiring, and fluid leaks.
Symptoms

- Dashboard Warning Lights Illuminated — The ABS, red Brake warning, and VSC/Traction Control lights illuminate simultaneously.
- Abnormal Brake Pedal Feel — The brake pedal feels spongy, sinks to the floor, or becomes extremely hard, causing abrupt and unpredictable stops. 🎬 See this expert guide on diagnosing hydraulic brake problems.
- Loud Noise When Braking — A loud screeching, grinding, or continuous buzzing/groaning sound emits from the ABS actuator pump when pressing the brake.
Diagnostic Flowchart

Tap your situation to follow the diagnostic path that matches what you're seeing on this code.
Common Fixes & Costs
- Replace Brake Actuator Assembly
— Parts: $1,200-$2,500, Labor: $600-$1,200, ~4.5 hr book time
(Professional)
Lexus LS460 (2007-2017): OEM 44050-50110 (Alt: Cardone 12-4541, Dorman 601-046)
Toyota Prius (2010-2015): OEM 47050-47150 (Alt: Cardone 12-4545)
Toyota Highlander Hybrid (2006-2007): OEM 44050-48191 (Alt: Cardone 12-4519) - Bleed Brake System (with Scan Tool) — Parts: $20-$40, Labor: $150-$250, ~1.5 hr book time (Intermediate)
- Repair Brake Fluid Leak and Refill — Parts: $20-$200, Labor: $150-$300, ~1.8 hr book time (Intermediate)
- Replace Front Brake Pads and Rotors — Parts: $80-$300, Labor: $150-$250, ~1.5 hr book time (DIY)
- Repair ABS Module Wiring or Ground — Parts: $5-$50, Labor: $100-$400, ~2.5 hr book time (Intermediate)
Used vs. New Parts: Buying Guide
When a used part is worth it: A used brake actuator is a high-risk option only suitable for very old, high-mileage vehicles (over 200k miles) where the repair cost with a new part exceeds the car's value.
Donor-vehicle mileage cap: roughly under 100000 miles for the part to have meaningful remaining life.
Donor quality checklist:
- Match the part number exactly; many revisions exist and they are not always interchangeable.
- Prefer sellers who specialize in specific vehicles and offer a short-term warranty (30-90 days).
- Avoid parts from vehicles with unknown history or from rust-belt regions.
Decision logic:
- If Vehicle is under 150K miles and you plan to keep it → Buy a new OEM or high-quality remanufactured part. The safety and reliability justify the cost.
- If Budget is the absolute primary concern and you accept the risk → A used part from a low-mileage, accident-damaged donor is the best bet. Be prepared for premature failure.
- If A remanufactured part with a long warranty (1-5 years) is available → This is the best balance of cost and reliability, offering significant savings over new OEM.
Warranty tradeoff: Used parts typically have a 30-90 day warranty at best. Remanufactured units offer 1 to 5 years. New OEM parts carry a 12-month/12,000-mile warranty.
Worst-case if a used part fails: $600-$1200. If a used part fails, you pay for the diagnostic and installation labor a second time.
What Happens If You Wait — Timeline
- 0-1 week: Warning lights (ABS, Brake, VSC) are on. The vehicle enters a 'fail-safe' mode, disabling ABS and stability control. The brake pedal feels normal or slightly different. (MPG impact: 0%% · Added cost: $0)
- 1 week - 1 month: If the fault is a dragging caliper, the front left brake pads and rotor begin to wear rapidly and overheat. You smell burning brakes and notice a significant drop in fuel economy. (MPG impact: 5-15%% · Added cost: $150-$400)
- 1-3 months: Continued driving with an internal actuator leak causes the integrated pump motor to run constantly to maintain pressure. This leads to the motor burning out completely. (MPG impact: 10-20%% · Added cost: $1800-$3700)
- 3+ months: Catastrophic failure of the braking system becomes a high probability. A complete loss of braking ability or a wheel locking up unexpectedly occurs, leading to an accident. (MPG impact: N/A% · Added cost: Potentially infinite (cost of an accident, injury, or fatality).)
Cost of Not Fixing It
- Immediate: Catastrophic brake failure is possible. The vehicle enters a 'fail-safe' mode, disabling ABS, traction control, and stability control, severely compromising your ability to stop safely. (Added cost: Potentially infinite (cost of an accident).)
- 0-1 month: If the failure causes a caliper to drag, it rapidly destroys the brake pads and rotor on that wheel. You experience reduced fuel economy. (Added cost: $150-$400 for new pads and rotor.)
- 1-6 months: Continued operation with a failed actuator causes the integrated pump motor to burn out from running constantly. On hybrid vehicles, the loss of regenerative braking puts extra strain on the hybrid battery system. (Added cost: The cost of the primary repair increases if the pump motor fails completely.)
Diagnosis Steps
- Read Fault Codes & Freeze Frame Data
Scan the ABS module to confirm C1342. Check the 'INF Code' in the Freeze Frame Data (e.g., 561, 562, 563) to identify if the fault is a pressure increase, decrease, or valve leak. Fix related codes like C1241 or C1364 first.
Tools: Advanced OBD-II Scanner (Beginner) - Inspect Brake Fluid & Look for Leaks
Check the master cylinder reservoir level. Inspect the front left brake line, caliper, and ABS actuator for wetness. Low fluid guarantees a physical leak.
Tools: Flashlight (Beginner) - Perform Scan Tool Active Test
Enter the ABS utility and run an 'Active Test' on the front left brake circuit. Command the solenoids to increase/decrease pressure while monitoring the 'FL W/C Sensor' voltage. Erratic or stuck voltage confirms an internal actuator failure.
Tools: Advanced Bi-directional Scan Tool (Professional) - Inspect Physical Brake Components
Remove the front left wheel. Check for unevenly worn pads, a warped rotor, or a seized caliper. Uneven wear causes piston vibrations that mimic hydraulic faults.
Tools: Jack, Jack Stands, Lug Wrench (Intermediate) - Bleed the Brake System
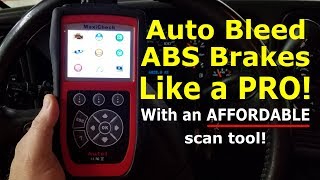
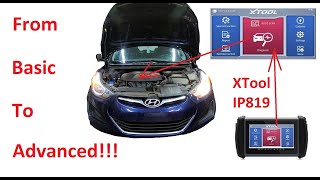
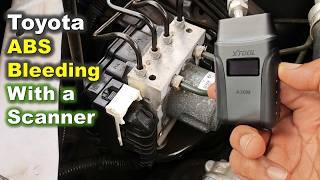
If recent brake work occurred, perform an automated ABS bleed using a scan tool. A standard manual bleed cannot remove air trapped inside the ABS actuator.
Tools: Bi-directional Scan Tool, Brake Bleeder Kit, Wrench, Brake Fluid (Advanced) - Check Wiring and Connectors
Inspect the ABS module harness for corrosion or backed-out pins. Verify the connection is secure.
Tools: Flashlight, Multimeter (Intermediate) - Check ECU Power, Ground, and CAN Bus
Measure voltage at the ECU power pin (11-14V) and resistance at the ground pins (<1 ohm). Measure resistance between CAN High and CAN Low (54-69 ohms) to rule out communication errors.
Tools: Multimeter, Vehicle-Specific Wiring Diagram (Advanced)
When This Code Triggers (Freeze-Frame Conditions)
- Vehicle Speed: 5-10 mph (The ABS/VSC system performs a self-test shortly after the vehicle begins to move.)
- Brake Pedal: Not Pressed (The fault is often detected during the system's automatic self-check, not necessarily during a braking event.)
- System Voltage: 11-14V (The Skid Control ECU requires stable voltage to operate; the code sets during normal operating voltage.)
- Ignition Status: ON (The code is set when the ignition is on and the ABS module is active and performing checks.)
Related Codes
- C1341 — Identical fault but for the Front Right (FR) wheel. Seeing C1341 and C1342 together points towards a systemic issue like a failed actuator assembly, low fluid, or air in the system.
- C1343 / C1344 — Hydraulic system malfunction codes for the Rear Right (RR) and Rear Left (RL) wheels. Having all four codes appear simultaneously strongly suggests a failure of the brake actuator assembly.
- C1241 — Indicates a problem with the vehicle's battery voltage. Unstable voltage causes errors in the Skid Control ECU, falsely triggering C1342. Fix C1241 first.
- C1364 — Points to a fault with a wheel cylinder pressure sensor. A bad pressure sensor sends incorrect data to the ECU, mimicking a hydraulic problem. Fix C1364 first.
Climate & Environmental Factors
- High Humidity: Brake fluid absorbs moisture from the atmosphere. Increased moisture lowers the boiling point of the brake fluid, causing vapor lock (a spongy pedal) under heavy braking and internal corrosion of sensitive ABS components.
- High Altitude: Thinner air is less effective at cooling brake components, increasing the risk of overheating. Lower atmospheric pressure slightly reduces power assist from engine vacuum-powered brake boosters, making the pedal feel harder.
- Cold Weather: Extreme cold increases brake fluid viscosity. This leads to a slightly sluggish response from the hydraulic system initially, though it rarely triggers a C1342 fault code directly.
How to Talk to a Mechanic About This Code
Say this: "I have a C1342 code with the ABS and VSC lights on. I need a diagnostic that checks for air in the brake system and reads the freeze-frame INF data before assuming it's a failed actuator."
This signals to the shop that you understand the common causes and want a proper diagnosis, not just an immediate jump to the most expensive repair. It prioritizes checking for simpler fixes like a brake bleed.
Avoid saying:
- 'My brake light is on, can you fix it?'
- 'Just do whatever it takes to fix it.'
- 'I think I need a new ABS pump.'
Questions to ask before authorizing the repair:
- Did you find any other codes, specifically for voltage (C1241) or a pressure sensor (C1364)?
- What was the specific INF code from the freeze-frame data (e.g., 561, 562, 563)?
- If you are recommending an actuator replacement, what was the result of the bi-directional active test on the front-left circuit?
- What is the warranty on the recommended part and the labor for this repair?
- Does the labor estimate include a full, scan-tool-assisted brake bleed and calibration?
Where to Take It: Dealer vs Independent vs Chain
- Dealer:
Recommended if your vehicle may be covered by a warranty or support program. Otherwise, it's the most expensive, but most likely to have the exact right tools.
Best for: Vehicles under a factory or extended warranty., Checking for eligibility in a Customer Support Program for the brake actuator., Complex diagnostics where manufacturer-specific tools are required.
Downsides: Highest labor rates, often 1.5-2x more than independent shops., Defaults to replacing the entire expensive actuator assembly without exploring simpler fixes. (Typical cost: +50% vs. baseline) - Independent Shop:
Best fit for most out-of-warranty repairs, but you must confirm the shop has a bi-directional scan tool capable of performing an ABS bleed on your specific vehicle.
Best for: Out-of-warranty vehicles, especially Toyota/Lexus models., Getting a second opinion on a dealer's expensive quote.
Downsides: Shop quality and equipment vary widely. You must verify they have the right tools., An unequipped shop misdiagnoses the issue or is unable to perform the necessary ABS bleed. (Typical cost: +0% vs. baseline) - Chain Shop:
AVOID for C1342 diagnosis. They are not equipped for this level of electronic brake system repair and are likely to cause more problems or recommend unnecessary parts.
Best for: Simple brake pad and rotor replacement (and even that carries risk on these sensitive systems).
Downsides: Technician skill varies dramatically., Very unlikely to have the expensive bi-directional scan tools needed for C1342 diagnosis and repair., High pressure to sell services, leading to potential misdiagnosis. (Typical cost: -10% vs. baseline)
When to Walk Away From the Repair
If the estimated repair cost for the actuator replacement ($1,800-$3,700) exceeds 50% of your car's private-party value, seriously consider selling the car as-is or trading it in.
- Car worth $6000, fix is $3200: Walk away. The repair cost is over half the car's value. Sell as a 'mechanic's special' or trade it in, fully disclosing the issue.
- Car worth $15000, fix is $3500: Fix it. The repair cost is significant but well below the 50% threshold. The car has plenty of remaining value.
- Car worth $4000, fix is $250: Fix it immediately. If the diagnosis only requires a scan-tool bleed, it's a small investment to keep a functional car.
What Scan Tool You Need for This Code

Minimum: A scanner that reads and clears Chassis (C-prefix) codes from the ABS module. For actual repair, a bi-directional tool with ABS bleed functionality for your specific vehicle is required.
A standard $20 engine code reader cannot see ABS codes at all. It shows 'No Codes Found,' which is dangerously misleading. It cannot perform the active tests or the electronic brake bleed procedure essential for diagnosing and fixing C1342.
Budget: No reliable recommendation (~$None) — Tools in this price range cannot perform the required bi-directional ABS bleed function. While some read ABS codes, they cannot complete the repair.
Mid-range: XTOOL D7 or Autel MaxiCOM MK808 (~$250-400) — These offer full system diagnostics to read/clear ABS codes, view live data, and have the bi-directional ABS bleed function needed to properly service the system after a repair.
Professional: Autel MaxiCOM MK808BT Pro or XTOOL D8 (~$450-750) — Offers everything the midrange picks do, with a more stable connection, faster processing, broader vehicle coverage, and more service functions. Suitable for a serious DIYer or independent shop.
Rent vs buy: Auto parts stores do NOT rent the bi-directional scanners needed for this job. If the repair requires an ABS bleed or actuator replacement, you must buy a capable scanner or pay a shop for the labor.
How to Clear the Code After You Fix It
- Use a compatible OBD-II scan tool to clear codes from the ABS/Skid Control ECU.
- Perform the scan tool-activated brake bleed and calibration procedure if the actuator was replaced.
- Perform a test drive to allow the system to complete its self-check.
Drive cycle (~15 minutes): After clearing the code, start the vehicle and drive straight forward at a speed of over 28 mph (45 km/h) for several seconds. The ABS system performs a self-check upon startup and initial movement. If the repair was successful, the ABS light will go off and stay off.
Readiness monitors affected: Not applicable
Watch out for:
- Using a generic OBD-II scanner that can only read engine codes will not clear an ABS code.
- The code returns almost immediately if the underlying hydraulic or electrical fault has not been properly repaired.
- Failing to perform the mandatory scan tool bleed and calibration after replacing an actuator prevents the system from working correctly.
Will This Fail Emissions / State Inspection?
Yes — this code typically fails an OBD-II emissions inspection.
- California: An illuminated brake warning light is an automatic failure of the state's safety inspection.
- New York: The NYS vehicle safety inspection checks for the presence and operation of ABS and brake warning lights. An illuminated light causes an immediate failure.
- Texas: During the annual safety inspection, the brake system and warning lamps are checked. An illuminated red or amber brake warning lamp results in a failure.
Most Commonly Affected Vehicles
- Toyota Prius (2004-2015) — Highly prone to brake actuator failures. TSB BR012-06 notes this code appears after a brake job if proper procedure isn't followed. NHTSA has investigated actuator failures on 2010-2015 models.
- Toyota Highlander Hybrid (2006-2007) — Uses a similar electronically controlled brake system susceptible to this fault. TSB BR012-06 warns of false codes after improper brake pad replacement.
- Toyota Camry Hybrid (2007-2011) — Shares brake system architecture with other Toyota hybrids. The 2007 model year is included in TSB BR012-06.
- Lexus LS 460 (2007-2017) — The advanced brake control system sets this code when the actuator assembly fails. TSB L-SB-0047-19 addresses noises and codes related to actuator failure.
- Lexus RX 400h / RX 450h (2006-2015) — Uses a sophisticated brake actuator that is a known failure point leading to C1342 and related codes.
- Ford Escape (2009-2012) — Ford vehicles use the similar code B1342, which indicates an internal electrical fault in the ABS module, not a hydraulic issue.
- Ford Crown Victoria (2008-2011) — Often sets the body code B1342, pointing to an internal failure of the ABS control module's memory.
- Subaru Legacy / Outback (2015-2018) — Subject to TSB 06-87-22R where a broken connector clip on the electronic parking brake actuator causes widespread brake system warnings.
Manufacturer-Specific Notes
- Toyota / Lexus: TSB BR012-06 addresses codes C1341-C1344 appearing after brake pad replacement. If caliper pistons are pushed back without using the proper service procedure, the system detects an unexpected pressure change and sets the code.
- Toyota / Lexus: Certain models have Warranty Enhancement Programs for brake actuator failures (e.g., program ZJB for 2010-2015 Prius, ZLA for LS460). Owners should contact a dealer with their VIN to check for eligibility.
- Ford / Lincoln: These brands use code B1342 (Body). B1342 indicates an internal electrical failure within the ABS control module itself, not a hydraulic pressure issue.
- Hyundai: On models like the 2012 Santa Fe, code C1342 indicates a 'Sensor 2 LFI Channel Failure' within the Tire Pressure Monitoring System (TPMS), completely unrelated to brakes.
- Nissan / Infiniti: Code B1342 often points to an issue with a satellite sensor for the airbag system, such as the front door impact sensor, and has no connection to the braking system.
Real Owner Stories
2007 Toyota Prius at 79K miles
While driving downhill, all brake warning lights came on, the brake pedal lost pressure, and a loud screech occurred during braking.
What they tried:
- A local mechanic replaced the brake pads, but the lights and symptoms remained.
- A Toyota dealer scanned the car, found C1342 and C1241 (low voltage), cleared the codes, and immediately recommended replacing the entire ABS unit.
- After clearing the codes, the brake pressure returned to normal, and the lights stayed off during normal driving.
Outcome: The immediate issue was temporarily resolved by clearing the codes, but the underlying cause was not definitively fixed. The owner was left wondering if the expensive ABS unit replacement was truly necessary.
Lesson: Do not immediately accept a recommendation for a full ABS actuator replacement. If other codes like C1241 (low voltage) are present, investigate them first.
2008 Lexus LS460 after DIY repair
Immediately after the owner replaced the driver's side wheel hub, bearing, and caliper, the ABS, VCS, and Check Brake lights illuminated.
What they tried:
- The owner bled the front brakes, finding air in the system.
- They reinstalled the original caliper, but the warning lights remained on.
- The brakes seemed to function correctly during a test drive despite the active warnings.
Outcome: The DIY repair introduced air into the system and likely triggered the fault codes. The problem required a more advanced diagnostic step, like checking the sensor wiring for continuity or using a scan tool to pinpoint the exact fault.
Lesson: When performing repairs near wheel hubs and brake components, it is very easy to damage the delicate ABS wheel speed sensor or its wiring. A full system bleed with a scan tool is often required after opening the hydraulic system.
2004 Toyota Prius with multiple brake codes
After removing calipers for service and reinstalling them, the ABS and Brake warning lights came on. The brake fluid level was found to be very low.
What they tried:
- Topping off the brake fluid did not clear the lights.
- The owner scanned the vehicle and found codes C1341 and C1342.
- Forum advice suggested that a proper, scan-tool-assisted brake bleed was necessary because air was likely trapped in the actuator.
Outcome: The root cause was air introduced into the ABS system during the caliper service. The solution required a professional-level brake bleed using Toyota's Techstream software to cycle the ABS pump and valves.
Lesson: On electronically controlled brake systems, any repair that opens the hydraulic lines requires a specific, scan-tool-assisted bleeding procedure. Simply topping off fluid or performing a traditional manual bleed will not remove air from the actuator.
How to Prevent This Code From Triggering
- Flush brake fluid every 2-3 years or 30,000 miles (Every 2-3 years) — Brake fluid absorbs moisture from the air, which lowers its boiling point and causes corrosion inside the expensive brake actuator and calipers. Fresh fluid protects internal seals.
- Address brake warning signs immediately (As needed) — Ignoring a soft pedal or warning lights allows a small issue to escalate, potentially causing the actuator pump motor to run excessively and burn out, leading to a much more expensive repair.
- Use proper service procedures for brake jobs (During brake service) — On electronically controlled brakes, always use the manufacturer-specified procedure to retract caliper pistons. This prevents setting false codes like C1342 and avoids damaging the system.
- Practice smooth braking habits (Daily habit) — Avoiding frequent, hard, last-minute braking reduces stress and heat cycles on the entire hydraulic system, extending the service life of the actuator, pump, pads, and rotors.
Frequently Asked Questions
Can I just clear the C1342 code and keep driving?
No. This code represents a critical safety issue with your brakes. Even if you clear the code, the underlying hydraulic failure remains and the light will return. Tow the vehicle to a repair shop.
What are the most common misdiagnoses for C1342?
Mechanics often replace wheel speed sensors or calipers before confirming the actuator has failed. Another major pitfall is ignoring voltage (C1241) or pressure sensor (C1364) codes, which actually cause the C1342 code. Always fix electronic and voltage codes first.
Why is the repair so expensive for my Toyota/Lexus hybrid?
Hybrids combine the master cylinder, ABS pump, and brake booster into one complex unit called a brake actuator. When an internal valve fails, the entire assembly requires replacement. A new OEM actuator alone costs between $1,200 and $2,500.
I just had my brakes done and now this light is on. What happened?
The mechanic likely forced the caliper pistons back without using the mandatory scan-tool service mode. This sends a pressure spike to the ECU, triggering a false C1342 code. Clearing the code and performing an automated ABS bleed usually resolves this.
Is a used brake actuator a good idea to save money?
No. Brake actuators are high-failure components, making a used unit a massive gamble that will likely fail soon after installation. Purchase a new OEM or professionally remanufactured part with a warranty for this critical safety system.
The mechanic cleared the code and the brakes feel fine now. Am I safe?
No. If the code was triggered by an actual internal leak, the pedal may feel firm now but fail completely during your next stop. Unless the code was a false positive from a recent brake job, the dangerous condition persists.
What does the little information code (e.g., 561, 562) mean with C1342?
This INF code in the Freeze Frame Data specifies the exact failure type. Code 561 indicates a pressure increase malfunction, 562 is a pressure decrease malfunction, and 563-565 point to internal valve leaks. This data tells the technician exactly which internal actuator component failed.
Key Takeaways
- Code C1342 flags a critical hydraulic failure in the front left brake, rendering the vehicle completely unsafe to drive.
- A failed brake actuator assembly causes over 80% of C1342 codes in Toyota and Lexus hybrids, requiring a $2,000+ replacement.
- Improperly retracting caliper pistons during a routine brake job triggers false C1342 codes, requiring a scan-tool reset and bleed.
- Always fix voltage (C1241) or pressure sensor (C1364) codes first, as these electronic faults frequently trigger a false C1342 hydraulic code.
- Verify your manufacturer's specific code definitions; Ford uses B1342 for ABS module failure, while Hyundai uses C1342 for a TPMS sensor fault.
Helpful Videos

The information in this article is provided for general reference and educational purposes only. Vehicle specifications, procedures, and part compatibility can vary by production date, trim level, and region. Always consult your vehicle's factory service manual and verify part numbers before purchasing or performing repairs. Safety-critical components such as airbags, seat belts, and braking systems should be installed by a qualified professional.
- 🎬 Helpful Videos
- What Does C1342 Mean?
- Can I Drive With C1342?
- Common Causes
- Symptoms
- Diagnostic Flowchart
- Common Fixes & Costs
- Used vs. New Parts: Buying Guide
- What Happens If You Wait — Timeline
- Cost of Not Fixing It
- Diagnosis Steps
- When This Code Triggers (Freeze-Frame Conditions)
- Related Codes
- Climate & Environmental Factors
- How to Talk to a Mechanic About This Code
- Where to Take It: Dealer vs Independent vs Chain
- When to Walk Away From the Repair
- What Scan Tool You Need for This Code
- How to Clear the Code After You Fix It
- Will This Fail Emissions / State Inspection?
- Most Commonly Affected Vehicles
- Manufacturer-Specific Notes
- Real Owner Stories
- 2007 Toyota Prius at 79K miles
- 2008 Lexus LS460 after DIY repair
- 2004 Toyota Prius with multiple brake codes
- How to Prevent This Code From Triggering
- Frequently Asked Questions
- Can I just clear the C1342 code and keep driving?
- What are the most common misdiagnoses for C1342?
- Why is the repair so expensive for my Toyota/Lexus hybrid?
- I just had my brakes done and now this light is on. What happened?
- Is a used brake actuator a good idea to save money?
- The mechanic cleared the code and the brakes feel fine now. Am I safe?
- What does the little information code (e.g., 561, 562) mean with C1342?
- Key Takeaways
- 🎟️ Get 5% Off