

C1256 on 2004-2011 Toyota Prius: Brake Actuator Failure Causes and Fixes
Code C1256 on a 2004-2011 Prius almost always means the brake actuator assembly has failed due to an internal leak, causing low pressure in the accumulator. This is a very common, expensive repair, often costing $2,000-$3,500 at a dealership. Replacement requires a specialized, computer-assisted brake bleed procedure.
- C1256 on a 2004-2011 Prius means there is a critical failure in the brake actuator assembly, which is not holding pressure.
- This is a known, widespread problem with this vehicle. Do not drive the car; have it towed for service.
- The repair involves replacing the entire brake actuator assembly, a complex and expensive job that is not recommended for DIY.
- Always use a new OEM part for this repair; used or remanufactured units have a high failure rate.
- Before repair, check with a Toyota dealer using your VIN to see if any active recalls or customer support programs cover your vehicle, though most have expired.
What's Unique About the 2004-2011 Toyota PRIUS

The 2004-2011 Prius (both Gen 2 and early Gen 3) uses a sophisticated and complex brake-by-wire system, unlike the purely hydraulic systems on most contemporary cars. The brake actuator assembly, which includes the pump, master cylinder, accumulator, and control module, is a known major failure point. This issue is so common that it's often referred to as one of the 'big three' expensive repairs for this generation of Prius. The failure is typically due to slow, internal leaks that develop over time, forcing the pump to run more frequently to maintain pressure until it eventually cannot keep up, triggering the C1256 code.
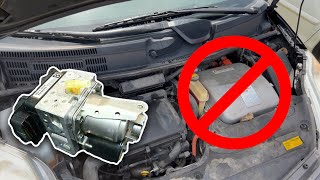
🎬 Watch: How to remove the actuator without pulling the inverter.Diagnostic Flowchart

Tap your situation to follow the diagnostic path that matches what you're seeing on this vehicle.
Generation note: This issue affects both the second generation (2004-2009) and the early third generation (2010-2011) Prius. The fundamental problem with the brake actuator assembly is common to both generations covered in this guide. Toyota has issued recalls and customer support programs (warranty extensions) for this part on various model years within this range, though most have now expired.
Symptoms You May Notice

- Multiple warning lights on the dashboard, including BRAKE, ABS, and VSC/TRAC.
- A loud, continuous or intermittent buzzing/beeping alarm from the dashboard.
- A very hard brake pedal that is difficult to press.
- Significantly reduced braking ability, or a feeling of 'no brakes'.
- The sound of the brake pump motor running frequently (e.g., every 15-30 seconds) even when not using the brakes.
- A 'barking' or 'squeaking' noise when pressing or releasing the brake pedal while stationary.
- Loss of regenerative braking, which can lead to the hybrid battery becoming overly discharged.
- Replacing only the brake accumulator or pump motor
- Blaming the driver for pressing the gas and brake pedals simultaneously. An owner reported a dealer made this claim, but it contradicts all technical documentation for this code.
- Attempting a traditional brake bleed without a scan tool. The system requires a computerized procedure to properly cycle the valves and purge air, and failure to do so will result in continued error codes and no brake pressure.
Most Likely Causes

- Failed Brake Actuator / Booster Assembly 🔴 High Probability The actuator assembly is known to develop small internal leaks over time, as documented in Toyota's own Technical Service Bulletins and warranty extension programs. This is a well-documented, widespread issue for this platform, acknowledged by Toyota under programs like ZG1.
How to confirm: A mechanic will use a diagnostic scan tool (like Toyota Techstream) to monitor the live data for the 'ACC Pressure Sensor'. A value that drops quickly (e.g., more than 0.20V in 30 seconds) or fails to build indicates an internal leak. Listening for the pump motor cycling on and off every few seconds when the car is on and the brake is not being pressed is a strong audible indicator of failure.
Typical fix: Complete replacement of the brake booster and master cylinder assembly (often called the brake actuator). This must be followed by a specific, multi-step brake bleeding procedure using a compatible scan tool.
Est. part cost: $900-$2200
Rare But Worth Checking
- Failing 12V Auxiliary Battery: A weak 12V battery can cause a variety of random electronic-related trouble codes, including brake system codes. While it's unlikely to be the root cause if you have classic symptoms like a buzzing pump, it's a simple and inexpensive check to perform before condemning a multi-thousand dollar part.
- Blown ABS Fuses or Relay: Before replacing the entire assembly, it is worth checking the main fuses and relays for the ABS system (often labeled ABS MTR). A blown fuse or faulty relay could prevent the pump from running, leading to a low-pressure condition. A user on PriusChat recommended removing the ABS motor relays before starting the replacement to prevent the new pump from running dry.
Diagnosis Steps
- Verify the complaint: Confirm the presence of warning lights (Brake, ABS, VSC) and listen for the audible alarm and/or frequent pump cycling (every 15-30 seconds).
- Scan for Codes: Use a Toyota-compatible scanner (like Techstream) to read all codes from the ABS/VSC/TRAC system. Note C1256 and any accompanying codes like C1391, C1252, or C1253.
- Check 12V Battery Health: Test the 12V auxiliary battery to ensure it is providing stable voltage. A weak battery can cause erroneous codes.
- Inspect ABS Fuses and Relays: Check the main fuses and relays for the ABS system in the under-hood fuse box, often labeled 'ABS MTR'.
- Monitor Accumulator Pressure (Live Data): Using a capable scan tool, monitor the live data for the 'ACC Pressure Sensor'. The voltage should build to around 3.6V when the pump runs and turn back on around 3.2V. With the pump off, observe if the pressure drops rapidly (a drop of more than 0.20V in 30 seconds is a definitive sign of a leak). This confirms an internal leak.
- Inspect for External Leaks: Although the common failure is internal, perform a visual inspection of all brake lines and connections for any signs of brake fluid leakage.
- Condemn the Actuator: If the pressure test fails and there are no external leaks or electrical issues, the brake actuator assembly is faulty and requires replacement.
Parts You'll Likely Need
- Brake Booster and Master Cylinder Assembly
(OEM #Gen 2 (2004-2009): 44500-47141 (replaces 44510-47050, 44510-47051). Gen 3 (2010-2011): 47070-47060.)— This is the component that fails internally, causing the low pressure condition. It is replaced as a single unit containing the pump, accumulator, and master cylinder.
Trusted brands: Toyota (OEM), Dorman (Remanufactured)
OEM price range: $1400-$2200
Aftermarket price range: $700-$1300
Related Codes That Often Appear With This One
- C1391 — This code indicates an 'Abnormal Leak in Accumulator'. It is very commonly seen with C1256 and points directly to the same failure within the brake actuator assembly.
- C1252 — This code means 'Brake Booster Pump Motor On Time Abnormally Long'. It sets because the pump has to run constantly to try and compensate for the pressure leak that is causing code C1256.
- C1253 — This code indicates a 'Brake Booster Pump Motor Relay Malfunction'. It can appear alongside the other codes as part of the overall system failure.
- P0A80 — This code means 'Replace Hybrid Battery Pack'. When the brake system fails and sets a C1256, regenerative braking is disabled. This means the hybrid battery is no longer being charged during deceleration, which can cause it to become overly discharged and trigger a battery failure code. The brake issue must be fixed first.
Technical Service Bulletins (TSBs) & Recalls
- T-SB-0024-19: Notes that DTCs C1391, C1252, C1256, and C1253 may be stored due to a small internal brake fluid leak inside the brake booster assembly.
- BR001-07 / T-SB-0307-08: An earlier TSB for 2004-2007 models that addressed a 'squeak-type noise' from the actuator, which was an early symptom of the larger problem.
Platform-Specific Known Issues
- Toyota has issued Technical Service Bulletin T-SB-0024-19 for some models, which acknowledges that codes C1256, C1391, C1252, and C1253 can be caused by an internal brake fluid leak in the brake booster assembly.
- Toyota issued Warranty Enhancement Program ZG1 for 2004-2009 Prius models, extending coverage for this specific failure. Primary coverage ended Dec 31, 2017, and secondary coverage (10 years/150k miles) has also expired for all vehicles.
- A similar Customer Support Program (POL18-03) was issued for 2010-2015 models, covering the same codes. The primary coverage for 2010 models ended Nov 30, 2019, and for 2011 models on Aug 31, 2021, with the 10-year/150k mile secondary coverage also now expired.
- The failure of this component is considered one of the most common and expensive repairs on the 2004-2011 Prius platform.
- Due to the high cost of new OEM parts, many owners opt for used or remanufactured units. However, this is a gamble, as used parts may fail quickly and remanufactured part quality can vary. Many forum users and shops strongly recommend using a new OEM part for safety and reliability.
Mechanic-Grade Diagnostic Values
- Accumulator Pressure Sensor Voltage (Live Data) — expected: The voltage should not drop with the pump motor stopped and the brake pedal not depressed.. Failure: A voltage drop of more than 0.20 V in 30 seconds indicates a definitive internal leak in the actuator assembly.
- Accumulator Pressure Thresholds (MPa) — expected: Normal operation maintains pressure above 14.62 MPa.. Failure: The code may set if pressure is below 12.45 MPa when braking is initiated, or if it remains below 14.62 MPa for 120 seconds after startup.
Hidden / Shadow Codes Worth Checking
- INF 141, 143 (for C1256/57): These are detail codes (or INF codes) visible in Techstream. Code 141 relates to low pressure at system start or during operation. Code 143 relates to pressure changing little while the pump is running or dropping without a corresponding increase in wheel cylinder pressure, pointing more directly to a leak or pump motor issue. (see via Toyota Techstream software connected to the vehicle's DLC3 port, in the ABS/VSC/TRAC ECU data.)
Scan Tool Commands That Help
- Toyota Techstream: Air Bleeding Utility — This is mandatory after replacing the brake actuator. It has specific sub-modes like 'Usual air bleeding' for fluid changes and 'ABS actuator has been replaced' for new part installation. Failure to use this utility will result in air trapped in the system, no brake pressure, and persistent codes.
- Toyota Techstream: Linear Valve Offset Calibration — After the brake system is bled and confirmed to be working, this calibration must be performed to zero out the pressure sensors and solenoids. It is often required to clear codes like C1345 that may appear after the actuator replacement.
Wiring & Ground Locations
- Brake Actuator Ground Points (GND1, GND2) — The primary ground connections for the actuator assembly are part of the main actuator connector itself. The ECU and overall system are grounded at various points in the engine compartment and behind the dash. For a 2009 Prius, a key ground point for the system is located in the left rear of the engine compartment.. A poor ground at the actuator connector or a main system ground could cause erratic behavior or a complete loss of pump motor function, potentially leading to a low-pressure code. While less common than internal failure, checking the connector for corrosion or damage is a valid diagnostic step.
Real Owner Repair Stories
- Reddit user deepminds on r/prius (2008 Toyota Prius, mileage not specified but failed before 172k miles.) — Brake actuator pump running every 15-20 seconds, which is a classic symptom of impending failure.
❌ Tried (didn't work) The user did not report trying other fixes, as the symptoms pointed directly to actuator failure.
✅ What actually fixed it The owner performed a DIY replacement using a used actuator from a low-mileage 2009 Prius. The user noted the repair was time-consuming but successful, and the used part was still working 100k miles later. They recommended using straps to move the heavy inverter out of the way without full disconnection. - PriusChat user Venable (2005 Toyota Prius with 225k miles.) — Standard warning lights (the '3 amigos') and codes C1256 & C1391.
❌ Tried (didn't work) The user initially considered a used part but was wary. They ordered a Dorman remanufactured part, but it arrived damaged.
✅ What actually fixed it The user received a replacement remanufactured part from Dorman, had a shop install it for $525, and confirmed the issue was resolved.
OEM Part Supersession History
44510-47050→44510-47051, then to orderable part number 44500-47141— Standard part revision for improved reliability. The number stamped on the unit (e.g., 44510-47050) is often an engineering number, not the final orderable part number from Toyota.
Heads up: The numbers can be confusing. 44510-47050 is what is often found on the original factory part. The replacement part ordered from Toyota is typically 44500-47141, which may have 44510-47051 stamped on it. They are interchangeable for Gen 2 models.47050-47070 (Gen 3)→47050-47150— Manufacturer revision for improved reliability.
Heads up: The newer part number (47050-47150) is the correct and recommended replacement for the original. Using the older part number is not advised.
Model Year Variations Within This Range
- 2004-2009 (Gen 2) vs 2010-2011 (Gen 3): The brake actuator assembly is a different part between Gen 2 and Gen 3. While they suffer from the same fundamental failure mode, the parts are not interchangeable. Additionally, the Gen 3 Prius switched to 4-wheel disc brakes, whereas the Gen 2 used a disc/drum combination, which may affect the actuator's internal programming and fluid dynamics.
- 2004-2009 (Gen 2): In Gen 2, the single actuator assembly contains the booster pump, accumulator, and master cylinder functions. This is unique, as later generations separated some of these components. Confusingly, the Gen 2 has a 'booster pump' but does not have a separate 'brake booster' like other cars.
Helpful Videos
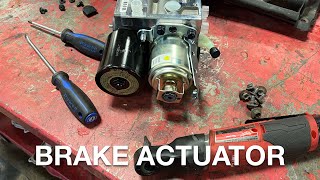
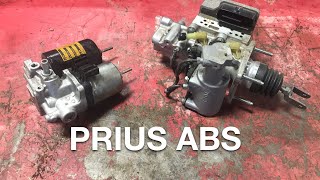
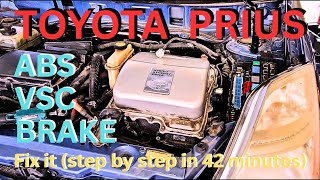
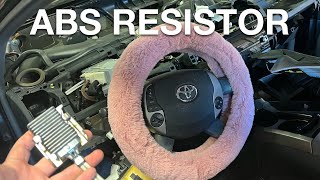
We Have This Part in Stock


The information in this article is provided for general reference and educational purposes only. Vehicle specifications, procedures, and part compatibility can vary by production date, trim level, and region. Always consult your vehicle's factory service manual and verify part numbers before purchasing or performing repairs. Safety-critical components such as airbags, seat belts, and braking systems should be installed by a qualified professional.
- Toyota PRIUS:
- 🎬 Helpful Videos
- 🛍️ Shop This Part
- What's Unique About the 2004-2011 Toyota PRIUS
- Diagnostic Flowchart
- Symptoms You May Notice
- Most Likely Causes
- Rare But Worth Checking
- Diagnosis Steps
- Parts You'll Likely Need
- Related Codes That Often Appear With This One
- Technical Service Bulletins (TSBs) & Recalls
- Platform-Specific Known Issues
- Mechanic-Grade Diagnostic Values
- Hidden / Shadow Codes Worth Checking
- Scan Tool Commands That Help
- Wiring & Ground Locations
- Real Owner Repair Stories
- OEM Part Supersession History
- Model Year Variations Within This Range
- 🎟️ Get 5% Off