

OBD-II Code C1256: Accumulator Low Pressure
The Ultimate 2026 Guide to What C1256 Means, Why It Triggers, and How to Fix It
- Code C1256 indicates a critical failure in the brake system's pressure accumulator, instantly disabling power brakes and making the vehicle unsafe to drive.
- The root cause in 90% of cases, especially on Toyota and Lexus hybrids, is an internal leak requiring a full replacement of the $1,200-$2,800 brake booster and actuator assembly.
- Never use a used or remanufactured actuator for this repair, as failure rates exceed 50% and will double your labor costs when the part fails.
- Completing this repair requires a bi-directional scan tool (like Toyota Techstream) to perform a mandatory electronic brake bleeding procedure; skipping this guarantees immediate code return.
What Does C1256 Mean?

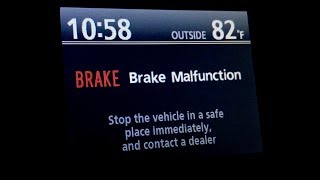
Code C1256 indicates the Skid Control ECU detected dangerously low pressure in the brake accumulator. The accumulator stores high-pressure brake fluid to operate the electronically controlled braking system. When pressure drops below safe thresholds, the system cannot guarantee brake function, triggering this code, illuminating warning lights, sounding a continuous alarm, and entering fail-safe mode.
Technical definition: The SAE/ISO definition for C1256 is "Accumulator Low Pressure Malfunction." It sets when the accumulator pressure sensor detects hydraulic pressure below 12.45 MPa (1805 PSI) for a specified duration. This confirms the system's inability to build or maintain required hydraulic pressure.
Can I Drive With C1256?
No — Do Not Drive. Do not drive under any circumstances. This code indicates a critical failure in the power-assisted braking system. The system enters a fail-safe mode, disabling ABS, stability control, and regenerative braking. The brake pedal becomes extremely hard to press, and stopping from 30 mph requires more than a city block. Continued driving is an immediate safety hazard.
Common Causes

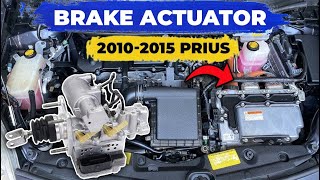
- Internal failure of the brake booster/actuator assembly (Very Common) — The assembly develops an internal brake fluid leak and cannot hold pressure. This is the root cause in the vast majority of Toyota/Lexus cases.
- Failing brake booster pump motor (Common) — The electric pump motor wears out and fails to generate the 1805 PSI required to pressurize the accumulator.
- Weak 12V Auxiliary Battery (Common) — Voltage below 12.4V causes false C1256 codes and prevents successful electronic brake bleeding after a repair.
- Improper Bleeding / Calibration After Repair (Less Common) — Failing to use a scan tool for the mandatory electronic bleed leaves air in the system, instantly re-triggering the code.
- Faulty accumulator pressure sensor (Rare) — The sensor sends incorrect low-pressure readings to the ECU. Usually integrated into the actuator assembly.
- Blown ABS/Brake system fuses or faulty relay (Rare) — A blown high-amperage fuse or failed relay cuts power to the pump motor.
- Leaking brake lines or fittings (Very Rare) — An external fluid leak causes pressure loss. Easily identified by low fluid in the reservoir and visible wetness.
Symptoms

- Loud, continuous alarm/buzzer — A persistent dashboard alarm warns that accumulator pressure is critically low and the vehicle is unsafe to drive.
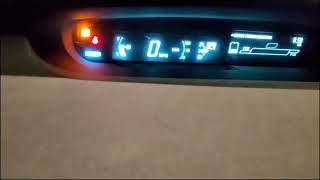
- Multiple warning lights on the dashboard — ABS, BRAKE, and VSC lights illuminate simultaneously, often with a 'Check VSC System' message.
- Hard or unresponsive brake pedal — Loss of hydraulic assist makes the brake pedal feel like 'standing on a brick,' drastically increasing stopping distance.
- Brake pump motor runs constantly — A whirring sound from the engine bay every 15-20 seconds indicates the pump is fighting an internal leak.
- Regenerative braking disabled (also visible on scanner) — The hybrid system stops capturing braking energy, forcing the gas engine to run constantly and risking hybrid battery damage.
Diagnostic Flowchart

Tap your situation to follow the diagnostic path that matches what you're seeing on this code.
Common Fixes & Costs
- Replace Brake Booster / Actuator Assembly — Parts: $1200-$2800, Labor: $500-$1200, ~4.5 hr book time (Professional)
- Replace Brake Booster Pump Motor — Parts: $200-$600, Labor: $200-$400, ~2.5 hr book time (Intermediate)
- Replace 12V Auxiliary Battery — Parts: $150-$350, Labor: $50-$150, ~0.5 hr book time (DIY)
- Replace Blown Fuses or Pump Motor Relay — Parts: $5-$50, Labor: $50-$100, ~0.5 hr book time (DIY)
Used vs. New Parts: Buying Guide
When a used part is worth it: Using a used brake actuator is strongly discouraged due to exceptionally high failure rates and the labor-intensive installation process.
Donor-vehicle mileage cap: roughly under 50000 miles for the part to have meaningful remaining life.
Donor quality checklist:
- Source from a low-mileage vehicle (under 50k miles) from a reputable seller offering a 90+ day warranty.
- Avoid parts from high-humidity or road-salt regions to prevent internal corrosion.
- Verify the exact part number; do not assume interchangeability.
Decision logic:
- If Replacing the brake actuator assembly. → Buy a new OEM part. Used parts frequently fail immediately, doubling your labor costs.
- If Budget is the absolute primary concern on a high-mileage vehicle. → A used part is a massive gamble. Expect a high probability of paying for labor twice.
Warranty tradeoff: Used parts offer 30-90 day part-only warranties (no labor coverage). New OEM parts installed by a dealer carry a 12-month/12,000-mile parts and labor warranty.
Worst-case if a used part fails: $800-$1500 if a used part fails after installation, erasing any initial savings.
What Happens If You Wait — Timeline
- 0-3 months (Pre-Failure): No warning lights. The brake pump motor runs frequently (every 30-60 seconds) to compensate for a developing internal leak. (MPG impact: 0%% · Added cost: $0)
- 3-6 months (Initial Warning): The pump runs every 15-20 seconds. ABS, VSC, and BRAKE warning lights illuminate intermittently. Regenerative braking is disabled when lights are on. (MPG impact: 5-10% drop% · Added cost: $50-$100 in wasted fuel.)
- 6-7 months (Constant Warning): Warning lights stay on permanently and a loud, continuous alarm sounds. The brake pedal becomes extremely hard. The vehicle is unsafe to drive. (MPG impact: 10-15% drop% · Added cost: $150-$250 in wasted fuel.)
- 7+ months (Cascading Failure): Driving without regenerative braking deeply discharges the high-voltage hybrid battery, triggering code P0A80 and destroying the battery pack. (MPG impact: 10-20% drop% · Added cost: $2000-$5000 for hybrid battery replacement.)
Cost of Not Fixing It
- Immediate: Catastrophic loss of braking power. The vehicle enters fail-safe mode with a hard brake pedal, requiring extreme physical force to stop. (Added cost: Accident liability and towing fees.)
- 0-1 month: Disabling of regenerative braking forces the engine to charge the hybrid battery exclusively, causing a 10-15% drop in fuel economy. (Added cost: $50-$150 in extra fuel costs.)
- 1-6 months: Driving without regenerative braking deeply discharges the high-voltage hybrid battery, triggering code P0A80 and destroying the battery pack. (Added cost: $2000-$5000 for hybrid battery replacement.)
Diagnosis Steps
- Check 12V Battery Health and Brake Fluid
Test the 12V battery with a multimeter; voltage below 12.4V causes false codes. Inspect the brake fluid reservoir for low levels indicating an external leak.
Tools: Multimeter, Flashlight (Beginner) - Confirm Codes and Listen to the Pump
Read all Chassis codes. Turn the vehicle 'ON' and listen to the brake pump. Running every 15-30 seconds without touching the brakes confirms a pressure leak.
Tools: OBD-II Scanner (Chassis code capable) (Beginner) - Perform a Pedal Pump Test
With the car off, pump the brakes 40 times to deplete pressure. Turn the car 'ON' to let the pump build pressure and stop. Press the brake once; if the pump immediately restarts, the accumulator is failing.
Tools: None (Intermediate) - Inspect ABS Fuses and Relays
Check all ABS/VSC fuses. Swap the brake pump relay with an identical non-critical relay (like the horn) to rule out a relay failure.
Tools: Owner's Manual, Fuse Puller (Beginner) - Read Live Sensor Data (Professional)
Use a bi-directional scanner to monitor 'Accumulator Pressure Sensor' voltage. A drop of >0.55V in 30 seconds with the pump off confirms an internal actuator leak.
Tools: Advanced Bi-Directional Scan Tool (Professional) - Perform Active Test with Scan Tool (Professional)
Command individual wheel cylinder solenoid valves to hold pressure. If pressure leaks down during the hold command, the internal actuator seals are blown.
Tools: Advanced Bi-Directional Scan Tool (Professional) - Check Pump Motor Resistance (Advanced)
Disconnect the actuator and measure resistance across the pump motor pins (e.g., BM1 to GND1). Resistance above 10 Ω indicates a dead motor.
Tools: Multimeter, Vehicle-Specific Wiring Diagram (Advanced)
When This Code Triggers (Freeze-Frame Conditions)
- Vehicle Speed: 0-10 mph (Sets at low speeds or stationary during self-checks when the pump fails to build pressure.)
- Brake Pedal Status: Not Pressed (The ECU monitors pressure bleed-down; a constant drop triggers the fault even while parked.)
- Accumulator Pressure Sensor Voltage: Below 3.2V (Confirms the low-pressure state at the exact moment of failure.)
- 12V System Voltage: 11.5V - 14.5V (Voltage below 12V indicates a failing auxiliary battery causing false electronic faults.)
Related Codes
- C1391 — Abnormal Leak in Accumulator. Always accompanies C1256 when the actuator fails internally. Seeing both confirms actuator replacement is required.
- C1252 — Brake Booster Pump Motor On Time Abnormally Long. Sets because the pump runs constantly to fight the C1391 leak.
- P0A80 — Replace Hybrid Battery Pack. A secondary symptom caused by C1256 disabling regenerative braking and starving the hybrid battery.
- C1241 — Low or High Power Supply Voltage. Points to a failing 12V battery, which triggers a false C1256.
Climate & Environmental Factors
- Cold Weather: Symptoms often appear exclusively below 20°F (-7°C). Cold weather contracts internal seals, acting as the final trigger that exposes an impending actuator failure.
- High Humidity: Brake fluid absorbs moisture rapidly in humid climates. This water contamination corrodes delicate internal actuator components, accelerating failure.
How to Talk to a Mechanic About This Code
Say this: "I have a Toyota/Lexus with codes C1256 and C1391, and the brake pump is running every 20 seconds. I need a quote to replace the brake actuator assembly with a new OEM part, including the full electronic brake bleeding procedure."
This signals you are an informed customer. You stated definitive codes, described the classic symptom, specified the correct part, and mentioned the mandatory final procedure, preventing incorrect diagnoses.
Avoid saying:
- 'My brake light and a buzzer are on.'
- 'Can you just bleed the brakes?'
- 'Can you install a used part I bought online?'
Questions to ask before authorizing the repair:
- Is the quote for a brand new, OEM brake actuator assembly?
- Does your shop have a bi-directional scan tool to perform the 'actuator replaced' electronic bleeding procedure?
- Does the quoted labor cost include the full electronic bleeding process?
- What is the parts and labor warranty for this repair?
Where to Take It: Dealer vs Independent vs Chain
- Dealer:
Best for: Vehicles potentially covered by an active Customer Support Program (e.g., 24TE01)., Owners wanting the highest guarantee of correct tools (Techstream) and OEM parts., Situations where a nationwide warranty is a high priority.
Downsides: Highest cost, often charging $3000-$4500., May refuse to work on a vehicle if a DIYer attempted a repair with a used part. (Typical cost: +50% vs. baseline) - Independent Shop:
Excellent choice, IF the shop is a vetted Toyota/hybrid specialist.
Best for: Out-of-warranty vehicles where cost is a major factor., Locating a Toyota/Lexus hybrid specialist familiar with this common failure.
Downsides: You MUST verify they have the correct bi-directional scan tool and experience with the electronic bleeding procedure. (Typical cost: +0% vs. baseline) - Chain Shop:
AVOID. This is a specialized, safety-critical repair far beyond the scope of a typical chain shop.
Best for: Absolutely not recommended for this repair.
Downsides: Technicians lack experience with complex hybrid brake systems., They typically lack the required bi-directional scan tools to perform the mandatory electronic bleeding., High risk of misdiagnosis and improper repair. (Typical cost: -20% vs. baseline)
When to Walk Away From the Repair
If the estimated repair cost ($2,500-$4,000) exceeds 50-60% of the car's private-party value, seriously consider selling the vehicle as-is.
- Car worth $5000, fix is $3200: Walk away. The repair cost is over 60% of the car's value. Sell the car as a 'mechanic's special'.
- Car worth $11000, fix is $3500: Fix it. The repair cost is roughly 32% of the vehicle's value. A worthwhile investment to keep it safely on the road.
What Scan Tool You Need for This Code
Minimum: A bi-directional scan tool with specific support for Toyota/Lexus ABS 'Air Bleeding' or 'Actuator Replaced' utility.
The final, mandatory repair step is running a specific software routine to bleed air from the new part. Without a scan tool that commands the ABS pump and valves, the repair fails and C1256 returns instantly.
Budget: Toyota Techstream Software with Mini VCI Cable (~$30-60) — OEM software providing full access to the ABS air bleeding utility. Requires a dedicated Windows laptop and can be difficult to configure.
Mid-range: XTOOL A30M / D7 or Foxwell NT510/NT710 Elite (~$150-400) — Provides a user-friendly, guided process for the air bleeding procedure. Offers bi-directional control to cycle the ABS pump.
Professional: Autel MaxiCOM MK808 / MK808BT or XTOOL D8 (~$450-800) — Professional-grade tools offering robust bi-directional control, live data streaming, and reliable ABS bleeding functions for virtually all makes.
Rent vs buy: Buy. Free rental scanners at auto parts stores are basic code readers and CANNOT perform the bi-directional ABS bleeding function required for this repair.
How to Clear the Code After You Fix It
- Perform the mandatory multi-stage electronic brake bleeding procedure using a bi-directional scan tool (e.g., Toyota Techstream).
- Clear C1256 and companion codes (C1391, C1252, C1253) from the Skid Control ECU.
- Test drive to confirm readiness monitors reset and no alarms return.
Drive cycle (~20 minutes): C1256 is a hard fault that returns instantly if low pressure persists. After repair and electronic bleeding, a 20-minute drive with mixed speeds and frequent braking confirms the fix.
Readiness monitors affected: This is a chassis code and does not directly affect emissions readiness monitors.
Watch out for:
- Attempting to clear the code without replacing the leaking actuator.
- Failing to perform the electronic brake bleed, which leaves air in the system and instantly re-triggers C1256.
- Using a basic OBD-II reader that cannot access chassis (C) codes or perform ABS bleeding.
Will This Fail Emissions / State Inspection?
Yes — this code typically fails an OBD-II emissions inspection.
- California: Fails the safety portion instantly if ABS or BRAKE warning lights are illuminated.
- New York: An illuminated ABS or BRAKE light is an automatic safety inspection failure.
- Texas: The inspector verifies the brake system warning lamp; an illuminated light results in immediate failure.
Most Commonly Affected Vehicles
- Toyota Prius (2004-2015) — The most common vehicle for this failure. The failing part number for 2010-2015 models is often 47050-47310.
- Lexus RX 400h / RX 450h (2006-2015) — Uses a similar electronically controlled brake system. Repair costs are typically higher than for a Prius.
- Toyota Highlander Hybrid (2006-2019) — Shares the same fundamental brake actuator design. The OEM part for 2008-2019 models is 44050-48320.
- Toyota Camry Hybrid (2007-2014) — The brake booster with master cylinder assembly is a known failure point with an identical failure pattern to the Prius.
- Toyota RAV4 Hybrid (2019-2021) — Covered by active Customer Support Program 24TE01 for extended warranty coverage on the brake actuator assembly.
- Ford Escape Hybrid / Mercury Mariner Hybrid (2005-2008) — Uses a similar electro-hydraulic brake system. Produces identical symptoms but typically logs codes C1526 and C1524.
Manufacturer-Specific Notes
- Toyota/Lexus: This code almost exclusively points to the failure of the entire brake booster and actuator assembly as a single, integrated unit.
- Toyota/Lexus: Toyota has an active Customer Support Program 24TE01 for certain 2019-2021 RAV4 Hybrid models, extending warranty coverage for the brake actuator assembly.
- General: The post-repair electronic bleeding procedure is absolutely critical. Skipping this step guarantees the immediate return of C1256.
- General: Mechanics frequently misdiagnose P0A80 as the root cause. The brake system failure (C1256) causes the battery code, not the other way around.
Real Owner Stories
2008 Toyota Prius at 93K miles with codes C1256 and C1391
All brake-related warning lights illuminated on the dashboard.
What they tried:
- Took the car to a Toyota-specialist independent repair shop.
Outcome: The shop diagnosed a failed brake actuator and master cylinder, quoting $3500 for replacement using OEM parts with a 36-month guarantee.
Lesson: When C1256 and C1391 appear together, it's a definitive diagnosis of actuator failure. Getting a quote from a trusted independent specialist ensures a long warranty on a critical repair.
Gen 2 Prius with C1256 after multiple DIY repair attempts
The owner installed a used actuator from an eBay seller, but the code and alarm persisted.
What they tried:
- Bought an XTool D8 scan tool to perform the ABS bleed procedure.
- Discovered the bleeding procedure failed due to a weak 12V battery and replaced it.
- Installed a second used actuator, but the C1256 code returned immediately.
Outcome: The owner purchased a new OEM actuator from Toyota for $1200. After installing the new part and performing an electronic bleed, the problem was fixed.
Lesson: Used actuators are a massive gamble. A weak 12V battery complicates diagnosis and prevents successful post-repair procedures.
How to Prevent This Code From Triggering
- Change brake fluid every 2-3 years or 30,000 miles. (Every 2-3 years / 30,000 miles) — Brake fluid absorbs moisture, leading to internal corrosion of the delicate seals inside the actuator assembly, which causes the internal leaks that trigger C1256.
- Listen for changes in the brake pump's run time. (Monthly) — A healthy pump runs infrequently. If the pump runs every 30-60 seconds, it's an early indicator of an internal leak, giving you time to plan for the repair.
- Ensure the 12V auxiliary battery is healthy. (Annually after 3 years of age) — A weak 12V battery causes low voltage conditions that trigger false C1256 codes and prevent the brake pump from running effectively.
Frequently Asked Questions
Is it safe to drive with code C1256?
No. This code indicates a catastrophic failure of the power brake system. The brake pedal will become extremely hard, and stopping distances will increase dangerously.
What is the loud, continuous buzzer my car is making?
The persistent alarm is a critical warning that accumulator pressure is too low to guarantee brake function. It means the vehicle is unsafe to operate and must be towed.
Can I just reset the C1256 code to make it go away?
No. C1256 is a hard fault indicating a physical pressure loss. The Skid Control ECU will instantly detect the low pressure and trigger the code again upon startup.
My mechanic says the C1256 code is because of my hybrid battery. Is that right?
This is a common misdiagnosis. The brake failure (C1256) disables regenerative braking, which starves the hybrid battery and triggers battery codes. You must fix the brake actuator first.
What's the difference between codes C1256 and C1391?
C1391 identifies the root cause (an internal fluid leak), while C1256 identifies the result (low accumulator pressure). Seeing both confirms the brake actuator assembly must be replaced.
Why is the repair for C1256 so expensive?
The repair requires replacing the entire brake booster and actuator assembly, which is a complex, $1,200+ OEM part. It also requires specialized labor and a mandatory electronic bleeding procedure using dealer-level software.
Can I use a used or remanufactured part to save money?
Using a used actuator is strongly discouraged due to exceptionally high failure rates. A used part will likely fail shortly after installation, forcing you to pay the $500+ labor cost twice.
Will a brake fluid flush fix code C1256?
No. A fluid flush cannot repair the blown internal seals causing the pressure leak. Component replacement is mandatory once this code sets.
Key Takeaways
- Code C1256 indicates a critical failure in the brake system's pressure accumulator, instantly disabling power brakes and making the vehicle unsafe to drive.
- The root cause in 90% of cases, especially on Toyota and Lexus hybrids, is an internal leak requiring a full replacement of the $1,200-$2,800 brake booster and actuator assembly.
- Never use a used or remanufactured actuator for this repair, as failure rates exceed 50% and will double your labor costs when the part fails.
- Completing this repair requires a bi-directional scan tool (like Toyota Techstream) to perform a mandatory electronic brake bleeding procedure; skipping this guarantees immediate code return.
Helpful Videos

The information in this article is provided for general reference and educational purposes only. Vehicle specifications, procedures, and part compatibility can vary by production date, trim level, and region. Always consult your vehicle's factory service manual and verify part numbers before purchasing or performing repairs. Safety-critical components such as airbags, seat belts, and braking systems should be installed by a qualified professional.
- 🎬 Helpful Videos
- What Does C1256 Mean?
- Can I Drive With C1256?
- Common Causes
- Symptoms
- Diagnostic Flowchart
- Common Fixes & Costs
- Used vs. New Parts: Buying Guide
- What Happens If You Wait — Timeline
- Cost of Not Fixing It
- Diagnosis Steps
- When This Code Triggers (Freeze-Frame Conditions)
- Related Codes
- Climate & Environmental Factors
- How to Talk to a Mechanic About This Code
- Where to Take It: Dealer vs Independent vs Chain
- When to Walk Away From the Repair
- What Scan Tool You Need for This Code
- How to Clear the Code After You Fix It
- Will This Fail Emissions / State Inspection?
- Most Commonly Affected Vehicles
- Manufacturer-Specific Notes
- Real Owner Stories
- 2008 Toyota Prius at 93K miles with codes C1256 and C1391
- Gen 2 Prius with C1256 after multiple DIY repair attempts
- How to Prevent This Code From Triggering
- Frequently Asked Questions
- Is it safe to drive with code C1256?
- What is the loud, continuous buzzer my car is making?
- Can I just reset the C1256 code to make it go away?
- My mechanic says the C1256 code is because of my hybrid battery. Is that right?
- What's the difference between codes C1256 and C1391?
- Why is the repair for C1256 so expensive?
- Can I use a used or remanufactured part to save money?
- Will a brake fluid flush fix code C1256?
- Key Takeaways
- 🎟️ Get 5% Off