

OBD-II Code C1254: Abnormal EBCM/Accumulator Pressure
What C1254 means, why it triggers, and how to fix it
- Code C1254 disables your ABS and stability control systems, significantly increasing stopping distances and skid risk during emergency braking.
- On Toyota and Lexus hybrids, this code almost always requires replacing the brake actuator assembly, costing between $1,500 and $3,500.
- For 2001-2004 GM vehicles, C1254 usually points to a faulty Electronic Brake Control Module (EBCM) that can be permanently repaired via a $150-$250 mail-in service.
- Test your 12V battery and clean the main ABS ground wire before buying parts, as voltage drops below 12.4V frequently trigger false C1254 codes.
What Does C1254 Mean?

C1254 indicates a critical failure within the electronic brake system. Your car's computer detects either an abnormal pressure reading from the brake accumulator or an internal electrical fault in the Electronic Brake Control Module (EBCM). The vehicle shuts down the ABS and Traction/Stability Control systems to prevent unpredictable braking behavior.
Technical definition: The SAE definition for C1254 varies by manufacturer. Toyota/Lexus define it as 'Abnormal pressure detected in accumulator'. General Motors defines it as 'Abnormal Shutdown Detected' or an internal EBCM checksum error. Ford defines it as an Anti-Lock Control fault. Subaru uses related code C0054 for a 'Brake Light Switch Malfunction'.
Can I Drive With C1254?
Yes, But With Caution. You can drive short distances, but with extreme caution. Your Anti-lock Braking System (ABS) and stability/traction control are disabled, significantly increasing the risk of wheel lock-up and losing control in a panic stop or on slippery surfaces. Your base hydraulic brakes still function, but stopping distances increase, and the pedal feels hard or unresponsive. Continued driving is not recommended; tow the vehicle if you must travel at highway speeds.
Common Causes

- Defective Brake Actuator Assembly (Toyota/Lexus) (Very Common) — On Toyota and Lexus models, the entire brake booster and actuator assembly (including the accumulator, pump, and pressure sensor) fails due to internal hydraulic leaks or a burnt-out pump motor.
- Failing Electronic Brake Control Module (GM) (Very Common) — On General Motors vehicles, internal solder joints on the EBCM circuit board fail over time, leading to communication errors or an 'Abnormal Shutdown' signal when the module fails its internal memory test.
- Low Battery Voltage (Common) — The EBCM is highly sensitive to voltage drops. A weak battery, failing alternator, or long engine cranks cause a significant voltage drop that triggers this code.
- Corroded EBCM Ground Connection (Common) — Corroded, loose, or damaged ground straps connected to the EBCM cause a sudden loss of power or erratic signals. A thorough inspection of the harness and ground points is critical.
- Faulty Brake Light Switch (Subaru) (Common) — An out-of-adjustment or faulty brake light switch sends incorrect signals to the brake control module. This is a known issue on Subaru models and leads to ABS/VDC codes.
- Corroded ABS Reluctor Ring (Less Common) — The metal reluctor ring on the axle rusts and expands, causing an erratic signal from the wheel speed sensor. The ABS module misinterprets this, triggering related control module codes.
- Low Brake Fluid (Uncommon) — Severely low brake fluid causes the ABS pump to ingest air, leading to pressure abnormalities and logging a C1254 code. This indicates a severe leak requiring immediate attention.
Symptoms

- ABS Light On — The Anti-lock Braking System (ABS) warning light on your dashboard illuminates.
- Traction Control/Stability Control Light On — Lights indicating 'TRAC OFF', 'VSC', 'DSC' or a symbol of a car with squiggly lines illuminate.
- Brake Warning Light On — The main red 'BRAKE' warning light illuminates alongside other system lights, indicating a serious fault.
- ABS Pump Motor Runs Constantly — A buzzing or electric motor sound from the engine bay does not shut off. The ABS pump motor runs continuously, trying to build pressure in a leaking system.
- Audible Alarm or Beeping — Toyota and Lexus models emit a continuous or intermittent beeping sound from the cabin to alert the driver of a critical brake system failure.
- Changes in Brake Pedal Feel — The brake pedal feels hard to press, or feels soft and requires more travel to stop the vehicle due to lost power assistance.
Diagnostic Flowchart
Tap your situation to follow the diagnostic path that matches what you're seeing on this code.
Common Fixes & Costs
- Replace Brake Actuator Assembly (Toyota/Lexus)
— Parts: $800-$2500, Labor: $500-$1000, ~4.5 hr book time
(Professional)
Toyota Prius (2004-2009): OEM ['44510-47050', '44500-47090'] (Alt: Cardone 12-52028, Dorman 520-528)
Lexus LS 460 (2007-2012): OEM ['44050-50150', '44050-50130'] (Alt: Cardone 12-4457) - Repair Electronic Brake Control Module (EBCM) — Parts: $150-$250 (Mail-in Service), Labor: $150-$300 (for removal and reinstallation), ~1.8 hr book time (Intermediate)
- Replace Electronic Brake Control Module (EBCM)
— Parts: $600-$1500, Labor: $150-$300, ~1.8 hr book time
(Professional)
Chevrolet Corvette C5 (2001-2004): OEM ['12216561', '10343433'] (Alt: Remanufactured units are widely available from specialists.) - Clean or Repair Ground Connections — Parts: $1-$10, Labor: $75-$175, ~0.8 hr book time (DIY)
- Replace Brake Light Switch
— Parts: $25-$60, Labor: $50-$150, ~0.6 hr book time
(DIY)
Subaru (Various Models, 2012-2017): OEM ['83311FJ001'] (Alt: Standard Motor Products SLS623, Wells SW8334)
DIY vs Professional
- Replace Brake Actuator Assembly (Toyota/Lexus) — Beginner:
Tools: Professional scan tool (e.g., Techstream), flare nut wrenches, socket set, torque wrench, brake fluid. - Repair Electronic Brake Control Module (EBCM) — Beginner:
Tools: Soldering iron, desoldering braid/pump, Torx screwdrivers, silicone sealant, basic hand tools. - Replace Electronic Brake Control Module (EBCM) — Beginner:
Tools: Socket set, Torx drivers, scan tool. - Clean or Repair Ground Connections — Beginner:
Tools: Socket set, wire brush, sandpaper, dielectric grease. - Replace Brake Light Switch — Beginner:
Tools: Basic hand tools (pliers, small socket/wrench).
Used vs. New Parts: Buying Guide
When a used part is worth it: For high-mileage vehicles (>150k miles) where the owner is on a tight budget. A used part from a reputable dismantler specializing in your vehicle's make is a viable option, but carries risk.
Donor-vehicle mileage cap: roughly under 100000 miles for the part to have meaningful remaining life.
Donor quality checklist:
- Match the part number exactly; many modules look identical but are not interchangeable.
- Source from a vehicle wrecked due to collision, not one scrapped for electrical or brake system failure.
- Look for sellers offering at least a 90-day warranty.
- Avoid parts from regions with heavy road salt use (Rust Belt) to prevent corroded connectors.
Decision logic:
- If The part is a GM EBCM for a 2001-2004 Corvette → Choose a professional mail-in repair service over used or new. It is cheaper and more reliable as known failure points are upgraded.
- If The part is a Toyota/Lexus brake actuator assembly → Favor a new OEM or high-quality remanufactured part. The labor is too intensive to risk on a questionable used unit.
- If The vehicle is older (15+ years) and has high mileage → A tested used part from a low-mileage donor is a reasonable budget-conscious choice.
Warranty tradeoff: Used parts typically have a 30-90 day warranty covering the part only. Remanufactured parts offer a 1-year to lifetime warranty. New OEM parts installed by a dealer carry a 12-month/12,000-mile warranty on parts and labor.
Worst-case if a used part fails: $500-$1500 if a used part fails after the warranty period, requiring a repeat of the labor costs plus another replacement part.
What Happens If You Wait — Timeline
- 0-1 month: Code sets, ABS/VSC/Brake lights illuminate, and safety systems are disabled. On Toyota/Lexus, an audible alarm sounds. No physical damage has occurred yet, but the vehicle is unsafe due to loss of ABS. (MPG impact: 0%% · Added cost: $0)
- 1-4 months: If the cause is a leaking Toyota/Lexus actuator, the ABS pump begins to run more frequently, then nearly constantly. This places a heavy strain on the pump motor and the vehicle's 12V battery. (MPG impact: 0-1%% · Added cost: $150-$350 (for a new battery prematurely worn out by the constant electrical draw))
- 4-9 months: The continuously running ABS pump motor burns out completely. The buzzing noise stops, but all warning lights remain. The constant electrical draw damages the battery. (MPG impact: 0%% · Added cost: $1500-$3500 (The cost of the inevitable actuator replacement, plus a likely battery replacement))
- 9+ months: A failed actuator causes a brake caliper to drag. This leads to rapid wear of the brake pads and rotor on one wheel, potentially overheating and warping the rotor or damaging the caliper. (MPG impact: 1-5% (due to brake drag)% · Added cost: $300-$800 (for new pads, rotor, and potentially a caliper for the affected wheel))
Cost of Not Fixing It
- Immediate: Loss of ABS and stability/traction control, leading to a significantly higher risk of wheel lock-up, skidding, and accidents in panic stops or on slippery roads. (Added cost: Potential for accident-related costs.)
- 1-3 months: On vehicles where a faulty actuator causes the ABS pump to run constantly, the pump motor burns out, and the constant electrical draw drains and damages the 12V battery. (Added cost: $150-$350 for a new battery.)
- 3+ months: A failing actuator causes brakes to drag intermittently on one or more wheels, leading to accelerated wear of brake pads, rotors, and calipers. (Added cost: $300-$800 for new pads, rotors, and a caliper on the affected wheel.)
Diagnosis Steps

- Check and Charge the Battery
Test the battery with a multimeter; a healthy battery reads at least 12.6 volts with the engine off. Test the alternator output, which should be 13.7 to 14.7 volts with the engine running. Low voltage is a primary trigger for C1254.
Tools: Multimeter, Battery Charger (Beginner) - Inspect EBCM/ABS Module Grounds
Locate the main ground wire for the EBCM. Disconnect the battery, remove the ground bolt, and thoroughly clean the contact surface with a wire brush until shiny. A poor ground is a frequent cause of this code.
Tools: Socket Set, Wire Brush (Intermediate) - Inspect Fuses and Relays
Check all fuses related to the ABS, VSC, and brake system in both the interior and under-hood fuse boxes. A blown fuse cuts power to the module.
Tools: Fuse Puller or Pliers (Beginner) - Read Live Data with an Advanced Scanner (Toyota/Lexus)
Use an OBD-II scanner to monitor 'Accumulator Pressure Sensor' live data. With the ignition on, voltage should be between 3.58V and 5.0V. If the pump runs but voltage doesn't change, the actuator assembly is faulty.
Tools: Advanced OBD-II Scanner (e.g., Techstream) (Advanced) - Check for EBCM Communication (GM)
Use a bi-directional scan tool to communicate with the EBCM. If the tool cannot establish communication with the EBCM but connects to other modules, it confirms an internal EBCM failure (assuming power/ground are good).
Tools: Bi-directional Scan Tool (Advanced) - Perform Accumulator Pressure Test (Toyota/Lexus)
Using a brake pressure gauge and scan tool, verify the system builds pressure to 768-1,308 psi (5,206-9,022 kPa). Failure to build pressure or rapid pressure loss indicates a leak or failed pump motor.
Tools: Brake Pressure Gauge, Advanced OBD-II Scanner (Advanced) - Inspect Wiring Harness and Connectors
Inspect all wiring going to the EBCM/ABS module for damage, melting, or corrosion. Unplug the main connector, check for bent pins, and apply electrical contact cleaner.
Tools: Flashlight, Contact Cleaner (Intermediate) - Test EBCM/ABS Module Power (Ford)
Using a multimeter and wiring diagram, test for proper battery and ignition voltage at the EBCM connector pins. A lack of voltage points to a wiring or fuse issue, not a failed module.
Tools: Multimeter, Vehicle-Specific Wiring Diagram (Advanced) - Perform Pressure Switch Resistance Test (Toyota/Lexus)
Depressurize the system by pumping the brake pedal 40 times. Disconnect the hydraulic booster connectors and measure resistance between specific terminals. Out-of-spec readings indicate a failed internal switch.
Tools: Multimeter, Vehicle-Specific Service Manual (Advanced)
When This Code Triggers (Freeze-Frame Conditions)
- Vehicle Speed: 15-45 mph (During initial self-test or steady driving. The EBCM performs self-checks once the vehicle exceeds 10 mph.)
- System Voltage: < 10.5V or > 15V (During engine crank or while driving. The code triggers from a low voltage condition caused by a weak battery during startup.)
- Brake Pedal Status: Off / Not Applied (During cruise or coasting. A pressure loss fault is detected when the pump runs excessively without brake application.)
- Time Since Ignition On: 1-5 minutes (Shortly after starting the vehicle. The EBCM performs internal checksum tests and pressure checks at startup.)
Related Codes
- C1256 — On Toyota/Lexus vehicles, this code for 'Accumulator Low Pressure' is almost always seen with C1254. They point to the same failure in the actuator assembly.
- C1391 — On Toyota/Lexus vehicles, this code indicates an 'Abnormal Leak in Accumulator Pressure' and is logged when pressure drops too quickly after the pump shuts off.
- C1248 — On GM vehicles, this code for 'Dynamic Rear Proportioning (DRP) Disabled' sets alongside C1254. The C1254 fault prevents the EBCM from controlling brake proportioning.
- C0054 — On Subaru vehicles, C0054 'Brake Light Switch Circuit Malfunction' is functionally related to C1254 as it represents a failure in a primary input to the brake control module.
Climate & Environmental Factors
- High Humidity / Road Salt (Rust Belt): Accelerates corrosion of critical electrical ground points, wiring harness connectors, and ABS components. A corroded EBCM ground is a frequent cause of intermittent power loss that triggers a C1254 fault on GM vehicles.
- High Heat: Prolonged exposure to high ambient and engine bay temperatures degrades electronic components. It contributes to the failure of solder joints on the EBCM's internal circuit board through repeated thermal expansion and contraction.
- Extreme Cold: Cold weather reduces a battery's cranking power. The significant voltage drop during a long engine crank causes the sensitive EBCM to register a fault and shut down, logging a C1254 code.
How to Talk to a Mechanic About This Code
Say this: "I have an ABS/VSC light on and my scanner shows code C1254. Before quoting a full module or actuator replacement, I'd like you to perform a baseline diagnosis. Please check the battery and charging system, inspect the main ground for the ABS module, and check for related fuses. If it's a Toyota/Lexus, please also note if codes C1256 and C1391 are present."
This signals you have done your research and understand the common, inexpensive causes versus the expensive ones. It directs the technician to perform a logical diagnostic sequence rather than immediately jumping to the most expensive conclusion.
Avoid saying:
- 'My ABS light is on, can you fix it?'
- 'Just replace the ABS module.'
- 'I heard a buzzing noise and now there are lights on.'
Questions to ask before authorizing the repair:
- What was the battery voltage at rest and with the engine running?
- Did you verify the integrity of the ABS module's power and ground circuits?
- For a Toyota/Lexus, what was the accumulator pressure sensor voltage reading from the live data stream? Did it change when the pump activated?
- For a GM vehicle, were you able to communicate with the EBCM? If not, have you ruled out a wiring issue?
- Does the repair estimate include the manufacturer-specific, scan-tool-actuated brake bleeding procedure required for this job?
Where to Take It: Dealer vs Independent vs Chain
- Dealer:
A necessary but expensive choice, especially for Toyota/Lexus actuator replacements that require specific, complex bleeding procedures. Always check for warranty extensions first.
Best for: Vehicles where a warranty extension program for the ABS actuator may still be active., Complex, late-model vehicles where specialized tools (e.g., Toyota's Techstream) and factory training are essential., When you want a guaranteed OEM part and a nationwide warranty on the repair.
Downsides: Highest labor rates and parts costs, often 1.5-2x more than an independent shop., Defaults to replacing an entire expensive assembly when a smaller component or wiring repair solves the issue. (Typical cost: +75% vs. baseline) - Independent Shop:
The best value option IF you properly vet the shop. Ask them directly if they have the tools and experience to replace and bleed a modern ABS/VSC actuator. A good independent shop is ideal for GM EBCM repairs/replacements.
Best for: Out-of-warranty vehicles where cost is a major factor., Common, well-documented failures like GM EBCM issues or Subaru brake light switches., Shops that specialize in your vehicle's make (e.g., a local Toyota or European car expert).
Downsides: Quality and capabilities vary widely. You must verify they own a bi-directional scan tool capable of performing the ABS-actuated bleed., May have less experience with this specific high-cost failure compared to a dealer. (Typical cost: +0% vs. baseline) - Chain Shop:
AVOID for diagnosing C1254. The complexity of this fault is far beyond the scope of most chain shops. Only use them for simple, pre-diagnosed parts replacement that is a known cause (e.g., Subaru brake light switch).
Best for: Simple, related jobs like replacing a battery or a brake light switch if diagnosed correctly beforehand.
Downsides: Technicians lack the advanced diagnostic training for complex codes like C1254., High risk of misdiagnosis, leading to unnecessary replacement of parts like wheel speed sensors., Generally not equipped with the high-end scan tools required for actuation and bleeding procedures. (Typical cost: -10% vs. baseline)
When to Walk Away From the Repair
If the estimated repair cost for the C1254 fault exceeds 50-60% of the car's current private-party value, it is often more financially sensible to sell the vehicle as-is or trade it in.
- Car worth $4500, fix is $3000: Walk away. The repair cost is ~67% of the vehicle's value. This is a clear case where the repair is not economical.
- Car worth $12000, fix is $3500: Fix it. The repair cost is ~29% of the car's value, which is well below the threshold. The vehicle has significant remaining value to justify the repair.
- Car worth $2500, fix is $1800: Walk away. The repair cost is 72% of the car's value. The money is better put towards a replacement vehicle.
What Scan Tool You Need for This Code

Minimum: A scanner that reads and clears codes from the ABS module, not just the engine computer. It must also display live data from the ABS sensors.
A basic $20 OBD-II reader only communicates with the engine control module (ECM). It cannot see the ABS module where the C1254 code is stored. You will see 'No Codes Found' while your dashboard is lit up. You need access to ABS live data to diagnose the fault correctly.
Budget: BlueDriver Pro (~$100) — Reads and clears ABS codes like C1254. It displays live data for some parameters to help confirm a diagnosis. It is NOT a bi-directional tool, so it cannot perform the ABS bleed procedure.
Mid-range: Foxwell NT510 Elite (~$180) — Offers full system diagnostics, including reading/clearing ABS codes. Crucially, it provides bi-directional control, allowing it to perform the 'automated bleed' or 'ABS bleed' function required after replacing an actuator or hydraulic unit.
Professional: Autel MaxiCOM MK808 / MK808BT (~$480-600) — A professional-level tool that provides comprehensive, OE-level diagnostics for all systems. It has robust bi-directional capabilities for ABS bleeding and component testing, live data graphing, and a user-friendly tablet interface.
Rent vs buy: For initial diagnosis, renting a scanner from a parts store works if it supports ABS. However, if you plan to DIY the replacement of an actuator or EBCM, you MUST buy a bi-directional tool like the Foxwell or Autel to perform the mandatory brake bleed procedure.
How to Clear the Code After You Fix It
- Reconnect the battery if it was disconnected for the repair.
- Use an OBD-II scan tool with ABS/SRS capability to clear the C1254 fault code from the EBCM/ABS module.
- Perform a scan tool-actuated brake bleeding procedure if hydraulic components were replaced.
- Perform a 'Zero Point Calibration' for the steering angle and yaw rate sensors if required by the manufacturer.
Drive cycle (~20 minutes): Start the vehicle and let it idle for 2 minutes. Drive in both city and highway conditions, ensuring the speed exceeds 20 mph for at least 5 minutes. This allows the EBCM to perform a full self-test of the wheel speed sensors and pump motor. The warning lights remain off if the repair was successful.
Readiness monitors affected: This code does not affect emissions-related readiness monitors., The ABS/VSC system has its own internal readiness status that resets.
Watch out for:
- Using a basic OBD-II code reader that cannot access or clear codes from the ABS control module.
- Failing to perform the manufacturer-specific brake bleeding procedure after replacing a hydraulic component, leaving air in the system.
- The code returning immediately because the root cause (e.g., a bad ground or weak battery) was ignored.
Will This Fail Emissions / State Inspection?
No — by itself this code doesn't fail OBD inspection (but it can keep readiness monitors from setting, which causes a separate fail).
- California: An illuminated ABS light does NOT cause a failure of the emissions portion (smog check). As long as the Check Engine Light is off and readiness monitors are set, it passes smog.
- New York: An illuminated ABS warning light is grounds for immediate failure of the annual safety inspection.
- Texas: The red 'BRAKE' warning light or an amber 'ABS' light being on is a cause for rejection in the annual safety inspection.
Most Commonly Affected Vehicles
- Toyota Prius (2004-2009) — Extremely common for the brake actuator assembly to fail. TSB BR001-07 noted a squeaking noise as an early symptom.
- Toyota 4Runner (2003-2005) — Prone to failure of the hydro-boost brake system, which includes the accumulator and pump motor.
- Lexus GX 470 (2003-2009) — Shares the same problematic hydro-boost brake design as the Toyota 4Runner. Dealer quotes for a new master cylinder assembly exceed $3,500.
- Chevrolet Corvette (C5) (1997-2004) — Known for EBCM failures. 1997-2000 models use a non-repairable module. 2001-2004 models have a separable module that is easily repaired by re-soldering internal relay connections.
- Lexus LS 460 (2007-2012) — The complex brake actuator assembly is a known failure point. New OEM part numbers like 44050-50150 are very expensive.
- Ford Windstar (1999-2003) — Experiences ABS module failures logging C1254. Diagnosis must focus on verifying power and ground at the module before condemning it.
- Ford E-Series Van (E-150, E-250) (2010-2014) — C1254 points to a general ABS module fault. Check the charging system and all power/ground circuits to the module before replacing it.
- BMW 3-Series (E90, E92) (2005-2013) — Famous for DSC/ABS failures caused by corroded rear axle reluctor rings. This gives a false wheel speed reading, triggering warning lights.
- Subaru Impreza, Crosstrek, Forester (2012-2017) — Logs related code C0054 due to a faulty brake light switch. Subaru issued TSB 06-55-16R for this issue, which deactivates ABS and VDC systems.
Manufacturer-Specific Notes
- Toyota/Lexus: The code almost always points to a failure of the brake actuator assembly, typically accompanied by codes C1256 and C1391.
- General Motors (Chevrolet/Cadillac): The code usually indicates an internal failure of the Electronic Brake Control Module (EBCM) due to failed solder joints. These modules are easily removed and sent to a specialist for repair.
- Ford: C1254 is a generic ABS module fault. Diagnosis must start with checking for proper voltage (over 10V) and ground (under 5 ohms) at the ABS module connector.
- Subaru: ABS/VDC warning lights are frequently triggered by a faulty brake light switch, logging code C0054. The switch is inexpensive and easy to replace.
Real Owner Stories
2002 Chevrolet Corvette Z06 at 75K miles
ABS/Traction Control lights appeared intermittently, especially during a race. Code C1214 was also present.
What they tried:
- Initially ignored the intermittent lights.
- After the problem became consistent, the owner removed the EBCM without disconnecting brake lines.
Outcome: Sent the EBCM to a mail-in repair service (ABS Fixer) for $150. The service repaired the known faulty solder joints on the internal relay, and the reinstalled module cleared all codes and restored function.
Lesson: For 2001-2004 Corvettes, a mail-in EBCM repair is a fast, cost-effective, and highly reliable fix. Consider it preventive maintenance if you have the car apart for other reasons.
2008 Toyota Prius at 160K miles
Loud, continuous beeping alarm in the cabin, plus ABS, Brake, and VSC warning lights. The ABS pump motor was heard running constantly.
What they tried:
- A mechanic initially suspected a wheel speed sensor, but the codes (C1254, C1256, C1391) pointed elsewhere.
- Tapping the actuator motor with a hammer made the noise and lights go away temporarily, confirming a motor issue.
Outcome: The owner opted to replace the entire brake actuator assembly with a remanufactured unit. The total cost including labor was approximately $1,800. This resolved all codes and symptoms.
Lesson: On a Toyota/Lexus with this code trio, the 'hammer test' confirms a failing pump motor. Don't waste money diagnosing other components; the actuator assembly is the culprit.
2003 Lexus GX470 with ~200K miles
ABS, VSC, and red BRAKE lights on, with an audible alarm. Codes C1254 and C1256 were present.
What they tried:
- The owner first checked the battery and alternator, which were fine.
- They inspected and cleaned the gas cap and checked brake fluid levels, with no change.
- A shop quoted over $4,000 for a new brake booster/actuator assembly from the dealer.
Outcome: The owner purchased a used actuator from a wrecked GX470 on eBay for $450. They paid an independent mechanic $600 for installation and the required scan-tool brake bleed procedure. The total cost was $1,050, and the fix was successful.
Lesson: For older, high-mileage vehicles outside of warranty, a used actuator from a reputable source saves thousands. Ensure your mechanic is equipped to perform the complex bleeding procedure.
2013 Subaru Crosstrek at 110K miles
ABS and Vehicle Dynamics Control (VDC) warning lights came on suddenly. No other symptoms were noted.
What they tried:
- The owner took the vehicle to a dealership.
- The dealership diagnosed a faulty brake light switch based on code C0054.
Outcome: The dealer replaced the brake light switch (Part # 83311FJ001) for a total cost of around $120. This is a known issue covered by Subaru TSB 06-55-16R.
Lesson: On modern Subarus, ABS/VDC lights are frequently caused by a cheap, easy-to-replace brake light switch. This is the first suspect before investigating the expensive ABS module.
How to Prevent This Code From Triggering
- Change brake fluid every 2-3 years or 30,000 miles (Every 2-3 years) — Brake fluid absorbs moisture from the air. This moisture corrodes the delicate internal components of the ABS actuator and EBCM, leading to seized valves or electrical shorts. Clean fluid is the single most important factor in ABS system longevity.
- Use a battery tender for stored vehicles (During any storage period longer than two weeks) — Maintains a stable voltage above 12.5V. This prevents the EBCM from experiencing low-voltage conditions during startup, which corrupts its memory and triggers a 'checksum' fault.
- Periodically activate the ABS system (Once every 6 months) — In a safe, open area, perform a few hard stops from ~20 mph to engage the ABS. This circulates fluid through the pump and valves, preventing them from seizing due to inactivity.
- Regularly inspect and clean EBCM/Actuator grounds and connectors (Every 2 years or during major service) — Visually inspect the main ground wire and electrical connector for the ABS module. In salty or humid climates, disconnect the battery, unplug the connector, and clean both with electrical contact cleaner to prevent corrosion.
Frequently Asked Questions
Is it safe to drive with code C1254?
It is not recommended for anything other than short, low-speed trips to a repair shop. Your anti-lock braking (ABS) and stability control systems are disabled. This significantly increases the risk of losing control in a panic stop or on a slippery surface.
Why is the repair so expensive for my Toyota/Lexus?
The C1254 code requires replacing the entire brake actuator assembly, a complex unit containing the ABS pump, accumulator, and control module. The part itself costs $1,200-$2,500, and the replacement involves labor-intensive, computerized brake bleeding procedures.
Can I just clear the code and keep driving?
You can clear the code, but it will return immediately or within a short time. This code indicates a hard fault in a critical safety system, not a temporary glitch. Clearing the code provides a false sense of security.
My mechanic hit my brake motor with a hammer and the lights went away temporarily. What does that mean?
This is a classic sign of a failing electric motor inside the brake actuator assembly. The impact temporarily re-establishes an electrical connection at the worn motor brushes. The entire assembly needs replacement as the motor is not serviced separately.
What are common misdiagnosis mistakes for C1254?
A common mistake is replacing the expensive ABS module without performing basic checks first. Technicians must rule out a weak battery, poor ground connections, blown fuses, or a faulty brake light switch. On BMWs, the issue is often a corroded reluctor ring on the axle.
The code appeared after I replaced my battery. What should I do?
This happens if there was a voltage surge or abnormal power loss. Ensure the new battery terminals are clean and tight, then clear the code with an ABS-capable scanner. If it returns, the system requires a 'Zero Point Calibration' with an advanced scan tool to re-learn sensor positions.
For my C5 Corvette, can I really fix the EBCM myself?
For 2001-2004 C5 Corvettes, owners successfully repair their EBCM by re-soldering five key connection points on the internal circuit board. This requires removing the module, opening the case, and basic soldering skills. The EBCM on 1997-2000 models uses a different design and is not repairable.
Will my car stop at all with a C1254 code?
Yes, your car stops using the base hydraulic brake system. However, your wheels can lock up and skid during a hard stop, and the brake pedal feels much harder to press.
Key Takeaways
- Code C1254 disables your ABS and stability control systems, significantly increasing stopping distances and skid risk during emergency braking.
- On Toyota and Lexus hybrids, this code almost always requires replacing the brake actuator assembly, costing between $1,500 and $3,500.
- For 2001-2004 GM vehicles, C1254 usually points to a faulty Electronic Brake Control Module (EBCM) that can be permanently repaired via a $150-$250 mail-in service.
- Test your 12V battery and clean the main ABS ground wire before buying parts, as voltage drops below 12.4V frequently trigger false C1254 codes.
Helpful Videos
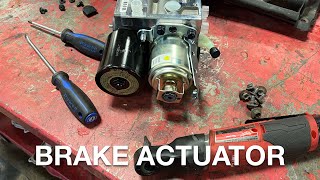
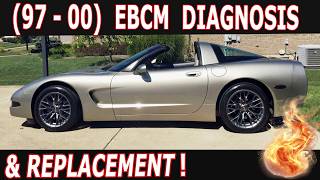
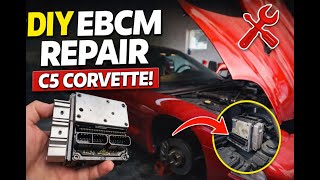
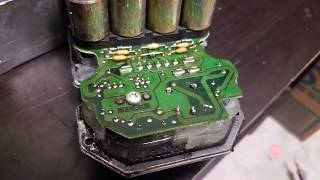

The information in this article is provided for general reference and educational purposes only. Vehicle specifications, procedures, and part compatibility can vary by production date, trim level, and region. Always consult your vehicle's factory service manual and verify part numbers before purchasing or performing repairs. Safety-critical components such as airbags, seat belts, and braking systems should be installed by a qualified professional.
- 🎬 Helpful Videos
- What Does C1254 Mean?
- Can I Drive With C1254?
- Common Causes
- Symptoms
- Diagnostic Flowchart
- Common Fixes & Costs
- DIY vs Professional
- Used vs. New Parts: Buying Guide
- What Happens If You Wait — Timeline
- Cost of Not Fixing It
- Diagnosis Steps
- When This Code Triggers (Freeze-Frame Conditions)
- Related Codes
- Climate & Environmental Factors
- How to Talk to a Mechanic About This Code
- Where to Take It: Dealer vs Independent vs Chain
- When to Walk Away From the Repair
- What Scan Tool You Need for This Code
- How to Clear the Code After You Fix It
- Will This Fail Emissions / State Inspection?
- Most Commonly Affected Vehicles
- Manufacturer-Specific Notes
- Real Owner Stories
- 2002 Chevrolet Corvette Z06 at 75K miles
- 2008 Toyota Prius at 160K miles
- 2003 Lexus GX470 with ~200K miles
- 2013 Subaru Crosstrek at 110K miles
- How to Prevent This Code From Triggering
- Frequently Asked Questions
- Is it safe to drive with code C1254?
- Why is the repair so expensive for my Toyota/Lexus?
- Can I just clear the code and keep driving?
- My mechanic hit my brake motor with a hammer and the lights went away temporarily. What does that mean?
- What are common misdiagnosis mistakes for C1254?
- The code appeared after I replaced my battery. What should I do?
- For my C5 Corvette, can I really fix the EBCM myself?
- Will my car stop at all with a C1254 code?
- Key Takeaways
- 🎟️ Get 5% Off