

C1252 on 2012-2016 Toyota Prius V: Brake Booster Pump Failure Causes and Fixes
Code C1252 on a 2012-2016 Prius V almost always means the brake booster pump and master cylinder assembly is failing due to a known internal leak. This is a critical safety issue requiring immediate attention. Expect a costly repair involving the replacement of the entire assembly, with dealer quotes ranging from $2,500 to over $4,700.
- Code C1252 on a 2012-2016 Prius V is a critical safety fault, almost always indicating a failed brake booster/master cylinder assembly due to a known internal leak.
- This is not a DIY-friendly repair due to the need for specialized electronic brake bleeding procedures with Toyota's Techstream software.
- The repair is very expensive, with OEM parts costing over $1,200 and total shop bills frequently ranging from $2,000 to over $4,500.
- Driving the vehicle is not recommended, as the braking system is compromised and could fail completely.
- The Lexus CT200h shares this exact failure, for which Lexus issued a Customer Support Program, highlighting the prevalence of the issue.
What's Unique About the 2012-2016 Toyota PRIUS V

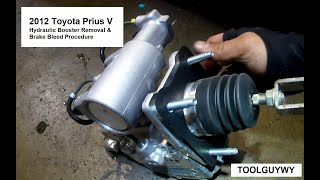
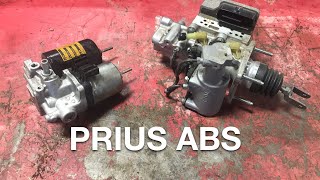
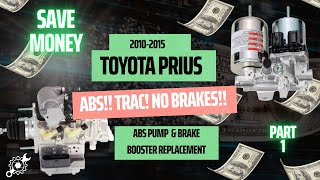
The Toyota Prius V uses a sophisticated and complex electronically controlled 'brake-by-wire' system, not a traditional vacuum brake booster. This system relies on an electric pump, an accumulator for storing pressure, and a master cylinder/actuator assembly. 🎬 Watch: Complete DIY tutorial for replacing the ABS pump and booster. While efficient, this design is known for a specific failure where a small internal brake fluid leak develops within the brake booster assembly. This known issue is the primary reason for seeing a C1252 code on this vehicle and has been acknowledged by Toyota in technical service bulletins and by Lexus in a customer support program for the sister platform, the CT200h.
Diagnostic Flowchart

Tap your situation to follow the diagnostic path that matches what you're seeing on this vehicle.
Symptoms You May Notice
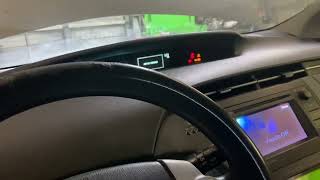
- Brake, ABS, and/or TRAC warning lights illuminated on the dashboard.
- "Check VSC" message displayed.
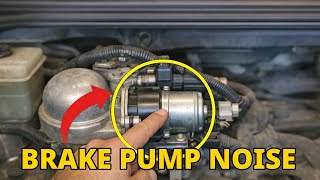
- A loud or frequent buzzing/humming noise from the engine bay, which is the brake pump running excessively. This may occur for 10+ seconds when opening the driver's door, or cycle on and off every 10-30 seconds while the car is on, even without pressing the brake pedal.
- A hard or soft/spongy brake pedal feel.
- A beeping alarm from the dashboard when the brake system fault is active.
- Some owners describe a "goose honking" or groaning sound from the actuator assembly.
- Replacing only the ABS pump/accumulator. While the accumulator low pressure code (C1256) is often present, the root cause is typically the internal leak in the master cylinder/booster unit, which overworks the pump. The two components are piped together, so a leak in one affects the other.
- Replacing a wheel speed sensor. While a faulty wheel speed sensor can trigger ABS/VSC lights, it will not cause the C1252 code or the audible symptom of the pump running excessively.
Most Likely Causes

- Failing Brake Booster with Master Cylinder Assembly 🔴 High Probability This is a well-documented failure point for this platform, addressed by Toyota TSBs #T-SB-0013-23 and #T-SB-0115-20. The cause is a small internal brake fluid leak within the sealed actuator assembly, which causes the pump to run constantly to try and maintain pressure.
How to confirm: Listen for the pump running for more than 10-15 seconds after opening the driver's door, or cycling every 15-30 seconds while parked. A professional diagnosis with Toyota's Techstream software can monitor the accumulator pressure sensor data; a rapid drop in pressure when the pump is not running confirms an internal leak.
Typical fix: Replace the entire Brake Booster and Master Cylinder assembly. The system must then be bled using a specialized, bi-directional scan tool procedure to properly cycle the ABS valves and purge all air. Simply replacing the part without the electronic bleed procedure will result in a non-functional or dangerous brake system.
Est. part cost: $900-$1500
Rare But Worth Checking
- Failing ABS Motor Relay: While less common than the booster assembly failure, a stuck or failing relay could theoretically cause the motor to run incorrectly. This is a much cheaper part to check first, as outlined in Toyota's diagnostic procedures. However, it is rarely the root cause when accompanied by pressure leak codes like C1256 or C1391.
- Air in the Brake Lines: If the brake system was recently opened (e.g., for a caliper or hose replacement) and not bled correctly using the proper electronic procedure, air can become trapped. This will cause the pump to run excessively trying to compress the air. This is typically only a cause if recent brake work has been performed.
- Failing Brake Booster Pump Motor: In some cases, the electric pump motor itself can fail from worn brushes or internal faults, especially after being overworked due to a leak. Some owners attempt to replace just the pump or rebuild it, but this is often a temporary fix as the underlying leak in the actuator assembly remains and will wear out the new pump quickly.
Diagnosis Steps
- Confirm the presence of C1252 and any accompanying codes (C1256, C1391, C1253) using an OBD-II scanner capable of reading Toyota chassis codes.
- Turn the vehicle on (to READY) and listen while parked. A healthy pump should run for a few seconds and shut off. If the pump runs continuously or cycles every 10-30 seconds without the brake pedal being pressed, it's a strong indicator of a pressure leak.
- Check the brake fluid reservoir. While an internal leak may not cause a noticeable drop in fluid level, a very low level is a major red flag.
- Consult Toyota Technical Service Bulletins T-SB-0013-23 and T-SB-0115-20, which detail this exact problem and point to replacement of the booster assembly.
- The definitive diagnosis involves using Toyota Techstream software (or a compatible tool) to monitor the 'Accumulator Pressure Sensor' value in the ABS/VSC/TRAC live data list. A healthy system will hold pressure for a long time. A rapid, steady drop in pressure while the car is stationary confirms a leak.
- If pressure holds perfectly, investigate the pump motor relay and associated wiring as a less likely but possible cause.
Parts You'll Likely Need

- Brake Booster and Master Cylinder Assembly
(OEM #47050-47110)— This is the component that fails due to the internal leak described in Toyota's TSBs, causing code C1252. It is sold as a complete assembly including the master cylinder, actuator, and ECU.
Trusted brands: Toyota (OEM)
OEM price range: $1200-$1900
Aftermarket price range: $900-$1300
Related Codes That Often Appear With This One
- C1256 — Stands for 'Accumulator Low Pressure'. This code is a direct result of C1252; the pump runs too long because it cannot get the accumulator up to the target pressure due to a leak.
- C1391 — Stands for 'Abnormal Leak of Accumulator Pressure'. This code specifically points to a leak and is frequently stored alongside C1252, confirming the diagnosis of an internal leak in the booster assembly.
- C1253 — Stands for 'Hydro-Booster Pump Motor Relay'. This can appear as the system tries to command the pump and detects a fault in the overall pressure-building process or relay circuit.
Technical Service Bulletins (TSBs) & Recalls

- T-SB-0013-23: Acknowledges that C1252 and related codes may be caused by a small brake fluid leak inside the brake booster assembly.
- T-SB-0115-20: Similar to the above, identifies an internal brake fluid leak in the brake booster assembly with master cylinder as the cause for C1252 and other codes.
Platform-Specific Known Issues
- Toyota has issued Technical Service Bulletins T-SB-0013-23 and T-SB-0115-20, which directly address this code on the Prius V. They state that warning lights with DTCs C1391, C1252, C1256, and/or C1253 may be caused by a 'small internal brake fluid leak in the brake booster assembly with master cylinder.'
- NHTSA owner complaints confirm this is a common real-world failure. One owner of a 2013 model reported codes C1252 and C1256, noting, 'This appears to be a common problem with these vehicles that Toyota does not want to address.'
- Another owner of a 2012 Prius V was diagnosed by a dealer with codes C1252, C1253, and C1256 and was told the 'brake booster and ABS pump needed to be replaced.'
- The Lexus CT200h, a platform mate, had a Customer Support Program (21LE01) issued for the same failure, extending warranty coverage for the brake booster and pump assemblies for this exact set of DTCs.
Mechanic-Grade Diagnostic Values
- Skid Control ECU (Connector A19) ground continuity — expected: Below 1 Ω. Failure: A reading higher than 1 Ω indicates a poor ground connection.
- Skid Control ECU (Connector A19) power supply voltage — expected: 10 to 14 V at pin A19-46 (IG1) with ignition switch ON. Failure: Voltage below 10V or no voltage indicates a power supply issue to the ECU.
- CAN Bus Line Resistance at Skid Control ECU — expected: 54 to 69 Ω between pins A19-11 (CANH) and A19-25 (CANL) with ignition OFF. Failure: Readings outside this range indicate a problem on the CAN communication bus.
- Brake Booster Pump Motor Harness Resistance — expected: Below 2 Ω. Failure: Higher resistance or an open circuit (OL) indicates a fault in the pump motor wiring or the motor itself.
Hidden / Shadow Codes Worth Checking
- C1252/52 with detailed code 130: The sub-code 130 specifies that the 'Motor relay is ON for at least 5 min,' confirming the general C1252 fault. (see via Toyota Techstream or a compatible professional scan tool capable of reading detailed diagnostic codes.)
- C1253/53 with detailed codes 132, 133, 134, 136, 137, 138: These sub-codes pinpoint specific malfunctions within the two motor relay circuits, such as a coil being energized when it should be off, or not energized when it should be on. (see via Toyota Techstream or a compatible professional scan tool.)
Scan Tool Commands That Help
- Toyota Techstream: Active Test: Motor Relay 1 / Motor Relay 2 — Use this to individually command each of the two pump motor relays ON and OFF. This helps isolate whether a failure is in a specific relay, its wiring, or one of the motor circuits, which is useful if the pump runs with one relay but not the other.
- Toyota Techstream: Utility: Accumulator 0 Down — This is a mandatory safety procedure used to depressurize the high-pressure accumulator BEFORE servicing or removing any brake actuator or pump components. Failure to do so can result in injury or component damage.
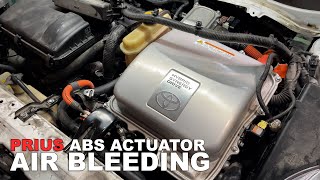
- Toyota Techstream: Utility: Air Bleeding — This is the required procedure for bleeding the brake system after replacing the actuator or opening any hydraulic lines. It electronically cycles the solenoids and pump to purge all trapped air, which is impossible with a manual bleed.
- Toyota Techstream: Active Test: Perform Actuator Pattern — This test is performed AFTER the initial 'Air Bleeding' utility. It forcefully moves the internal valves of the actuator to dislodge any remaining air pockets, ensuring a complete bleed.
- Toyota Techstream: Utility: Linear Valve Offset Calibration — This procedure must be performed after replacing the brake actuator assembly to learn the characteristics of the new linear solenoid valves. Failure to perform this calibration can result in persistent codes or improper brake feel.
Wiring & Ground Locations
- A19 — This is the main electrical connector for the Skid Control ECU (ABS Actuator).. Checking for power at pin 46 (IG1) and good ground at pins 1 (GND2) and 32 (GND1) is a fundamental step to rule out a power or ground issue to the control module itself.
- EA, EB, EC — These are major ground point locations in the engine compartment, typically on the frame rails or engine block.. The brake actuator assembly relies on a solid ground connection. A corroded or loose ground at one of these primary points can cause a variety of intermittent electrical faults in the brake system.
Real Owner Repair Stories
- PriusChat user (2013 Toyota Prius) — Initially code C1391 (accumulator leak). Two months later, total brake assist failure with a beeping alarm and codes C1252, C1253, C1256, and C1391.
❌ Tried (didn't work) The user replaced the brake actuator assembly.
✅ What actually fixed it The repair was incomplete and problematic. After replacing the part and clearing codes, the beeping and faults returned. The Techstream 'Air Bleeding' utility failed to run, giving an error. This story highlights that replacing the actuator is only half the battle; the subsequent electronic bleeding procedure is complex and can fail, preventing a successful repair. - PriusChat user (Unknown year Prius) — Codes C1256 and C1391, all brake warning lights on, frequent clicking noise.
❌ Tried (didn't work) The owner swapped the actuator themselves, but the codes did not go away. The symptom became worse, with the car braking hard on only the driver's side wheel.
✅ What actually fixed it The issue was identified by another user as improper bleeding. The story underscores that failing to use the Techstream-guided bleeding procedure after replacing the actuator will lead to dangerous brake performance and persistent codes.
When the Usual Fixes Don't Work
- While the overwhelming consensus points to replacing the brake actuator assembly, it is not a magic bullet. In one documented case, a user replaced the brake booster and accumulator with used parts, but the C1252 and related codes persisted, and the audible leak sound remained. This indicates that either the replacement (used) part was also faulty, or the actual root cause was something else, such as a failure to perform the mandatory electronic brake bleeding procedure correctly. This serves as strong counter-evidence to the assumption that simply swapping the hardware will fix the problem. The follow-up procedures are just as critical as the part itself.
OEM Part Supersession History
47050-47360→04000-23876— Part update or revision by manufacturer.
Heads up: This part is for 2016 models and differs from the part for 2012-2014 models.47050-47361→04000-25147— Part update or revision by manufacturer.
Heads up: This part is for 2017 models. Using a part from a different year range may not work.47070-12020→04006-22212— Part update or revision by manufacturer.
Heads up: This is the 'Pump Assy, Brake Booster', which is a separate component from the 'Brake Booster Assembly With Master Cylinder'. The TSB calls for replacing the main assembly, and sometimes this pump as well.
Model Year Variations Within This Range
- 2012-2014: The Brake Booster and Master Cylinder Assembly part number is typically 47050-47110.
- 2016-2018: Different part numbers are used for the Brake Booster Assembly (e.g., 47050-47360 for 2016). Using the incorrect part number for the vehicle's specific year is known to cause compatibility issues.
Helpful Videos
We Have This Part in Stock



The information in this article is provided for general reference and educational purposes only. Vehicle specifications, procedures, and part compatibility can vary by production date, trim level, and region. Always consult your vehicle's factory service manual and verify part numbers before purchasing or performing repairs. Safety-critical components such as airbags, seat belts, and braking systems should be installed by a qualified professional.
- Toyota PRIUS V:
- 🎬 Helpful Videos
- 🛍️ Shop This Part
- What's Unique About the 2012-2016 Toyota PRIUS V
- Diagnostic Flowchart
- Symptoms You May Notice
- Most Likely Causes
- Rare But Worth Checking
- Diagnosis Steps
- Parts You'll Likely Need
- Related Codes That Often Appear With This One
- Technical Service Bulletins (TSBs) & Recalls
- Platform-Specific Known Issues
- Mechanic-Grade Diagnostic Values
- Hidden / Shadow Codes Worth Checking
- Scan Tool Commands That Help
- Wiring & Ground Locations
- Real Owner Repair Stories
- When the Usual Fixes Don't Work
- OEM Part Supersession History
- Model Year Variations Within This Range
- 🎟️ Get 5% Off