

C1252 on 2011-2015 Lexus CT HYBRID: Brake Booster Pump Fault Causes and Fixes
On a 2011-2015 Lexus CT Hybrid, code C1252 almost always indicates a failing brake booster and master cylinder assembly due to a well-documented internal leak. This is a critical safety issue requiring immediate attention. Lexus has acknowledged this with Customer Support Programs (21LE01 and 24LE01) that extend warranty coverage. For those not covered, expect a repair cost of approximately $2,000 to $3,500 at an independent shop, with dealer prices potentially being higher.
- Code C1252 on a 2011-2015 CT200h is a critical safety alert for a failing brake system.
- The cause is almost certainly a failing brake booster and master cylinder assembly due to a known internal leak.
- Do not drive the vehicle. Have it towed to a qualified repair shop, preferably one with experience in Toyota/Lexus hybrids.
- The repair is expensive, involving the replacement of the entire brake actuator assembly and a specialized electronic bleeding procedure.
- Always check with a Lexus dealer first to see if your vehicle's VIN is covered by an active warranty extension or Customer Support Program for this issue, which could cover the cost of the repair.
What's Unique About the 2011-2015 Lexus CT HYBRID

The Lexus CT Hybrid, like its Toyota Prius platform-mate, uses a sophisticated Electronically Controlled Braking (ECB) system instead of a traditional vacuum booster. This system is necessary for blending regenerative and friction braking. Unfortunately, the brake actuator assembly in this generation is a known high-failure item due to internal seals that degrade over time, causing a slow loss of pressure. This specific failure pattern is so common that Lexus has issued Technical Service Bulletins (TSBs) and Customer Support Programs for this exact issue across multiple models, confirming the diagnosis when C1252 is present with C1391, C1256, and/or C1253.
Diagnostic Flowchart

Tap your situation to follow the diagnostic path that matches what you're seeing on this vehicle.
Symptoms You May Notice

- Multiple warning lights on the dashboard, including Brake, ABS, and TRAC.
- "Check VSC" message displayed on the information screen.
- A buzzing or humming noise from the engine bay that occurs frequently (e.g., every 5-30 seconds), even when the brake pedal is not being pressed. 🎬 Listen to the specific buzzing sound of a failing pump motor. This is the sound of the pump motor running excessively.
- A change in brake pedal feel, which may become hard or require more effort to press.
- A beeping alarm from the dashboard when the fault is active.
- A hissing sound from the actuator area after the car is turned off as pressure bleeds off.
- Replacing only the brake booster pump motor. The motor is usually running because it's trying to overcome a leak in the actuator; the motor itself is not the root cause.
- Suspecting a bad 12V auxiliary battery. While a failing 12V battery can cause various electrical issues on a hybrid, it does not typically cause the specific C1252 code and the associated symptoms of a constantly running pump. However, a weak battery can complicate the electronic brake bleeding procedure after the repair.
- Replacing the actuator but failing to bleed the system correctly. A YouTube user documented replacing the booster and accumulator with used parts but the problem persisted because the system was not electronically bled, demonstrating the necessity of this step.
Most Likely Causes
- Failing Brake Booster and Master Cylinder Assembly 🔴 High Probability This is a well-documented failure point on this platform. Lexus TSBs L-SB-0008-24 and L-SB-0009-21 directly attribute codes like C1252 to a "small internal brake fluid leak" inside this assembly. Lexus also issued Customer Support Programs 21LE01 (for 2011-2013 models) and 24LE01 (for 2014-2017 models) to cover this specific failure.
How to confirm: Listen for the brake booster pump running for more than 10-15 seconds at a time, or cycling on and off every few seconds. A mechanic can use a scan tool (like Techstream) to monitor the 'Accumulator Pressure Sensor' voltage; a steady, rapid drop in voltage (more than 0.55V in 30 seconds without braking) confirms an internal leak. 🎬 See how to use a scan tool to confirm internal leaks.
Typical fix: The entire brake booster and master cylinder assembly must be replaced. This is sold as a single unit. After replacement, the brake system must be electronically bled using a compatible scan tool.
Est. part cost: $800-$1600
Rare But Worth Checking
- Failing ABS Fuses or Relay: While much less common than actuator failure, it's worth checking the main ABS motor fuses (typically 25A or 30A) and relays before condemning an expensive part. A faulty relay could cause the motor to run continuously. A Prius owner with similar codes found blown ABS-1 (25A) and ABS-2 (30A) fuses.
- Skid Control ECU Malfunction: In very rare cases, the integrated Skid Control ECU, which is part of the brake actuator assembly, can fail electronically. However, this is unlikely without the presence of the tell-tale internal leak. Since the ECU is part of the assembly, it gets replaced during the standard repair anyway.
Diagnosis Steps
- Confirm the presence of C1252 and any related codes (C1391, C1256, C1253) using an OBD-II scanner capable of reading ABS/Chassis codes.
- Turn the vehicle to the 'ON' position (Ready off) and listen for the brake booster pump in the engine bay. Note if it runs for longer than 15-20 seconds or cycles on and off repeatedly without the brake being applied.
- Check the brake fluid level. While the leak is usually internal, it's good practice to check for any external leaks.
- If you have access to an advanced scan tool (like Techstream), monitor the 'Accumulator Pressure Sensor' data PID. Observe the pressure drop after the pump shuts off. A steady, rapid decline (a voltage drop greater than 0.55V in 30 seconds) confirms an internal leak.
- If the pump does not run at all, check the related high-amperage fuses (e.g., ABS MTR1, ABS MTR2) and relays in the fuse box.
- Check with a Lexus dealer using your VIN to see if your vehicle is covered under Customer Support Program 21LE01 (for 2011-2013 models) or 24LE01 (for 2014-2017 models).
- Based on the TSBs and overwhelming evidence, if the pump runs excessively and codes C1252/C1391/C1256 are present, the brake booster and master cylinder assembly is faulty and requires replacement.
Parts You'll Likely Need

- Brake Booster and Master Cylinder Assembly
(OEM #47050-76100, 47050-76120, 47050-76121, 47050-76122)— This is the complete unit that fails due to an internal hydraulic leak, causing the C1252 code. It includes the master cylinder, pump, accumulator, and control ECU. TSB L-SB-0008-24 lists several part numbers and their updated kit versions (e.g., 04003-22176 for 47050-76100).
Trusted brands: Lexus (OEM), Aisin / ADVICS (OEM supplier)
OEM price range: $1500-$2200
Aftermarket price range: $800-$1300 - Brake Booster Pump Assembly
(OEM #47070-12020)— Lexus Customer Support Programs often call for the replacement of both the main booster assembly and this separate pump assembly to ensure a complete repair.
Trusted brands: Lexus (OEM)
OEM price range: $300-$500
Related Codes That Often Appear With This One
- C1391 — This code indicates an "Abnormal Leak in Accumulator" and is almost always stored with C1252, as the leak is what causes the pump to run excessively.
- C1256 — This code means "Accumulator Low Pressure". It is a direct result of the internal leak, as the system cannot maintain the required hydraulic pressure.
- C1253 — This code points to a "Brake Booster Pump Motor Relay Malfunction". It often appears alongside the other codes as part of the same general system failure, as the relay is overworked.
Technical Service Bulletins (TSBs) & Recalls
- LSB000824: Notes that for 2014-2017 CT200h, codes C1391, C1252, C1256, and/or C1253 can be caused by a small internal brake fluid leak in the brake actuator.
- L-SB-0009-21: Describes the same set of codes on 2011 models as potentially being caused by a small internal brake fluid leak inside the brake booster assembly with master cylinder.
- 21LE01: Customer Support Program for 2011-2013 CT200h models to replace the brake booster and pump assemblies if specific DTCs (including C1252) are present.
- 24LE01: Customer Support Program for 2014-2017 CT200h models for the same issue, extending the warranty coverage.
Platform-Specific Known Issues
- Lexus issued Technical Service Bulletin L-SB-0008-24, which states that for 2014-2017 models, warning lights with DTCs C1391, C1252, C1256, and/or C1253 may be caused by a small internal brake fluid leak inside the brake actuator.
- An earlier TSB, L-SB-0009-21, noted the same issue for 2011 models, describing the cause as a "small internal brake fluid leak inside the brake booster assembly with master cylinder".
- Lexus Customer Support Program 21LE01 covers this failure on 2011-2013 CT200h models. Primary coverage ended Nov 30, 2022, but secondary coverage lasts for 10 years or 150,000 miles from the date of first use.
- Lexus Customer Support Program 24LE01 covers this failure on 2014-2017 CT200h models. Primary coverage ends March 31, 2025, with secondary coverage for 10 years or 150,000 miles from the date of first use.
Mechanic-Grade Diagnostic Values
- Accumulator Pressure Sensor Voltage Drop (at rest) — expected: Voltage change should be within 0.55 V over a 30-second period with the brake pedal not depressed.. Failure: A voltage drop greater than 0.55 V indicates a pressure leak in the system, which is the root cause of C1252.
- Accumulator Pressure Sensor Voltage (Normal Operating Range) — expected: 3.58 to 5.0 V after the pump has run.. Failure: If the value is constant regardless of pump operation, the sensor itself may have malfunctioned.
- Skid Control ECU Power & Ground (at ECU connector) — expected: Power Pins (+BS, +BM, IG1) to Body Ground: 11 to 14 V. Ground Pins (GND1, GND2) to Body Ground: Below 1 Ω.. Failure: Voltage below 11V or resistance above 1 Ω indicates a wiring or power supply issue to the ECU.
- Brake Booster Pump Motor Winding Resistance — expected: Below 2 Ω between terminals MT+ and MT-.. Failure: Higher resistance could indicate a failing motor, though this is a less common cause than an actuator leak.
Scan Tool Commands That Help
- Toyota Techstream: Data List -> ABS/VSC/TRAC -> Accumulator Pressure Sensor — Used to monitor the live voltage from the pressure sensor. Watching for a rapid voltage drop with the system at rest is the primary method to confirm an internal leak.
- Toyota Techstream: Active Test -> ABS Motor Relay — This command manually cycles the pump motor. It's used to verify if the pump motor and its relay are functional, helping to rule out an electrical failure if the pump doesn't run at all.
- Toyota Techstream: Utility -> ABS/VSC -> Air Bleeding — This is a mandatory procedure after replacing the brake actuator assembly. It electronically cycles the solenoids and pump to purge all air from the complex hydraulic circuits. Failure to perform this step will result in a spongy pedal and persistent codes.
- Toyota Techstream: Utility -> ABS/VSC -> Zero Down — This function safely depressurizes the accumulator before starting any physical repairs on the hydraulic unit, such as disconnecting brake lines.
- Toyota Techstream: Utility -> ABS/VSC -> ECB Invalid — This procedure is used in conjunction with the 'Zero Down' command to disable the electronically controlled braking system, allowing for manual bleeding of the front brakes as part of the larger bleeding process.
Wiring & Ground Locations
- Skid Control ECU (Brake Actuator Assembly) — The ECU is integrated into the brake actuator assembly, which is located on the driver's side of the engine bay, mounted to the firewall.. This is the central control unit for the entire ABS/VSC/Brake system. All sensor inputs, pump commands, and fault detections originate here. A failure of this unit is the root cause of the C1252 code.
- Ground Points (GND1, GND2) — The primary ground points for the brake actuator assembly are located on the chassis near the actuator itself. A wiring diagram is needed to trace the specific ground locations (often designated 'BA' in diagrams).. A poor ground connection can cause erratic voltage readings and incorrect operation of the pump motor or ECU, potentially triggering false codes. Checking for clean, tight ground connections is a fundamental electrical diagnostic step.
- Actuator Connector — The main electrical connector plugs directly into the side of the brake actuator assembly in the engine bay.. This connector carries power, ground, and CAN bus communication signals to the ECU. Corrosion or backed-out pins can interrupt communication or power, leading to system failure.
Real Owner Repair Stories
- Reddit user in r/prius (2006 Toyota Prius (similar platform)) — Dashboard lit up 'like a Christmas tree' after actuator replacement, throwing codes C1252 and C1256.
❌ Tried (didn't work) Replacing the ABS actuator., Bleeding the brakes (initially).
✅ What actually fixed it The user discovered they had forgotten to properly and fully install the orange high-voltage service plug for the main battery. After correctly seating the plug, the issue was resolved. This highlights the importance of following hybrid system power-down and power-up procedures correctly. - ClubLexus user Scsyndrome (2013 Lexus CT200h with 160k miles) — All brake-related warning lights on, ABS actuator buzzing every 5 seconds, hissing sound after shutoff, spongy brake feel, and code C1391.
❌ Tried (didn't work) Hoping the issue would resolve on its own., Visiting a Lexus dealer who confirmed no active recalls for the VIN.
✅ What actually fixed it The user replaced both the brake accumulator (actuator) and the booster pump assembly. After replacement, they used Techstream to recalibrate everything, which resolved the problem.
OEM Part Supersession History
47050-76100→04003-22176 (Kit)— This is a kit part number provided by Lexus in TSB L-SB-0008-24 to replace the original actuator assembly on 2014-2017 models. The kit ensures all necessary updated components are used for the repair.47050-75030→04002-07275 (Kit)— This kit part number is specified in a TSB for the related Lexus HS 250h model and likely applies to the early CT200h as well, representing an updated repair package from the manufacturer.47050-76120→47050-76121, 47050-76122— Standard part number evolution by the manufacturer to address design improvements or supplier changes.
Heads up: While later part numbers often supersede earlier ones, it is critical to verify the correct part for your specific VIN using the Lexus parts catalog, as there can be subtle differences between model years.
Model Year Variations Within This Range
- 2014-2015: The 2014 model year marked a mid-cycle refresh for the CT200h. Changes included revised exterior styling (spindle grille), a fixed central navigation screen, different steering wheel controls, and more subdued engine noise. Lexus also reportedly added extra welds to the body to increase rigidity, which may slightly alter the ride compared to 2011-2013 models. These changes do not affect the root cause of code C1252, but they do mean some interior and exterior parts are not interchangeable.
- 2011-2013 vs 2014-2017: Lexus has two separate Customer Support Programs for this issue: 21LE01 for 2011-2013 models and 24LE01 for 2014-2017 models, indicating there may be different part series or production dates associated with the failure, even though the failure mechanism is the same.
Helpful Videos

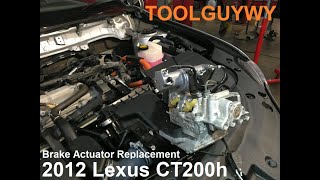

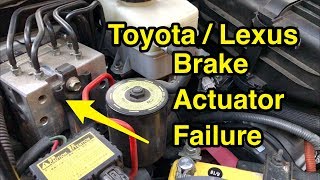
We Have This Part in Stock

The information in this article is provided for general reference and educational purposes only. Vehicle specifications, procedures, and part compatibility can vary by production date, trim level, and region. Always consult your vehicle's factory service manual and verify part numbers before purchasing or performing repairs. Safety-critical components such as airbags, seat belts, and braking systems should be installed by a qualified professional.
- Lexus CT HYBRID:
- 🎬 Helpful Videos
- 🛍️ Shop This Part
- What's Unique About the 2011-2015 Lexus CT HYBRID
- Diagnostic Flowchart
- Symptoms You May Notice
- Most Likely Causes
- Rare But Worth Checking
- Diagnosis Steps
- Parts You'll Likely Need
- Related Codes That Often Appear With This One
- Technical Service Bulletins (TSBs) & Recalls
- Platform-Specific Known Issues
- Mechanic-Grade Diagnostic Values
- Scan Tool Commands That Help
- Wiring & Ground Locations
- Real Owner Repair Stories
- OEM Part Supersession History
- Model Year Variations Within This Range
- 🎟️ Get 5% Off