

OBD-II Code C1194: ABS Outlet Valve Coil Left Front Circuit Failure
What C1194 means, why it triggers, and how to fix it
- Code C1194 disables your Anti-lock Braking System (ABS) due to an electrical fault in the left front brake valve circuit, increasing your risk of skidding.
- The most frequent cause on 1997-2004 Ford and Jaguar vehicles is a failed ABS electronic control module caused by cracked internal solder joints.
- Before spending $500+ on a new module, test the ABS fuses and verify the module connector receives over 12 volts of power and has less than 5 ohms of ground resistance.
- Sending your original ABS module to a mail-in rebuild service costs $150-$250, saving you hundreds over a new part and eliminating the need for dealer reprogramming.
What Does C1194 Mean?

Trouble code C1194 means the Anti-lock Brake System (ABS) module detected an electrical fault in the circuit for the left front wheel's outlet valve. This valve rapidly releases brake fluid pressure to prevent wheel lockup during hard braking.
Technical definition: The official SAE/ISO definition for C1194 is "ABS Outlet Valve Coil Left Front Circuit Failure". This indicates the ABS control module registered an electrical fault—such as an open circuit, short to ground, or short to power—in the coil circuit of the solenoid valve responsible for releasing brake pressure at the left front wheel.
Can I Drive With C1194?
Yes, But With Caution. Yes, but with significant caution. Your normal hydraulic brakes function, but your Anti-lock Braking System (ABS) and Traction/Stability Control are disabled. In a panic stop or on low-traction surfaces, your wheels will lock up, causing a skid and increasing stopping distances.
Common Causes

- Failed ABS Control Module (Thermal/Solder Failure) (Very Common) — This is the most frequent cause, especially on Ford, Lincoln, and Jaguar models. Engine bay heat and vibration cause internal solder joints on the module's circuit board to crack, creating an open circuit. The ABS light often turns on only after the vehicle warms up.
- Damaged or Corroded Wiring/Connectors (Common) — The wiring harness leading to the ABS module degrades, frays, or corrodes over time. The large main connector at the module is a frequent entry point for moisture, leading to corroded pins and broken connections.
- Poor ABS Module Ground Connection (Common) — The ABS module requires a solid ground connection to the vehicle's frame. This ground point rusts or loosens, causing high resistance and triggering circuit codes. This is a primary failure point on GM trucks.
- Blown Fuse or Faulty Power Relay (Less Common) — High-amperage fuses and relays protect the ABS module. A blown fuse or failing relay cuts power to the module, triggering C1194 alongside primary power codes like C1185.
- Faulty ABS Hydraulic Control Unit (HCU) (Less Common) — The outlet valve is located inside the HCU (the ABS pump assembly). The internal solenoid coil for the left front outlet fails electrically, resulting in an out-of-spec resistance reading.
- Shorted ABS Pump Motor/MOSFET (Rare) — The MOSFET chip on the module's circuit board that controls the pump motor shorts out. This causes the ABS pump to run continuously, even with the key off, triggering circuit codes as a side effect.
- Low Battery Voltage (Rare) — A weak battery or failing alternator drops system voltage below the 10-volt operating threshold for the ABS module, triggering multiple electrical fault codes simultaneously.
Symptoms

- ABS Light On — The ABS warning light on your dashboard illuminates immediately upon detecting the fault.
- Traction/Stability Control Light On — Traction and stability control systems use the ABS hardware, so their warning lights illuminate concurrently.
- ABS System Inoperative — During a panic stop or on a slippery surface, the wheels lock up and skid because the anti-lock function is disabled.
- ABS Pump Motor Continuously Running — A short circuit within the ABS module forces the pump motor to run constantly, even with the ignition off, draining the battery.
- Brake Pedal Feel Change — If the hydraulic unit fails internally, the brake pedal feels spongy or inconsistent during normal stops.
Diagnostic Flowchart

Tap your situation to follow the diagnostic path that matches what you're seeing on this code.
Common Fixes & Costs
- Repair or Rebuild ABS Control Module — Parts: $150-$250 (mail-in rebuild service), Labor: $100-$150 (removal and reinstallation), ~1 hr book time (Intermediate)
- Replace Blown Fuse — Parts: $2-$5, Labor: $0, ~0.1 hr book time (DIY)
- Clean or Repair ABS Module Ground Point — Parts: $5 (sandpaper, dielectric grease), Labor: $50-$100, ~0.8 hr book time (DIY)
- Repair Damaged Wiring or Connector — Parts: $10-$30, Labor: $100-$200, ~1.5 hr book time (Intermediate)
- Replace ABS Control Module
— Parts: $500-$1000 (New OEM) / $200-$400 (Used), Labor: $200-$350 (includes mandatory dealer programming), ~1.5 hr book time
(Professional)
Ford F-150 (2000-2003): OEM YL34-2C346-AG (Alt: Dorman 599-788) - DIY ABS Module Circuit Board Repair — Parts: $10-$20 (solder, replacement MOSFET), Labor: $0 (Professional)
Used vs. New Parts: Buying Guide
When a used part is worth it: A used module is a budget-friendly option for older vehicles, but carries high risk. Because this part has a high factory failure rate, a used unit often has the same internal flaw. It only makes sense if pulled from a low-mileage donor and you factor in reprogramming costs.
Donor-vehicle mileage cap: roughly under 70000 miles for the part to have meaningful remaining life.
Donor quality checklist:
- Match the part number exactly, accounting for 2WD vs. 4WD and specific traction control options.
- Verify the donor vehicle's mileage.
- Purchase from a seller offering at least a 90-day warranty.
Decision logic:
- If Your original module is available for rebuilding → Choose a mail-in repair service. This is the best value, avoids programming fees, and usually includes a lifetime warranty.
- If Vehicle is newer or you want maximum reliability → Buy a new OEM part, but budget for high part costs and mandatory dealer programming.
- If Budget is the top priority and rebuilding is not an option → Buy a used part, but factor in $100-$250 for programming and accept the risk of premature failure.
Warranty tradeoff: Used parts carry 30-90 day warranties. Rebuild services offer 1-year to lifetime warranties. New OEM parts carry 1-2 year warranties.
Worst-case if a used part fails: $300-$500 lost on a faulty used part and the associated labor/programming fees.
What Happens If You Wait — Timeline
- Immediate: ABS, Traction Control, and Stability Control systems are disabled. Conventional hydraulic brakes function normally. (MPG impact: 0%% · Added cost: $0 (Immediate cost is a significant reduction in safety).)
- 1-4 weeks (if pump is shorted): If the internal failure is a short circuit, the ABS pump motor runs continuously, draining the battery overnight. (MPG impact: 0%% · Added cost: $150-$250 (Cost of a new battery if repeatedly drained).)
- 1-3 months (if pump continues to run): Allowing the ABS pump motor to run constantly causes it to overheat and burn out, requiring replacement of the entire ABS assembly. (MPG impact: 0%% · Added cost: $500-$1000 (Cost to replace the destroyed pump/motor assembly).)
- Ongoing: Driving indefinitely without ABS increases the risk of skidding and loss of steering control during emergency stops. (MPG impact: 0%% · Added cost: $1000s (Potential cost of an avoidable accident).)
Cost of Not Fixing It
- Immediate: Loss of Anti-lock Braking System (ABS), Traction Control, and Stability Control. Increased risk of skidding and longer stopping distances. (Added cost: $0 (Safety risk is the primary cost))
- Weeks to Months: If the failure causes the ABS pump to run continuously, it drains the battery overnight and eventually burns out the pump motor. (Added cost: $150-$500 (New battery and replacement pump))
- Long Term: Uneven tire wear or flat spots occur if wheels lock up during hard braking. The primary long-term cost remains the ongoing safety hazard. (Added cost: $100-$400 (Premature tire replacement))
Diagnosis Steps
- Check for Accompanying Codes
Use an ABS-capable OBD-II scanner. If C1194 appears alongside power codes (C1095, C1185) or other valve codes (C1198, C1210), the failure is system-wide, pointing directly to the ABS module or its main power/ground supply.
Tools: OBD-II Scanner (with ABS capability) (Beginner) - Inspect ABS Fuses and Relays
Locate the ABS module and pump fuses in the engine bay and interior fuse boxes. Visually inspect them and test for continuity with a multimeter. A healthy fuse reads less than 1 ohm.
Tools: Owner's Manual, Multimeter (Beginner) - Visually Inspect and 'Wiggle Test' Wiring
Inspect the main electrical connector at the ABS module for corrosion, moisture, or pushed-out pins. With the ignition on and a scanner monitoring the code status, gently wiggle the wiring harness. If the code status changes, you have an intermittent connection or broken wire.
Tools: Flashlight, Hands, OBD-II Scanner (Intermediate) - Test Power and Ground (Voltage Drop)
Disconnect the ABS module connector. Identify the main power and ground pins using a wiring diagram. Place one multimeter lead on the positive battery terminal and the other on the B+ power pin; the reading must be <0.2V. Repeat for the ground circuit (negative terminal to ground pin). Readings >0.2V indicate excessive circuit resistance.
Tools: Multimeter, Vehicle-Specific Wiring Diagram, Back-probe pins (Advanced) - Test Outlet Valve Coil Resistance
Identify the two pins corresponding to the Left Front Outlet Valve Coil on the HCU (pump) side of the connector. Measure the resistance between them. A healthy valve coil reads between 4 and 8 ohms. Infinite resistance (open) or zero ohms (short) confirms a failed coil inside the HCU.
Tools: Multimeter, Vehicle-Specific Wiring Diagram (Advanced) - Oscilloscope Analysis (Professional)
Back-probe the command wire for the LF outlet valve at the ABS module connector. Command the ABS solenoids to activate using a bi-directional scan tool. A healthy module sends a square wave (PWM) signal. If power/grounds are good but no square wave appears, the module's internal driver circuit is dead.
Tools: Oscilloscope, Bi-directional Scan Tool, Back-probe pins (Professional)
When This Code Triggers (Freeze-Frame Conditions)
- Vehicle Speed: 15-45 mph (Triggers during normal driving after the module completes its self-test.)
- System Voltage: 13.5-14.5 V (Stable voltage indicates the problem is an isolated circuit fault, not a power supply issue.)
- Engine Temperature: 180-210°F (Occurs when the engine bay is hot, confirming a heat-related expansion failure in the module's solder joints.)
- ABS/TCS Status: Inactive (Detected during the module's internal self-test, not necessarily during an active braking event.)
Related Codes
- C1198 — Indicates "ABS Inlet Valve Coil LF Circuit Failure". Appearing alongside C1194 strongly confirms a failed ABS module, as multiple separate circuits rarely fail simultaneously.
- C1095 — Indicates "ABS Hydraulic Pump Motor Circuit Failure". Seeing this with C1194 points to a module-wide electrical problem, often a failed internal power relay.
- C1185 — Indicates "ABS Power Relay Output Circuit Failure". This primary power code means the module lacks main power. Resolving the C1185 power fault usually clears the C1194 code.
- B1676 / U1900 — Indicates "ABS Module Voltage Out of Range" or a CAN bus failure. You must resolve these system-level power or network issues before diagnosing specific circuit codes like C1194.
Climate & Environmental Factors
- High Heat / Thermal Cycling: Repeated heating and cooling cycles from the engine bay expand and contract electronic components, eventually cracking solder joints on the ABS circuit board.
- Humidity and Moisture: Moisture penetrates weathered connector seals, corroding electrical pins and causing open circuits.
- Road Salt (Corrosion): Salt accelerates corrosion on exposed wiring, connectors, and the main ABS module ground point bolted to the vehicle's frame.
- Vibration: Constant road vibration fatigues electronic components and solder joints, contributing to mechanical failure inside the module.
How to Talk to a Mechanic About This Code
Say this: "I have an ABS light on with a C1194 code. Please test for proper power and ground at the ABS module connector and check the wiring before recommending a module replacement."
This signals you understand that cheaper issues like wiring or ground faults mimic an expensive module failure, directing the technician to perform a thorough diagnosis.
Avoid saying:
- 'My ABS light is on, can you fix it?'
- 'I think I need a new ABS module.'
- 'Just do whatever it takes to turn the light off.'
Questions to ask before authorizing the repair:
- Did you confirm the ABS module has good power and a solid ground connection?
- What were the results of the wiring harness inspection?
- If the module failed, what is the cost difference between rebuilding my original unit versus installing a new one?
- Does the recommended repair require programming, and is that included in the quote?
Where to Take It: Dealer vs Independent vs Chain
- Dealer:
Recommended only if a new module is required and needs dealer-specific programming.
Best for: Vehicles under warranty, Complex programming for a brand-new OEM module
Downsides: Highest labor rates., Will replace the entire module with a new part rather than offering an affordable rebuild. (Typical cost: +75% vs. baseline) - Independent Shop:
Best Fit. An experienced independent mechanic performs electrical tests correctly and is more likely to facilitate a cost-effective rebuild.
Best for: Out-of-warranty vehicles., Diagnosing the root cause (module vs. wiring vs. ground)., Facilitating a module rebuild service.
Downsides: Diagnostic skill varies; look for ASE certifications., May lack tools to program new modules for all brands. (Typical cost: +0% vs. baseline) - Chain Shop:
Not Recommended. The risk of misdiagnosis or being oversold on an unnecessary part is high.
Best for: Simple brake jobs like pads and rotors.
Downsides: Technicians often lack advanced electrical diagnostic experience., High pressure to sell parts leads to full replacements without proper diagnosis. (Typical cost: -10% vs. baseline)
When to Walk Away From the Repair
If the estimated repair cost exceeds 40-50% of the car's value, pause and consider options. Because this fault does not prevent driving, the threshold is lower than for a non-running vehicle.
- Car worth $3000, fix is $400: Fix it. A module rebuild is low-cost and restores a critical safety feature.
- Car worth $3000, fix is $1500: Get a second opinion. A quote this high is for a new module assembly. Seek a shop that offers a rebuild.
- Car worth $15000, fix is $1500: Fix it. The repair cost is well below the threshold for a vehicle of this value.
What Scan Tool You Need for This Code
Minimum: A scanner that reads and clears ABS diagnostic trouble codes. Basic engine-only readers will not work.
A standard $20 OBD-II reader only communicates with the Engine Control Unit (ECU). C1194 is stored in the separate ABS module.
Budget: BlueDriver Pro (~$100) — Connects via Bluetooth to read and clear ABS codes, view freeze-frame data, and monitor live ABS sensor data.
Mid-range: Foxwell NT630 Plus (~$150) — Provides bi-directional control, allowing you to manually activate the ABS pump and solenoids to test their function.
Professional: Autel MaxiCOM MK808S (~$450) — Performs the automated ABS bleed procedure required if you replace the entire ABS hydraulic unit.
Rent vs buy: Auto parts stores offer loaner tools, but verify they read ABS codes. Buying a budget or midrange scanner is a worthwhile investment for ongoing diagnostics.
How to Clear the Code After You Fix It
- Use an ABS-capable OBD-II scanner to erase the code.
- Turn the ignition off, then start the vehicle.
- Drive the vehicle above 15 mph to force the ABS module to perform its self-test.
Drive cycle (~10 minutes): Drive the vehicle for 5-10 minutes, ensuring you exceed 15 mph. This allows the ABS controller to verify circuit integrity. If the light remains off, the repair is successful.
Readiness monitors affected: None. ABS codes do not affect emissions readiness monitors.
Watch out for:
- Using a basic engine-only scanner that cannot communicate with the ABS module.
- Disconnecting the battery, which does not clear hard codes from modern ABS memory.
- Ignoring an immediate code return, which proves the electrical fault still exists.
Will This Fail Emissions / State Inspection?
No — by itself this code doesn't fail OBD inspection (but it can keep readiness monitors from setting, which causes a separate fail).
- California: An ABS light does NOT cause a smog check failure. The test focuses strictly on emissions systems.
- New York: An illuminated ABS light is NOT a cause for failure in a standard NYS safety inspection, though regulations are subject to change.
- Texas: An illuminated ABS light is NOT a cause for rejection. The inspection checks service brake performance, not ABS functionality.
Most Commonly Affected Vehicles

- Ford F-150 (1997-2004) — Extremely common ABS module failure. Solder joints for the power and solenoid pins on the internal circuit board crack.
- Ford Explorer (1996-2002) — Frequently experiences internal ABS module failures that trigger C1194 alongside other valve codes.
- Ford Windstar (1999-2003) — Owners report a cascade of ABS codes (C1194, C1185, C1095) pointing directly to a failed electronic control module.
- Jaguar S-Type, X-Type (2000-2008) — Developed under Ford ownership, these models use identical ABS components and suffer the exact same module failures.
- Chevrolet / GMC Silverado, Sierra, Tahoe (1999-2007) — Notorious for ABS issues caused by a corroded ground connection for the Electronic Brake Control Module (EBCM) on the frame rail.
Manufacturer-Specific Notes
- Ford: On late 90s and early 2000s trucks, C1194 almost exclusively means the ABS electronic module has failed due to cracked internal solder joints.
- Ford (Practical Tip): The ABS module is secured with six T-20 Torx screws that corrode heavily. Clean the screw heads with a pick and soak in penetrating oil before attempting removal to prevent stripping.
- Jaguar: Jaguar models from the early 2000s log this code due to failed ABS modules. Technicians diagnose this by verifying power and ground; if present, the module is immediately condemned.
- General Motors (GM): A corroded ground wire for the EBCM (typically bolted to the frame rail below the driver's door) causes multiple random ABS codes. Cleaning this G103/G104 ground is the mandatory first step.
Real Owner Stories
2002 Ford F-150 with multiple ABS codes
Owner had an ABS light on for two years with codes C1198, C1214, and B1676.
What they tried:
- Removed the ABS electronic module and cut open the sealed case.
- Found visibly cracked solder joints on the main connector pins.
- Re-soldered all main pin and solenoid coil connections.
Outcome: After sealing and reinstalling the module, all ABS codes cleared. The DIY repair saved approximately $400 compared to buying a replacement part.
Lesson: For older Ford trucks, re-soldering the module's internal joints directly addresses the most common failure point for those comfortable with advanced electronics repair.
2000 Ford F-150 with continuously running ABS pump
The ABS pump would not shut off with the key out, forcing the owner to pull the 50-amp fuse to prevent battery drain.
What they tried:
- Identified a failed MOSFET chip on the module's circuit board as the cause.
- Cut the module open, desoldered the old MOSFET, and installed a new one with a heatsink.
Outcome: The repair stopped the pump from running continuously and cleared the ABS light, restoring normal function.
Lesson: A continuously running ABS pump points directly to a shorted component inside the electronic module. Disconnect the ABS fuse immediately to save your battery and pump motor.
1996 Ford Explorer with C1194
The ABS light was on constantly with only code C1194 present. The owner assumed the module was bad.
What they tried:
- Replaced the ABS module with a new one, but the light remained on.
- Checked the continuity of all wheel speed sensors, which tested good.
Outcome: The owner wasted money replacing the module without completing a full diagnostic circuit test (power, grounds, wiring) first.
Lesson: Never replace the ABS module based on the code alone. Always verify solid power and ground at the module connector before condemning the expensive module.
2011 Mazda 3 after hitting a pothole
After hitting a pothole, the brake pedal felt spongy and the ABS light illuminated. A shop quoted $1400 for a 'catastrophic ABS module failure'.
What they tried:
- Sought a second opinion due to the sudden failure after a physical impact.
Outcome: Forum members advised that a sudden failure after an impact points to a damaged wire or wheel speed sensor, not an internal module failure.
Lesson: If a fault appears immediately after hitting a pothole or curb, thoroughly inspect the wiring harness and connectors near the impacted wheel before assuming the module failed.
How to Prevent This Code From Triggering
- Flush brake fluid every 2-3 years. (Every 2-3 years or 30,000 miles) — Brake fluid absorbs moisture over time. This moisture causes internal corrosion of the delicate solenoid valves within the ABS hydraulic unit.
- Apply dielectric grease to the ABS module connector. (Whenever the connector is disconnected.) — Dielectric grease blocks moisture, road salt, and dirt from entering the connector and corroding the electrical pins.
- Install a heat shield for the ABS module. (Once, if the module is near the exhaust.) — Excessive heat causes solder joint failure inside the electronic module. A heat shield lowers the operating temperature, extending its life.
- Regularly clean the engine bay and undercarriage. (Annually, especially in Salt Belt regions.) — Washing away road salt prevents accelerated corrosion of the ABS module's ground wire connection and wiring harnesses.
Frequently Asked Questions
Is it safe to drive with code C1194?
You can drive, but with extra caution. Your normal brakes function, but the anti-lock feature, traction control, and stability control are disabled. In an emergency, your wheels will lock up and skid, increasing stopping distances.
What's the most common mistake when diagnosing C1194?
The biggest mistake is replacing the expensive ABS module without verifying it has proper power and ground. A blown fuse, bad relay, or corroded ground wire mimics a failed module and costs much less to fix.
My scanner shows C1194 plus a bunch of other ABS codes. Do I have multiple problems?
It is highly unlikely multiple components failed simultaneously. A cluster of ABS codes almost always points to a single, system-wide failure, typically the ABS control module itself or its main power/ground supply.
Will replacing the left front wheel speed sensor fix a C1194 code?
No. C1194 refers to the outlet valve circuit inside the ABS hydraulic unit and control module. A bad wheel speed sensor triggers a different code, such as C1145.
Can I fix the ABS module myself?
Repairing the module internally is an advanced task requiring you to cut open the unit and re-solder microscopic connections. It is highly recommended to send the module to a professional mail-in repair service instead.
Do I need to bleed the brakes after replacing the ABS module?
If you only remove the electronic control module and leave the hydraulic unit attached to the brake lines, you do not need to bleed the brakes. Replacing the entire assembly requires a professional automated bleed.
My ABS pump won't stop running, is that related to C1194?
Yes. A continuously running pump is a classic symptom of a shorted MOSFET inside the ABS control module. Pull the main ABS fuse immediately to prevent battery drain and pump burnout until you can repair the module.
Do I need to reprogram a replacement ABS module?
If you rebuild your original module, no reprogramming is needed. If you buy a new or used replacement module, a dealer or specialist must program it to match your vehicle's VIN.
Key Takeaways
- Code C1194 disables your Anti-lock Braking System (ABS) due to an electrical fault in the left front brake valve circuit, increasing your risk of skidding.
- The most frequent cause on 1997-2004 Ford and Jaguar vehicles is a failed ABS electronic control module caused by cracked internal solder joints.
- Before spending $500+ on a new module, test the ABS fuses and verify the module connector receives over 12 volts of power and has less than 5 ohms of ground resistance.
- Sending your original ABS module to a mail-in rebuild service costs $150-$250, saving you hundreds over a new part and eliminating the need for dealer reprogramming.
Helpful Videos
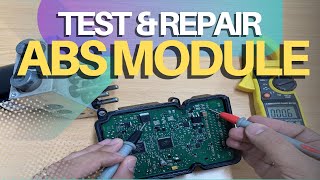
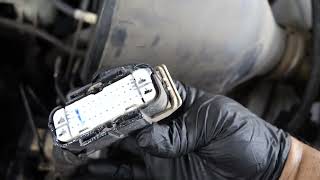

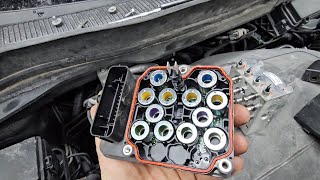

The information in this article is provided for general reference and educational purposes only. Vehicle specifications, procedures, and part compatibility can vary by production date, trim level, and region. Always consult your vehicle's factory service manual and verify part numbers before purchasing or performing repairs. Safety-critical components such as airbags, seat belts, and braking systems should be installed by a qualified professional.
- 🎬 Helpful Videos
- What Does C1194 Mean?
- Can I Drive With C1194?
- Common Causes
- Symptoms
- Diagnostic Flowchart
- Common Fixes & Costs
- Used vs. New Parts: Buying Guide
- What Happens If You Wait — Timeline
- Cost of Not Fixing It
- Diagnosis Steps
- When This Code Triggers (Freeze-Frame Conditions)
- Related Codes
- Climate & Environmental Factors
- How to Talk to a Mechanic About This Code
- Where to Take It: Dealer vs Independent vs Chain
- When to Walk Away From the Repair
- What Scan Tool You Need for This Code
- How to Clear the Code After You Fix It
- Will This Fail Emissions / State Inspection?
- Most Commonly Affected Vehicles
- Manufacturer-Specific Notes
- Real Owner Stories
- 2002 Ford F-150 with multiple ABS codes
- 2000 Ford F-150 with continuously running ABS pump
- 1996 Ford Explorer with C1194
- 2011 Mazda 3 after hitting a pothole
- How to Prevent This Code From Triggering
- Frequently Asked Questions
- Is it safe to drive with code C1194?
- What's the most common mistake when diagnosing C1194?
- My scanner shows C1194 plus a bunch of other ABS codes. Do I have multiple problems?
- Will replacing the left front wheel speed sensor fix a C1194 code?
- Can I fix the ABS module myself?
- Do I need to bleed the brakes after replacing the ABS module?
- My ABS pump won't stop running, is that related to C1194?
- Do I need to reprogram a replacement ABS module?
- Key Takeaways
- 🎟️ Get 5% Off