

C1114 on 2009-2013 Chevrolet Avalanche: 'Service Trailer Brake System' Causes and Fixes
This code indicates a fault in the integrated trailer brake control system, often appearing with a 'Service Trailer Brake System' message. The most common causes are a faulty trailer brake control switch in the dashboard, or wiring issues, especially corrosion in the harness above the spare tire or a bad ground (G401). A less common cause is a problem with the Trailer Brake Control Module (TBCM).
- Code C1114 on a 2009-2013 Avalanche means there's a fault in the factory integrated trailer brake system.
- Do not immediately assume a trailer needs to be connected; the fault can occur on the truck side alone.
- The most likely parts to fail are the trailer brake control switch in the dashboard (Part No. 15926102) and the wiring harness above the spare tire.
- Before replacing expensive modules, thoroughly inspect the wiring harness for corrosion, check the 7-pin connector, and clean ground G401 on the driver's side frame rail.
What's Unique About the 2009-2013 Chevrolet AVALANCHE
The GMT900 platform, which includes the 2009-2013 Avalanche, features a fully integrated trailer brake control system. Unlike aftermarket controllers, it communicates directly with the vehicle's other modules. TSB #PIT4595J specifically addresses diagnostic tips for this system on these trucks, highlighting that issues can arise from the control switch, wiring, or the module itself, sometimes even without a trailer connected. The TSB emphasizes that the root cause is often a wiring fault, leading to many functional control modules being replaced unnecessarily.
Diagnostic Flowchart
Tap your situation to follow the diagnostic path that matches what you're seeing on this vehicle.
Symptoms You May Notice
- "Service Trailer Brake System" message on the Driver Information Center (DIC)
- "Check Trailer Wiring" message on the DIC
- Trailer brakes do not apply when using the manual control switch
- Trailer brakes apply erratically or not at all when towing
- The fault may appear even when no trailer is connected
- Audible dinging/chiming that corresponds with the DIC message
- Replacing the Trailer Brake Control Module (TBCM) when the actual fault is a less expensive part like the in-dash control switch or a simple wiring issue. The TSB specifically notes that functional modules are often replaced unnecessarily.
- Assuming the problem is with the truck when the fault lies within the trailer's own wiring, which is often of lower quality and more prone to shorts or bad grounds.
Most Likely Causes
- Faulty Trailer Brake Control Switch 🔴 High Probability The switch assembly in the dashboard contains electronic components and potentiometers that can fail or wear out over time, leading to incorrect or erratic signal voltages being sent to the TBCM. It is a very common failure point reported by owners.
How to confirm: Using a capable scan tool, monitor the live data for the 'Trailer Brake Control User Gain' and 'Manual Apply Switch' parameters while operating the controls. If the readings are erratic, stuck, or do not change, the switch is faulty. A simpler, though less scientific, test is to replace it, as it's a known high-failure item.
Typical fix: Replace the trailer brake control switch assembly located in the dashboard.
Est. part cost: $40-$150 - Wiring or Connector Issues 🔴 High Probability The main trailer wiring harness runs along the driver's side frame rail and is exposed underneath. The section above the spare tire is a notorious spot for moisture, dirt, and salt to collect, causing corrosion and shorts in the wiring to the TBCM. TSB #PIT4595J specifically calls out checking for unsealed splices, damaged wiring (especially the dark blue Circuit 47), and poor grounds (especially ground G401) as potential causes. Corrosion in the 7-pin trailer connector at the bumper can also cause shorts.
How to confirm: Lower the spare tire for access. Visually inspect the wiring harness running to the 7-pin connector and the Trailer Brake Control Module (TBCM) for any signs of damage, chafing, or corrosion. Check for blown fuses (often a 30A J-case fuse for trailer brakes). Locate ground G401 on the driver's side frame rail behind the rear tire, disassemble it, and check for corrosion.
Typical fix: Repair the damaged section of wiring, ensuring new connections are sealed with heat-shrink tubing. Clean or replace the corroded 7-pin connector. Disassemble, sand to bare metal, and re-secure the G401 ground connection.
Est. part cost: $5-$50 - Faulty Trailer Brake Control Module (TBCM) ⚪ Low Probability The TBCM, located above the spare tire, can fail internally due to moisture intrusion or electronic failure. However, it is less common than switch or wiring failures. GM noted in TSB #PIT4595J that many modules were being returned that were fully functional, indicating misdiagnosis is common.
How to confirm: This is typically a process of elimination. If the control switch, all related wiring (especially Circuit 47), fuses, and ground G401 have been confirmed to be good, the TBCM is the likely culprit. A dealership or shop with a Tech 2 scan tool can perform advanced diagnostics to condemn the module.
Typical fix: Replace the Trailer Brake Control Module. This may require programming by a dealership.
Est. part cost: $100-$250
Diagnosis Steps
- Check for the 'Service Trailer Brake System' message on the DIC.
- Scan the Chassis Control Module for codes using an OBD-II scanner. Confirm C1114 is present.
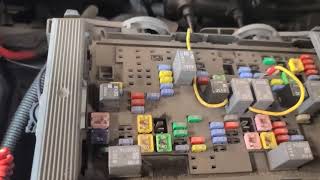
- Check all related fuses, particularly the 30A J-case fuse for trailer brakes in the under-hood fuse box.
- Inspect the 7-pin trailer connector at the rear bumper for any corrosion, debris, or bent pins. Clean thoroughly and apply dielectric grease.
- Lower the spare tire to gain access to the TBCM and its wiring harness.
- Visually inspect the wiring harness leading to the 7-pin connector and the TBCM for any visible damage, chafing, or poorly-repaired splices. Pay close attention to the dark blue wire (Circuit 47).
- Locate and inspect ground G401 on the driver's side frame rail behind the rear tire. Disassemble the ground, clean all contact surfaces to bare metal, and re-secure it tightly.
- If a capable scan tool (like a Tech 2) is available, monitor the 'TBCM Relay Feedback Signal'. Per TSB PIT4595J, the voltage should be between 3.2-4.1V. If it's outside this range, investigate for a short in Circuit 47.
- If a scan tool is not available, the most probable causes are the in-dash trailer brake control switch or a wiring fault. Given the high failure rate of the switch, it is a common next step to replace it.
- If all wiring, the ground, and the switch are confirmed good, the Trailer Brake Control Module (TBCM) may be faulty.
Parts You'll Likely Need
- Trailer Brake Control Switch
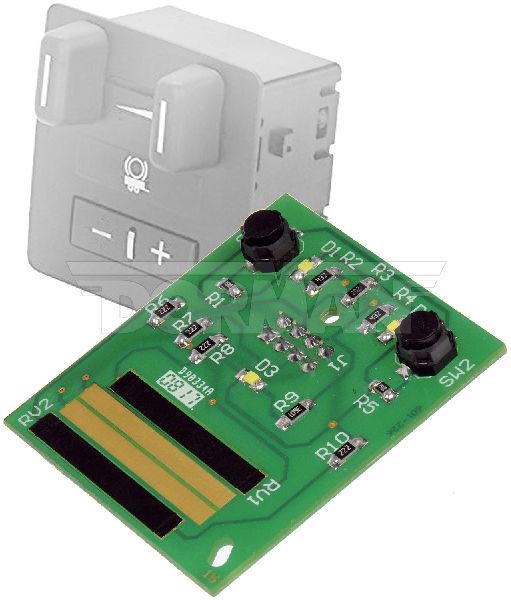
(OEM #15926102)— This is the most frequent failure point for code C1114 on this platform, causing incorrect signals to be sent to the control module. This part number supersedes the older 15823719.
Trusted brands: ACDelco, Dorman, GM Genuine Parts
OEM price range: $80-$150
Aftermarket price range: $40-$90
Related Codes That Often Appear With This One
- C1112 — This code is also related to the trailer brake control relay circuit and is mentioned alongside C1114 in the primary Technical Service Bulletin (PIT4595J), indicating they often stem from the same set of wiring or module faults.
Technical Service Bulletins (TSBs) & Recalls
- PIT4595J: This PI communicates diagnostic tips to help dealership diagnosis a service trailer brake message with DTC C1114 and C1112. It provides specific voltage checks and emphasizes checking wiring and grounds before module replacement.
Platform-Specific Known Issues
- GM Technical Service Bulletin PIT4595J was issued to help technicians diagnose C1114 and C1112, pointing toward wiring, grounds, and the control module as areas to investigate. It specifically notes that many modules are replaced when the fault is elsewhere.
- The wiring harness located directly above the spare tire is a well-documented failure point. Its location makes it highly susceptible to collecting moisture and debris, leading to corrosion that causes shorts in the trailer brake circuits.
Mechanic-Grade Diagnostic Values
- TBCM Relay Feedback Signal Voltage (Circuit 47) — expected: 3.2 - 4.1 Volts. Failure: A voltage higher than 4.1V suggests a short to voltage; a voltage lower than 3.2V suggests a short to ground or an open/high resistance in the circuit.
- TBCM Ground Circuit Resistance — expected: Less than 5.0 ohms. Failure: Resistance greater than 5.0 ohms indicates an open or high resistance in the ground circuit (G401).
- System Voltage at TBCM — expected: 9.5 - 17 Volts. Failure: If system voltage is outside this range, the TBCM may not initialize correctly and may set various codes.
Hidden / Shadow Codes Worth Checking
- C1114 with 'Check Trailer Wiring' message: Indicates the TBCM has detected a short to ground on the trailer brake output circuit (dark blue wire, Circuit 47). (see via Read the DTC with a scanner and observe the corresponding message on the Driver Information Center (DIC).)
- C1114 with 'Service Trailer Brake System' message: Indicates the TBCM has detected a short to power on the trailer brake output circuit (Circuit 47) or a poor trailer ground. (see via Read the DTC with a scanner and observe the corresponding message on the Driver Information Center (DIC).)
Scan Tool Commands That Help
- Tech 2 / GDS2: Data Display > TBCM Relay Feedback Signal — Use this to monitor the live voltage on Circuit 47. Per TSB PIT4595J, this is the primary diagnostic data point to check for shorts or opens without a trailer connected. The voltage should be stable between 3.2-4.1V.
- Tech 2 / GDS2: Data Display > Trailer Brake Control User Gain — Monitor this parameter while operating the gain switch on the dash. The reading should change from 0-100 percent. If it is stuck or does not respond, it points to a faulty in-dash control switch.
Wiring & Ground Locations
- G401 — On the driver's side frame rail, typically behind the rear tire. It serves as a critical ground point for the rear chassis components.. This is the primary ground for the Trailer Brake Control system. Corrosion or a loose connection at G401 is a very common cause for a 'Service Trailer Brake System' message with code C1114, as the module interprets the high resistance as a fault.
- K170 Trailer Brake Control Module (TBCM) — Located above the spare tire, often on a shared bracket with the Fuel Pump Flow Control Module.. This is the module that sets the code. Its location makes its wiring harness susceptible to damage from moisture and debris kicked up by the tires, especially when the spare tire is removed or not seated properly.
- Trailer Brake Control Relay — Located near the TBCM, above the spare tire.. This relay is controlled by the TBCM and sends power down Circuit 47 to the trailer. The TSB diagnostic procedure involves checking the voltage feedback from this relay.
- Circuit 47 (Dark Blue wire) — Runs from the Trailer Brake Control Relay above the spare tire, along the frame rail, to the 7-pin trailer connector at the bumper.. This is the specific circuit monitored by the TBCM. The entire diagnostic process for C1114 revolves around checking this wire for shorts to ground, shorts to power, or open circuits.
Real Owner Repair Stories
- YouTube comments and various forum threads (2007-2013 GM Truck (Silverado/Avalanche/Sierra)) — Intermittent 'Service Trailer Brake System' message, which eventually becomes constant. Message appears even with no trailer connected. Code C1114 is stored.
❌ Tried (didn't work) Replacing the in-dash trailer brake control switch., Cleaning the 7-pin trailer connector at the bumper., Replacing the Trailer Brake Control Module (TBCM).
✅ What actually fixed it The problem was a corroded wire inside the main wiring harness that runs along the driver's side frame rail, specifically in the area above the spare tire. The dark blue wire (Circuit 47) and/or the ground wire were often found broken or corroded inside the plastic loom. The fix was to cut out the damaged section of wire, splice in a new piece, and seal the repair with heat-shrink tubing.
OEM Part Supersession History
15823719→15926102— Part revision by the manufacturer. The new part is a direct replacement for the old one.
Helpful Videos
Used OEM Parts in Stock

New Aftermarket Parts Available


The information in this article is provided for general reference and educational purposes only. Vehicle specifications, procedures, and part compatibility can vary by production date, trim level, and region. Always consult your vehicle's factory service manual and verify part numbers before purchasing or performing repairs. Safety-critical components such as airbags, seat belts, and braking systems should be installed by a qualified professional.
- Chevrolet AVALANCHE:
- 🎬 Helpful Videos
- 🛍️ Shop This Part
- What's Unique About the 2009-2013 Chevrolet AVALANCHE
- Diagnostic Flowchart
- Symptoms You May Notice
- Most Likely Causes
- Diagnosis Steps
- Parts You'll Likely Need
- Related Codes That Often Appear With This One
- Technical Service Bulletins (TSBs) & Recalls
- Platform-Specific Known Issues
- Mechanic-Grade Diagnostic Values
- Hidden / Shadow Codes Worth Checking
- Scan Tool Commands That Help
- Wiring & Ground Locations
- Real Owner Repair Stories
- OEM Part Supersession History
- 🎟️ Get 5% Off