

OBD-II Code C1095: ABS Pump Motor Circuit Failure
What C1095 means, why it triggers, and how to fix it
- Code C1095 disables your Anti-lock Brake System (ABS) and stability control due to a pump motor electrical fault, increasing stopping distances by up to 20% on wet roads.
- Before buying a $1,000+ replacement ABS module, inspect the 40-60A ABS pump fuse and clean the main chassis ground connection to bare metal.
- The most frequent cause of C1095 is cracked solder joints inside the ABS control module, which a specialist can rebuild for $200-$350 instead of replacing.
- Do not attempt to replace the ABS hydraulic unit yourself unless you own a bidirectional scan tool; failing to perform the automated ABS bleed leaves dangerous air in the brake lines.
What Does C1095 Mean?

C1095 means the ABS Control Module detected an electrical problem in the circuit for the ABS hydraulic pump motor. This motor rapidly modulates brake pressure to prevent wheel lock-up during hard braking. When this code triggers, the entire ABS and stability control system shuts down as a safety precaution.
Technical definition: The SAE/OBD-II definition for C1095 is "ABS Hydraulic Pump Motor Circuit Failure." The ABS control module detected an open circuit, short to ground, short to power, or excessive current draw in the pump motor circuit. It also triggers if the module's internal driver transistor fails or the pump motor seizes.
Can I Drive With C1095?
Yes, But With Caution. Yes, but exercise extreme caution. Your regular hydraulic brakes still function, but the Anti-lock Braking System (ABS), Traction Control, and Electronic Stability Control (ESC) are disabled. Without ABS, stopping distances on wet or slippery surfaces increase, and you risk complete loss of steering control during a panic stop due to front wheel lock-up. Deactivated ESC also makes the vehicle highly susceptible to spinning out during evasive maneuvers.
Common Causes

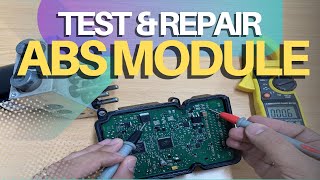
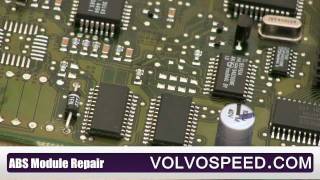
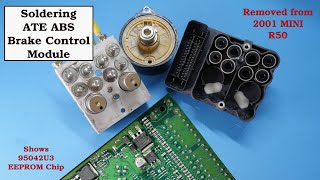
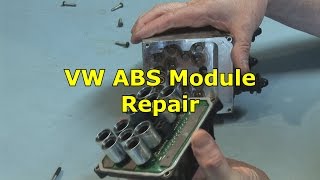
- Internal ABS Module Failure (Very Common) — The electronic control module attached to the ABS pump fails due to cracked solder joints on the internal circuit board from years of vibration 🎬 See how to repair a faulty ABS control module yourself. and heat cycles. This prevents the module from commanding the pump motor or receiving its feedback.
- Poor Chassis Ground Connection (Common) — The ABS module and pump require a solid chassis ground. A corroded or loose ground point creates high resistance and triggers C1095. This is a notorious issue on 1999-2014 GM trucks.
- Failed ABS Pump Motor (Common) — The electric motor driving the hydraulic pump fails internally due to worn brushes, shorted windings, or seizure from age and contaminated brake fluid. The pump and module are often integrated and replaced as a single unit.
- Blown Fuses or Faulty Relay (Common) — A power surge or short circuit blows the high-amperage (40-60A) pump motor fuse or the smaller control module fuse. A failed motor relay also cuts power to the circuit.
- Corroded or Damaged Wiring/Connectors (Common) — Wiring and connectors between the ABS module and pump motor suffer damage or corrosion from weather and road salt, interrupting the electrical signal.
- Low Battery Voltage / Charging System Fault (Uncommon) — An aging battery or failing alternator drops system voltage during the high-demand startup self-test. The ABS module misinterprets this low voltage as a circuit fault.
- Software/Firmware Glitch (Rare) — A glitch in the ABS control module's software falsely reports a C1095 code, requiring a dealer firmware update.
Symptoms

- ABS Warning Light On — The ABS light on your dashboard illuminates steadily immediately after the fault is detected.
- Traction or Stability Control Light On — Because TCS and ESC use the same ABS hardware, their warning lights illuminate alongside the ABS light.
- ABS Not Working — During a hard stop on a wet or loose surface, the wheels lock up and skid. The brake pedal does not pulsate.
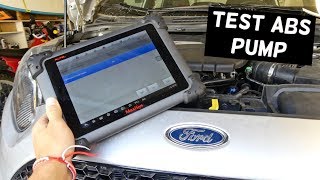
- Unusual Noises or Lack of Noise — You will either hear the ABS pump motor running constantly (draining the battery) or, more commonly, hear absolute silence from the pump during the initial key-on system check. 🎬 Watch this guide on ABS pump failure symptoms and testing.
- Spongy or Altered Brake Pedal Feel — The brake pedal feels softer, spongier, or requires more effort to press once the hydraulic unit goes offline.
Diagnostic Flowchart

Tap your situation to follow the diagnostic path that matches what you're seeing on this code.
Common Fixes & Costs
- Repair Chassis Ground Connection — Parts: $5-$20, Labor: $100-$200, ~1 hr book time (DIY)
- Replace Blown ABS Fuse — Parts: $5-$20, Labor: $0, ~0.1 hr book time (DIY)
- Repair/Rebuild the ABS Module — Parts: $200-$350 (service cost), Labor: $150-$300 (for removal/reinstallation), ~1.5 hr book time (Intermediate)
- Replace ABS Module/Pump Assembly
— Parts: $800-$2500, Labor: $200-$400, ~2 hr book time
(Professional)
Chevrolet Silverado (2013): OEM GM: 20927955 (Assembly), 22858868 / 19436355 (EBCM only) (Alt: Dorman: 599-775, A1 Cardone: 12-12212)
Ford Escape (2011): OEM Dealer part, VIN-specific (Alt: Cardone (Reman), Dorman (Reman))
Jaguar XF (2010): OEM Dealer part, VIN-specific (Alt: Primarily repair services; remanufactured units are rare.) - Repair Wiring or Connectors — Parts: $10-$50, Labor: $120-$300, ~1.5 hr book time (DIY)
Used vs. New Parts: Buying Guide
When a used part is worth it: A used ABS module/pump assembly makes sense for older, high-mileage vehicles where a new part is prohibitively expensive or discontinued. It reduces the part cost by 50-75%. It is viable if you have access to a mechanic with the tools to reprogram it.
Donor-vehicle mileage cap: roughly under 100000 miles for the part to have meaningful remaining life.
Donor quality checklist:
- Verify the part number matches your original unit exactly.
- Purchase from a reputable seller offering a 30-90 day warranty.
- Inquire about the mileage of the donor vehicle; lower is better.
- Visually inspect the unit for corrosion around the electrical connector.
Decision logic:
- If The identified fault is the electronic module ONLY and your original can be repaired/rebuilt → Choose a repair service; it is cost-effective and avoids reprogramming.
- If Vehicle is less than 10 years old and the part cost is under $1000 → Favor a new or remanufactured part for its longer warranty and guaranteed compatibility.
- If Vehicle is older, budget is the primary concern, and you confirmed a shop can program it → A used part is a reasonable choice, but accept the risk of a shorter lifespan.
Warranty tradeoff: Used parts typically come with a 30-90 day functional warranty. New aftermarket parts offer a 1-year to limited lifetime warranty. New OEM parts carry a 1-2 year warranty. A repair service for your original module often includes a lifetime warranty on the repair itself.
Worst-case if a used part fails: $300-$600 if a used part is faulty or incompatible. This includes labor for the initial installation, diagnostic time, and labor for the second installation.
What Happens If You Wait — Timeline
- Immediate: ABS, Traction Control, and Stability Control warning lights illuminate. The systems are disabled. Regular hydraulic braking still functions. (MPG impact: 0%% · Added cost: $0)
- 0-1 month (if pump runs continuously): In a rare failure mode, the pump motor shorts and runs constantly, even with the key off. This drains the battery and burns out the pump motor. (MPG impact: 0%% · Added cost: $650-$1000 (Cost of a new battery plus a new/reman pump motor).)
- 1-12 months: The primary consequence is the ongoing safety risk. The driver forgets the systems are offline, leading to a loss of control in a panic situation. The vehicle fails mandatory state safety inspections. (MPG impact: 0%% · Added cost: $0 (direct), but potential for accident costs is high.)
- During the next panic stop: Without ABS, the wheels lock during a panic stop. The driver loses all steering control, and the vehicle skids. This causes flat spots on tires and leads to avoidable collisions. (MPG impact: 0%% · Added cost: $200-$800 (for tire replacement) up to thousands in collision repair costs.)
Cost of Not Fixing It
- Immediate: Loss of ABS, Traction Control, and Stability Control. This creates a significant safety risk, increasing stopping distances on slippery surfaces and the potential for loss of control in emergency maneuvers. (Added cost: 0)
- 0-3 months: If the failure causes the ABS pump to run continuously, it drains the battery and burns out the pump motor. (Added cost: $150-$300 (new battery), $500+ (new pump motor if separate from module))
- Long-term: Continued driving without ABS functionality guarantees failure of any mandatory state safety inspection. (Added cost: 0)
Diagnosis Steps
- Read the Trouble Codes
Use an ABS-capable OBD-II scanner to confirm C1095. Note any other codes (e.g., C1096, C1097, U0121) for context. Generic engine-only scanners cannot communicate with the ABS module.
Tools: ABS-capable OBD-II Scanner (Beginner) - Check the ABS Fuses and Relays
Inspect the ABS fuses in the under-hood and cabin fuse boxes. Look for a blown large main fuse (40-60A) for the pump motor and a smaller one (5-15A) for the control module. Swap the ABS pump relay with a known-good identical relay.
Tools: Owner's Manual, Fuse Puller or Pliers (Beginner) - Inspect and Test the Chassis Ground
Locate the main chassis ground wire for the ABS module (often on the frame rail under the driver's door on GM trucks). Disassemble, clean all contact points to bare metal with a wire brush, apply dielectric grease, and re-secure.
Tools: Wrenches, Wire Brush, Dielectric Grease (Intermediate) - Test the Pump Motor with a Scan Tool
Use a bidirectional scan tool to command the ABS pump motor ON. Listen for the motor to run and feel for vibration. If it runs but the code returns while driving, the ABS module is likely faulty. If it doesn't run, suspect the motor, wiring, or module driver.
Tools: Bidirectional OBD-II Scanner (Advanced) - Inspect Wiring and Connectors
Visually inspect the main electrical connector at the ABS module/pump assembly. Look for corrosion (green/white powder), pushed-out pins, or damaged wires. Clean with electrical contact cleaner and reconnect securely.
Tools: Flashlight, Electrical Contact Cleaner (Beginner) - Perform a Voltage Drop Test (Pro Tip)
Set a multimeter to DC Volts. Connect the positive lead to the ABS ground pin and negative to the battery negative. Activate the pump with a scan tool; a reading over 0.1V indicates a poor ground. Repeat on the power side (battery positive to pump power pin); a reading over 0.2V indicates high resistance.
Tools: Multimeter, Bidirectional Scanner, Wiring Diagram (Advanced) - Measure Pump Motor Current Draw (Pro Tip)
Place a DC clamp-on ammeter around the pump's main power wire and command the pump ON. A healthy pump draws 5-20 amps. A sustained draw over 30A indicates a seized motor. A 0A reading confirms an open circuit.
Tools: DC Clamp-on Ammeter, Bidirectional Scanner (Advanced) - Measure Pump Motor Winding Resistance (Pro Tip)
Disconnect the ABS module and probe the two pins leading to the pump motor. A healthy motor shows 2-5 Ohms. 'OL' or infinity indicates an open circuit (dead motor), while near 0 Ohms indicates a short circuit.
Tools: Multimeter, Vehicle-Specific Wiring Diagram (Advanced) - Test the Pump Motor Directly
Apply fused 12V power (20A fuse) directly to the pump motor's input pins. If the motor runs, the control module or power supply failed. If it does not run, the motor itself failed.
Tools: Fused Jumper Wires, Vehicle-Specific Wiring Diagram (Advanced)
When This Code Triggers (Freeze-Frame Conditions)
- Event Trigger: Key-On Self-Test (The code sets immediately when the ignition turns on. The ABS module performs a self-test, briefly activating the pump motor. If it doesn't see the expected electrical response, it sets the code.)
- Vehicle Speed: 0 MPH (Occurs at startup before the vehicle moves. It also triggers during driving if an intermittent fault occurs.)
- System Voltage: 10.5 - 12.0V (The fault records during engine cranking when system voltage is lowest. A weak battery drops voltage enough to be misinterpreted as a circuit failure.)
- Brake Pedal Status: Not Applied (The fault is detected during the automatic self-test, not necessarily during braking. However, a hard brake application exposes a borderline fault.)
Related Codes
- C1096 — C1096 specifically means 'ABS Hydraulic Pump Motor Circuit Open.' While C1095 is a general circuit failure, C1096 points directly to a break in the wiring, a disconnected connector, a burned-out motor winding, or a failed internal module driver.
- C1097 — C1097 means 'ABS Hydraulic Pump Motor Circuit Short To Ground.' This indicates the power wire for the pump motor is making contact with the vehicle's chassis, or the motor windings shorted internally.
- C1100 — C1100 means 'ABS Pump Switch Circuit Failure.' This code often appears with C1095 and indicates a problem with the switch inside the ABS pump assembly. Seeing both codes together makes an internal pump/module failure highly likely.
- U0121 — U0121 means 'Lost Communication With ABS Control Module.' Seeing U0121 with C1095 signifies the entire ABS module is offline due to a blown main fuse, complete connector failure, or catastrophic internal module failure.
Climate & Environmental Factors
- Road Salt and Humidity: Corrosive salt spray and moisture attack the ABS unit's electrical connector, wiring, and main chassis ground point, causing high resistance or open circuits. In salt-belt regions, these external circuit faults are extremely common.
- Cold Weather: Metal contracts in the cold, opening microscopic cracks in the solder joints on the module's internal circuit board. Additionally, the ABS pump motor works harder to move cold, thick brake fluid, and the resulting voltage drop triggers the code.
- Heat and Vibration: Years of engine heat and road vibration cause thermal stress on the ABS control module's circuit board. This leads to fatigue and cracking of critical solder joints, the most common internal failure mode for C1095.
How to Talk to a Mechanic About This Code
Say this: "I have an ABS light on and my scanner shows code C1095. I'd like to book a diagnostic appointment. Based on my research, the most common causes are the main ABS fuse, the chassis ground, or the module itself. Can you please ensure the technician starts with the simple checks like the fuse and ground connection before quoting a full module replacement?"
This signals to the shop that you are an informed customer. It directs them toward a logical, cost-effective diagnostic process and makes it harder to justify jumping straight to the most expensive repair. It establishes a collaborative tone and sets clear expectations.
Avoid saying:
- 'My ABS light is on, can you fix it?' (This is too vague and invites a wide range of costly guesses).
- 'I think I need a new ABS module.' (Never diagnose the car for the mechanic; you might end up paying for a part you don't need).
- 'Just do whatever it takes to fix it.' (This is an open invitation for unnecessary up-sells).
Questions to ask before authorizing the repair:
- What were the results of the fuse and ground connection checks?
- Were you able to command the ABS pump motor on with your scan tool? Did it run?
- What were the voltage and resistance readings at the pump motor connector?
- If the module is the problem, is sending my original module out for repair a cheaper option than replacing it?
- If a new or used module is required, does the quoted price include the cost of programming it to my vehicle?
Where to Take It: Dealer vs Independent vs Chain
- Dealer:
A safe but expensive choice. Best for warranty/recall work, but an independent shop is often better for out-of-warranty C1095 diagnosis.
Best for: Vehicles still under warranty., Known recall-related issues (e.g., Hyundai/Kia fire risk)., Complex repairs on late-model vehicles that require proprietary software that independent shops may not have.
Downsides: Highest labor rates and parts costs., Often defaults to replacing the entire expensive assembly rather than attempting a simpler fix or using a repair service. (Typical cost: +50% vs. baseline) - Independent Shop:
Best fit for most situations. A good independent shop with ASE-certified technicians and modern diagnostic tools offers the best balance of expertise and value for this repair.
Best for: Out-of-warranty vehicles where cost is a factor., Diagnosing common pattern failures (like the GM ground issue) that experienced technicians recognize quickly., Arranging for module repair services, which dealers will not do.
Downsides: Quality and diagnostic capability vary widely. You must find a shop with a good reputation for electrical diagnostics., May not have the latest manufacturer-specific software for programming new modules on very recent models. (Typical cost: +0% vs. baseline) - Chain Shop:
AVOID for this code. The risk of misdiagnosis and paying for unnecessary parts is very high. This type of electrical fault is outside their core expertise.
Best for: Simple, routine maintenance like oil changes, tires, and basic brake pad replacement.
Downsides: Technicians may lack the specialized electrical diagnostic training needed for C1095., High pressure to meet sales targets leads to misdiagnosis and selling unnecessary parts, like replacing a whole ABS unit for a bad fuse or ground. (Typical cost: -10% vs. baseline)
When to Walk Away From the Repair
If the total estimated repair cost for the C1095 fault exceeds 50% of your car's current private-party market value, you should seriously consider not doing the repair and either selling the car as-is or trading it in.
- Car worth $3500, fix is $2200: Walk away. The repair cost is over 60% of the car's value. It is not economical to proceed. Sell the car as a 'mechanic's special' or trade it in, disclosing the issue.
- Car worth $15000, fix is $850: Fix it. This repair is well below the threshold and is necessary for the vehicle's safety and value.
- Car worth $5000, fix is $2500: Borderline. At 50% of the vehicle's value, this is a tough call. Get a second opinion, and strongly explore a module repair service (~$400) or a used part (~$600) to bring the cost down before authorizing the full replacement.
What Scan Tool You Need for This Code

Minimum: A scanner that can read and clear Anti-lock Braking System (ABS) trouble codes. A basic engine-only code reader will not work as it cannot communicate with the ABS module.
A standard $20 OBD-II reader only accesses the engine control unit. It cannot see chassis codes like C1095. You need a tool that specifically accesses the ABS module to confirm the code is present.
Budget: BlueDriver Pro Scan Tool (~$100) — Reads and clears ABS codes on most major brands (Ford, GM, Toyota, Chrysler). It allows you to confirm the C1095 code and clear it after a repair. It does not offer the bidirectional control needed to activate the pump motor.
Mid-range: Foxwell NT630 Plus or Autel MaxiCOM MK808 (~$130-400) — This is the ideal DIY level. These tools offer bidirectional control, allowing you to command the ABS pump motor ON and OFF directly. This critical diagnostic step isolates the problem between the pump, wiring, or the control module. They also perform the ABS bleed function after a hydraulic unit replacement.
Professional: Autel MaxiSys MS906Pro or XTOOL D7/D8 (~$500-1200) — Provides all OEM-level functions, including full bidirectional control, advanced coding and programming for new modules, and detailed live data graphing. This is professional-grade equipment, generally overkill for a single DIY repair but essential for a repair shop.
How to Clear the Code After You Fix It
- Reconnect the battery if it was disconnected for the repair.
- Use an ABS-capable OBD-II scan tool to clear the C1095 code from the ABS module.
- Perform the automated ABS bleed procedure with the scan tool if the hydraulic unit was replaced.
- Perform any required calibration routines (like for a steering angle sensor) if prompted by the scan tool.
Drive cycle (~15 minutes): After clearing the code, start the vehicle and let it idle for 2 minutes. Drive in a mix of city and highway conditions, exceeding 40 mph. Perform several normal stops. The system performs a self-check at every startup; if the light stays off after a key cycle and short drive, the repair is successful.
Readiness monitors affected: This is a chassis (C) code and does not directly affect engine-related emissions readiness monitors.
Watch out for:
- Disconnecting the battery does not clear a C1095 code; it must be cleared with a proper scan tool.
- Failing to perform the automated ABS bleed procedure after replacing the hydraulic unit leaves air in the system and results in a spongy brake pedal.
- Installing a used or new ABS module without reprogramming it with the vehicle's VIN prevents it from functioning.
Will This Fail Emissions / State Inspection?
No — by itself this code doesn't fail OBD inspection (but it can keep readiness monitors from setting, which causes a separate fail).
- California: An illuminated ABS light does NOT cause a failure of the emissions-only smog check, but represents a separate safety issue.
- New York: An illuminated ABS warning light is grounds for automatic failure of the annual state safety inspection.
- Texas: As of 2025, most non-commercial vehicles are exempt from the annual safety inspection. For commercial vehicles, an illuminated ABS light is NOT a cause for rejection, though a failure of the service brakes is.
Most Commonly Affected Vehicles
- Ford Escape, Fusion, Focus (2006-2012) — Known for frequent ABS module failures triggering C1095. The hydraulic control unit (HCU) and motor can often be replaced separately from the electronic module, avoiding reprogramming.
- Chevrolet / GMC Silverado, Sierra, Tahoe, Suburban (2007-2014) — Highly prone to C1095 due to corrosion at the main EBCM ground connection on the frame rail below the driver's door. Cleaning this ground point to bare metal resolves the issue.
- Jaguar XF, XK8, XJ8 (2000-2013) — Prone to cracked solder joints inside the ABS module. A replacement module must be programmed by a specialist, making module repair a much more popular option.
- BMW 3-Series (E46/E90), 5-Series (E39/E60) (1998-2010) — Frequently experience internal ABS/DSC hydraulic unit failures. The code points to a failure of both the pump motor and the control module, requiring full unit replacement or specialized repair.
- Mazda 3, 6, CX-7 (2007-2013) — C1095 results from an internal failure of the DSC hydraulic unit/control module assembly. Replacement of the entire assembly is the typical fix.
- Dodge / Ram Ram 1500, 2500, 3500 (2006-2018) — C1095 results from the ABS module itself or failures within the Totally Integrated Power Module (TIPM), which affects power delivery to the ABS system.
- Hyundai Sonata, Elantra, Santa Fe (2011-2018) — Failure of the ABS Hydraulic and Electronic Control Unit (HECU) is a known issue, subject to major safety recalls due to fire risk. See manufacturer quirks for details.
- Lincoln Continental, LS (1998-2005) — Often presents with C1095 alongside C1286, pointing strongly to a failed ABS control module rather than a sensor or wiring issue.
Manufacturer-Specific Notes
- Harley-Davidson: On many Harley-Davidson models, C1095 means 'Front Brake Switch Open.' This is completely different than in cars and indicates a problem with the switch on the front brake lever, not the ABS pump motor.
- Hyundai / Kia: RECALL/FIRE RISK: Massive recalls cover millions of 2010-2019 models. The Hydraulic Electronic Control Unit (HECU) develops an internal electrical short, causing a fire even with the vehicle turned off. Owners are advised to park outside until the free recall fix is performed.
- General Motors: GROUNDS & RECALLS: For 1999-2014 trucks and SUVs (Silverado, Tahoe, etc.), the primary suspect for C1095 is the main ground point for the EBCM on the frame rail beneath the driver's door. Cleaning this ground resolves the issue.
- Jaguar: The most common reason for C1095 on older Jaguars is cracked solder joints on the module's circuit board where the pump motor connects. Specialist repair services are far more economical than dealer replacement.
Real Owner Stories
2008 Chevy Silverado, 150K miles - The 'Easy Fix' Ground Wire
Owner reported ABS and Brake lights came on intermittently, then stayed on. Scanned code C1095. Shop quoted $1,200 to replace the EBCM (ABS module).
What they tried:
- Owner researched forums and found numerous mentions of the ground wire issue on GM trucks.
- Located the ground point on the frame rail under the driver's side door.
- Disconnected the battery, unbolted the ground wire, and found significant rust and corrosion on the frame and the wire's terminal.
Outcome: Cleaned the frame contact point and wire terminal to bare, shiny metal with a wire brush. Re-attached securely and coated with dielectric grease. Reconnected battery. All warning lights went out and C1095 code did not return. Total cost was under $10 for supplies.
Lesson: On GM trucks and SUVs from this era, always inspect and clean the main EBCM ground on the frame before replacing the expensive ABS module.
2009 Ford Focus, 110K miles - Misdiagnosis Leads to Wasted Money
ABS light on, code C1095. Owner assumed the ABS module had failed.
What they tried:
- Purchased a used ABS module/pump assembly from a salvage yard for $300.
- Paid a local shop $250 in labor to install the used part.
- The ABS light came back on immediately with the same C1095 code.
Outcome: The shop then performed proper diagnostics. They found the main 40A ABS fuse in the under-hood fuse box was blown. Replacing the fuse caused it to blow again immediately. Further testing revealed the original ABS pump motor was shorted internally. The used salvage part was also faulty. The owner had to buy a new ABS pump (another $600) and pay for labor again. The initial $550 was completely wasted.
Lesson: Never replace an expensive component without verifying the basics. Checking fuses and testing the pump motor directly saves hundreds of dollars and identifies the true cause.
2005 BMW 3-series (E46), 140K miles - The Intermittent Cold Weather Fault
Owner experienced the ABS/DSC/Brake 'trifecta' of warning lights only on cold mornings (below 40°F). The lights turned off after the car warmed up and was restarted. Code C1095 was stored.
What they tried:
- Initially ignored the problem as it would go away.
- Checked fuses and wiring, which all appeared fine.
- Sent the original ABS module to a specialty repair service.
Outcome: The repair service diagnosed cracked solder joints on the module's internal circuit board. The cold temperature caused the metal to contract, opening the electrical circuit. As the module warmed from engine heat, the connection was restored. The service re-soldered the board for $250. The owner reinstalled the repaired module, permanently solving the problem.
Lesson: Intermittent faults related to temperature point to an electronic module failure (cracked solder joints). Repairing the original module is cheaper and easier than replacing and reprogramming a new one.
How to Prevent This Code From Triggering
- Flush brake fluid every 2-3 years (Every 24-36 months) — Brake fluid absorbs moisture over time. This moisture corrodes the sensitive valves and solenoids inside the ABS hydraulic unit, leading to mechanical seizure of the pump.
- Periodically clean chassis ground connections (Every 2-3 years, especially in salt-belt states) — Corrosion at the main ABS ground point creates high resistance, mimicking a circuit failure and triggering code C1095. Cleaning these points to bare metal prevents this issue.
- Address battery issues promptly (As needed) — A weak battery or failing alternator drops system voltage during startup. The ABS module misinterprets this low voltage as a circuit fault. Maintaining a healthy charging system prevents false codes.
- Wash the vehicle's undercarriage after winter storms (Seasonally) — Road salt and de-icing chemicals are highly corrosive to the ABS module's electrical connector, wiring, and ground points. Rinsing the undercarriage removes these corrosive agents.
Frequently Asked Questions
Can I just clear the C1095 code and keep driving?
You can clear the code, but it returns immediately upon the next startup self-test. Clearing the code does not fix the underlying electrical problem. Your ABS system remains inactive until repaired.
Will a C1095 code cause my car to fail an inspection?
Yes, in virtually all regions requiring a safety inspection, an illuminated ABS warning light results in an automatic failure.
What's the most common misdiagnosis for C1095?
The most common mistake is replacing the expensive ABS pump/module assembly without performing basic electrical checks. Technicians often condemn the module when the actual fault is a blown 60-amp fuse or a corroded frame ground. Always verify fuses, power, and grounds before ordering parts.
Why did the code appear after I slammed on my brakes?
Hard braking demands maximum performance from the ABS system, causing a large electrical draw from the pump motor. This sudden load exposes weak pump motors, high-resistance connections, or failing solder joints. The code triggers at the exact moment the circuit fails under load.
My battery recently died, and now I have a C1095 code. Are they related?
Yes, a weak battery causes voltage to drop significantly during engine cranking. The ABS module performs a self-test at startup and misinterprets this low voltage as a circuit failure. Ensure your battery is fully charged and healthy before starting complex ABS diagnostics.
Can a C1095 code cause the brake pedal to feel different?
Yes, drivers often report a spongy, soft, or pulsating brake pedal after the fault occurs. The inactive hydraulic unit alters normal fluid flow and pedal feel. However, standard hydraulic braking power remains intact.
Do I have to go to the dealer for this repair?
Independent shops can diagnose and replace ABS components, often at a lower labor rate. However, installing a brand-new module requires proprietary software for VIN programming. Opting for a module rebuild service bypasses the need for dealer programming entirely.
What does C1095 mean on a Harley-Davidson motorcycle?
On many Harley-Davidson motorcycles, C1095 indicates 'Front Brake Switch Open.' This is completely unrelated to the ABS pump and points to a fault with the front brake hand lever switch. Always use a manufacturer-specific code definition for motorcycles.
Key Takeaways
- Code C1095 disables your Anti-lock Brake System (ABS) and stability control due to a pump motor electrical fault, increasing stopping distances by up to 20% on wet roads.
- Before buying a $1,000+ replacement ABS module, inspect the 40-60A ABS pump fuse and clean the main chassis ground connection to bare metal.
- The most frequent cause of C1095 is cracked solder joints inside the ABS control module, which a specialist can rebuild for $200-$350 instead of replacing.
- Do not attempt to replace the ABS hydraulic unit yourself unless you own a bidirectional scan tool; failing to perform the automated ABS bleed leaves dangerous air in the brake lines.
Helpful Videos


The information in this article is provided for general reference and educational purposes only. Vehicle specifications, procedures, and part compatibility can vary by production date, trim level, and region. Always consult your vehicle's factory service manual and verify part numbers before purchasing or performing repairs. Safety-critical components such as airbags, seat belts, and braking systems should be installed by a qualified professional.
- 🎬 Helpful Videos
- What Does C1095 Mean?
- Can I Drive With C1095?
- Common Causes
- Symptoms
- Diagnostic Flowchart
- Common Fixes & Costs
- Used vs. New Parts: Buying Guide
- What Happens If You Wait — Timeline
- Cost of Not Fixing It
- Diagnosis Steps
- When This Code Triggers (Freeze-Frame Conditions)
- Related Codes
- Climate & Environmental Factors
- How to Talk to a Mechanic About This Code
- Where to Take It: Dealer vs Independent vs Chain
- When to Walk Away From the Repair
- What Scan Tool You Need for This Code
- How to Clear the Code After You Fix It
- Will This Fail Emissions / State Inspection?
- Most Commonly Affected Vehicles
- Manufacturer-Specific Notes
- Real Owner Stories
- 2008 Chevy Silverado, 150K miles - The 'Easy Fix' Ground Wire
- 2009 Ford Focus, 110K miles - Misdiagnosis Leads to Wasted Money
- 2005 BMW 3-series (E46), 140K miles - The Intermittent Cold Weather Fault
- How to Prevent This Code From Triggering
- Frequently Asked Questions
- Can I just clear the C1095 code and keep driving?
- Will a C1095 code cause my car to fail an inspection?
- What's the most common misdiagnosis for C1095?
- Why did the code appear after I slammed on my brakes?
- My battery recently died, and now I have a C1095 code. Are they related?
- Can a C1095 code cause the brake pedal to feel different?
- Do I have to go to the dealer for this repair?
- What does C1095 mean on a Harley-Davidson motorcycle?
- Key Takeaways
- 🎟️ Get 5% Off