

OBD-II Code C1035: Right Rear Wheel Speed Sensor Circuit Fault
The Ultimate 2026 Guide to Diagnosing and Fixing C1035
- Code C1035 disables your ABS and traction control due to a right rear wheel speed sensor fault, increasing stopping distances by up to 20% on wet roads.
- Over 80% of C1035 codes stem from a failed $30-$150 wheel speed sensor or a damaged wiring harness near the right rear wheel.
- Use an ABS-capable OBD-II scanner to view live data at 15-25 mph; a reading of 0 mph on the right rear wheel confirms a dead sensor or severed wire.
- Before buying parts, spend 10 minutes cleaning the sensor's electrical connector and checking the mounting surface for rust buildup, which frequently causes false failures.
What Does C1035 Mean?

Code C1035 means your car's main computer (ECU or ABS module) detects a fault in the circuit for the right rear wheel speed sensor. The computer receives no signal, an erratic signal, or an illogical signal compared to the other three wheels when moving above 25 mph. This sensor is a critical component for your ABS, traction control, and stability control systems.
Technical definition: The official SAE/OBD-II definition for code C1035 is 'Right Rear Wheel Speed Sensor Circuit Open or Shorted' or 'Right Rear Wheel Speed Comparative Performance'. An 'Open or Shorted' circuit indicates a direct electrical failure, like a broken wire. 'Comparative Performance' means the sensor's reported speed is illogical compared to the other wheel sensors, pointing to a mechanical issue like a bad bearing or mismatched tire size.
Can I Drive With C1035?
Yes, But With Caution. Yes, but with caution. Your Anti-lock Braking System (ABS) and Traction/Stability Control are disabled. This increases your stopping distance by 20% or more on wet or icy surfaces and dramatically increases the risk of losing control in a panic stop or evasive maneuver. Your wheels will lock up, causing a skid. On Chrysler and Dodge vehicles, it causes erratic transmission shifting. Driving must be limited to essential trips to a repair shop.
Common Causes

- Failed Right Rear Wheel Speed Sensor (Very Common) — The sensor itself is the most frequent point of failure. 🎬 See this step-by-step guide for replacing a rear wheel speed sensor. Located at the wheel hub, it is exposed to extreme heat, vibration, moisture, and road debris, causing internal electronics to fail.
- Damaged Wiring or Corroded Connector (Very Common) — The wire leading from the sensor to the main harness is vulnerable to being cut, chafed by suspension parts, or damaged by road debris. The connector pins fill with water and corrode, causing a poor or open connection.
- Failing Wheel Hub/Bearing Assembly (Common) — On modern cars, the wheel speed sensor and tone ring are integrated into the wheel hub bearing assembly. A worn-out wheel bearing develops excessive play ('wobble'), increasing the air gap between the sensor and the ring, causing the signal to drop out intermittently.
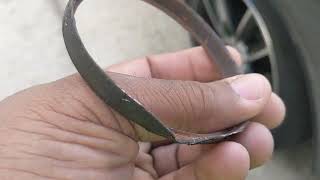
- Damaged, Rusted, or Contaminated Tone Ring (Common) — The sensor reads a notched or magnetic ring (tone or reluctor ring) that spins with the wheel. If this ring is cracked, has broken teeth, is covered in thick rust, or delaminates from the axle, the sensor cannot get a clean reading.
- Rust Buildup Under Sensor Mount ('Rust Jacking') (Common) — On Honda and GM vehicles, rust builds up on the steering knuckle directly underneath the sensor's mounting flange. This corrosion physically pushes the sensor away from the tone ring, increasing the air gap and weakening the signal enough to trigger a fault code.
- Mismatched Tire Sizes or Incorrect Pressure (Less Common) — If the right rear tire is a significantly different diameter than the others, it rotates at a different speed. The ABS module detects this discrepancy, assumes a sensor fault, and triggers the 'Comparative Performance' code.
- Low System Voltage / Weak Battery (Less Common) — A weak battery causes low voltage spikes during engine cranking. This forces electronic modules, including the ABS controller, to fail their self-check and store erroneous fault codes like C1035.
- Failed ABS Control Module (Rare) — The problem is occasionally the ABS computer itself. This is a last resort after ruling out all other possibilities and is accompanied by codes like C2200 (ABS Module Internal Failure).
Symptoms

- ABS and Traction/Stability Control Lights On — The ABS, Traction Control, and Stability Control systems rely on the same wheel speed sensors. A failure illuminates all related warning lights on your dashboard permanently.
- ABS System Inactive — During a panic stop or on a slippery surface, your brakes lock up and skid. You will not feel the familiar pulsing in the brake pedal that indicates the ABS is working.
- Cruise Control Disabled — As a safety precaution, vehicles disable the cruise control system when any ABS fault is detected.
- Erratic Transmission Shifting or Speedometer — On Chrysler, Dodge, and Jeep models, the rear wheel speed sensor data feeds the transmission control module and speedometer. A bad sensor causes harsh shifting, getting stuck in gear, or an inaccurate speedometer.
- Brake Pedal Feels Different — Drivers report a slightly spongy or different-feeling brake pedal, as the ABS hydraulic unit is inactive and not performing its usual self-checks.
Diagnostic Flowchart
Tap your situation to follow the diagnostic path that matches what you're seeing on this code.
Common Fixes & Costs
- Replace Right Rear Wheel Speed Sensor
— Parts: $30-$150, Labor: $90-$150, ~1.2 hr book time
(DIY)
Jeep Wrangler (JK, 2007-2018): OEM Mopar 52125003AD (Alt: Standard Motor Products ALS1932, Dorman 970-056 ($20-$60)) - Repair Wiring Harness or Connector — Parts: $10-$50, Labor: $100-$250, ~2.5 hr book time (Intermediate)
- Clean Sensor Mounting Surface and/or Tone Ring — Parts: $5-$15, Labor: $75-$150, ~1.0 hr book time (DIY)
- Replace Right Rear Wheel Hub Bearing Assembly
— Parts: $100-$500, Labor: $150-$450, ~2.3 hr book time
(Professional)
Ford F-150 (2009-2014, 4WD): OEM Ford BL3Z-1104-B (Alt: Timken HA590378, MOOG 515119 ($120-$250)) - Replace Axle Shaft Tone Ring
— Parts: $15-$60, Labor: $200-$400, ~3.0 hr book time
(Professional)
Dodge Charger / Chrysler 300 (RWD, 2005-2018): OEM N/A (Part of Axle Shaft) (Alt: Dorman 917-566, TRQ BSA71650 ($15-$40)) - Repair or Replace ABS Control Module — Parts: $150-$2000, Labor: $200-$400, ~2.5 hr book time (Professional)
Used vs. New Parts: Buying Guide
When a used part is worth it: For a simple wheel speed sensor, buying used is never recommended due to the high failure rate and low cost of a new part. For a complete wheel hub assembly, a used part from a low-mileage vehicle is a budget option, but carries significant risk.
Donor-vehicle mileage cap: roughly under 50000 miles for the part to have meaningful remaining life.
Donor quality checklist:
- Verify donor vehicle was a low-mileage, non-collision wreck.
- Avoid parts from 'Rust Belt' regions as corrosion is a primary failure cause.
- Match part numbers exactly; visual similarity is not enough.
Decision logic:
- If The part is a standalone sensor → Always buy new. The potential savings are not worth the risk of a faulty used part and repeated labor.
- If The part is an expensive hub assembly and budget is the top priority → A used part is a high-risk option. Expect a significantly shorter lifespan and no meaningful warranty.
- If The vehicle is a daily driver or carries family → Buy a new OEM or high-quality aftermarket hub assembly. Safety and reliability outweigh the cost savings of a used part.
Warranty tradeoff: Used parts: Typically 30-90 days, often for part exchange only (no labor). Aftermarket new: 1-year to limited lifetime warranty. OEM new: 12-month/12,000-mile warranty.
Worst-case if a used part fails: $300-$600 if a used hub assembly fails shortly after installation, requiring repeat labor plus the cost of another part.
What Happens If You Wait — Timeline
- 0-4 weeks: ABS and Traction Control lights are on. ABS, stability, and traction control are disabled. Braking feels normal in dry conditions. No other symptoms are likely unless the cause is a severe bearing failure. (MPG impact: 0%% · Added cost: $0)
- 1-3 months: If the root cause is a failing wheel bearing, a faint humming or grinding noise begins, noticeable when turning. On Chrysler/Dodge vehicles, erratic signals cause unnecessary stress on transmission clutch packs due to confused shift logic. (MPG impact: 1-3%% · Added cost: $20-$60 in wasted fuel.)
- 3-9 months: The failing wheel bearing noise becomes a loud growl or grinding. The bearing develops significant play ('wobble'), causing uneven tire wear and placing stress on the hub and suspension components. (MPG impact: 3-8%% · Added cost: $350-$700 (Cost of a new tire due to uneven wear + a new hub assembly).)
- 9+ months: Catastrophic failure of the wheel bearing is imminent. This causes the wheel to wobble violently or separate from the vehicle, leading to a complete loss of control. The failed bearing damages the axle spindle. (MPG impact: 5-15%+% · Added cost: $1500-$3000+ (Includes potential cost of spindle/knuckle replacement, plus accident damage).)
Cost of Not Fixing It
- Immediate: Loss of ABS, traction control, and stability control. Increased risk of skidding and loss of control in a panic stop or on slippery surfaces. (Added cost: 0)
- 1-6 Months: If the cause is a bad wheel bearing, continued driving leads to uneven tire wear and damage to the hub and suspension components. On Chrysler/Dodge vehicles, it causes premature wear on transmission components due to erratic shifting. (Added cost: $200-$1500)
- 6+ Months: A completely failed wheel bearing leads to the wheel separating from the vehicle, causing a catastrophic accident. The vehicle automatically fails any state safety inspection. (Added cost: $2500+)
Diagnosis Steps

- Scan for Codes & View Live Data
Use an OBD-II scanner that reads ABS codes. Confirm C1035 is present. Access the live data function to view the wheel speed readings from all four sensors while driving. If the Right Rear (RR) sensor reads 0 mph or its reading is erratic while the others are steady above 15 mph, it confirms the problem is in that corner.
Tools: ABS-Capable OBD-II Scanner (Beginner) - Visual Inspection of Sensor & Wiring
Safely raise and support the right rear of the vehicle. Thoroughly inspect the wheel speed sensor and its wiring harness. Look for a cut or frayed wire, a loose connector, or wiring rubbing against suspension or brake components.
Tools: Jack, Jack Stands, Flashlight (Beginner) - Inspect and Clean the Connector
Unplug the sensor's electrical connector. Inspect the pins on both the sensor side and the harness side for green or white corrosion, bent pins, or moisture. Clean with electrical contact cleaner and ensure it clicks securely when reconnected.
Tools: Electrical Contact Cleaner, Small Pick or Brush (Beginner) - Test Sensor with Multimeter
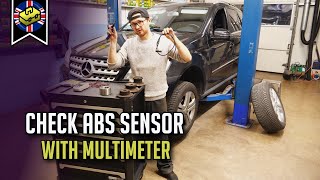
Disconnect the sensor. For a 2-wire passive sensor, set your multimeter to Ohms (Ω). A good sensor reads between 800-1400 Ω; OL (open) or 0 Ω (short) indicates a bad sensor. For active (3-wire) sensors, check the harness side for a reference voltage (5V or 12V) with the key on.
Tools: Multimeter (Intermediate) - Inspect Tone Ring and Air Gap
Remove the sensor from the hub. Use a flashlight to look inside the mounting hole. Have a helper slowly rotate the wheel and look for broken teeth, heavy rust, or cracks in the tone ring. Check for 'rust jacking' under the sensor's mounting flange. The ideal air gap is between 0.016 and 0.050 inches (0.4 mm to 1.3 mm).
Tools: Feeler Gauge, Wire Brush, Brake Cleaner, Flashlight (Advanced) - Test the Wiring Harness
Using a multimeter, check for continuity on the two wires in the harness running from the sensor connector to the ABS module. Check for a short to ground by testing for continuity between each wire and a clean chassis ground. If you find a break or short, repair the harness.
Tools: Multimeter, Vehicle Wiring Diagram (Advanced) - Swap Test
If the left and right rear sensors are identical part numbers, swap them. Clear the codes and drive. If the code changes to C102A (Left Rear Sensor), the sensor itself is faulty. If C1035 returns, the problem is in the wiring, hub, or tone ring on the right side.
Tools: Basic hand tools (socket/wrench) (Intermediate) - Analyze Sensor Signal with Oscilloscope
For intermittent issues, back-probe the sensor's signal wire at the ABS module with an oscilloscope. A good active sensor produces a clean square wave that increases in frequency with wheel speed. Gaps or noise indicate a problem with the sensor, tone ring, or air gap.
Tools: Oscilloscope, Wiring Diagram (Professional)
When This Code Triggers (Freeze-Frame Conditions)
- Vehicle Speed: 25-55 mph (The code sets when the vehicle exceeds a speed threshold where the ABS module begins comparing wheel speeds.)
- ABS System Status: Enabled, Performing Self-Check (The fault is detected during the ABS module's initial self-test upon startup or when actively monitoring wheel speeds during driving.)
- Brake Pedal: Not Applied (The 'Comparative Performance' type of fault sets during steady driving, not necessarily during a braking event.)
- Engine RPM: 1500-2500 RPM (Corresponds to steady-state cruising where wheel speed differences become apparent to the control module.)
Related Codes
- C102B — Means 'Right Rear Wheel Speed Sensor Circuit Low/Open'. Points to an electrical failure. If present with C1035, the fault is a broken wire, corroded connector, or a failed sensor.
- C1032 — Means 'Right Rear Wheel Speed Sensor Signal Erratic'. Indicates the signal is present but inconsistent. Points towards a mechanical issue like a damaged tone ring or a failing wheel bearing.
- C2200 — Means 'ABS Module Internal Failure'. If seen with C1035, the ABS module is failing and incorrectly flagging a sensor issue.
- C1049 — A generic code for 'Left/Right Rear Wheel Speed Sensor Circuit'. Reinforces that the fault lies within the right rear wheel speed sensor system.
Climate & Environmental Factors
- Road Salt / High Humidity ('Rust Belt' Regions): Salt spray and moisture accelerate the corrosion of wiring connectors and pins. It causes tone rings to rust and break, and causes 'rust jacking' under the sensor mount, increasing the air gap.
- Extreme Cold: Moisture that seeps into the sensor or connector freezes, causing temporary or permanent damage. Systems experience reduced sensor accuracy in extreme cold, triggering a fault light that disappears once the vehicle warms up.
- Off-Roading / Debris: Driving on unpaved roads exposes the sensor and wiring to mud, rocks, and branches. Rocks directly sever the wiring or damage the sensor housing, a common issue on Jeep Wranglers.
How to Talk to a Mechanic About This Code
Say this: "I have an ABS and traction control light on, and my scanner shows a C1035 code for the right rear wheel speed sensor circuit. I'd like to book a diagnostic appointment. Please check the live data from all four wheel speed sensors to confirm the fault before replacing any parts."
This signals you are an informed customer. It directs the technician to perform the correct initial diagnostic step (viewing live data) rather than replacing the sensor, which might not be the actual problem. It shows you understand the difference between a code and a diagnosis.
Avoid saying:
- 'My ABS light is on, can you fix it?' (Too vague and invites a shop to start replacing parts without proper diagnosis.)
- 'Just replace the right rear speed sensor.' (The sensor itself may not be the problem; it is often wiring, the hub, or the tone ring.)
- 'I have no idea what's wrong, just do whatever it takes.' (Gives a blank check for unnecessary repairs and upselling.)
Questions to ask before authorizing the repair:
- Did the live data show the right rear sensor reading zero or an erratic signal compared to the other three?
- Did you visually inspect the wiring harness and connector for damage or corrosion?
- If the sensor needs replacement, have you checked the tone ring and the sensor's mounting surface for rust or damage?
- If the wheel bearing/hub assembly is the recommended fix, what was the specific finding that led to that conclusion (e.g., excessive play, integrated tone ring)?
- What is the warranty on the parts and labor for this repair?
Where to Take It: Dealer vs Independent vs Chain
- Dealer:
Recommended only if the vehicle is under warranty or has a very specific known issue (like a TSB) that an independent shop misses.
Best for: Vehicles still under warranty., Complex, manufacturer-specific electronic issues or recalls., When a previous repair at an independent shop failed to fix the issue.
Downsides: Highest labor rates, typically 1.5-2x more than independent shops., Defaults to replacing an entire expensive assembly (like a hub) when a smaller component (like a tone ring) or cleaning is all that is needed. (Typical cost: +50% vs. baseline) - Independent Shop:
Best fit for this code. A reputable independent shop with good diagnostic tools handles a C1035 fault efficiently and more affordably than a dealer.
Best for: Most out-of-warranty vehicles., Common, well-documented problems like C1035., Building a long-term relationship with a trusted mechanic.
Downsides: Quality and diagnostic capabilities vary greatly. Vet shops based on reviews and ASE certifications., Lacks access to the very latest manufacturer-specific tools or information. (Typical cost: +0% vs. baseline) - Chain Shop:
Use with caution. Acceptable for a straightforward, visible-sensor replacement if you have already diagnosed it yourself. AVOID for initial diagnosis of an ABS light.
Best for: Simple, routine maintenance like oil changes and tire rotations.
Downsides: Technician skill and diagnostic equipment for anything beyond basic codes are lacking., High pressure to upsell leads to misdiagnosis (e.g., selling a whole hub assembly when only the sensor is bad)., Not equipped to diagnose wiring or mechanical issues like tone rings or rust jacking. (Typical cost: -10% vs. baseline)
When to Walk Away From the Repair
If the total estimated repair cost exceeds 40-50% of your car's private-party value, seriously consider selling or trading in the vehicle instead of repairing it.
- Car worth $4000, fix is $2000: Walk away. The repair cost is 50% of the car's value. It is not a sound financial decision to proceed.
- Car worth $12000, fix is $800: Fix it. The repair cost is well under the threshold and is a reasonable investment to maintain a reliable vehicle.
- Car worth $2500, fix is $1500: Walk away. The repair cost is 60% of the car's value. The money is better put toward a replacement vehicle.
What Scan Tool You Need for This Code
Minimum: A scanner that reads and clears Anti-lock Braking System (ABS) codes and displays live data for individual wheel speed sensors.
A standard $20 engine code reader cannot communicate with the ABS module. It will not see the C1035 code or related faults. To diagnose this problem, you MUST have a tool that accesses the ABS system and displays the live speed signal from each of the four wheels simultaneously.
Budget: BlueDriver Pro Scan Tool (~$99) — Connects to your smartphone via Bluetooth. It reads and clears ABS codes and displays live data for all four wheel speed sensors, allowing you to drive and see which sensor is not reporting correctly.
Mid-range: Foxwell NT510 Elite / Autel AutoLink AL619 (~$150) — Handheld, all-in-one units that do not require a phone. They provide robust ABS code reading and live data graphing for wheel speed sensors. Some offer advanced functions like ABS automated bleeding.
Professional: Autel MaxiCOM MK808 / MK906BT (~$500-1200) — Offers full, professional-level diagnostics. Provides bidirectional control to test ABS solenoids and motors directly. Features advanced data graphing and performs system calibrations and programming required for replacing an ABS module.
Rent vs buy: Many auto parts stores scan your codes for free, but their in-store tools rarely read ABS live data. Buying a budget pick like the BlueDriver is a smart investment, as it is used for future ABS, SRS (airbag), and engine issues on multiple cars.
How to Clear the Code After You Fix It
- Ensure all connectors are securely seated and components are torqued to spec.
- Use an ABS-capable OBD-II scan tool to command the 'Clear Codes' function.
- Perform a test drive that exceeds 25 mph to allow the ABS module to confirm the repair.
Drive cycle (~10 minutes): After clearing the code, drive the vehicle for 10 minutes, ensuring you reach a speed of at least 30 mph. The ABS light should remain off. Some vehicles require a key cycle after the test drive for the light to extinguish.
Readiness monitors affected: None. ABS faults do not affect emissions-related readiness monitors.
Watch out for:
- Using a basic code reader that cannot access the ABS module will not clear the code or the light.
- Disconnecting the battery will not reliably clear ABS codes on modern vehicles and causes other electronic issues.
- The code immediately returns if the root cause was not correctly identified and fixed.
Will This Fail Emissions / State Inspection?
No — by itself this code doesn't fail OBD inspection (but it can keep readiness monitors from setting, which causes a separate fail).
- California: An ABS light will NOT cause a failure of the emissions (smog) inspection. It fails a separate safety inspection if one is required.
- New York: Current NYS inspection regulations state that an illuminated ABS warning light is NOT a cause for rejection. It is an advisory item.
- Texas: An illuminated ABS light will NOT be a cause for rejection during a safety inspection. As of 2025, annual safety inspections are eliminated for most personal vehicles in many counties.
Most Commonly Affected Vehicles
- Jeep Wrangler (JK) (2007-2018) — Prone to wiring damage near the suspension from off-roading or wear and tear. The harness is too short and breaks from suspension articulation.
- Jeep Compass/Patriot (2007-2017) — The sensor is held by a simple metal clip on the wheel bearing that rusts and fails, allowing the sensor to become dislodged.
- Dodge/Chrysler Charger, 300, Magnum, Ram 1500 (2005-2018) — On RWD models, the tone ring on the axle shaft rusts, delaminates, and breaks off completely. This causes harsh shifting in vehicles with the 722.6 transmission.
- Ford F-150 (2004-2014) — Common issues include corrosion of the tone ring on the rear axle and failure of the sensor, which is integrated into the hub assembly on later models.
- Chevrolet / GMC Silverado / Sierra 1500 (2007-2013) — Wiring harness is susceptible to chafing along the frame rail. 'Rust jacking' at the sensor mounting point is a common cause of an increased air gap.
- Honda Accord, Civic, CR-V (2003-2012) — Famous for 'rust jacking,' where corrosion builds up under the sensor's mounting point. The sensor seizes in the steering knuckle due to galvanic corrosion.
- Subaru Outback, Forester, Impreza (2010-2017) — The rear brake backing plate rusts out, damaging the sensor or its wiring. Replacing the backing plate requires replacing the wheel bearing (TSB 05-70-19R).
- Suzuki Swift, SX4 (2004-2017) — Wiring issues are common under the rear passenger seats where the harness is pinched or damaged.
Manufacturer-Specific Notes
- Jeep: On Compass/Patriot models, the rear speed sensor is held in a metal clip on the wheel bearing. This clip rusts and breaks, allowing the sensor to fall out of place, causing an immediate C1035 code.
- Chrysler/Dodge/Ram: On RWD vehicles, the tone ring is part of the axle shaft and rusts heavily, breaking off entirely. On vehicles with the 722.6 transmission, this ABS fault directly causes harsh or erratic transmission shifts.
- Honda: Corrosion builds up on the aluminum steering knuckle under the steel base of the sensor, pushing the sensor away from the tone ring ('rust jacking'). Clean the mounting surface to bare metal before installing a new sensor.
- Subaru: Severe corrosion of the rear brake backing plate flakes apart and physically damages the sensor or its wiring. Subaru TSB 05-70-19R acknowledges unevenness on original backing plates causes premature hub/bearing failure.
Real Owner Stories
2016 Jeep Wrangler (JKU) with ABS/Traction light on.
ABS and traction control lights illuminated on the dashboard. A scan revealed code C1035 for the right rear wheel speed sensor.
Outcome: The owner disconnected the old sensor, unbolted it from the hub, and installed the new one. After clearing the code, a test drive confirmed the lights stayed off. The DIY repair took less than 30 minutes.
Lesson: On vehicles like the Jeep Wrangler, a standalone wheel speed sensor is an easy, fast, and inexpensive DIY fix requiring only basic hand tools.
2010 Dodge Charger with ABS light and harsh shifting.
ABS and ESP/BAS lights were on, and the transmission was shifting erratically. A scan showed code C1035.
Outcome: The owner purchased a new aftermarket tone ring (Dorman 917-566) for $20. The repair required removing the wheel, brake caliper, and rotor, then unbolting and sliding out the axle shaft to press on the new ring. This fixed both the C1035 code and the transmission shifting issues.
Lesson: If you have a RWD Chrysler, Dodge, or Jeep product with C1035 and transmission issues, check the tone ring on the axle shaft first. It is a known failure point misdiagnosed as a transmission problem.
2008 Honda CR-V with intermittent C1035 in a 'Rust Belt' state.
ABS light came on intermittently after driving on rough roads. Code C1035 was present. The owner had replaced the sensor a year prior.
Outcome: Using a small file and a wire brush, the owner cleaned the mounting surface down to bare, flat metal. They applied anti-seize compound and re-installed the same sensor. The code was cleared and did not return. The 'rust jacking' had increased the air gap, causing the signal to drop out.
Lesson: In regions with heavy road salt use, 'rust jacking' is a primary cause of ABS sensor codes. Never replace a sensor without first cleaning its mounting surface to bare metal.
How to Prevent This Code From Triggering
- Apply Dielectric Grease to Connectors (Anytime the connector is disconnected for service.) — Dielectric grease is non-conductive and seals the connection from moisture, road salt, and oxygen. This prevents the connector pins from corroding, a primary cause of electrical circuit faults.
- Clean Sensor Mounting Surface During Brake Jobs (Every 30,000-50,000 miles (or during brake replacement).) — In rust-prone areas, cleaning the sensor's mounting point prevents 'rust jacking,' where corrosion buildup physically pushes the sensor away from the tone ring, causing a weak signal.
- Inspect Wiring Harness for Secure Mounting (During every oil change or tire rotation.) — Visually check that the sensor wiring is properly secured in its clips and not rubbing against suspension components or the tire. This prevents chafing that wears through the insulation.
- Periodically Wash the Vehicle's Undercarriage (Monthly, especially during winter in 'Rust Belt' regions.) — Washing away road salt and brine reduces the corrosive elements that attack wiring, connectors, tone rings, and sensor mounting points, extending the life of ABS components.
Frequently Asked Questions
What are the most common mistakes when diagnosing C1035?
The biggest mistake is replacing the sensor without viewing live data to confirm the right rear wheel is the actual fault. The second is ignoring the wiring harness, which frequently breaks near suspension components. Finally, using cheap aftermarket sensors often results in immediate failure.
What does 'Comparative Performance' mean in the code definition?
It means the ABS module receives a signal from the right rear sensor, but the reported speed is illogical compared to the other three wheels. This points to a mechanical issue like a mismatched tire, a wobbly wheel bearing, or a damaged tone ring.
Can a bad alignment or worn suspension cause a C1035 code?
No, a bad alignment itself will not trigger the code. However, a severely worn wheel bearing causing the bad alignment creates wheel wobble. This wobble changes the gap between the sensor and the tone ring, leading to an erratic signal.
Can a weak or old battery cause a C1035 code?
Yes. A battery providing low voltage during engine start-up causes electronic control modules like the ABS to glitch and report false error codes. Test your battery if it is over 4 years old before beginning expensive ABS repairs.
Will the C1035 code clear itself after I fix the problem?
No. You must use an OBD-II scanner capable of communicating with the ABS module to erase the code after the repair. The ABS and traction control lights remain on until manually cleared.
Is the right rear wheel speed sensor part of the wheel bearing?
It depends on your vehicle. On older Jeeps and Hondas, it is a separate, bolt-in sensor that is easy to replace. On many modern cars, it is integrated into the wheel hub assembly and must be replaced as a single unit.
How do I know if it's the sensor or the wiring?
Perform a 'wiggle test' by moving the wiring harness while watching the live data screen on your scanner. If the speed reading jumps or cuts out, the wiring is bad. If the wiring is solid, swap the left and right sensors to see if the code follows the sensor.
Can I just cut the wires or otherwise bypass the sensor?
No. Cutting the wires creates a permanent open circuit, guaranteeing the C1035 code and warning lights stay on forever. The ABS module requires a valid speed signal from all four wheels to function.
Key Takeaways
- Code C1035 disables your ABS and traction control due to a right rear wheel speed sensor fault, increasing stopping distances by up to 20% on wet roads.
- Over 80% of C1035 codes stem from a failed $30-$150 wheel speed sensor or a damaged wiring harness near the right rear wheel.
- Use an ABS-capable OBD-II scanner to view live data at 15-25 mph; a reading of 0 mph on the right rear wheel confirms a dead sensor or severed wire.
- Before buying parts, spend 10 minutes cleaning the sensor's electrical connector and checking the mounting surface for rust buildup, which frequently causes false failures.
Helpful Videos

The information in this article is provided for general reference and educational purposes only. Vehicle specifications, procedures, and part compatibility can vary by production date, trim level, and region. Always consult your vehicle's factory service manual and verify part numbers before purchasing or performing repairs. Safety-critical components such as airbags, seat belts, and braking systems should be installed by a qualified professional.
- 🎬 Helpful Videos
- What Does C1035 Mean?
- Can I Drive With C1035?
- Common Causes
- Symptoms
- Diagnostic Flowchart
- Common Fixes & Costs
- Used vs. New Parts: Buying Guide
- What Happens If You Wait — Timeline
- Cost of Not Fixing It
- Diagnosis Steps
- When This Code Triggers (Freeze-Frame Conditions)
- Related Codes
- Climate & Environmental Factors
- How to Talk to a Mechanic About This Code
- Where to Take It: Dealer vs Independent vs Chain
- When to Walk Away From the Repair
- What Scan Tool You Need for This Code
- How to Clear the Code After You Fix It
- Will This Fail Emissions / State Inspection?
- Most Commonly Affected Vehicles
- Manufacturer-Specific Notes
- Real Owner Stories
- 2016 Jeep Wrangler (JKU) with ABS/Traction light on.
- 2010 Dodge Charger with ABS light and harsh shifting.
- 2008 Honda CR-V with intermittent C1035 in a 'Rust Belt' state.
- How to Prevent This Code From Triggering
- Frequently Asked Questions
- What are the most common mistakes when diagnosing C1035?
- What does 'Comparative Performance' mean in the code definition?
- Can a bad alignment or worn suspension cause a C1035 code?
- Can a weak or old battery cause a C1035 code?
- Will the C1035 code clear itself after I fix the problem?
- Is the right rear wheel speed sensor part of the wheel bearing?
- How do I know if it's the sensor or the wiring?
- Can I just cut the wires or otherwise bypass the sensor?
- Key Takeaways
- 🎟️ Get 5% Off