

C0711 on 2009-2014 Chevrolet Tahoe: Service Suspension System Causes and Fixes
On a 2009-2014 Tahoe, code C0711 almost always indicates a problem with the rear air suspension, specifically the air pressure sensor circuit. The most common cause is damaged wiring at the air compressor. Before buying an expensive new compressor, inspect the wiring harness for breaks or corrosion, as advised in GM TSB #PIT4954D. The damage is typically found where the harness gets pinched between the compressor bracket and the frame rail.
- C0711 indicates an electrical fault in the rear air suspension's pressure sensor circuit.
- The most common cause is a damaged or corroded wire at the air compressor, not a failed compressor.
- Always inspect the wiring harness thoroughly before replacing any parts, as a simple wire repair is the most likely and cheapest fix.
- Symptoms include a "Service Suspension System" message and a sagging rear end.
What's Unique About the 2009-2014 Chevrolet TAHOE
The GMT900 platform, which includes the 2009-2014 Tahoe, mounts the air suspension compressor on the driver's side frame rail. This location exposes the compressor and its electrical connector to road salt, moisture, and debris. Consequently, the wiring harness is highly prone to getting pinched against the frame or corroding, making a wiring fault the most common cause for a C0711 code on these specific vehicles, a fact well-documented by GM itself in TSB PIT4954D.
Diagnostic Flowchart
Tap your situation to follow the diagnostic path that matches what you're seeing on this vehicle.
Symptoms You May Notice
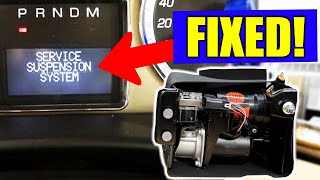
- "Service Suspension System" message on the Driver Information Center (DIC).
- Rear of the vehicle is sagging or sitting lower than normal.
- Harsh or bouncy ride quality.
- Air compressor does not turn on or runs continuously.
- Audible air leak from the rear of the vehicle.
- Replacing the entire air compressor assembly without first inspecting the wiring harness. TSB #PIT4954D and numerous owner experiences confirm that a simple wire repair often resolves the code, saving hundreds of dollars.
- Replacing the compressor for a failed pressure sensor when the filter/dryer/sensor assembly could be replaced separately at a lower cost.
Most Likely Causes
- Damaged Wiring or Connector at Air Compressor 🔴 High Probability The wiring harness is frequently pinched between the compressor mounting bracket and the vehicle frame, causing wires to chafe, break, or short to ground. Its exposed location under the vehicle also makes it susceptible to corrosion from road salt and moisture.
How to confirm: Visually inspect the wiring harness leading to the air compressor, located on the driver's side frame rail. The compressor must be unbolted (typically three bolts) and lowered to fully inspect the top of the harness where it meets the frame. Look for chafed, broken, or corroded wires. Wires can also break internally with no visible damage to the insulation; a 'tug test' on each individual wire at the connector can reveal these breaks.
Typical fix: Repair the damaged section of wire using weatherproof butt connectors and heat shrink tubing or by soldering. Reroute the harness with additional protective loom and secure it with zip ties to prevent it from being pinched again. TSB #PIT4954D explicitly advises repairing the wiring before replacing any parts.
Est. part cost: $5-$25 - Failed Air Suspension Compressor Assembly 🟡 Medium Probability The pressure sensor that triggers code C0711 is integrated into the compressor's filter/dryer assembly. Moisture can get into the air system, saturate the dryer, and cause the sensor to fail internally, a cause noted in TSB PIT4954D. Also, a compressor that has been overworked due to leaks in the air shocks can burn out.
How to confirm: After confirming the wiring is intact and has proper power (4.75-5.25V 5V reference) and ground (less than 2.0 ohms), use a scan tool to monitor the pressure sensor reading. If the reading is invalid (stuck at 0 or 5 volts) or does not change, the sensor has failed.
Typical fix: Replace the entire air suspension compressor assembly. Alternatively, if the compressor motor is still good, GM offers the filter/dryer/sensor assembly as a separate part (PN 22964558 for pre-May 2012 models, PN 22941807 for later models).
Est. part cost: $80-$500 - Faulty Electronic Suspension Control (ESC) Module ⚪ Low Probability
How to confirm: This is a diagnosis of exclusion. If the wiring, connector, and compressor assembly have all been tested and confirmed to be good, the ESC module itself may be the issue. Check for corrosion at the module's connector, which is located above the spare tire. In some cases, an improperly seated main connector at the ESCM can trigger C0711.
Typical fix: Replace and program the Electronic Suspension Control Module. Ensure the main connector is fully seated upon installation.
Est. part cost: $150-$300
Rare But Worth Checking
- Improperly Seated ESCM Connector:
Diagnosis Steps
- Read all Diagnostic Trouble Codes from the Electronic Suspension Control Module (ESCM) using a scan tool capable of accessing chassis codes.
- Visually inspect the rear ride height for sagging.
- Check the suspension-related fuses (often labeled ESC, ALC, or RTD) in the underhood fuse block.
- Safely raise and support the vehicle.
- Locate the air compressor on the driver's side frame rail, near the rear wheel.
- CRITICAL: Unbolt the compressor (typically 3 bolts) and lower it to thoroughly inspect the wiring harness and connector going to the compressor. Check for wires pinched between the bracket and the frame. Look for chafed, melted, or corroded wires.
- If wiring damage is found, repair it using weatherproof connectors. Clear the codes and re-test.
- If wiring appears intact, disconnect the sensor connector and test the harness side. With the ignition ON, use a multimeter to test for a 5-volt reference (4.75-5.25V) at terminal H and a good ground (less than 2.0 ohms resistance) at terminal F.
- If the 5V reference or ground is missing, trace the circuit back to the ESCM for an open or short.
- If power and ground are good, the fault is likely the pressure sensor itself or the signal wire.
- If the compressor, sensor, and wiring all test good, the fault may lie with the Electronic Suspension Control Module (ESCM), though this is uncommon.
Parts You'll Likely Need
- Air Suspension Compressor Assembly
(OEM #20930288 (supersedes 25913289, 15949881))— This is the required replacement if the integrated pressure sensor has failed internally or the compressor motor has burned out. The OEM part number has been superseded multiple times.
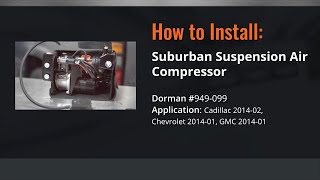
Trusted brands: ACDelco, Dorman (e.g., 949-001, 949-099)
OEM price range: $350-$500
Aftermarket price range: $200-$350 - Air Compressor Filter/Dryer/Sensor Assembly
(OEM #22964558 (pre-May 2012) or 22941807 (post-May 2012))— If only the pressure sensor has failed (confirmed via diagnostics), GM recommends replacing this assembly instead of the entire compressor. The pre-2012 version includes a necessary jumper harness.
Trusted brands: ACDelco
OEM price range: $80-$150
Aftermarket price range: N/A - Air Suspension Compressor Wiring Pigtail
(OEM #ACDelco PT2321 (Varies))— If the connector itself is corroded or damaged beyond a simple wire repair, a new pigtail will be needed to fix the circuit. The GMT900 platform uses a rectangular connector.
Trusted brands: ACDelco, Dorman
OEM price range: $30-$50
Aftermarket price range: $15-$30
Related Codes That Often Appear With This One
- C0696 — This code for 'Level Control Air Pressure Sensor Circuit High' is also related to the Electronic Suspension Control module and is mentioned alongside C0711 in TSB #PIT4954D as being caused by the same wiring short issue.
Technical Service Bulletins (TSBs) & Recalls
- PIT4954D: States that DTCs C0711 and C0696 can be caused by the wiring to the automatic level control (ALC) pressure sensor being shorted to ground. It advises inspecting for pinched wires before replacing parts and also notes sensor failure from moisture. It covers models from 2001-2014.
- PIT4954C: A previous version of the TSB that also details the wiring chafe issue and introduced the updated sensor/dryer part numbers.
Platform-Specific Known Issues
- A GM Technical Service Bulletin (PIT4954D) directly addresses code C0711 and confirms the primary cause is often the wiring to the pressure sensor being shorted to ground where it gets pinched by the compressor bracket.
- Moisture intrusion into the pressure sensor is another known issue that can cause an internal fault and trigger this code. This is often due to a saturated air dryer.
- Forum users frequently post photos of the exact chafe point: on top of the compressor, where the harness is crushed against the frame rail. A preventative fix is to wrap the harness in protective loom and zip-tie it away from the frame after repair.
Mechanic-Grade Diagnostic Values
- ALC Pressure Sensor Signal Voltage — expected: 0.5V - 4.75V. Failure: Voltage below 0.5V or above 4.75V will set the DTC.
- 5-Volt Reference Circuit at Sensor Harness Connector — expected: 4.75V - 5.25V (between Terminal H and ground). Failure: Voltage outside this range indicates a fault in the circuit or the ESCM.
- Low Reference (Ground) Circuit Resistance at Sensor Harness Connector — expected: < 2.0 Ohms (between Terminal F and a known good chassis ground). Failure: Resistance greater than 2.0 Ohms indicates high resistance or an open in the ground circuit.
Scan Tool Commands That Help
- Tech 2 / GDS2: Data Display: ALC Air Pressure Sensor Voltage — Used to monitor the live voltage signal from the pressure sensor to check if it is within the expected range (0.5-4.75V) and responds to system pressure changes.
- Tech 2 / GDS2: ALC Compressor Relay ON/OFF — Used to test the compressor relay and the power circuit to the compressor motor, bypassing the pressure sensor inputs. This helps isolate a faulty relay or compressor motor from a sensor or wiring issue.
- Tech 2 / GDS2: ALC Exhaust Valve Solenoid ON/OFF — Commands the exhaust solenoid on the compressor to open or close. This can be used to test the solenoid's function and its circuit. A test lamp connected to the circuit should cycle with the command.
Wiring & Ground Locations
- G400 / G401 — Mounted to the left rear body mount or left-hand frame rail, behind the left rear tire.. These are primary ground points for the rear chassis components, including the Electronic Suspension Control Module (ESCM). A corroded or loose connection here can cause erratic module behavior or high resistance in the sensor's ground circuit, triggering C0711.
- ALC Pressure Sensor Connector — On the air compressor assembly, mounted to the driver's side frame rail near the rear wheel.. This is the main test point for the sensor circuit. For GMT900 (2009-2014), Pin H is the 5V reference, and Pin F is the low reference (ground). This connector and its harness are the most common failure point due to being pinched or corroded.
- ESCM Connector — Above the spare tire, mounted to a rear frame cross-member.. This is the main connection for the entire Autoride system. A poor connection here, due to corrosion or not being fully seated, can cause C0711 by interrupting the sensor's signal, 5V reference, or ground path.
Real Owner Repair Stories
- Various forum reports (TahoeYukonForum, GM-Trucks.com) (2009-2013 GM SUVs with Autoride) — C0711 code, 'Service Suspension System' message, compressor not running.
❌ Tried (didn't work) Visual inspection of the wiring harness showed no obvious damage.
✅ What actually fixed it The wires in the harness near the compressor connector were broken *inside* the insulation. A simple visual check did not find the fault. A 'tug test' on each individual wire revealed the broken conductor. Repairing the broken wire resolved the code. - TahoeYukonForum user report (2011 Chevrolet Tahoe LTZ) — C0711 code appeared immediately after replacing the ESCM.
❌ Tried (didn't work) Replacing the Electronic Suspension Control Module (ESCM) and having it reprogrammed., Replacing the air compressor assembly., Replacing the rear shock absorbers.
✅ What actually fixed it The main electrical connector at the newly installed ESCM was not fully seated. A forum member suggested removing the rubber gasket from the connector to allow it to click into place properly, which resolved the code. This indicates a poor pin connection at the module was the root cause, not the multiple replaced components.
OEM Part Supersession History
N/A→22964558— Original sensor/dryer assembly for vehicles built on or before May 7, 2012. This kit includes a jumper harness to adapt to the older vehicle wiring.
Heads up: This part has been discontinued but is required for pre-May 2012 vehicles. It has been replaced by 20982305 and 22197161 in some parts catalogs.N/A→22941807— Updated sensor/dryer assembly for vehicles built after May 7, 2012. This part has an improved design to resist moisture intrusion and does not require a jumper harness.
Heads up: This part is for vehicles built in May 2012 and later. It will not directly connect to earlier models without harness modification.
Model Year Variations Within This Range
- 2009 - Early 2012: Vehicles built on or before May 7, 2012, use the older style air compressor filter/dryer/sensor assembly. When replacing just this component, part number 22964558 is required, which includes a jumper harness for compatibility.
- Late 2012 - 2014: Vehicles built after May 7, 2012, use the updated filter/dryer/sensor assembly, part number 22941807. This version has an improved design against moisture and does not use or require the jumper harness.
Helpful Videos
We Have This Part in Stock


The information in this article is provided for general reference and educational purposes only. Vehicle specifications, procedures, and part compatibility can vary by production date, trim level, and region. Always consult your vehicle's factory service manual and verify part numbers before purchasing or performing repairs. Safety-critical components such as airbags, seat belts, and braking systems should be installed by a qualified professional.
- Chevrolet TAHOE:
- 🎬 Helpful Videos
- 🛍️ Shop This Part
- What's Unique About the 2009-2014 Chevrolet TAHOE
- Diagnostic Flowchart
- Symptoms You May Notice
- Most Likely Causes
- Rare But Worth Checking
- Diagnosis Steps
- Parts You'll Likely Need
- Related Codes That Often Appear With This One
- Technical Service Bulletins (TSBs) & Recalls
- Platform-Specific Known Issues
- Mechanic-Grade Diagnostic Values
- Scan Tool Commands That Help
- Wiring & Ground Locations
- Real Owner Repair Stories
- OEM Part Supersession History
- Model Year Variations Within This Range
- 🎟️ Get 5% Off