

OBD-II Code C0299: Brake Booster Performance
The Ultimate Guide to What C0299 Means, Why It Triggers, and How to Fix It
- Code C0299 indicates a total loss of power brake assist, increasing stopping distances by up to 4 times and making the vehicle unsafe to drive.
- The four most common culprits are a cracked vacuum hose, a faulty pressure sensor, a dead electric vacuum pump, or a ruptured brake booster diaphragm.
- On 2007-2014 GM trucks, a leaking master cylinder destroys the booster and sensor, requiring an $800-$1,200 replacement of all three components simultaneously.
- Never confuse chassis code C0299 (Brake Booster) with powertrain code P0299 (Turbo Underboost), as they require completely different diagnostic paths.
- Accurate diagnosis requires pulling the vacuum sensor to check for brake fluid contamination, testing booster integrity with a hand-held vacuum gauge, and verifying sensor voltage.
What Does C0299 Mean?

Code C0299 indicates the Electronic Brake Control Module (EBCM) detected a critical loss of vacuum or pressure in the brake booster system. This system uses engine vacuum or an auxiliary electric pump to multiply the force you apply to the brake pedal. When this code triggers, power assist is disabled, requiring massive physical effort to stop the vehicle.
Technical definition: The SAE/ISO definition for C0299 is "Brake Booster Performance." The EBCM sets this code when it receives a signal from the brake booster vacuum/pressure sensor that is illogical for current operating conditions. Specifically, it triggers if the sensor detects no vacuum for 10 seconds after startup, low vacuum for over 60 seconds while driving, or a voltage reading outside the expected 1.0V-3.0V range.
Can I Drive With C0299?
No — Do Not Drive. Do not drive the vehicle. A C0299 code indicates a total failure in the power brake assist system. The force required to press the brake pedal will be extremely high, and stopping distances increase by 2 to 4 times. While the vehicle can be moved at idle speeds in an emergency (e.g., onto a tow truck), it is unsafe for public roads.
Common Causes

- Leaking master cylinder rear seal (Very Common) — The master cylinder leaks brake fluid from its rear seal directly into the brake booster. This corrosive fluid destroys the booster's internal rubber diaphragm and shorts the vacuum sensor. This is the definitive root cause for millions of GM truck failures. 🎬 Watch: How fluid leaks cause C0299 on GM trucks.
- Leaking brake booster vacuum hose (Very Common) — The primary rubber hose running from the engine's intake manifold to the brake booster cracks, splits, disconnects, or collapses internally. This creates a sudden, massive vacuum leak.
- Faulty brake booster vacuum/pressure sensor (Very Common) — This sensor measures the vacuum level inside the booster. It fails electrically or leaks from its own seals, sending false zero-vacuum readings to the EBCM.
- Failed electric vacuum pump (Common) — Vehicles with turbocharged engines or hybrid systems (e.g., Ford F-150 EcoBoost, Subaru XT, Chevy Cruze) use an auxiliary electric pump to generate vacuum. The pump motor burns out, its relay sticks, or moisture intrusion causes internal corrosion.
- Leaking brake booster diaphragm (Common) — The brake booster contains a large internal rubber diaphragm. This diaphragm tears or ruptures with age, creating a major internal vacuum leak accompanied by a loud hissing sound when braking.
- Failed brake booster check valve (Less Common) — A one-way valve traps vacuum inside the booster. If it sticks open or cracks, vacuum escapes back toward the engine, eliminating brake assist immediately after the engine shuts off.
- Damaged master cylinder O-ring (Rare) — The small O-ring sealing the mounting point between the master cylinder and the brake booster becomes brittle or gets pinched during service, creating a localized vacuum leak.
Symptoms

- Extremely hard brake pedal — The brake pedal becomes rigid and difficult to push, requiring significant leg strength to slow the vehicle down.
- Dashboard Warnings (Service Brakes, ABS, Traction Control) — The Driver Information Center displays a 'Service Brake Assist' message, and the ABS/Traction Control warning lights illuminate because these systems disable themselves when booster faults occur.
- Hissing noise from dashboard or engine bay — A loud hissing sound occurs when pressing or releasing the brake pedal, indicating vacuum escaping from a torn booster diaphragm or leaking hose.
- Rough, high, or stalling engine idle — A significant vacuum leak in the brake system allows unmetered air into the engine, disrupting the air-fuel mixture and causing erratic idling or stalling.
- Slow-to-return brake pedal — After being pressed, the brake pedal returns to its resting position very slowly due to the lack of vacuum assist to help retract it.
Diagnostic Flowchart
Tap your situation to follow the diagnostic path that matches what you're seeing on this code.
Common Fixes & Costs

- Replace master cylinder, brake booster, and sensor (GM Combo) — Parts: $300-$500, Labor: $450-$650, ~4.0 hr book time (Professional)
- Replace brake booster vacuum hose/pipe — Parts: $30-$80, Labor: $75-$150, ~0.5 hr book time (DIY)
- Replace brake booster vacuum/pressure sensor — Parts: $50-$100, Labor: $75-$125, ~0.5 hr book time (Intermediate)
- Replace electric brake vacuum pump — Parts: $150-$350, Labor: $150-$250, ~1.5 hr book time (Intermediate)
- Replace brake booster — Parts: $150-$300, Labor: $250-$400, ~2.5 hr book time (Professional)
DIY vs Professional
- Replace brake booster vacuum hose/pipe — Beginner:
Tools: Pliers, basic hand tools. - Replace brake booster vacuum/pressure sensor — Beginner:
Tools: Basic hand tools (socket set, screwdrivers). - Replace electric brake vacuum pump — Beginner:
Tools: Socket set, trim removal tools. - Replace brake booster and/or master cylinder — Beginner:
Tools: Line wrenches, torque wrench, pressure bleeder, bi-directional scan tool.
Used vs. New Parts: Buying Guide
When a used part is worth it: A tested, used OEM electric vacuum pump from a low-mileage donor is a cost-effective alternative for older vehicles. Never buy a used master cylinder or brake booster due to severe safety risks and unknown internal seal conditions.
Donor-vehicle mileage cap: roughly under 60000 miles for the part to have meaningful remaining life.
Donor quality checklist:
- Verify the donor vehicle was not scrapped due to a front-end collision.
- For electric pumps, ensure exact part number matching and inspect connectors for green corrosion or moisture damage.
Decision logic:
- If The part is a master cylinder or brake booster → Buy new (OEM or premium aftermarket). The safety risk of internal seal failure is too high.
- If The part is an electric vacuum pump and the vehicle is >10 years old → Buy a tested, used OEM pump from a low-mileage donor to save $200+.
- If The part is a vacuum sensor → Buy new. The cost is low ($50-$100), and a new part guarantees accurate voltage readings.
Warranty tradeoff: Salvage yard parts offer 30-90 day warranties covering only the part. New aftermarket parts offer 1-year to lifetime warranties. New OEM parts provide the best fit and longevity.
Worst-case if a used part fails: $300-$600 if a used part fails, requiring repeat labor and a second replacement part.
What Happens If You Wait — Timeline
- Immediately: A major component like the booster diaphragm or vacuum hose fails. The brake pedal becomes extremely hard to press, and the 'Service Brake Assist' light comes on. The vehicle is unsafe to drive. (MPG impact: 0%% · Added cost: $0 (but accident risk is extremely high))
- 1-4 weeks (with a slow leak): If the cause is a small vacuum leak, the C0299 code sets intermittently. The engine develops a slight rough idle as unmetered air enters the intake. P0171/P0174 (lean) codes appear. (MPG impact: 5-10%% · Added cost: $50-100 in wasted fuel. Risk of catalytic converter damage begins.)
- 1-6 months (with a leaking master cylinder): A slow master cylinder leak drips brake fluid into the booster. Initially, there are no symptoms other than dropping fluid levels. Eventually, the fluid shorts the vacuum sensor, triggering the C0299 code. (MPG impact: 0%% · Added cost: $200-$400. The brake booster is now contaminated and must be replaced along with the master cylinder.)
- 6+ months (ignoring Stage 3): Brake fluid completely saturates the booster, destroying the internal rubber diaphragm. The car now has a persistent hard pedal AND a ruined booster. Corrosive fluid damages the sensor connector and wiring. (MPG impact: 5-10% (due to resulting vacuum leak)% · Added cost: $800-$1,200+. A full replacement of the master cylinder, brake booster, sensor, and potentially wiring is required.)
Cost of Not Fixing It
- Immediately: Stopping distances increase by 2-4x normal length, and brake pedal effort becomes dangerously high. The risk of a rear-end collision is extreme. (Added cost: Accident-related costs ($500 - $20,000+))
- 0-1 Month: A large vacuum leak causes a persistent lean running condition, leading to rough idling, stalling, and long-term damage to the catalytic converter from improper air/fuel mixtures. (Added cost: $1,200-$2,800 for catalytic converter replacement)
- 1-6 Months: If the root cause is a leaking master cylinder, brake fluid continues saturating the brake booster. This destroys the booster's internal diaphragm and shorts the vacuum sensor, turning a single component failure into a complete system replacement. (Added cost: $500-$1,000 in additional parts (booster, sensor) on top of the initial master cylinder failure)
Diagnosis Steps

- Inspect the Vacuum Sensor for Contamination (Crucial for GM)
With the engine off, remove the brake booster vacuum sensor. Shine a light into the sensor port. Any oily residue (brake fluid) confirms a leaking master cylinder. If fluid is present, stop diagnosis: the master cylinder, booster, and sensor require immediate replacement.
Tools: Basic hand tools, flashlight (Beginner) - Perform a Thorough Visual Inspection
Inspect the entire brake booster vacuum hose from the engine to the booster. Look for cracks, disconnected fittings, or collapsed sections. Verify the check valve is fully seated in the booster grommet.
Tools: Flashlight (Beginner) - Test the Brake Booster Check Valve
With the engine off, pump the brake pedal 5-6 times to deplete all stored vacuum. Press and hold the brake pedal with moderate force, then start the engine. If the booster and vacuum supply are working, the pedal drops slightly toward the floor. If it does not move, there is zero vacuum assist.
Tools: None (Beginner) - Check for Vacuum Leaks with Engine Running
With the engine running, listen for a hissing sound around the booster and hoses. Spray a controlled amount of carburetor cleaner or soapy water on suspected areas. A sudden change in engine idle speed or bubbling confirms the exact leak location.
Tools: Carburetor cleaner or spray bottle with soapy water (Intermediate) - Test Electric Vacuum Pump Operation (If Equipped)
Listen for the auxiliary pump to run for a few seconds after a cold start. If it remains silent, check its dedicated fuse and relay. Use a multimeter to confirm power and ground reach the pump connector. If power is present but the pump doesn't run, the pump motor is dead.
Tools: Multimeter or test light (Intermediate) - [PRO TIP] Test Booster Integrity with a Vacuum Gauge
Disconnect the main vacuum hose from the booster and attach a hand-held vacuum pump. Pump the gauge to 20 in-Hg. The booster must hold this vacuum with less than 2 in-Hg of loss over one minute. If it bleeds down quickly, the internal diaphragm is ruptured and the booster requires replacement.
Tools: Hand-held vacuum pump with gauge (Advanced) - [PRO TIP] Test the Vacuum Sensor Voltage
Using a multimeter, back-probe the sensor's signal wire. On a typical 3-wire sensor, the signal reads approximately 3.0V with the engine off (no vacuum) and drops to 1.0V-2.5V with the engine idling (full vacuum). A reading stuck at 0V or 5V indicates a dead sensor or wiring short.
Tools: Multimeter, vehicle-specific wiring diagram, back-probe pins (Advanced) - [PRO TIP] Analyze Scan Tool PID Data
Monitor the 'Brake Booster Vacuum Sensor' PID on a live data scanner. With Key On/Engine Off, pressure should read near 0 PSI (atmospheric). Upon starting the engine, the reading must drop to reflect strong vacuum (e.g., -7 to -12 PSI). Erratic or unchanging values confirm a sensor or vacuum supply failure.
Tools: OBD-II Scan Tool with Live Data capability (Advanced) - [PRO TIP] Use a Scan Tool to Check Fuel Trims
Monitor Short-Term Fuel Trim (STFT) data. With the engine idling, firmly press and release the brake pedal several times. If STFT values spike significantly (>10-15%) during pedal presses, unmetered air is entering the engine through a leaking booster diaphragm.
Tools: OBD-II Scan Tool with Live Data capability (Advanced)
When This Code Triggers (Freeze-Frame Conditions)
- Ignition Voltage: > 9 Volts (The system requires a minimum voltage to operate and run diagnostics.)
- Engine Status: Running (The code only sets when the engine is running and expected to produce vacuum.)
- Time Since Start-Up: 10-60+ seconds (The code triggers if no vacuum is detected for 10 seconds after startup, or if low vacuum is detected for over a minute while driving.)
- Vehicle Speed: 0-70 mph (The fault is detected at idle or while driving at steady highway speeds, often during light or zero acceleration.)
Related Codes
- C025E — Points specifically to an electrical circuit fault (short/open) in the Vacuum Sensor. C0299 is a performance code. If you have C025E, the sensor or wiring is the definite cause.
- P050F — The Engine Control Module's (ECM) version of the same fault. Having both C0299 and P050F strongly confirms a physical vacuum supply issue rather than an isolated EBCM glitch.
- P0171/P0174 — These 'System Too Lean' codes are a direct result of the vacuum leak causing C0299. The booster leak allows unmetered air into the intake manifold. Fix the C0299 leak first, and the lean codes will clear.
- C0110 — Points specifically to a fault in the electric vacuum pump's circuit. If you have both C0110 and C0299, the electric pump motor has failed or has a wiring issue.
Climate & Environmental Factors
- Cold Weather: In freezing temperatures, moisture inside vacuum lines or the check valve freezes, creating a temporary blockage and a hard pedal on startup. Relays for electric vacuum pumps also stick in extreme cold.
- High Altitude: Engine vacuum naturally decreases by approximately 1 in-Hg per 1,000 feet of elevation. This reduces available vacuum, making the system hyper-sensitive to small leaks that go unnoticed at sea level.
- High Humidity: On vehicles with electric vacuum pumps (e.g., 2011-2012 Ford F-150), high humidity drives moisture ingress into the pump assembly, causing internal corrosion and premature motor failure.
How to Talk to a Mechanic About This Code
Say this: "I have a C0299 code and a 'Service Brake Assist' message. I need a diagnostic appointment. Based on the symptoms, I suspect a vacuum leak, a bad sensor, or potentially a master cylinder leaking into the booster. I'd like you to confirm the source of the failure before replacing any parts."
This signals to the shop that you're an informed customer. It directs their diagnosis toward the most likely causes and prevents them from just replacing the most expensive part. Mentioning the master cylinder leak shows you're aware of the common catastrophic failure pattern.
Avoid saying:
- 'My brakes feel weird.'
- 'My 'Service Brakes' light is on, can you just fix it?'
- 'Just do whatever it takes to get it back on the road.'
Questions to ask before authorizing the repair:
- If you are recommending a new sensor, what was the voltage reading on the old one, and did you check for brake fluid contamination inside the booster?
- If you are recommending a new booster, did it fail a vacuum hold test? What was the leak-down rate?
- If you are recommending a new master cylinder, is there evidence of fluid leaking from its rear seal into the booster?
- What is the warranty on the parts and labor for this repair?
Where to Take It: Dealer vs Independent vs Chain
- Dealer:
Best for: Vehicles under warranty or covered by a specific recall (like the Ford F-150 vacuum pump)., Complex electrical issues requiring manufacturer-specific diagnostic tools.
Downsides: Highest labor rates, often 1.5-2x more than independent shops., May recommend replacing the entire booster/master cylinder assembly as a policy, even if a smaller component is the cause. (Typical cost: +50% vs. baseline) - Independent Shop:
Best fit for most cases. A good independent mechanic accurately diagnoses the vacuum system, checks for leaks, and replaces only the necessary components.
Best for: Out-of-warranty vehicles where cost is a major factor., Diagnosing and repairing common, well-documented issues like the GM C0299 failure pattern.
Downsides: Quality and expertise vary greatly. It's crucial to find a shop with ASE-certified technicians and good reviews for brake work. (Typical cost: +0% vs. baseline) - Chain Shop:
AVOID for diagnosis. This is a critical safety system fault requiring more diagnostic expertise than is typically found at a quick-lube or tire chain.
Best for: Simple, unrelated maintenance like an oil change or tire rotation.
Downsides: Technician skill is inconsistent. They lack the advanced diagnostic tools for chassis codes., High pressure to upsell leads to misdiagnosis (e.g., selling a full brake job when the issue is a vacuum leak). (Typical cost: -10% vs. baseline)
When to Walk Away From the Repair
If the estimated repair cost for the C0299 fault exceeds 50% of the car's private-party value, seriously consider selling the vehicle as-is or trading it in.
- Car worth $8000, fix is $1500: Fix it. The repair cost is significant but well below the 50% threshold. The vehicle retains substantial value after the fix.
- Car worth $4000, fix is $1500: Borderline. The repair is nearly 40% of the car's value. Get a second opinion before proceeding. If other major repairs are needed, it may be time to walk away.
- Car worth $2500, fix is $1500: Walk away. The repair cost is 60% of the vehicle's value. It is not economically sensible to invest this much into an older, low-value car.
What Scan Tool You Need for This Code
Minimum: An OBD-II reader that can read and clear ABS/Chassis 'C' codes. Basic engine-only code readers will NOT see the C0299 code.
A standard $20 code reader only accesses powertrain ('P') codes from the engine computer. C0299 is stored in the Electronic Brake Control Module (EBCM), requiring a scanner with ABS capabilities.
Budget: BlueDriver Pro (~$100) — Reads and clears ABS codes like C0299 on major brands. Displays live data for the 'Brake Booster Vacuum Sensor' PID, allowing you to see sensor readings in real-time to diagnose a leak vs. a bad sensor.
Mid-range: Foxwell NT630 Plus / Innova 5610 (~$150) — Offers dedicated ABS functions, including reading/clearing codes and viewing live data. Crucially, provides bi-directional control to perform an 'ABS Bleed' service, required after replacing a master cylinder.
Professional: Autel MaxiCOM MK808 / MK808TS (~$450-600) — Provides full-system diagnostics to read codes from every module. Offers extensive live data graphing, records freeze frame data, and has powerful bi-directional functions like ABS bleeding to properly complete the repair.
How to Clear the Code After You Fix It
- Use an OBD-II scan tool with ABS capabilities to clear the C0299 code from the Electronic Brake Control Module (EBCM).
- Perform a 10-minute test drive including several normal stops to verify pedal feel and allow the system to run its vacuum plausibility monitor.
- Re-scan the EBCM to ensure the code does not return.
Drive cycle (~15 minutes): Start the engine and idle for 2 minutes. Drive for at least 10 minutes at varying speeds, performing several complete stops. The 'Service Brakes' message must remain off.
Readiness monitors affected: None. This is a Chassis (C) code and does not affect emissions readiness monitors.
Watch out for:
- Disconnecting the battery will not clear this code from the EBCM; an ABS-capable scan tool is mandatory.
- The code returns immediately if the underlying mechanical vacuum leak or fluid contamination is not resolved.
Will This Fail Emissions / State Inspection?
Yes — this code typically fails an OBD-II emissions inspection.
- California: An illuminated ABS or Brake warning light is an automatic failure of the state safety inspection required for title transfers.
- New York: An illuminated ABS warning light is immediate grounds for failing the annual safety inspection.
- Texas: A vehicle fails the annual safety inspection if the primary red 'BRAKE' light or ABS warning indicators are illuminated.
Most Commonly Affected Vehicles
- Chevrolet Silverado / Tahoe / Suburban / Avalanche (2007-2014) — Extremely common issue. The root cause is a leaking master cylinder that contaminates the booster and sensor. TSB 21-NA-045 also addresses faulty vacuum pipe routing.
- GMC Sierra / Yukon / Yukon XL (2007-2014) — Shares the GMT900 platform with Chevrolet and suffers the exact same catastrophic master cylinder leak pattern.
- Cadillac Escalade (2007-2014) — Highly susceptible to the same master cylinder, booster, and sensor failures as its GM platform siblings.
- Ford F-150 (2011-2018) — On EcoBoost and 5.0L models, the supplemental electric brake vacuum pump (part # BL3Z-2A451-A for 2011-12) is a known high-failure part due to moisture intrusion.
- Subaru Forester XT / WRX / Ascent (2014-2021) — Turbocharged models rely on an electric vacuum pump that frequently fails. TSB 06-79-20R also addresses a leaking seal between the master cylinder and booster.
- Chevrolet Cruze (2011-2016) — Models with the 1.4L turbo engine use an auxiliary vacuum pump. This pump, or the check valve in its vacuum line, frequently fails and triggers this code.
- Chrysler / Dodge Pacifica / Grand Caravan (2017-2022) — These minivans experience electrical failure of the auxiliary vacuum pump, leading to a hard brake pedal and C0299.
- Ford Edge / Explorer (2011-2019) — EcoBoost models frequently suffer from ruptured brake booster diaphragms, causing a loud hissing noise and a hard pedal.
Manufacturer-Specific Notes
- General Motors (Chevrolet, GMC, Cadillac): On 2007-2014 trucks, the master cylinder's rear seal leaks brake fluid into the booster, destroying the diaphragm and sensor. Replacing only the sensor is a temporary fix that fails immediately. The correct repair requires replacing the master cylinder, brake booster, and vacuum sensor simultaneously.
- Ford: On 2011-2012 F-150s with the 3.5L EcoBoost, the electric vacuum pump was subject to Customer Satisfaction Program 15N05 and recall 17S13 due to moisture failures. Diagnosis must start at the electric pump.
- Subaru: While the electric vacuum pump is a known failure item on turbo models, technicians must check TSB 06-79-20R, which describes a hard pedal caused by a leaking seal between the master cylinder and booster.
- Chrysler / Dodge: On the Pacifica and Grand Caravan, the electric vacuum pump becomes noticeably noisy before failing completely. Verify power and ground to the pump before hunting for hose leaks.
Real Owner Stories
2008 Chevy Avalanche at 140K miles
'Service Brakes Soon' message appeared with code C0299. Brakes felt mostly normal, but the owner was losing brake fluid with no visible external leak.
What they tried:
- Checked vacuum hose from engine (22 in-Hg, good).
- Replaced O-ring between master cylinder and booster.
- Removed vacuum sensor and brake fluid poured out of the booster.
Outcome: The master cylinder had a slow internal leak, filling the brake booster with fluid and destroying the sensor. The owner replaced the master cylinder, brake booster, and sensor to fix the issue permanently.
Lesson: On 2007-2014 GM trucks, if you have C0299 and are mysteriously losing brake fluid, the master cylinder is the root cause. Replacing only the sensor is a temporary fix that fails once submerged in fluid again.
2011 Ford F-150 EcoBoost
Hard brake pedal and 'Service Brake Assist' warning. C0299 code stored.
What they tried:
- Owner initially suspected a vacuum leak from the engine.
- A mechanic identified the vehicle has a supplemental electric vacuum pump because the turbocharged engine produces less vacuum.
Outcome: The electric vacuum pump had failed, a common issue on these trucks. Replacing the pump (Ford part BL3Z-2A451-A) and its relay restored normal brake function for $450 at an independent shop.
Lesson: On vehicles with turbocharged engines, always suspect the electric vacuum pump first for C0299. Listen for it to run for a few seconds after startup.
1998 GMC K1500 with 4.3L V6
Engine ran rough and stumbled when braking. Pumping the brakes made the pedal hard and a hissing noise was audible.
What they tried:
- Owner confirmed the vacuum hose to the booster looked solid.
- Diagnosis pointed to a large internal vacuum leak in the booster itself.
Outcome: The internal diaphragm of the brake booster ruptured. This created a massive vacuum leak, causing both the hard pedal (no assist) and the rough engine idle (unmetered air). Replacing the brake booster solved both problems.
Lesson: A C0299 fault is an engine vacuum problem. If you have a rough idle or lean codes (P0171/P0174) along with C0299, it strongly points to a large vacuum leak from the booster or its hose.
2009 Silverado with aftermarket camshaft
After installing a 'big cam,' the engine produced less vacuum at idle, constantly triggering the 'Service Brakes Soon' message and C0299 code.
What they tried:
- The owner confirmed there were no actual leaks in the brake system.
- The EBCM was not seeing the vacuum level it expected from a stock engine.
Outcome: The owner bypassed the sensor using resistors to send a constant 'good' voltage signal to the EBCM, tricking the computer. This solved the warning message but is a high-risk modification.
Lesson: Highly modified engines that produce low vacuum trigger this code. The safe fix is adding a supplemental electric vacuum pump, not bypassing safety sensors.
How to Prevent This Code From Triggering
- Perform a brake fluid flush as per manufacturer's schedule. (Every 2-3 years or 30,000 miles.) — Brake fluid absorbs moisture over time. This moisture causes internal corrosion in the master cylinder, leading to seal failure, leaks into the booster, and eventual C0299 codes.
- Visually inspect brake vacuum hoses. (Every oil change.) — The main vacuum hose is exposed to intense engine heat. Checking for cracks or soft spots catches potential leaks before they trigger a C0299 and cause a hard pedal.
- Address a 'sinking' or 'spongy' brake pedal immediately. (As needed.) — A brake pedal that slowly sinks to the floor at a stoplight is a classic sign of an internal master cylinder leak. Replacing it early prevents fluid from destroying the much more expensive brake booster.
- Listen for your electric vacuum pump (if equipped). (Periodically.) — On vehicles with an electric pump, you hear it run for a few seconds on a cold start. If it goes silent, the pump or relay has failed, allowing you to fix it before an emergency braking situation occurs.
Frequently Asked Questions
What does the '-5A' mean after the C0299 code?
The '-5A' is a GM Failure Type Byte meaning 'Plausibility Failure.' It indicates the sensor signal is illogical, such as reporting zero vacuum while the engine is running. This points directly to a major leak, a failed sensor, or a disconnected hose.
My mechanic says P0299 means I need a new turbo. Is that the same as C0299?
No, 'P0299' is a powertrain code for 'Turbo/Supercharger Underboost,' while 'C0299' is a chassis code for 'Brake Booster Performance.' A P0299 repair involves the turbocharger, whereas a C0299 repair involves the braking system. Always verify the first letter of the code.
Can I just replace the C0299 sensor to fix the problem?
Only if the sensor failed electrically without an underlying cause. Always inspect for a leaking master cylinder first, as brake fluid destroys the sensor and booster. If fluid is present, you must replace the master cylinder, booster, and sensor together to prevent immediate repeat failure.
How much does it cost to fix code C0299?
Costs range from $100 for a simple vacuum hose replacement to $350 for a new electric vacuum pump. A complete brake booster and master cylinder replacement is the most expensive, typically costing $800 to $1,200 at a repair shop.
My brakes only feel hard in very cold weather. Is the booster failing?
Not necessarily. In freezing temperatures, moisture inside a vacuum line or check valve can freeze, causing a temporary blockage and a hard pedal. If normal braking returns as the engine bay warms up, you likely have a moisture issue rather than a failed component.
I have a modified engine with a big cam and keep getting a C0299 code. What can I do?
Aggressive aftermarket camshafts reduce engine vacuum at idle, which the computer misinterprets as a brake booster fault. The safest solution is adding a supplemental electric vacuum pump or canister to supply the required vacuum. Modifying the sensor circuit with resistors is a high-risk workaround that alters a critical safety system.
What is that hissing sound I hear when I press the brakes?
A hissing sound when pressing the brakes indicates air rushing through a ruptured internal diaphragm in the brake booster. Pressing the pedal opens a valve to let atmospheric pressure in; a torn diaphragm lets this air escape, causing a total loss of power assist.
Key Takeaways
- Code C0299 indicates a total loss of power brake assist, increasing stopping distances by up to 4 times and making the vehicle unsafe to drive.
- The four most common culprits are a cracked vacuum hose, a faulty pressure sensor, a dead electric vacuum pump, or a ruptured brake booster diaphragm.
- On 2007-2014 GM trucks, a leaking master cylinder destroys the booster and sensor, requiring an $800-$1,200 replacement of all three components simultaneously.
- Never confuse chassis code C0299 (Brake Booster) with powertrain code P0299 (Turbo Underboost), as they require completely different diagnostic paths.
- Accurate diagnosis requires pulling the vacuum sensor to check for brake fluid contamination, testing booster integrity with a hand-held vacuum gauge, and verifying sensor voltage.
Helpful Videos
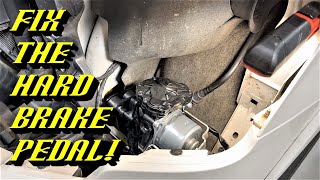

The information in this article is provided for general reference and educational purposes only. Vehicle specifications, procedures, and part compatibility can vary by production date, trim level, and region. Always consult your vehicle's factory service manual and verify part numbers before purchasing or performing repairs. Safety-critical components such as airbags, seat belts, and braking systems should be installed by a qualified professional.
- 🎬 Helpful Videos
- What Does C0299 Mean?
- Can I Drive With C0299?
- Common Causes
- Symptoms
- Diagnostic Flowchart
- Common Fixes & Costs
- DIY vs Professional
- Used vs. New Parts: Buying Guide
- What Happens If You Wait — Timeline
- Cost of Not Fixing It
- Diagnosis Steps
- When This Code Triggers (Freeze-Frame Conditions)
- Related Codes
- Climate & Environmental Factors
- How to Talk to a Mechanic About This Code
- Where to Take It: Dealer vs Independent vs Chain
- When to Walk Away From the Repair
- What Scan Tool You Need for This Code
- How to Clear the Code After You Fix It
- Will This Fail Emissions / State Inspection?
- Most Commonly Affected Vehicles
- Manufacturer-Specific Notes
- Real Owner Stories
- 2008 Chevy Avalanche at 140K miles
- 2011 Ford F-150 EcoBoost
- 1998 GMC K1500 with 4.3L V6
- 2009 Silverado with aftermarket camshaft
- How to Prevent This Code From Triggering
- Frequently Asked Questions
- What does the '-5A' mean after the C0299 code?
- My mechanic says P0299 means I need a new turbo. Is that the same as C0299?
- Can I just replace the C0299 sensor to fix the problem?
- How much does it cost to fix code C0299?
- My brakes only feel hard in very cold weather. Is the booster failing?
- I have a modified engine with a big cam and keep getting a C0299 code. What can I do?
- What is that hissing sound I hear when I press the brakes?
- Key Takeaways
- 🎟️ Get 5% Off