

C0287 on 2011-2015 Chevrolet Camaro: StabiliTrak Chassis Bus Fault Causes and Fixes
On a 2011-2015 Camaro, code C0287 indicates a communication failure on the chassis network, not a simple part failure. It's often caused by a wiring problem between the Multi-Axis Sensor (under the center console) and the brake control module. A common chafe point for the harness is under the driver's seat. Expect to diagnose wiring before replacing any parts.
- C0287 on your Camaro means there's a communication problem with the StabiliTrak system, not a simple bad part.
- This code is almost always accompanied by other 'U' or 'C' codes; the combination points to a network wiring fault.
- The most common cause is a damaged wire or loose connector for the Multi-Axis Sensor located under the center console.
- Do not replace expensive parts like the EBCM until the wiring harness has been thoroughly tested.
- Due to the complexity, professional diagnosis with a GM-specific scan tool is highly recommended.
What's Unique About the 2011-2015 Chevrolet CAMARO
On the 5th generation Camaro, C0287 is rarely a standalone code. It almost always appears with a cluster of other communication and sensor codes (like C0186, C0196, and various U-codes), as documented in GM TSBs. This is a strong indicator that the root cause is not a single failed component, but rather a disruption of the entire network. Forum discussions frequently point to a wiring harness issue under the driver's seat or center console as the culprit, where wires can chafe or get pinched by the seat track or other components.
Diagnostic Flowchart
Tap your situation to follow the diagnostic path that matches what you're seeing on this vehicle.
Symptoms You May Notice
- "Service StabiliTrak" message on the driver information center
- "Service Traction Control" message
- ABS warning light is on
- StabiliTrak/Traction Control warning light is on
- In some cases, "Engine Power is Reduced" message may appear
- Gauges may behave erratically or sweep randomly
- Heavy or difficult power steering feel
- Grinding noise or vibration from the brakes at low speeds as the ABS incorrectly activates
- Replacing the throttle body. While a dirty throttle body can cause a 'Service StabiliTrak' message, it's usually accompanied by idle problems and different codes (P-codes), not C0287.
- Replacing wheel speed sensors. A faulty wheel speed sensor will typically set a specific code for that sensor (e.g., C0035-C0050) rather than a general bus communication code like C0287.
Most Likely Causes
- Chassis Bus Wiring Fault (Short/Open/Corrosion) 🔴 High Probability Wiring harnesses, particularly the one running under the driver's seat and center console, are susceptible to chafing against the seat frame, seat track, or chassis. Movement of the power seat can pinch or wear through the insulation over time, causing a short circuit on the CAN bus wires that connect the EBCM to the Multi-Axis Sensor.
How to confirm: Perform a thorough visual inspection of the harness under the driver's seat and along the center console. Use a multimeter to check for continuity and for shorts to power or ground on the CAN bus wires between the Multi-Axis Sensor and the EBCM. Wiggling the harness, especially under the driver's seat, while monitoring scan tool data can often pinpoint the fault location.
Typical fix: Repair the damaged section of the wiring harness. This involves carefully soldering the broken wire, insulating it properly with heat shrink tubing, and re-routing or securing the harness with zip ties to prevent future chafing. Replacing a damaged connector pigtail may be necessary.
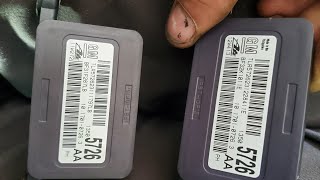
Est. part cost: $5-$50 - Faulty Multi-Axis Acceleration Sensor (Yaw Rate Sensor) 🟡 Medium Probability This sensor provides critical data for the StabiliTrak system. An internal failure can cause it to send invalid data, stop communicating, or show intermittent signal dropouts, disrupting the chassis bus. GM has released updated part numbers for this sensor, suggesting revisions to the original design.
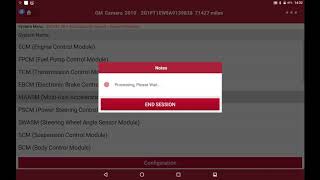
How to confirm: After confirming the wiring is intact, use a high-end scan tool to monitor the live data stream from the sensor. 🎬 Watch: Professional diagnostic steps for testing the yaw rate sensor. Look for data that is frozen, erratic, or drops out completely, especially when the vehicle is turning or on an incline. The sensor is located under the center console, often behind the shifter assembly.
Typical fix: Replace the Multi-Axis Acceleration Sensor. A calibration or 'learn' procedure using a GM-specific scan tool (like a Tech2 or GDS2) is required after replacement to zero the sensor.
Est. part cost: $80-$250 - Poor Ground Connection or Low Battery Voltage ⚪ Low Probability The battery is located in the trunk, and long cable runs can lead to voltage drop issues. A weak battery or a loose/corroded main ground connection can cause various electronic modules to malfunction and throw communication codes. Owners have reported that a failing battery can cause random StabiliTrak messages and erratic gauge behavior.
How to confirm: Load test the battery to ensure it is healthy. Check the main battery negative cable connection in the trunk for tightness and corrosion. Inspect and clean the main chassis ground points, including the one near the battery and any under the hood.
Typical fix: Clean the contact surfaces of the ground connection and tighten the bolt securely. Replace the battery if it fails a load test. Some owners add a supplementary ground strap from the engine block to the chassis as a preventative measure.
Est. part cost: $0-$250
Rare But Worth Checking
- Faulty Electronic Brake Control Module (EBCM): While possible, the EBCM is an expensive component and should only be replaced after all wiring, sensor, and ground possibilities have been exhaustively ruled out. An internal EBCM failure can disrupt the entire chassis network it controls.
Diagnosis Steps
- Connect a professional scan tool capable of reading GM-specific chassis codes.
- Record all DTCs from the EBCM and other related modules. Note the presence of codes like U0074, U0125, C0186, and C0196. [Bulletin #PIT5076E]
- Check battery health and ground connections. Perform a battery load test and inspect the main ground cable in the trunk for tightness and corrosion.
- Access the vehicle's data link connector (DLC) and measure the resistance between the chassis CAN bus pins (typically Pin 12 and Pin 13). A healthy network should read approximately 60 ohms. A reading of 120 ohms indicates an open circuit or a missing terminating resistor.
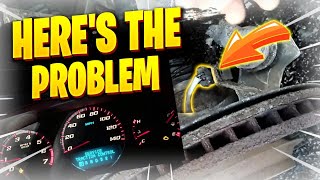
- Remove the driver's seat to gain full access to the wiring harness that runs underneath it. Carefully inspect the entire length of the harness for signs of chafing, pinching, or damage, especially where it passes near the seat track and frame. 🎬 See how to access and repair the under-seat wiring harness.
- Gain access to the Multi-Axis Sensor under the center console. Visually inspect the wiring harness between it and the EBCM.
- With the key on, use the scan tool to monitor live data from the Multi-Axis sensor. Have an assistant wiggle the harness under the driver's seat and at the sensor connector. Watch for the data to drop out or become erratic, which pinpoints the location of the short/open.
- If a wiring fault is found, repair the damaged wire(s) and secure the harness away from any sharp edges or moving parts.
- If all wiring and connections are confirmed to be good, the fault is likely with the Multi-Axis Sensor itself.
- If the sensor is replaced, a 'Yaw Rate Sensor Learn' or 'Calibration' procedure must be performed with a GM-compatible scan tool. 🎬 Watch: How to perform the yaw rate sensor learn procedure.
Parts You'll Likely Need
- Multi-Axis Acceleration Sensor / Yaw Rate Sensor
(OEM #20882993 (supersedes older numbers))— If wiring is confirmed to be good, the sensor's internal electronics are the next most likely point of failure, causing it to send invalid data or stop communicating.
Trusted brands: ACDelco (GM Genuine), Bosch
OEM price range: $150-$250
Aftermarket price range: $80-$180 - Driver Seat Wiring Harness
(OEM #22752487 (for non-Recaro power cloth seats, check VIN for exact fit))— In cases of severe chafing or damage under the driver's seat, replacing the entire harness section may be easier and more reliable than multiple wire repairs.
Trusted brands: ACDelco (GM Genuine)
OEM price range: $80-$130
Aftermarket price range: N/A
Related Codes That Often Appear With This One
- U0074 — As cited in TSB #PIT5076E, this is a general CAN Bus communication code that often appears with C0287, indicating a network-wide problem.
- U0125 — Lost Communication With Multi-axis Acceleration Sensor Module. This code directly points to the sensor that is likely involved in the C0287 fault, either due to a wiring issue or sensor failure.
- U0126 — Lost Communication With Steering Angle Sensor Module. The steering angle sensor is another key component on the same chassis bus, and a network disruption will affect it as well.
- C0186 — Lateral Accelerometer Circuit. This sensor is part of the same Multi-Axis Sensor assembly as the yaw and longitudinal sensors. A wiring issue affects all of them. [Bulletin #PIT5076E]
- C0196 — Yaw Rate Sensor Circuit. This sensor is also part of the Multi-Axis Sensor assembly and shares the same power, ground, and communication lines. [Bulletin #PIT5076E]
Technical Service Bulletins (TSBs) & Recalls
- PIT5076E: Notes that if C0287 is set along with codes like U0074, U0125, C0186, or C0196, the technician should diagnose the Chassis bus for faults.
Platform-Specific Known Issues
- TSB #PIT5076E specifically groups C0287 with other communication codes and directs technicians to diagnose the 'Chassis bus' for faults, confirming this is a network issue rather than a simple component failure on these vehicles. [Bulletin #PIT5076E]
- A widely discussed failure point in owner forums is the wiring harness under the driver's seat, which is prone to damage from the seat's movement. This is often the true root cause when C0287 appears with other communication codes.
Mechanic-Grade Diagnostic Values
- Chassis Bus Resistance at DLC — expected: Approximately 60 Ω. Failure: A reading of ~120 Ω indicates an open circuit (e.g., broken wire, unplugged module). A reading near 0 Ω indicates the CAN High and Low wires are shorted together.
- Chassis Bus Voltage at DLC (Key On, Engine Off) — expected: Pin 12 (CAN Low) to Ground: ~2.3-2.4V. Pin 13 (CAN High) to Ground: ~2.6-2.7V.. Failure: Voltages that are stuck high, low, or equal to each other indicate a bus fault.
- Multi-Axis Sensor Power Supply Voltage — expected: 11-14V at the sensor connector (Ignition ON).. Failure: Low or no voltage points to a fault in the power supply circuit from the EBCM or a blown fuse.
- Multi-Axis Sensor Ground Circuit Resistance — expected: Below 1.0 Ω between the sensor's ground pin and a clean chassis ground.. Failure: High resistance indicates a poor ground connection, which can cause the sensor to malfunction.
Scan Tool Commands That Help
- GM GDS2 / Tech2: Yaw Rate Sensor Learn — This procedure is mandatory after replacing the Multi-Axis Acceleration Sensor. It calibrates the new sensor to the vehicle, establishing a new zero point.
- GM GDS2 / Tech2: Yaw Rate Sensor Reset — This function is used before the 'Learn' procedure to clear any stored offset values. The procedure requires the vehicle to be on a flat, level surface with excess weight removed.
Wiring & Ground Locations
- Multi-Axis Acceleration Sensor — Under the center console, mounted to the floor, often just behind or to the side of the shifter assembly.. This is the sensor that provides yaw, lateral, and longitudinal acceleration data. C0287 is often triggered by a loss of valid communication from this sensor.
- Primary Chafe Point — The wiring harness running along the floor under the driver's seat, where it can be pinched or rubbed by the seat frame or power seat mechanism.. This is the most commonly reported location for a wiring short or open that causes the C0287 and related communication codes.
- G203 — Under the center console.. This is a key ground point for several modules located in the center console area, potentially including the Multi-Axis Sensor.
- G302 — Under the console at the rear, below the rear fuse block.. This ground serves components in the rear of the console. A poor connection here could affect modules on the chassis bus.
- DLC (OBD-II Port) Pins — Pins 12 and 13 on the Data Link Connector under the driver's side dash.. These are the pins for the medium-speed 'Chassis Bus' network. Technicians measure resistance and voltage here to assess the health of the entire network.
Real Owner Repair Stories
- Camaro5 Forums (synthesized from multiple threads) (2011-2014 Chevrolet Camaro SS and V6 models) — Sudden 'Service StabiliTrak' and 'Service Traction Control' messages, ABS light on. Sometimes accompanied by erratic gauge behavior or 'Engine Power is Reduced' message.
❌ Tried (didn't work) Replacing the battery., Replacing wheel speed sensors., Clearing codes, only for them to return immediately.
✅ What actually fixed it The definitive fix for many owners was locating a chafed or broken wire in the harness that runs under the driver's seat. After removing the seat, a damaged wire (often the CAN bus wires) was found, repaired with solder and heat shrink, and the harness was re-routed or secured with zip ties to prevent it from rubbing against the seat frame again. The codes were cleared and did not return.
OEM Part Supersession History
Multiple older numbers (e.g., 13505726 on similar platforms)→20882993, 23483148 (ACDelco)— Revisions to improve reliability and address internal electronic failures.
Heads up: Always verify the latest part number with a GM dealer using the vehicle's VIN. Using an incorrect revision, even if it physically fits, may cause communication or calibration issues.
Model Year Variations Within This Range
- 2011-2015: No significant variations related to the cause or diagnosis of code C0287 are documented within this generation. The underlying Zeta platform architecture for the chassis electronics remained consistent through the 2014/2015 facelift.
Helpful Videos

We Have This Part in Stock



The information in this article is provided for general reference and educational purposes only. Vehicle specifications, procedures, and part compatibility can vary by production date, trim level, and region. Always consult your vehicle's factory service manual and verify part numbers before purchasing or performing repairs. Safety-critical components such as airbags, seat belts, and braking systems should be installed by a qualified professional.
- Chevrolet CAMARO:
- 🎬 Helpful Videos
- 🛍️ Shop This Part
- What's Unique About the 2011-2015 Chevrolet CAMARO
- Diagnostic Flowchart
- Symptoms You May Notice
- Most Likely Causes
- Rare But Worth Checking
- Diagnosis Steps
- Parts You'll Likely Need
- Related Codes That Often Appear With This One
- Technical Service Bulletins (TSBs) & Recalls
- Platform-Specific Known Issues
- Mechanic-Grade Diagnostic Values
- Scan Tool Commands That Help
- Wiring & Ground Locations
- Real Owner Repair Stories
- OEM Part Supersession History
- Model Year Variations Within This Range
- 🎟️ Get 5% Off