

B3979 on 2018-2022 Chevrolet Traverse: Causes for Electrical Faults and Fixes
Code B3979 on a 2018-2022 Traverse almost always indicates an electrical issue caused by water intrusion into the Body Control Module (BCM). This is often due to a leaking HVAC drain hose. The fix involves drying and cleaning the BCM and its connectors, and repairing the source of the water leak.
- B3979 on a 2018-2022 Traverse is a strong indicator of water damage to the Body Control Module (BCM).
- Before replacing any parts, inspect the BCM for moisture, especially under the HVAC drain hose connection inside the cabin.
- The official GM-sanctioned repair for the leak is simple and low-cost: secure the drain hose with a zip tie as detailed in TSB 21-NA-183.
- This is a well-documented issue that also affects the Buick Enclave, GMC Acadia, and Cadillac XT5/XT6 on the same platform.
What's Unique About the 2018-2022 Chevrolet TRAVERSE

The second-generation Traverse, along with other vehicles on the same GM C1XX platform (like the Buick Enclave and GMC Acadia), is susceptible to a specific failure outlined in Technical Service Bulletin 21-NA-183. The design allows the HVAC evaporator drain hose to leak condensation directly onto the Body Control Module (BCM) and its connectors, which are located in the passenger-side footwell area. This single point of failure can trigger a cascade of seemingly unrelated electrical DTCs and symptoms, including B3979, making it crucial to check for water damage first before replacing any modules.
Diagnostic Flowchart

Tap your situation to follow the diagnostic path that matches what you're seeing on this vehicle.
Symptoms You May Notice
- Intermittent or inoperative door locks
- Instrument panel warning lamps illuminating while driving
- Immobilizer system issues, potentially causing a no-start or start-and-stall condition
- Unwanted horn or hazard flasher activation
- Check Engine Light may be on
- "Shift to Park" message on dash
- Wet carpet in the passenger-side footwell
- Sloshing sound from behind the dashboard
- A/C system blowing warm air or not functioning correctly
- Replacing the HVAC control module without checking for water damage at the BCM.
- Replacing individual door lock actuators when all locks fail intermittently.
- Replacing the battery without addressing the underlying electrical draw or communication fault causing the issue.
- Assuming the windshield is leaking without first checking the HVAC and sunroof drains.
Most Likely Causes

- Water Intrusion into Body Control Module (BCM) 🔴 High Probability As documented in TSB 21-NA-183, the HVAC drain hose can leak at its connection point to the HVAC module case, dripping water onto the BCM located nearby in the passenger compartment. The seal is inadequate from the factory.
How to confirm: Visually inspect the BCM and its electrical connectors for signs of moisture, corrosion (green or white crust), or water staining. The BCM is located behind the passenger side front floor console extension panel. You may also find the passenger side carpet is damp. TSB 21-NA-183 instructs technicians to run the A/C at maximum speed to see if water appears at the hose connection.
Typical fix: The official GM fix involves securing the HVAC drain hose connection with a zip tie to prevent further leaking. If corrosion is present, disconnect the battery, then clean the BCM connectors and pins with electronic contact cleaner. If the BCM is internally corroded (which can be confirmed by opening the case), it must be replaced and programmed.
Est. part cost: $1 for a zip tie, $5-$50 for a new hose/seal if needed, $300-$600 for a new BCM if required.
Rare But Worth Checking
- Low Voltage Event or Improper Jump-Start: A low battery, battery replacement, or improper jump-start can sometimes cause modules to lose their environmental identifiers, triggering a host of communication codes like B3979. A specific BCM reprogramming procedure may be required to resolve this.
- Faulty HVAC Control Module: While the code definition points to the HVAC module, it is rarely the root cause. This should only be considered after water intrusion and other wiring issues have been completely ruled out.
- Clogged Sunroof Drains: While less common than the HVAC drain leak, clogged sunroof drains can also cause water to enter the cabin and potentially reach the BCM or other electronics, causing similar issues. Owners have reported this as another source of water intrusion.
Diagnosis Steps
- Scan the Body Control Module (BCM) for all Diagnostic Trouble Codes (DTCs). Note B3979 and any accompanying codes like B3125, B3130, B3135, B3980, or any U-codes.
- Gain access to the BCM. On the Traverse, this involves removing the right side front floor console extension panel.
- Carefully inspect the BCM, its connectors (especially the X4 connector mentioned in forums), and the surrounding area for any signs of water, water stains, or green/white corrosion. Check if the passenger carpet is damp.
- Trace the HVAC drain hose and inspect its connection to the HVAC module case. Per TSB 21-NA-183, start the vehicle and run the A/C on max blower speed to see if water drips from the connection point.
- If water damage is found, disconnect the battery. Carefully disconnect the BCM connectors (avoid touching the pins to prevent static damage) and inspect the pins for corrosion. Clean any minor corrosion using an appropriate electronic contact cleaner and a soft brush.
- Repair the source of the water leak. The official GM fix is to install a zip tie tightly around the drain hose where it connects to the HVAC module to create a better seal.
- If corrosion is severe or the BCM has been soaked, it will likely need replacement. The TSB advises opening the BCM case to inspect for internal corrosion to confirm. A replacement BCM will require programming by a dealer or qualified technician.
- If no water damage is found, inspect the wiring and connectors between the HVAC module and the BCM for any damage or loose connections.
- If no physical faults are found, follow GM's diagnostic procedures for BCM communication issues, which may involve checking for software updates or performing a BCM reprogramming, especially if the issue occurred after a battery replacement or jump-start.
Parts You'll Likely Need

- Body Control Module (BCM)
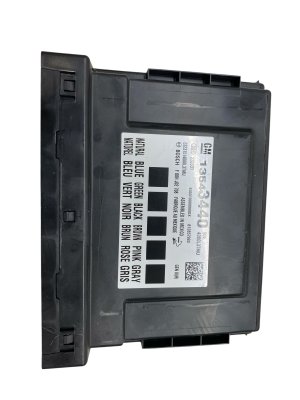
(OEM #13519672, 13524922, 13534190, 13522387)— This module is the most common point of failure due to its vulnerability to water damage from the HVAC drain. It may be damaged beyond repair by corrosion. Part number varies by vehicle options; always verify with VIN.
Trusted brands: ACDelco (OEM)
OEM price range: $300-$600
Aftermarket price range: $250-$450 - BCM Electrical Connector/Pigtail — If corrosion from water damage is severe, the connector itself may need to be replaced along with repairing the wiring. The X4 connector is frequently mentioned in forums.
Trusted brands: ACDelco, Dorman
OEM price range: $40-$100
Aftermarket price range: $20-$60 - Zip Tie — This is the official, low-cost part of the GM-recommended repair to secure the leaking HVAC drain hose and prevent recurrence.
OEM price range: <$1
Aftermarket price range: <$1
Related Codes That Often Appear With This One
- B3125 — Driver Door Only Unlock Circuit fault, often triggered by the same BCM water intrusion issue.
- B3130 — All Doors Unlock Circuit fault, often triggered by the same BCM water intrusion issue.
- B3135 — All Doors Lock Circuit fault, often triggered by the same BCM water intrusion issue.
- B3980 — Incorrect Environmental Identifier from Instrument Cluster, indicating a wider communication problem originating from the BCM fault.
- Various U codes — U-codes indicate a loss of communication between modules, which is a direct result of the BCM being compromised by water or internal faults.
Technical Service Bulletins (TSBs) & Recalls
- 21-NA-183: Intermittent Door Locks Inoperative, DTCs B3125, B3130, B3135, B3979, B3980, Various U codes, IP Lamps Illuminate, Immobilizer, Unwanted Horn or Hazard Flasher Operation. This TSB identifies water intrusion to the BCM from the HVAC drain hose as the likely cause and provides the diagnostic and repair procedure, which includes adding a zip tie to the hose.
Platform-Specific Known Issues
- HVAC Drain Leak onto BCM (TSB 21-NA-183): A known issue, documented in TSB 21-NA-183, is water leaking from the HVAC drain hose onto the BCM, causing a wide range of electrical problems. The official fix is to secure the hose connection with a zip tie.
Scan Tool Commands That Help

- GDS2: Module Setup / BCM Programming — This function is mandatory after replacing the BCM. It uses the GM Service Programming System (SPS) to write the vehicle's VIN, configure RPO codes (vehicle options), and perform the security credential transfer (VTD setup) to the new module. Failure to program a new BCM will result in a no-start condition.
- GDS2: Clear Codes — After performing repairs (like cleaning connectors or replacing the BCM), use this function to clear B3979 and all other related DTCs from every module.
- GDS2: Output Control Functions — To test individual components controlled by the BCM (like door locks, lights, horn) without relying on the physical switches. This helps confirm if the BCM can command a function, isolating the problem to the BCM, the component, or the wiring.
- GDS2: Immobilizer Learn — After BCM replacement and programming, this procedure is required to 'introduce' the existing keys to the new BCM, allowing the Vehicle Theft Deterrent system to authorize engine start.
Wiring & Ground Locations
- BCM Fuses — In the Instrument Panel Fuse Box, located under the dashboard on the passenger side, behind a cover.. The BCM is powered by multiple fuses. Specifically, fuses F1 (Body control module 6), F7 (Body control module 3), F13 (Body control module 7), F19 (Body control module 1), and F21 (Body control module 4) are dedicated to the BCM. Checking these fuses is a preliminary step before condemning the module itself.
- G303 — Near the base of the left 'B' pillar.. This is a major ground point that serves the BCM, Instrument Panel Cluster (IPC), and Data Link Connector (DLC). A loose or corroded G303 can cause a wide range of communication errors and bizarre electrical behavior similar to a faulty BCM, making it a critical point to check during diagnosis.
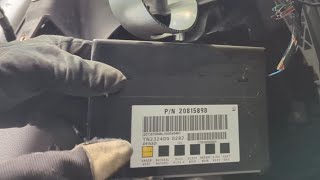
- BCM Connectors — On the BCM itself, located behind the passenger side front floor console extension panel.. These are the primary points of failure. Water from the leaking HVAC drain drips directly onto these connectors, causing corrosion on the pins and in the connector housing. The X4 connector is frequently cited in forums as being particularly susceptible.
Real Owner Repair Stories
- Ford F150 Forum (similar issue) (2019 Ford F-150 XLT) — Alarm going off randomly, battery drain, strange electrical issues.
❌ Tried (didn't work) Initial inspection did not immediately reveal the source of the problem.
✅ What actually fixed it A dealer mechanic found water in the BCM connectors. The proposed fix was to replace the BCM, de-pin and clean the corroded connector terminals, apply dielectric grease, and reassemble. The source of the water leak (a window seal in this case) also had to be repaired to prevent recurrence. This confirms the repair strategy of replacing the module and cleaning/salvaging the harness if possible.
OEM Part Supersession History
13519672→13534190— Part revision or update by the manufacturer.
Heads up: Part 13534190 is listed as a direct replacement for 13519672. Programming is required for all replacements.
Model Year Variations Within This Range
- 2018-2022: The core issue of the HVAC drain leaking onto the BCM, located in the passenger side of the center console, appears consistent across the 2018-2022 model years, including the refreshed 2022 model. No significant changes to the location or the fundamental cause of the problem have been noted within this generation.
Helpful Videos


We Have This Part in Stock





The information in this article is provided for general reference and educational purposes only. Vehicle specifications, procedures, and part compatibility can vary by production date, trim level, and region. Always consult your vehicle's factory service manual and verify part numbers before purchasing or performing repairs. Safety-critical components such as airbags, seat belts, and braking systems should be installed by a qualified professional.
- Chevrolet TRAVERSE:
- 🎬 Helpful Videos
- 🛍️ Shop This Part
- What's Unique About the 2018-2022 Chevrolet TRAVERSE
- Diagnostic Flowchart
- Symptoms You May Notice
- Most Likely Causes
- Rare But Worth Checking
- Diagnosis Steps
- Parts You'll Likely Need
- Related Codes That Often Appear With This One
- Technical Service Bulletins (TSBs) & Recalls
- Platform-Specific Known Issues
- Scan Tool Commands That Help
- Wiring & Ground Locations
- Real Owner Repair Stories
- OEM Part Supersession History
- Model Year Variations Within This Range
- 🎟️ Get 5% Off