

OBD-II Code B3894: Stop Lamp Switch Circuit Plausibility Failure
What B3894 means, why it triggers, and how to fix it on GM trucks and SUVs
- Code B3894 disables your cruise control and integrated trailer brakes due to conflicting brake pedal signals at the Trailer Brake Control Module.
- Apply dielectric grease to the brake light switch connector before buying parts; GM TSB PIT5144 identifies fretting corrosion here as the #1 cause.
- Avoid replacing the $150-$300 Trailer Brake Control Module immediately, as the fault almost always lies in a $20 brake switch, a blown 30-amp fuse, or corroded wiring.
- Never tow a trailer with an active B3894 code; your trailer's electric brakes will not activate, dramatically increasing stopping distances and legal liability.
What Does B3894 Mean?

B3894 is a body diagnostic trouble code specific to General Motors vehicles, like Chevy and GMC trucks and SUVs. It means the Trailer Brake Control Module (TBCM) receives conflicting signals about whether your foot is on the brake pedal. The TBCM performs a self-check by comparing a direct, hardwired signal from the brake switch to a second signal sent over the vehicle's data network (GMLAN) from the Body Control Module (BCM). If these two signals disagree, the TBCM determines the brake pedal's status is unreliable and shuts down both the cruise control and the trailer brake system as a safety precaution.
Technical definition: The official definition for B3894 is "Stop Lamp Switch Circuit Plausibility Failure." The Trailer Brake Control Module (TBCM) compares two brake status signals: one received directly via a dedicated hardwired circuit from the brake light switch and another received as a serial data message over the GMLAN from the Body Control Module (BCM). This plausibility check occurs after master cylinder brake pressure exceeds a preset threshold. If the two signals disagree (e.g., one says 'Applied' while the other says 'Released'), the TBCM sets code B3894 and disables the trailer brake control system for the remainder of the ignition cycle.
Can I Drive With B3894?

Yes, But With Caution. Yes, the truck is safe to drive for normal use as the primary hydraulic brakes are not affected, but your cruise control will not work. More importantly, the integrated trailer brake controller is disabled. Towing a trailer with electric brakes is extremely hazardous as the trailer's brakes will not activate, which dramatically increases stopping distances. This places you at fault in an accident due to improperly equipped vehicle laws, leading to significant liability and insurance claim denial.
Common Causes

- Fretting Corrosion at Brake Light Switch Connector (Very Common) — This is the most frequent cause. Tiny vibrations and thermal cycling cause the metal pins in the electrical connector at your brake pedal to build up a layer of insulating oxidized debris (fretting corrosion). GM released TSB PIT5144 for this exact problem, stating it is far more common than the switch itself failing. The corrosion appears as small, dark smudges on the terminals.
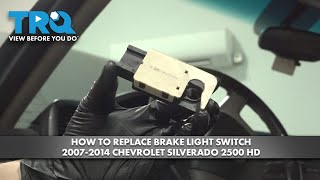
- Faulty Brake Light Switch (Brake Pedal Position Sensor) (Common) — The switch connected to your brake pedal is a high-use component that wears out or fails internally. It contains multiple contacts for different systems. If the contact sending the signal to the TBCM or BCM fails, it triggers the code. Replace this part if cleaning the connector fails.
- Corroded Wiring at the Trailer Brake Control Module (TBCM) (Less Common) — The TBCM sits on the truck's frame rail, often above the spare tire. Its exposed location makes it vulnerable to water, road salt, and grime. This corrodes the connector pins and wires, causing a bad signal or broken wires right at the connector, often called 'blue crusties'.
- Blown Fuse or Faulty Trailer Relay (Less Common) — A 30-amp J-case fuse in the underhood fuse box protects the trailer brake circuit. If this fuse blows due to a short, or a related trailer brake relay on the frame fails, the TBCM loses power or signal and sets this code.
- Wiring Harness Damage or Chafe (Less Common) — The wiring harness sustains damage in several locations. A known issue involves the Data Link Connector (DLC) harness rubbing on the adjustable pedal motor bracket, shorting communication wires. A pinched dash harness or a poor ground wire for the trailer wiring system (often G401 on the frame rail) also causes this fault.
- Faulty Master Cylinder Pressure Sensor (Rare) — Mentioned in TSB PIT4508C, this sensor fails occasionally. On vehicles with StabiliTrak, this sensor is internal to the Electronic Brake Control Module (EBCM). If a scan tool shows brake pressure in the TBCM data list when the pedal is released, this sensor is the cause.
- Faulty Trailer Brake Control Module (TBCM) (Rare) — While it sets the code, the TBCM itself rarely fails. GM notes that technicians replace many modules unnecessarily when the fault lies in the wiring or connectors. Only consider replacement after proving all wiring, connectors, and the brake switch are good.
- Aftermarket LED Brake Lights (Rare) — Installing low-quality aftermarket LED brake lights causes this code. These bulbs lack proper resistance, causing voltage to backfeed into the system and confuse the BCM and TBCM's sensitive monitoring circuits.
Symptoms
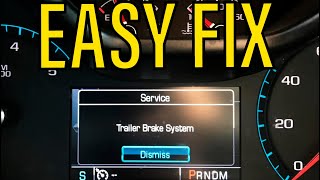
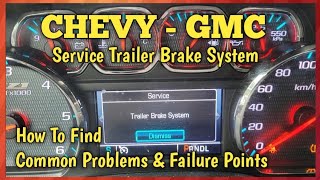
- "Service Trailer Brake System" message on the dashboard — The driver information center (DIC) displays this warning message to alert you that a fault exists in the trailer brake system.
- Cruise control will not turn on or is inoperative — This is often the first and most noticeable symptom. The system disables cruise control as a safety feature when it cannot rely on the brake signal.
- Integrated trailer brake controller doesn't work — When you try to use the manual slider or when the truck should apply the trailer brakes, there is no output, and the gain display does not respond.
- ABS and/or StabiliTrak warning lights illuminate — The ABS and stability control systems also use brake pedal input. A faulty signal triggers codes and warning lights in those modules as well.
- Red light on the trailer brake controller flashes — The small LED indicator on the controller itself flashes or fails to illuminate, indicating a system fault.
Diagnostic Flowchart
Tap your situation to follow the diagnostic path that matches what you're seeing on this code.
Common Fixes & Costs
- Clean Connector and Apply Dielectric Grease — Parts: $5-$15 for dielectric grease., Labor: $0 (DIY) or included in a $75-$150 diagnostic fee., ~0.3 hr book time (DIY)
- Replace Brake Light Switch — Parts: $15-$45., Labor: $75-$250, often as part of diagnosis., ~0.8 hr book time (DIY)
- Replace Blown Fuse — Parts: $5-$10 for a J-case fuse., Labor: $0 (DIY), ~0.1 hr book time (DIY)
- Repair Damaged Wiring/Connector — Parts: $20-$60 for a new connector pigtail., Labor: $150-$400, depending on location and severity of damage., ~2.5 hr book time (Professional)
- Replace Trailer Brake Control Module (TBCM) — Parts: $150-$300., Labor: $150-$250, plus potential programming fees., ~1.2 hr book time (Professional)
DIY vs Professional
- Clean Connector and Apply Dielectric Grease — Beginner: Yes. This is the ideal first step for a beginner.
Tools: Flashlight, small nylon brush, tube of dielectric grease. - Replace Brake Light Switch — Beginner: Yes, this is a manageable DIY task for a beginner with basic tools.
Tools: 10mm socket, ratchet, small screwdriver, flashlight. - Replace Blown Fuse — Beginner: Yes, this is a very simple beginner task.
Tools: Fuse puller (often included in the fuse box) or small pliers. - Repair Damaged Wiring/Connector — Beginner: No, this is not recommended for beginners.
Tools: Multimeter, wire strippers, soldering iron or quality crimp tool, heat shrink tubing, new connector pigtail. - Replace Trailer Brake Control Module (TBCM) — Beginner: No, this is not recommended for beginners.
Tools: Wrenches to lower spare tire, socket set.
Used vs. New Parts: Buying Guide
When a used part is worth it: For the most common fix, the brake light switch, buying used is not recommended. The part is a high-wear item and a new one is very inexpensive ($15-$45). For a more expensive part like the Trailer Brake Control Module (TBCM), a used part from a low-mileage, accident-damaged vehicle is a cost-saving option, but only after confirming it is the true cause of failure.
Donor-vehicle mileage cap: roughly under 60000 miles for the part to have meaningful remaining life.
Donor quality checklist:
- For a TBCM, verify the part number is an exact match.
- Avoid parts from vehicles in high-corrosion (Rust Belt) areas.
- Ask for a functional warranty (30-90 days is typical for used parts).
Decision logic:
- If The required part is the brake light switch. → Always buy new. The low cost and high failure rate of used switches make it impractical to buy used.
- If The TBCM is confirmed faulty and a new OEM part is cost-prohibitive. → A used module from a reputable recycler is a viable option, but carries the risk of being faulty or having a short lifespan.
- If The part is a connector pigtail or wiring harness. → New is strongly preferred to ensure good wire quality and terminal connections.
Warranty tradeoff: Used parts typically have a 30-90 day warranty at best. New aftermarket parts often carry a 1-year to limited lifetime warranty. New OEM parts have a 1-2 year warranty.
Worst-case if a used part fails: $200-$500 if a used TBCM fails after the warranty period, as it requires purchasing another part plus paying for the installation labor again.
What Happens If You Wait — Timeline
- 0-3 months: Intermittent 'Service Trailer Brake System' message, often triggered by temperature changes or bumps. Cruise control is disabled when the message is active. The code clears on its own but returns. (MPG impact: 0%% · Added cost: $0)
- 3-6 months: The fault becomes a 'hard code,' appearing every time the vehicle is started and will not clear. Cruise control is permanently inoperative. The constant warning message on the dash becomes a significant annoyance. (MPG impact: 0%% · Added cost: $0)
- Attempting to Tow: Driver ignores the warning and connects a trailer with electric brakes. The integrated trailer brake controller provides no output. The trailer's brakes will not activate, creating a severe safety hazard and dramatically increasing stopping distance. (MPG impact: 0%% · Added cost: Potentially thousands in fines, legal liability, and denied insurance claims in the event of an accident. The truck owner can be held liable for operating an improperly equipped vehicle.)
- 6+ months (Worst Case): If the root cause is a wiring short that is left unaddressed, it worsens and blows a fuse shared with other components. In rare cases, a bad ground causes unpredictable behavior in other unrelated electronic systems. (MPG impact: 0%% · Added cost: $150-$400 for professional diagnostic time to trace a more complex electrical fault that now affects multiple systems.)
Cost of Not Fixing It
- Immediate: Loss of cruise control function and a persistent 'Service Trailer Brake System' message on the dash. (Added cost: Negligible)
- During Towing: Complete failure of the integrated trailer brake controller. The trailer's electric brakes will not activate, dramatically increasing stopping distances and creating an extreme safety hazard. (Added cost: Potentially infinite (legal liability from an accident, insurance claim denial, fines for improperly equipped vehicle).)
- Long-Term: No direct damage to other vehicle components occurs. The cost is the ongoing inconvenience of no cruise control and the critical safety risk if towing is attempted. (Added cost: N/A)
Diagnosis Steps

- Check for Other Codes
Use an OBD-II scanner to check for other codes. Communication codes (like U0140), other brake system codes (like C0561 or C0277), or a B3894 with a '5A' symptom byte provide critical clues and must be addressed first.
Tools: OBD-II Scanner (Beginner) - Inspect and Clean the Brake Light Switch Connector
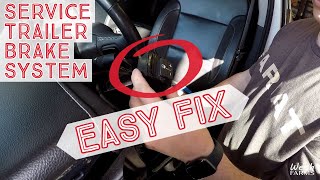
Locate the brake light switch on the brake pedal support. Disconnect its electrical connector and inspect the metal pins for dark smudges (fretting corrosion). Following GM TSB PIT5144, use a small nylon brush to apply dielectric lubricant to both sides of the connector before reconnecting. This is the single most common fix. 🎬 Watch: This video shows the easy connector cleaning fix.
Tools: Flashlight, Dielectric Grease, Small Nylon Brush (Beginner) - Inspect the Fuses
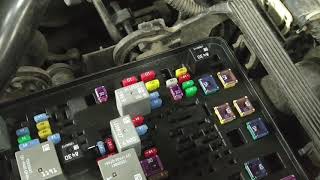
Open the underhood fuse box and locate the fuses for the trailer brake control system. Check the 30A J-case fuse for the TBCM (labeled 'MISC - IGN') and related fuses ('TRL B/U', 'TRLR STOP'). Verify they are intact and replace if blown.
Tools: Owner's Manual, Fuse Puller or Pliers (Beginner) - Test the Brake Light Switch with Live Data
If cleaning the connector fails, the switch is likely bad. With a live-data scan tool, monitor the 'Brake Switch Status' parameter in both the BCM and TBCM data lists. The status must change from 'Released' to 'Applied' instantly when you press the pedal. If it sticks or lags, replace the switch.
Tools: Advanced OBD-II Scanner (Intermediate) - Inspect the Trailer Brake Control Module (TBCM) Connector
Lower the spare tire to access the TBCM on the driver's side frame rail. Unplug its main electrical connector and inspect for green or white corrosion ('blue crusties'), bent pins, or broken wires. Clean corrosion with electrical contact cleaner and repair damaged wires.
Tools: Wrenches (for spare tire), Flashlight, Electrical Contact Cleaner, Small Brush (Intermediate) - Test the Hardwired Brake Signal to the TBCM
Disconnect the TBCM connector. Connect a multimeter between the ground pin (Pin 13) and the brake signal pin (Pin 37, typically Light Blue/White). Have a helper press the brake pedal. The multimeter must show battery voltage when pressed and 0V when released. If not, there is an open or short in that wire.
Tools: Multimeter, Vehicle-Specific Wiring Diagram (Advanced) - [PRO TIP] Perform TBCM Power and Ground Test
Verify the TBCM has proper power and ground. With the key ON, test for battery voltage between the ignition circuit at the TBCM connector (Pin 15, Pink wire) and a known good ground. Voltage must exceed 11.0 volts. Next, check for less than 1.0 ohm of resistance between the ground circuit (Pin 13, Black wire) and the chassis frame. Higher resistance indicates a bad ground connection (G401).
Tools: Multimeter, Vehicle-Specific Wiring Diagram (Advanced) - [PRO TIP] Verify Brake Signal at the BCM
To rule out a BCM issue, check the brake signal input to the BCM. Locate the correct BCM connector (e.g., X5) and the brake signal input pin (e.g., Pin 5). Back-probe the connector and verify this signal changes state when the brake pedal is pressed. If the signal is good here but bad on the scan tool's BCM data, the BCM is faulty.
Tools: Multimeter, Back-probe Kit, Vehicle-Specific Wiring Diagram (Advanced) - [PRO TIP] Analyze Live Data PIDs for Sensor Values
Monitor key PIDs in the TBCM. 'TBCM System Voltage' must be stable between 9.5 and 17 volts. Monitor 'Master Cylinder Pressure'. With your foot off the brake, this must read 0 psi. A pressure reading without pedal application points to a faulty Brake Pressure Modulator Valve (BPMV/EBCM), per TSB PIT4508C.
Tools: Advanced OBD-II Scanner (e.g., GM Tech2/GDS2) (Advanced) - [PRO TIP] Perform Brake Pedal Position Sensor Relearn
If you replaced the brake light switch (Brake Pedal Position Sensor), you must perform a relearn procedure. Find this in the 'Special Functions' menu for both the BCM and ECM in a professional scan tool. Skipping this step causes the new sensor to send incorrect data, triggering StabiliTrak warnings or returning code B3894.
Tools: Advanced OBD-II Scanner with bi-directional controls (Advanced)
When This Code Triggers (Freeze-Frame Conditions)
- Condition: Brake Pedal Applied (The fault is checked when the master cylinder pressure exceeds a preset threshold.)
- System Voltage: 9.5-17 Volts (The TBCM must have adequate voltage to run the diagnostic.)
- Vehicle Speed: 15-65 mph (Typically occurs during normal driving when the brakes are applied.)
- Ignition Status: Run (The check is performed after the vehicle's modules have completed their initialization on startup.)
Related Codes
- B3894 5A — The '5A' is a manufacturer-specific symptom byte meaning 'Stop Lamp Switch Circuit Plausibility Failure'. Seeing this symptom byte strongly points toward the fretting corrosion issue described in TSB PIT5144.
- C0561 — This code for 'StabiliTrak Disabled' often appears with B3894 because the stability control system (EBCM) and trailer brake system (TBCM) both rely on brake pedal information. Fixing the root cause of B3894 almost always resolves C0561.
- U0140 — This code means 'Lost Communication With Body Control Module (BCM)'. The TBCM needs the data message from the BCM to perform its plausibility check. Diagnose a U0140 code first, as the TBCM cannot perform its check without that data.
- C0277 — This code indicates a fault in the 'Brake Pedal Position Sensor Circuit'. Service manuals instruct technicians to diagnose this DTC before B3894. A fault directly with the sensor's primary circuit causes the plausibility check to fail downstream.
Climate & Environmental Factors
- High Humidity and Road Salt (Rust Belt / Coastal Regions): These conditions significantly accelerate corrosion at the Trailer Brake Control Module (TBCM) connector and ground points (G401) on the vehicle's frame rail. The exposed location of the TBCM makes it highly vulnerable to moisture and salt spray kicked up by the tires, leading to poor connections or broken wires.
- Vibration and Thermal Cycling (Normal Driving): All vehicles experience vibration and temperature changes, causing microscopic movement between metal terminals in electrical connectors. This movement (fretting) scrapes away protective plating and exposes base metal, which oxidizes. This creates an insulating layer of debris (fretting corrosion) that increases resistance, the primary cause of failure at the brake light switch connector described in TSB PIT5144.
How to Talk to a Mechanic About This Code
Say this: "I have a 'Service Trailer Brake System' message and my scanner shows code B3894. I've read about GM TSB PIT5144. Before replacing any parts, please start by inspecting and cleaning the brake light switch connector and applying dielectric grease."
This signals you are informed about the most common, low-cost fix for this specific code. It directs the technician to perform a specific, targeted action rather than starting a broad, expensive diagnosis, and helps avoid the unnecessary replacement of the brake light switch or TBCM.
Avoid saying:
- 'My cruise control isn't working.'
- 'There's a trailer warning on my dash, can you check it out?'
- 'Just fix whatever is wrong with it.'
Questions to ask before authorizing the repair:
- Did you find any fretting corrosion or dark smudges on the brake light switch connector pins?
- If cleaning the connector doesn't work and you recommend replacing the switch, can you first show me the live data from the BCM and TBCM that proves the switch is failing?
- If you are recommending a wiring repair or TBCM replacement, what specific voltage or continuity tests failed at the TBCM connector?
- Does your shop's warranty cover both parts and labor for this repair?
Where to Take It: Dealer vs Independent vs Chain
- Dealer:
Best for: Vehicles still under warranty., Newer models (2015+) that require a 'Brake Pedal Position Sensor Relearn' after switch replacement., Confirming eligibility for Customer Satisfaction Program N232414840 on 2020-2024 HD trucks.
Downsides: Highest labor rates, often 1.5-2x more than independent shops., May be less flexible in diagnostic approach for out-of-warranty vehicles. (Typical cost: +50% vs. baseline) - Independent Shop:
Best fit for most vehicles, especially out-of-warranty GMT900 (2007-2014) trucks and SUVs. An experienced independent technician efficiently diagnoses and repairs this issue, often at a significantly lower cost than a dealer.
Best for: Out-of-warranty vehicles where cost is a primary concern., Diagnosing and performing the most common fixes (connector cleaning, switch replacement)., Tracing and repairing wiring harness issues.
Downsides: Shop quality and experience with GM-specific electrical issues vary; check reviews and ASE certifications., May not own the specific tools for a BPP sensor relearn on the newest models. (Typical cost: +0% vs. baseline) - Chain Shop:
Use with caution. Acceptable if you are certain the brake light switch needs replacement and you instruct them to perform only that task. AVOID for initial diagnosis of the problem.
Best for: Simple, direct parts replacement if you have already diagnosed the issue yourself.
Downsides: Technicians lack the specific knowledge of GM TSBs for this code., High pressure to upsell leads to recommending unnecessary part replacements instead of the simple connector cleaning., Generally not equipped for complex wiring diagnostics. (Typical cost: -10% vs. baseline)
When to Walk Away From the Repair
If the estimated repair cost exceeds 40-50% of the vehicle's private-party value, pause and evaluate whether to fix it, sell it as-is, or trade it in.
- Car worth $12000, fix is $250: Fix it. The repair cost is minimal compared to the vehicle's value and is critical for safety if you tow.
- Car worth $12000, fix is $750: Fix it. Even a worst-case scenario repair (e.g., TBCM replacement) is well below the threshold for a vehicle of this value.
- Car worth $3500, fix is $750: Borderline, but likely worth fixing. This represents ~21% of the vehicle's value. If the truck is otherwise reliable, the repair is a good investment. If it has other major pending issues, this is a reason to consider selling 'as-is'.
What Scan Tool You Need for This Code
Minimum: A scanner that reads GM-specific Body ('B') trouble codes and displays live data from the Body Control Module (BCM) and Trailer Brake Control Module (TBCM).
A basic $20 code reader only shows Powertrain ('P') codes and will not see the B3894 code at all. To properly diagnose this, you must see the 'Brake Switch Status' live data parameter from both the BCM and TBCM to determine if the switch, wiring, or a module is at fault.
Budget: BlueDriver Pro (~$99) — Reads and clears enhanced codes (including BCM/TBCM), shows freeze-frame data, and streams live data to your phone, which is sufficient to watch the brake switch status and diagnose the most common failures.
Mid-range: Foxwell NT510/NT530 Elite with GM Software (~$180) — Provides all the functions of the budget pick plus bidirectional controls. This is critical for performing the 'Brake Pedal Position Sensor Relearn' procedure required on newer GM models after replacing the switch.
Professional: Autel MaxiCOM MK808 / MK906BT (~$500-1200) — Offers full bidirectional control, all OEM-level diagnostic functions, and a faster, more user-friendly interface for efficiently testing all related modules (BCM, TBCM, ECM) and performing any necessary relearn procedures or programming.
How to Clear the Code After You Fix It
- Use an OBD-II scan tool to clear the DTC from the TBCM.
- Perform a complete drive cycle to ensure the fault does not return.
- If the battery was disconnected, allow for a longer drive cycle to reset all emissions readiness monitors.
Drive cycle (~20 minutes): A GM-specific drive cycle involves a cold start (engine temp below 122°F), a 2-3 minute idle with electrical load (A/C on), accelerating to 55 mph and holding for 3-5 minutes, then coasting down to 20 mph without using the brake. The code also clears on its own after 40 warm-up cycles without the fault reoccurring.
Readiness monitors affected: Catalyst (CAT), Evaporative (EVAP) System, Oxygen (O2) Sensor, Oxygen Sensor Heater, EGR System
Before emissions retest: drive at least 100 miles to fully set monitors.
Watch out for:
- Simply clearing the code will not fix the problem; the code will return immediately if the electrical fault is still present.
- Disconnecting the battery will clear the code but also resets all emissions readiness monitors, which causes an automatic failure at a smog check until a full drive cycle is completed.
Will This Fail Emissions / State Inspection?
No — by itself this code doesn't fail OBD inspection (but it can keep readiness monitors from setting, which causes a separate fail).
- California: This code itself won't fail the test, but clearing it resets readiness monitors. As of late 2025, CARB requires all monitors to be 'Ready' for a vehicle to pass a Smog Check. Complete a full drive cycle after repairs before re-testing.
- New York: The NYS inspection includes an OBD-II scan. While a 'B' code may not cause an automatic failure, having incomplete readiness monitors from clearing the code prevents the test from being completed, resulting in a failure.
- Texas: In the 17 counties requiring an emissions test, the inspection fails if too many readiness monitors are 'Not Ready'. For 2001 and newer vehicles, only one 'Not Ready' monitor is allowed. The separate safety inspection checks for functional brake lights, which fails if the switch is completely inoperative.
Most Commonly Affected Vehicles

- Chevrolet Silverado 1500/2500/3500 (2007-2014) — Extremely common on the GMT900 platform. The original brake switch (P/N 15861245) was superseded by P/N 25981009 (ACDelco D1539J).
- GMC Sierra 1500/2500/3500 (2007-2014) — Shares the same platform and electronics as the Silverado, making it equally prone to fretting corrosion at the brake switch connector.
- Chevrolet Tahoe / Suburban (2007-2014) — These SUVs use the same trailer brake control system. The brake light switch part number differs for models with power-adjustable pedals. Part #25981009 is for models without this option.
- GMC Yukon / Yukon XL / Denali (2007-2014) — Like its Chevy counterparts, the Yukon family is highly susceptible. TSB PIT5144 specifically lists the 2008-2011 Yukon Denali.
- Chevrolet Avalanche (2007-2013) — As part of the GMT900 family, the Avalanche experiences the same B3894 fault, with the fix almost always being related to the brake light switch or its connector.
- Cadillac Escalade / ESV / EXT (2007-2014) — Built on the same GMT900 platform and sharing the same electronics, the Escalade family is also affected by this issue.
- Hummer H2 (2008-2009) — The JL1 trailer brake controller was an option on these model years, and they share the same TBCM architecture, making them susceptible to this code.
- Chevrolet / GMC Express / Savana (2008-Present) — Models equipped with the factory integrated trailer brake controller (RPO JL1) experience this code, as they use a similar control system architecture.
Manufacturer-Specific Notes
- General Motors (Chevrolet/GMC): GM directly links the cruise control's function to the trailer brake system. A fault in the trailer brake module disables cruise control, even if you never tow a trailer.
- General Motors (Chevrolet/GMC): GM issued Technical Service Bulletin PIT5144, stating the most common cause for B3894 is fretting corrosion at the brake light switch connector, not a bad switch. The official fix is applying dielectric lubricant, not replacing parts.
- General Motors (Chevrolet/GMC): TSB PIT4508C provides a diagnostic path for when B3894 is present and cruise control is inoperative. It advises using a scan tool to check 'Master Cylinder Pressure' data in the TBCM. Pressure readings without pedal application point toward EBCM issues.
- General Motors (Chevrolet/GMC): On newer vehicles, replacing the brake light switch (Brake Pedal Position Sensor) requires a 'BPP Sensor Relearn' procedure using a scan tool. This calibrates the sensor's home position in both the BCM and ECM.
- General Motors (Chevrolet/GMC): GM issued Customer Satisfaction Program N232414840 for certain 2020-2024 Silverado/Sierra HD trucks. Voltage feedback from a trailer's battery causes a 'Service Trailer Brake System' message. Dealers replace the Trailer Brake Power Module free of charge until August 31, 2026.
Real Owner Stories
2014 Chevy Silverado LTZ with intermittent warning, worse in hot weather.
The 'Service Trailer Brake System' message appeared intermittently, becoming almost constant on hot days, with frequent beeping. Cruise control would not work when the message was active.
What they tried:
- Initially ignored it as it would come and go.
- Checked fuses related to the trailer brake system; all were good.
- Replaced the in-dash trailer brake controller switch assembly (~$30 part).
Outcome: Replacing the in-dash switch assembly fixed the problem. The owner noted that an aftermarket switch failed after a few months and recommended using a genuine GM part. The entire job took about 10 minutes with simple trim tools.
Lesson: For intermittent issues, especially those related to temperature, a failing electronic component like the dash switch is a strong possibility and a cheap, easy part to replace before pursuing more complex diagnostics.
2018 GMC Sierra with 'Service Trailer Brake System' message on every startup.
Warning appeared every time the truck was started, whether a trailer was connected or not. The owner had already replaced the in-dash controller and the brake light switch without success.
What they tried:
- Replaced the in-dash trailer brake controller switch.
- Replaced the brake light switch at the pedal.
- Took the vehicle to the dealership under warranty.
Outcome: The dealership found and repaired a wiring issue under warranty. The pre-warranty estimate was around $400. The problem was a damaged wire in the harness rubbing against the frame, a known issue.
Lesson: If replacing the common, inexpensive components (brake switch, dash switch) doesn't solve a persistent 'hard fault', the problem is likely in the wiring harness between the switch, BCM, and TBCM, or a bad ground. A professional diagnosis is needed to trace the wiring.
2015 GMC Sierra with 'Service Trailer Brake System' message and no trailer connected.
The warning message appeared even without a trailer attached, disabling the cruise control. The owner lived in a region with road salt and harsh weather.
What they tried:
- First, checked the 30-amp fuse in the under-hood fuse box, which was intact.
- Disconnected the batteries.
- Lowered the spare tire to access the Trailer Brake Control Module (TBCM) on the frame rail.
- Disconnected the TBCM connector, cleaned it with electrical contact cleaner, and reconnected it.
Outcome: Simply cleaning the TBCM connector resolved the issue. The connector had visible signs of dirt and moisture ingress, causing a poor connection. The warning message disappeared and did not return.
Lesson: On trucks exposed to road salt and moisture, always inspect the TBCM connector above the spare tire. This exposed location is a common failure point due to corrosion, and cleaning it is a free fix that should be attempted before replacing any parts.
How to Prevent This Code From Triggering
- Apply Dielectric Grease to Key Connectors (Once, or every few years in harsh climates) — Applying a thin layer of non-conductive dielectric grease to the brake light switch connector and the TBCM connector seals them from moisture and oxygen, preventing the fretting corrosion and water intrusion that cause most B3894 faults.
- Inspect and Clean Underbody TBCM and Ground Wire (Annually, especially before winter in 'Rust Belt' areas) — The TBCM and its ground wire (G401) are on the frame rail, exposed to road salt and grime. Annually inspecting for corrosion and ensuring the ground connection is clean and tight prevents high resistance from developing in the TBCM's power and ground circuits.
- Clean the 7-Pin Trailer Socket Periodically (Every 6 months or after off-road use) — Dirt, dust, and moisture accumulate in the bumper-mounted trailer socket. While less likely to cause B3894 directly, a corroded or shorted socket blows the TBCM fuse, leading to a B3894 code due to loss of power to the module.
- Perform Regular Tug-Tests When Towing (Before every trip with a trailer) — Before driving, roll forward slowly and manually apply the trailer brakes using the slider. Feeling the trailer's brakes engage (a 'tug') confirms the entire system, from the truck's controller to the trailer's brakes, is functional. This ensures you don't begin a journey with an undetected fault.
Frequently Asked Questions
Can I fix code B3894 myself?
Yes, in most cases. The most common fix involves cleaning a connector and applying dielectric grease, a simple task costing under $20. Replacing the brake light switch is also very DIY-friendly.
What are the most common mistakes when diagnosing B3894?
The biggest mistake is replacing parts without proper diagnosis. Many replace the brake light switch without first trying the TSB-recommended fix of cleaning the connector and applying dielectric grease. Another error is immediately replacing the expensive Trailer Brake Control Module (TBCM) when the problem is almost always a simple wiring, connector, or switch issue.
I replaced the brake light switch and cleaned the connector, but the code came back. What's next?
If a new switch and clean connector fail, inspect the connector and wiring at the Trailer Brake Control Module (TBCM) on the frame rail for corrosion. Next, check the related 30-amp fuse and perform a 'Brake Pedal Position Sensor Relearn' with a capable scan tool. If all else fails, advanced diagnostics like testing wiring continuity are necessary.
Why did my cruise control stop working when the error is for the trailer brakes?
GM trucks automatically disable cruise control if they cannot get a reliable signal that the brake pedal is working correctly. Since the trailer brake module (TBCM) detects the signal problem, it tells the cruise control to shut down for safety.
Is it safe to tow a trailer with code B3894 active?
No. This code means your truck's integrated trailer brake controller is disabled. Your trailer's electric brakes will not activate when you press the brake pedal, significantly increasing your stopping distance.
Will just clearing the code fix the problem?
No. Clearing the code only makes the light go away temporarily. The TBCM re-runs its check as soon as you drive and press the brake, returning the code immediately if the electrical problem remains.
Can bad trailer wiring or a faulty trailer cause code B3894?
It is unlikely. Code B3894 relates to an internal plausibility check of the truck's own brake signals before a trailer is even considered. However, a severe short in the trailer's wiring theoretically blows the main TBCM fuse, causing B3894 to set due to power loss.
What does it mean if the 'Service Trailer Brake System' message won't go away?
If the message appears instantly on startup and cannot be dismissed, it indicates a 'hard fault'. This means the electrical problem is continuously present, unlike an intermittent issue. This points to a blown fuse, a completely failed switch, or a broken wire requiring repair.
Key Takeaways
- Code B3894 disables your cruise control and integrated trailer brakes due to conflicting brake pedal signals at the Trailer Brake Control Module.
- Apply dielectric grease to the brake light switch connector before buying parts; GM TSB PIT5144 identifies fretting corrosion here as the #1 cause.
- Avoid replacing the $150-$300 Trailer Brake Control Module immediately, as the fault almost always lies in a $20 brake switch, a blown 30-amp fuse, or corroded wiring.
- Never tow a trailer with an active B3894 code; your trailer's electric brakes will not activate, dramatically increasing stopping distances and legal liability.
Helpful Videos

The information in this article is provided for general reference and educational purposes only. Vehicle specifications, procedures, and part compatibility can vary by production date, trim level, and region. Always consult your vehicle's factory service manual and verify part numbers before purchasing or performing repairs. Safety-critical components such as airbags, seat belts, and braking systems should be installed by a qualified professional.
- 🎬 Helpful Videos
- What Does B3894 Mean?
- Can I Drive With B3894?
- Common Causes
- Symptoms
- Diagnostic Flowchart
- Common Fixes & Costs
- DIY vs Professional
- Used vs. New Parts: Buying Guide
- What Happens If You Wait — Timeline
- Cost of Not Fixing It
- Diagnosis Steps
- When This Code Triggers (Freeze-Frame Conditions)
- Related Codes
- Climate & Environmental Factors
- How to Talk to a Mechanic About This Code
- Where to Take It: Dealer vs Independent vs Chain
- When to Walk Away From the Repair
- What Scan Tool You Need for This Code
- How to Clear the Code After You Fix It
- Will This Fail Emissions / State Inspection?
- Most Commonly Affected Vehicles
- Manufacturer-Specific Notes
- Real Owner Stories
- 2014 Chevy Silverado LTZ with intermittent warning, worse in hot weather.
- 2018 GMC Sierra with 'Service Trailer Brake System' message on every startup.
- 2015 GMC Sierra with 'Service Trailer Brake System' message and no trailer connected.
- How to Prevent This Code From Triggering
- Frequently Asked Questions
- Can I fix code B3894 myself?
- What are the most common mistakes when diagnosing B3894?
- I replaced the brake light switch and cleaned the connector, but the code came back. What's next?
- Why did my cruise control stop working when the error is for the trailer brakes?
- Is it safe to tow a trailer with code B3894 active?
- Will just clearing the code fix the problem?
- Can bad trailer wiring or a faulty trailer cause code B3894?
- What does it mean if the 'Service Trailer Brake System' message won't go away?
- Key Takeaways
- 🎟️ Get 5% Off