

OBD-II Code B3101: Keyless Entry Communication Failure
What B3101 means, why it triggers, and how to fix it
- On 2014-2020 GM trucks and SUVs, code B3101 almost always indicates a pinched wiring harness behind the driver's side dashboard (TSB PIT5288H).
- Look for a cluster of 3 or more symptoms: keyless entry failure, a 'Service StabiliTrak' warning, a dead battery, or a blank radio screen.
- Never replace the Body Control Module (BCM) without first spending 30 minutes physically inspecting the dash and driver's door sill wiring harnesses for chafing or corrosion.
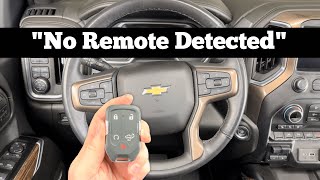
- If the vehicle displays 'No Remote Detected' and refuses to start, place the key fob in the center console's dedicated backup transmitter pocket to bypass the error and start the engine.
What Does B3101 Mean?

B3101 means your car's main body computer (Body Control Module or BCM) lost communication with the module receiving signals from your key fob (Remote Control Door Lock Receiver or RCDLR). This communication happens on a dedicated single-wire data circuit called a Local Interconnect Network (LIN) bus. When this link breaks, it disables your key fob and push-to-start system, triggering a "No Remote Detected" message.
Technical definition: The official SAE/OBD-II definition for B3101 is "Keyless Entry Data Link Circuit Range/Performance". This indicates a fault in the communication circuit between the Body Control Module (BCM) and the Remote Control Door Lock Receiver (RCDLR). On many GM vehicles, this code is accompanied by a 2-digit symptom byte (e.g., B3101 02) specifying the fault type, such as a short to ground or open circuit.
Can I Drive With B3101?
Yes, But With Caution. You can drive, but it comes with significant risks. The underlying wiring fault disables the StabiliTrak and Traction Control systems, increasing the risk of losing control in an emergency maneuver. You also risk being stranded if the key fob isn't detected, which prevents the car from starting. Furthermore, the issue causes a parasitic battery drain that leaves you with a dead battery without warning.
Common Causes

- Pinched or Damaged Dash Wiring Harness (Very Common) — On 2014-2020 GM trucks and SUVs, a metal dash support bracket pinches the main wiring harness behind the driver's side dashboard during factory assembly. This documented manufacturing flaw (TSB PIT5288H) damages communication wires, causing code B3101 and cascading electrical failures. This is the definitive root cause for affected vehicles.
- Corroded or Broken Wire in Door Sill (Common) — The communication wire between the BCM and RCDLR breaks inside the wiring harness under the driver's side door sill plate. This area traps moisture from wet shoes or leaking door seals, causing wires (often Yellow/Green) to corrode and snap.
- Weak or Dead Key Fob Battery (Common) — A low CR2032 battery in the key fob triggers communication issues. While it causes "No Remote Detected" messages, it is a starting point for diagnosis rather than the root cause if other electrical symptoms, like a StabiliTrak warning, are present.
- BCM Software Glitch (Less Common) — A known software issue (GM TSB 16-NA-277) causes the RCDLR to "lock up" and stop communicating intermittently. Reprogramming the BCM with updated dealer software fixes this. The issue often resolves itself after the vehicle sits for 10 minutes, making it hard to diagnose.
- Poor BCM Ground (G218 or G103) (Less Common) — A loose or corroded main ground for the BCM (G218), located under the driver's side dash, causes bizarre electrical issues (GM TSB 18-NA-161). A poor connection at ground G103 in the engine bay also disrupts BCM and RCDLR communication.
- Faulty Remote Control Door Lock Receiver (RCDLR) (Less Common) — The RCDLR module listens for your key fob's signal. Failure occurs from internal faults or water intrusion from a leaking third brake light dripping onto the module. Exhaust all wiring and software possibilities before replacing it.
- Disconnected RCDLR Antenna (Rare) — The RCDLR uses a coax cable connected to an antenna. If this cable disconnects at the module, amplifier, or window antenna (TSB 16-NA-061), it causes poor key fob range or a total loss of signal, triggering B3101.
- Faulty Body Control Module (BCM) (Rare) — The BCM logs the code but rarely causes the problem. Shorts in the wiring harness damage it, but it remains the absolute last component to replace after ruling out all other causes.
- Aftermarket Electronics Interference (Rare) — Improperly installed remote starters, alarms, or dash cams interfere with the LIN bus communication circuit. Tapping into the wrong wires disrupts data signals and causes B3101.
Symptoms

- Keyless entry remote not working (also visible on scanner) — Key fob buttons (lock, unlock, remote start, panic) fail completely or work intermittently.
- "No Remote Detected" Message (also visible on scanner) — The driver information center displays "No Remote Detected" or "No Fob Detected," and the push-button ignition fails to start the engine.
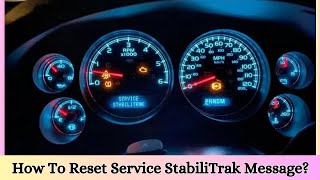
- Service StabiliTrak / Traction Control Warning Light (also visible on scanner) — A stability and traction control warning appears on the dash. 🎬 See this step-by-step guide to fixing the StabiliTrak light The damaged wiring harness severs communication with safety modules bundled in the exact same location.
- Dead Vehicle Battery (also visible on scanner) — Damaged wiring creates a parasitic drain (often 200mA-1A) that kills the battery overnight. Modules fail to shut down correctly due to the short circuit.
- Other Electrical Failures (also visible on scanner) — The damaged dash harness contains circuits for numerous systems. You will likely experience a dead radio, blank touch screen, failing power windows, inoperative rear wipers, or flickering dash lights simultaneously.
- Service Tire Pressure System Warning (also visible on scanner) — The RCDLR receives signals from the tire pressure sensors. A fault in the RCDLR or its communication circuit triggers a TPMS warning alongside the keyless entry failure.
- Service Suspension System Message (also visible on scanner) — On vehicles with active suspension (e.g., MagneRide), the damaged harness disrupts communication to the suspension control module, triggering this warning.
Diagnostic Flowchart
Tap your situation to follow the diagnostic path that matches what you're seeing on this code.
Common Fixes & Costs
- Replace Key Fob Battery
— Parts: $5-$15, Labor: $0, ~0.1 hr book time
(DIY)
: OEM CR2032 (Alt: Duracell CR2032, Energizer CR2032) - Repair Pinched Dash Wiring Harness — Parts: $10-$50 (wiring supplies), Labor: $300-$750 (parts and labor at a shop), ~3.5 hr book time (Professional)
- Repair Door Sill Wiring — Parts: $10-$30 (wiring supplies), Labor: $150-$400 (parts and labor at a shop), ~2 hr book time (Intermediate)
- Reprogram Body Control Module (BCM) — Parts: $0, Labor: $100-$200 (labor only at a dealership), ~1 hr book time (Professional)
- Clean or Repair BCM Ground (G218) — Parts: $5 (abrasives, dielectric grease), Labor: $50-$150 (labor to access and clean), ~1 hr book time (Intermediate)
- Replace Remote Control Door Lock Receiver (RCDLR)
— Parts: $35-$80, Labor: $100-$200 (parts and labor, requires programming), ~1.5 hr book time
(Intermediate)
: OEM GM 13587439 (Fits many 2014-2019 Silverado/Sierra) (Alt: Dorman (various)) - Replace Body Control Module (BCM)
— Parts: $80-$250, Labor: $200-$400 (parts and labor, requires programming), ~2.5 hr book time
(Professional)
: OEM GM 13594692 (2014-2015 Silverado), GM 13510531 (2016 Tahoe/Silverado) (Alt: Cardone (Remanufactured), Dorman (Remanufactured))
Used vs. New Parts: Buying Guide
When a used part is worth it: For the most common failure (wiring), this is not applicable. For replacement modules like the BCM or RCDLR, buying used is extremely risky and generally not recommended. Many GM modules are VIN-locked after initial programming and cannot be reprogrammed for another vehicle by a dealer.
Donor-vehicle mileage cap: roughly under 50000 miles for the part to have meaningful remaining life.
Donor quality checklist:
- Verify the exact part number matches; superseded numbers may not work.
- For a BCM, only consider a 'virgin' (never programmed) or professionally 'unlocked' remanufactured unit.
- Ask the seller if the module is guaranteed to be reprogrammable; many used modules are effectively paperweights.
Decision logic:
- If The required part is a BCM or RCDLR → Strongly favor a new OEM part to ensure it can be programmed correctly.
- If A used BCM is the only option due to budget or availability → Use a specialized service that clones the data from your old BCM's EEPROM chip to the used one, bypassing the need for dealer programming.
Warranty tradeoff: Used parts: Typically 30-day warranty, which may not be long enough to discover programming issues. Aftermarket/Reman New: 1-year to limited lifetime warranty. OEM New: 12-24 month warranty, guaranteed to be programmable.
Worst-case if a used part fails: $300-$600 if a used module cannot be programmed — you lose the cost of the part plus the non-refundable shop labor for the programming attempt.
What Happens If You Wait — Timeline
- 0-1 month: Intermittent 'No Remote Detected' message. Key fob fails to work occasionally. StabiliTrak light flickers on and then off. The parasitic drain begins but may not be severe enough to kill a healthy battery overnight. (MPG impact: 0%% · Added cost: $0)
- 1-3 months: Keyless entry functions fail completely. 'Service StabiliTrak' and other warnings are constantly illuminated. The parasitic drain becomes significant (often 200mA-1A), draining the battery overnight or within 48 hours. The vehicle requires frequent jump-starts. (MPG impact: 0%% · Added cost: $100-$300 (Tow service, cost of a new battery after repeated deep cycling ruins the original))
- 3-6 months: The constant shorting and voltage fluctuations from the damaged harness stress electronic modules. The vehicle is unreliable, risking being stranded at any time. The main vehicle battery is permanently damaged and requires replacement. (MPG impact: 0%% · Added cost: $250-$500 (Cost of a premium AGM battery to replace the one destroyed by the parasitic drain))
- 6+ months: Catastrophic failure is possible. The persistent electrical short in the harness causes thermal stress and internal damage to the Body Control Module (BCM) or other connected modules. A simple wiring repair now becomes a much more expensive module replacement. (MPG impact: 0%% · Added cost: $600-$1500+ (The original wiring repair cost PLUS the cost of a new BCM/RCDLR and programming after the short damages it))
Cost of Not Fixing It
- 0-1 month: Risk of being stranded due to a dead battery or a no-start condition. Inconvenience of non-working keyless entry. Reduced vehicle safety from disabled StabiliTrak. (Added cost: $100-$300 (Tow service, new battery))
- 1-6 months: Permanent damage to the vehicle's main battery from repeated deep discharging due to the parasitic drain, requiring premature replacement. Increased risk of a loss-of-control accident in an emergency maneuver. (Added cost: $250-$500 (Premium AGM battery replacement))
- 6+ months: The constant shorting in the wiring harness causes thermal damage to the internal circuits of the Body Control Module (BCM) or RCDLR, turning a wiring repair into a much more expensive module replacement job. (Added cost: $600-$1500+ (BCM/RCDLR replacement and programming))
Diagnosis Steps

- Replace Key Fob Battery
Replace the CR2032 battery in your key fob and test your spare remote. This low-cost first step rules out the simplest cause before tearing into wiring.
Tools: New CR2032 key fob battery (Beginner) - Try the Backup Starting Procedure
If the vehicle shows "No Remote Detected", place the fob in the dedicated transmitter pocket (usually inside the center console or cup holder). This bypasses the error and allows the engine to start.
Tools: None (Beginner) - Scan for All Trouble Codes
Use a professional OBD-II scanner to read codes from all modules (BCM, RCDLR), not just the engine. Multiple communication codes (starting with 'U') alongside B3101 confirm a network-wide wiring harness problem.
Tools: Professional OBD-II Scanner ($100+) (Beginner) - Inspect and Wiggle Dash Wiring Harness (GM Vehicles)
Remove the lower driver-side dash panels near the parking brake pedal. Locate the large wiring harness and check for pinching or chafing against the black metal dash support bracket. With the ignition on, wiggle this harness; if the radio cuts out or dash lights flicker, you confirmed the fault location.
Tools: Trim removal tools, flashlight, socket set (Advanced) - Inspect the Driver's Door Sill Harness
Remove the plastic door sill trim on the driver's side. Lift the carpet and inspect the wiring channel for water intrusion or green corrosion. Open the harness loom and locate broken or corroded wires (often Yellow/Green).
Tools: Trim removal tools, flashlight (Intermediate) - Repair Damaged Wires
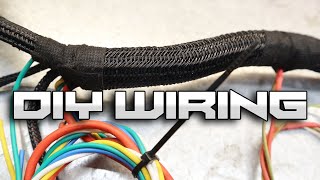
Disconnect the battery. Cut away damaged wire sections and splice in new wire using high-quality butt connectors or solder and heat shrink. Stagger the splices to prevent harness bulging, wrap in fabric tape, and reroute away from the pinch point.
Tools: Wire cutters, wire strippers, butt connectors or soldering iron, heat shrink, fabric wiring tape (Advanced) - Pro Tip: Check RCDLR Power and Ground
At the RCDLR connector, verify power and ground. With the key on, the B+ wire must read >11.5V. The ground wire resistance to a clean chassis ground must be <2 ohms. Missing power or ground prevents communication.
Tools: Multimeter, vehicle wiring diagram (Professional) - Pro Tip: Perform LIN Bus Voltage Checks
Probe the LIN bus data wire at the RCDLR. A healthy, inactive bus reads ~1V below battery voltage (11-12V). 0V indicates a short to ground. Steady battery voltage indicates a short to power or open circuit.
Tools: Multimeter with Min/Max function, vehicle wiring diagram (Professional) - Pro Tip: Perform LIN Bus Resistance Check
With the battery disconnected, check resistance between the LIN bus data wire terminal and chassis ground. It must read 'OL' (Open Line). Any continuity confirms a short to ground in the harness.
Tools: Multimeter, vehicle wiring diagram (Advanced) - Pro Tip: Isolate the Fault with an Oscilloscope
Connect an oscilloscope to the LIN bus wire. A healthy signal is a square wave toggling between >80% and <20% of battery voltage. A flat line at 0V confirms a short to ground; a flat line at 12V confirms an open circuit.
Tools: Oscilloscope, vehicle wiring diagram (Professional)
When This Code Triggers (Freeze-Frame Conditions)
- Ignition Status: Key On, Engine Running (KOER) or Key On, Engine Off (KOEO) (BCM is actively monitoring communication.)
- System Voltage: 10-16V (Sufficient voltage for module operation.)
- Module State: Active/Awake (The BCM is attempting to poll the RCDLR for status.)
- Time Since Fault: < 5 seconds (Code sets almost immediately after the BCM fails to receive a valid signal from the RCDLR.)
Related Codes
- U0028, U0077, U0126, U0151 — These communication codes frequently appear with B3101. Their presence strongly suggests the pinched wiring harness issue, as multiple data lines for different modules are damaged in the same location.
- B144C, C0544, C0710 — These Body and Chassis codes are listed in GM's service bulletin (PIT5288H) as being directly caused by the same pinched wiring harness. Seeing these alongside B3101 confirms the common harness failure.
- C0750, C0755, C0760, C0765 — These Tire Pressure Monitor (TPM) codes appear with B3101 because the RCDLR module handles both keyless entry and TPMS signals. Their presence points to a faulty RCDLR module or a disconnected antenna.
- P0106, P2122, P2127, P2138 — These Powertrain codes relate to the MAP and Accelerator Pedal Position sensors. TSB PIT5288G confirms these codes are caused by the same pinched dash harness. Their presence with B3101 is a critical clue pointing to the harness defect.
Climate & Environmental Factors
- Humidity and Moisture: High humidity or direct water intrusion, particularly in the driver's side door sill area, significantly increases the likelihood of wire corrosion and breakage.
- Road Salt: In regions that use road salt during winter, moisture carrying dissolved salt wicks into the door sill and under-dash harnesses, dramatically accelerating corrosion.
- Cold Weather: Extreme cold makes wire insulation brittle, increasing the chance of it cracking at stress points like the dash harness pinch point. Cold temperatures also reduce battery efficiency.
How to Talk to a Mechanic About This Code
Say this: "I have a B3101 code on my GM vehicle, and it's showing the classic symptoms of a dead battery and a 'Service StabiliTrak' light. I'd like to schedule a diagnostic, and I request that you specifically start by inspecting the dash wiring harness for pinching near the support bracket, as described in TSB PIT5288H, before considering any module replacements."
This signals to the shop that you are informed about the common manufacturing defect causing this specific code. It directs them to the most likely point of failure, saving diagnostic time and preventing them from immediately suggesting an expensive and likely unnecessary BCM replacement.
Avoid saying:
- 'My key fob stopped working.'
- 'My car has some weird electrical problems.' (too vague, invites a wide-ranging and expensive diagnostic process)
- 'Just replace whatever is broken.'
- 'A guy online said to replace the BCM.'
Questions to ask before authorizing the repair:
- Did you physically inspect the dash harness near the I/P bracket and find chafed or broken wires?
- If you are recommending a BCM or RCDLR replacement, can you show me the test results that prove the wiring and grounds are good?
- If you found broken wires, how do you plan to repair and reroute the harness to prevent it from happening again?
- Does your estimate for replacing a module include the cost of programming it to the vehicle?
Where to Take It: Dealer vs Independent vs Chain
- Dealer:
Recommended if a software update or module programming is required. They are most familiar with the TSBs but may be more expensive for the wiring repair itself.
Best for: Vehicles still under warranty., Cases where a BCM software update is needed (TSB 16-NA-277)., When a BCM or RCDLR module replacement and programming is confirmed to be necessary.
Downsides: Highest labor rate., May be quick to replace a module before exhaustively checking for a wiring fault. (Typical cost: +50% vs. baseline) - Independent Shop:
Best fit for the most common fix (wiring harness repair), provided you choose a well-regarded shop with ASE-certified technicians specializing in electrical systems.
Best for: Out-of-warranty vehicles where the known dash harness issue is the likely cause., Owners who have a trusted relationship with a shop that has strong electrical diagnostic skills.
Downsides: Shop must have experience with complex electrical diagnosis and be willing to research TSBs. Not all independent shops have the expensive tools for module programming if it becomes necessary. (Typical cost: +0% vs. baseline) - Chain Shop:
AVOID for diagnosing B3101. The problem is almost always too complex for a typical chain shop to handle correctly.
Best for: Simple tasks like replacing a key fob battery.
Downsides: Technicians often lack the specialized training for complex electrical diagnosis., High risk of misdiagnosis, leading to unnecessary and expensive part replacements (e.g., replacing the BCM when it's not the problem). (Typical cost: -10% vs. baseline)
When to Walk Away From the Repair
If the estimated repair cost exceeds 40-50% of the car's private-party value, you should pause and consider your options. However, since the affected vehicles are often newer trucks and SUVs, the typical $300-$750 repair cost is almost always well below this threshold.
- Car worth $20000, fix is $750: Fix it. The repair cost is less than 5% of the vehicle's value.
- Car worth $4000, fix is $600: Borderline, but likely worth fixing. A $4,000 car with these electrical issues is difficult to sell, and finding a reliable replacement for under $5,000 is challenging.
- Car worth $2500, fix is $1500: Walk away. The repair cost is over 50% of the car's value, and continued electrical problems may exist.
What Scan Tool You Need for This Code

Minimum: A scanner that can read codes from all vehicle modules, including the Body Control Module (BCM), not just the engine computer.
A basic $20-50 engine code reader cannot see Body (B-prefix) or Communication (U-prefix) codes. It will show 'No Codes Found' even when B3101 is active, making it useless for this problem.
Budget: BlueDriver Pro Scan Tool (~$100) — Reads and clears codes from all modules, including the BCM, on GM vehicles. This is enough to confirm B3101 and see the related 'U' codes that point to the harness issue. It does not offer bidirectional controls.
Mid-range: Autel MaxiCOM MK808S / Topdon ArtiDiag Pro (~$300-400) — Offers full system diagnostics plus bidirectional controls. This allows a user to command the BCM to lock/unlock doors, helping to test the module independently from the key fob signal. This is a powerful diagnostic step to isolate the fault.
Professional: VXDIAG VCX Nano GM with a Techline Connect Subscription (~$150 (tool) + subscription cost) — This is the most affordable setup for DIYers that provides the same capability as a GM dealer. It can perform full module programming, which is required if the BCM or RCDLR needs to be replaced or if a software update (like TSB 16-NA-277) is the recommended fix.
Rent vs buy: Most auto parts stores' free scanning services or loaner tools are basic engine code readers and will NOT be able to read the B3101 code. You must buy a scanner with BCM capabilities or go to a professional shop.
How to Clear the Code After You Fix It
- Reconnect vehicle battery if disconnected for repair.
- Use a professional scan tool to access the BCM and clear the DTC.
- Cycle the ignition off, then on, and test all key fob functions (lock, unlock, remote start).
Drive cycle (~5 minutes): A formal drive cycle is not required for this body code. The BCM self-tests the LIN bus communication at every key-on event. After clearing the code, simply cycle the ignition and verify symptoms are gone.
Readiness monitors affected: None
Watch out for:
- Simply clearing the code without fixing the underlying wiring or module fault causes the code to return instantly.
- Disconnecting the battery clears the code temporarily, but it reappears on the next key cycle if the physical fault still exists.
- If the wiring fault also caused powertrain (P-prefix) codes, a full GM drive cycle (50-100 miles of mixed driving) is needed to set emissions readiness monitors after the repair.
Will This Fail Emissions / State Inspection?
No — by itself this code doesn't fail OBD inspection (but it can keep readiness monitors from setting, which causes a separate fail).
- California: A B3101 code by itself will not fail the OBD-II portion of the smog check, as it does not illuminate the Check Engine Light. However, if a 'Service StabiliTrak' light is on, some inspectors flag it as a safety concern, and any accompanying P-codes cause an automatic failure.
- New York: NYS inspection focuses on emissions-related codes (P-codes) and MIL status. B3101 is not an automatic failure. However, an illuminated ABS or StabiliTrak warning light leads to a failure of the separate annual safety inspection.
- Virginia: Virginia performs an annual safety inspection. An illuminated 'Service StabiliTrak' or ABS warning light is a direct cause for rejection, separate from any emissions testing. The vehicle cannot pass inspection until the system is repaired and the light is off.
Most Commonly Affected Vehicles
- Chevrolet Silverado 1500/2500/3500 (2014-2019) — Extremely common due to the pinched dash wiring harness issue documented in GM TSB #PIT5288H. The 2019 'Silverado LD' model is also affected.
- GMC Sierra 1500/2500/3500 (2014-2019) — Platform mate to the Silverado, suffers from the identical pinched dash wiring harness flaw. The 2019 'Sierra Limited' model is also included in the TSB.
- Chevrolet Tahoe / Suburban (2015-2020) — Built on the same K2XX platform, these SUVs have the same wiring harness pinch point behind the driver's side dash.
- GMC Yukon / Yukon XL (2015-2020) — Also part of the K2XX platform, these vehicles are highly susceptible to the B3101 code from the known wiring harness defect.
- Cadillac Escalade / Escalade ESV (2015-2020) — The luxury version of the K2XX platform has the same design flaw with the dash wiring harness being pinched.
- Chevrolet Cruze (2011-2016) — B3101 is caused by a damaged wiring harness in the roof near the headliner, or by the RCDLR software lock-up issue fixed by a BCM update per TSB 16-NA-277.
- Chevrolet HHR (2006-2011) — Experiences B3101 symptoms due to a failing RCDLR module, which also handles TPMS functions. The failure is more often the module itself rather than a systemic wiring issue.
- Saab 9-5 (2010-2011) — Being a GM-platform vehicle, it sets a B3101 code for a communication failure between the BCM and RCDLR, requiring circuit testing to diagnose.
- Buick LaCrosse (2010-2016) — B3101 is often related to a direct circuit fault (open, short to ground/voltage) that requires multimeter testing between the BCM and RCDLR to isolate.
- Buick Envision (2016-2017) — Specifically listed in TSB 16-NA-277 for the intermittent RCDLR software lock-up issue resolved with a BCM software update.
Manufacturer-Specific Notes
- General Motors (Chevrolet, GMC, Cadillac): For 2014-2020 K2XX platform trucks and SUVs, code B3101 is almost always caused by the main dash wiring harness being pinched by a metal bracket near the parking brake pedal. This is a well-documented manufacturing flaw covered by TSB #PIT5288H.
- General Motors (Various Models): A less common issue, documented in TSB #16-NA-277, involves a software glitch where the RCDLR 'locks up' and becomes unresponsive, triggering an intermittent B3101. This is resolved with a BCM software update from a dealer.
- General Motors (Various Models): TSB #18-NA-161 points to a poor ground at location G218 (under the driver's dash) as a cause for a wide range of electrical issues with symptoms that overlap with the pinched harness problem.
- General Motors (Warranty & Recalls): While TSB PIT5288H documents a clear manufacturing defect, there is no active safety recall for the pinched dash harness on K2XX vehicles. Repairs are typically covered only if the vehicle is still within its original bumper-to-bumper warranty period.
- General Motors (Professional Diagnostics): A technician using a GM GDS2 scan tool uses bi-directional controls to command the BCM to lock/unlock doors. If this works but the fob doesn't, it confirms the fault is in the RKE system and not the BCM or lock actuators.
Real Owner Stories
2016 GMC Sierra 1500 at 110K miles
Owner experienced a sudden cascade of issues: 'No Remote Detected', 'Service StabiliTrak', radio screen black, and a dead battery overnight. The truck would only start if the fob was in the center console pocket.
Outcome: Following forum advice pointing to TSB PIT5288H, the owner's independent mechanic removed the driver's side dash panels and found the main harness crushed by the metal dash support bracket. Several wires were chafed. The mechanic repaired 5 wires and rerouted the harness. Total cost was $450 for 3 hours of labor plus materials. All symptoms were resolved.
Lesson: A cluster of seemingly unrelated electrical failures on a GM truck is the classic sign of the pinched dash harness. Do not let a shop replace the BCM before physically inspecting the harness per TSB PIT5288H.
2017 Chevrolet Silverado 2500HD
Keyless entry completely stopped working and the 'Service TPMS' message appeared. The truck would still start and run normally, and there were no other electrical problems.
Outcome: The technician found a broken and corroded Yellow/Green wire inside the wiring harness located under the driver's side door sill plate. Water had wicked into the harness and corroded the wire. Repairing this single wire restored both keyless entry and TPMS functions.
Lesson: If B3101 appears *without* a flood of other communication codes or StabiliTrak warnings, the fault is more likely isolated to the RCDLR circuit itself. The door sill harness is the second most likely location for a wire break after the dash pinch point.
2016 Chevrolet Cruze at 75K miles
The key fob would intermittently stop working, and the car would display 'No Remote Detected'. The problem would always disappear after the car sat for 5-10 minutes. The passive entry and push-to-start would then work normally for a while before failing again.
Outcome: The owner took the vehicle to a GM dealer. The dealer identified TSB 16-NA-277, which describes the RCDLR module 'locking up' intermittently. They performed a BCM software update. The problem has not returned. The cost was 1 hour of labor for diagnostics and reprogramming ($150).
Lesson: For truly intermittent issues that resolve themselves after a short wait and where no wiring damage can be found, a software glitch is a real possibility. Check for TSBs related to BCM software updates before replacing hardware.
2011 Chevrolet Cruze
Remote key fob functions were completely invalid. The car would not lock or unlock remotely. The B3101 code was present.
Outcome: After consulting wiring diagrams, they traced the circuit through two intermediate connectors. They discovered a damaged section of the wire harness located in the car's roof near the headliner. Repairing the broken wire in the roof harness fixed the problem.
Lesson: While the dash pinch is common on trucks, other models have their own unique wiring vulnerabilities. An open circuit diagnosis confirms a physical wire break, which can occur anywhere between the two modules.
How to Prevent This Code From Triggering
- Inspect and Protect Driver's Door Sill (Annually or after winter) — The driver's door sill traps water and road salt, leading to corrosion that breaks wires in the harness. Periodically remove the plastic sill plate, vacuum debris, and ensure the area is dry. Check for any signs of water intrusion from door seals.
- Apply Dielectric Grease to Connectors (During any related repair) — If you are working near electrical connectors, especially in areas prone to moisture like door sills or under the dash, applying a thin coat of dielectric grease to the connector seals prevents moisture intrusion and long-term corrosion.
- Install Door Sill Protectors (Once) — Installing aftermarket vinyl or plastic door sill protectors provides a physical barrier that shields the underlying wiring channels from moisture, mud, and snow brought in on shoes, reducing the risk of water seeping into the harness area.
- Proactively Reroute Dash Harness (Ambitious DIY/Shop) (Once) — For owners of high-risk GM K2XX vehicles who may already be working under the dash, proactively loosening the I/P bracket, inspecting the harness, wrapping it with anti-abrasion tape (like Tesa tape), and routing it away from the pinch point prevents the common failure from ever occurring.
- Seal Water Leaks Immediately (As needed) — Address any water leaks from windshield seals, door seals, or the third brake light immediately. Water that enters the cabin migrates into wiring harnesses, causing hidden corrosion that leads to failures like B3101. Installing vapor barriers on doors also helps protect electronics.
Frequently Asked Questions
Can I just replace the key fob to fix a B3101 code?
Replacing the fob rarely fixes B3101 on affected GM vehicles. While a bad fob causes similar symptoms, B3101 specifically points to a hard communication circuit failure between modules. This is almost always a wiring problem.
Why did my StabiliTrak light come on with a key fob code?
On many GM trucks, the keyless entry and stability control wires are bundled in the exact same harness. When the metal dash bracket pinches this harness, it severs communication for both systems simultaneously.
Why did my radio and power windows stop working with the B3101 code?
The pinched dash harness on GM K2XX vehicles contains circuits for the radio, infotainment screen, and window motors. When the harness crushes against the bracket, all these unrelated systems short out and fail at once.
My mechanic says the wiring is fine, but the problem is intermittent. What now?
If physical wiring is intact, a software glitch is the culprit. GM TSB 16-NA-277 describes the RCDLR module temporarily 'locking up' and resetting after 10 minutes. A dealer BCM software update permanently fixes this.
Can I just clear the code to fix it?
No. Clearing the code only erases the fault record from the module's memory. The code and symptoms return immediately once the module fails its next communication self-test.
Is it safe to drive with code B3101?
You can drive, but with serious risks. The disabled StabiliTrak system reduces stability in emergency maneuvers, and the parasitic battery drain will eventually leave you stranded.
How much will it cost to fix code B3101?
A simple key fob battery costs under $15. However, repairing the common damaged dash wiring harness costs between $300 and $750 at a repair shop due to the labor required to access the wires.
My mechanic wants to replace the BCM. Is that correct?
Replacing the BCM is the absolute last resort. B3101 is almost always caused by damaged wiring leading to the BCM, not the module itself. Insist on a physical inspection of the dash wiring harness (TSB PIT5288H) first.
Can a weak car battery cause the B3101 code?
B3101 causes a dead battery via parasitic drain, not the other way around. However, system voltage below 9V disrupts module communication, so ensuring your battery is fully charged is a required diagnostic step.
Will disconnecting the battery reset the StabiliTrak light and B3101 code?
Disconnecting the battery temporarily clears the codes if a module locked up. However, if a physical short exists in the wiring, the codes return the moment you reconnect power.
Key Takeaways
- On 2014-2020 GM trucks and SUVs, code B3101 almost always indicates a pinched wiring harness behind the driver's side dashboard (TSB PIT5288H).
- Look for a cluster of 3 or more symptoms: keyless entry failure, a 'Service StabiliTrak' warning, a dead battery, or a blank radio screen.
- Never replace the Body Control Module (BCM) without first spending 30 minutes physically inspecting the dash and driver's door sill wiring harnesses for chafing or corrosion.
- If the vehicle displays 'No Remote Detected' and refuses to start, place the key fob in the center console's dedicated backup transmitter pocket to bypass the error and start the engine.
Helpful Videos




The information in this article is provided for general reference and educational purposes only. Vehicle specifications, procedures, and part compatibility can vary by production date, trim level, and region. Always consult your vehicle's factory service manual and verify part numbers before purchasing or performing repairs. Safety-critical components such as airbags, seat belts, and braking systems should be installed by a qualified professional.
- 🎬 Helpful Videos
- What Does B3101 Mean?
- Can I Drive With B3101?
- Common Causes
- Symptoms
- Diagnostic Flowchart
- Common Fixes & Costs
- Used vs. New Parts: Buying Guide
- What Happens If You Wait — Timeline
- Cost of Not Fixing It
- Diagnosis Steps
- When This Code Triggers (Freeze-Frame Conditions)
- Related Codes
- Climate & Environmental Factors
- How to Talk to a Mechanic About This Code
- Where to Take It: Dealer vs Independent vs Chain
- When to Walk Away From the Repair
- What Scan Tool You Need for This Code
- How to Clear the Code After You Fix It
- Will This Fail Emissions / State Inspection?
- Most Commonly Affected Vehicles
- Manufacturer-Specific Notes
- Real Owner Stories
- 2016 GMC Sierra 1500 at 110K miles
- 2017 Chevrolet Silverado 2500HD
- 2016 Chevrolet Cruze at 75K miles
- 2011 Chevrolet Cruze
- How to Prevent This Code From Triggering
- Frequently Asked Questions
- Can I just replace the key fob to fix a B3101 code?
- Why did my StabiliTrak light come on with a key fob code?
- Why did my radio and power windows stop working with the B3101 code?
- My mechanic says the wiring is fine, but the problem is intermittent. What now?
- Can I just clear the code to fix it?
- Is it safe to drive with code B3101?
- How much will it cost to fix code B3101?
- My mechanic wants to replace the BCM. Is that correct?
- Can a weak car battery cause the B3101 code?
- Will disconnecting the battery reset the StabiliTrak light and B3101 code?
- Key Takeaways
- 🎟️ Get 5% Off