

B2605 on 2015-2017 Cadillac Escalade: Right DRL Circuit Fault Causes and Fixes
On a 2015-2017 Escalade, code B2605 indicates a fault in the right Daytime Running Lamp (DRL) circuit. This is almost always caused by a poor Body Control Module (BCM) ground (G218) under the dash where insulation gets trapped, or a chafed wiring harness behind the front bumper. These common issues, not a bad DRL lamp or BCM, often trigger a cascade of other electrical codes.
- B2605 on a 2015-2017 Escalade means there's a problem with the right DRL circuit, not a seat sensor.
- Before buying any parts, first check the BCM ground G218 under the driver's dash for trapped insulation.
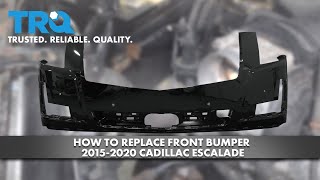
- The second most likely cause is the front wiring harness rubbing against the bumper bar; this requires removing the bumper cover to inspect.
- This code rarely indicates a failed BCM or DRL lamp; it's almost always a wiring or ground issue.
- If you fix a short circuit, you must disconnect the battery for 30 seconds to reset the BCM's protective mode.
What's Unique About the 2015-2017 Cadillac ESCALADE
While B2605 meant 'Seat Position Sensor Failure' on older GM vehicles, on the K2XX platform (which includes the 2015-2017 Escalade, Chevrolet Tahoe/Suburban, GMC Yukon, and 2014-2018 Silverado/Sierra), it is exclusively for the right DRL circuit. This platform is known for two specific electrical weaknesses that trigger this code: a BCM ground point (G218) that can be compromised by trapped dash insulation, and a front fascia wiring harness that is prone to chafing against the metal bumper reinforcement bar. These issues often cause B2605 to appear with a cascade of other seemingly unrelated trouble codes, as documented in TSB PIT5405C.
Diagnostic Flowchart
Tap your situation to follow the diagnostic path that matches what you're seeing on this vehicle.
Symptoms You May Notice
- Right Daytime Running Light (DRL) is not working
- Warning message on the driver information center (DIC)
- Multiple other seemingly unrelated electrical issues may occur simultaneously (e.g., flickering lights, instrument cluster blackouts, power steering faults, radio clock resets).
- Check Engine Light may be on, often accompanied by many other B-codes, C-codes, and U-codes.
- Turn signals may flash rapidly ('hyperflash').
- Alarm may sound unexpectedly or door locks may cycle on their own.
- Replacing the Daytime Running Lamp assembly when the fault is in the wiring or ground.
- Replacing the Body Control Module (BCM) before thoroughly checking the G218 ground and the front fascia harness.
- Replacing the battery without addressing the underlying electrical short or high-resistance ground that may be causing charging system issues.
Most Likely Causes
- Poor Body Control Module (BCM) Ground at G218 🔴 High Probability As documented in GM TSBs PIT5405B and PIT5405C, the front dash insulator mat was often improperly installed at the factory, getting trapped between the G218 ground terminal and the vehicle body. This creates high resistance and is a well-known issue across the entire K2XX platform.
How to confirm: Locate ground G218 under the driver's side of the dashboard, high up and to the left, near the base of the A-pillar and often behind the dash-mounted speaker. After removing the side dash panel, visually inspect if the black dash insulator mat is pinched under the ground's eyelet connector. Check if the 10mm nut is loose.
Typical fix: Disconnect the negative battery terminal. Remove the 10mm nut for the G218 ground. Cut away the interfering insulator mat, clean the contact surfaces of the ground terminal and body stud with a wire brush or sandpaper until shiny, and securely retighten the nut to 9 Nm (80 lb-in).
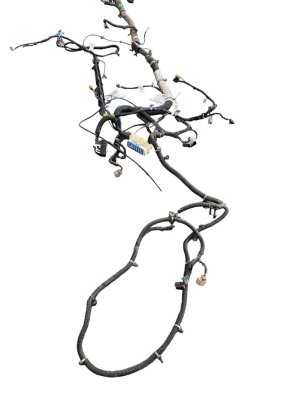
Est. part cost: $0-$5 - Chafed or Shorted Front Fascia Wiring Harness 🟡 Medium Probability The wiring harness that serves the DRLs, park assist, and front cameras is routed in a way that it can rub against the sharp metal edge of the front bumper reinforcement bar, eventually wearing through the insulation and causing a short circuit. This failure point is specifically called out in TSB PIT5487F.
How to confirm: Remove the front bumper cover to gain access to the wiring harness. Carefully inspect the entire length of the harness, paying extremely close attention to the area where it passes the sharp metal edge of the right bumper reinforcement bar. Look for worn insulation, exposed copper wires, black marks from arcing, or previous electrical tape repairs.
Typical fix: Repair the damaged wires using solder and heat shrink tubing or quality butt connectors. Wrap the repaired section in anti-abrasion tape (like Tesa tape) and securely zip-tie the harness away from the sharp edge to prevent future damage. In cases of severe damage, the harness may need to be replaced (e.g., OEM Part #23444884 for 2015-2016 models).
Est. part cost: $5-$25 for repair supplies, or $250+ for a replacement harness. - Blown Fuse ⚪ Low Probability A short circuit in the DRL harness will often blow the corresponding fuse as a protective measure. This is a symptom, not the root cause.
How to confirm: Check the underhood fuse block for blown fuses. Specifically inspect fuses related to lighting, such as F10DL, F19DR, F43UA, and F46DR. If a fuse is blown, a short circuit is confirmed.
Typical fix: Replace the blown fuse AFTER locating and repairing the short circuit. If the fuse is replaced before the short is fixed, it will blow again immediately.
Est. part cost: $1-$10
Rare But Worth Checking
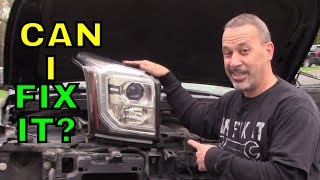
- Faulty Daytime Running Lamp: While possible, the LED DRL assembly on these vehicles is generally reliable. A YouTube video by 'House Doctor Ray' shows a repair for corrosion on the internal DRL circuit board, but circuit fault codes like B2605 point to an external wiring issue far more often than a failed lamp unit.
- Faulty Body Control Module (BCM): This should be the last consideration after all wiring, ground, and fuse issues have been definitively ruled out. The BCM is often mistakenly replaced when the actual problem is a simple wiring or ground fault. A GM bulletin notes that the BCM must be reset by disconnecting the battery for 30 seconds after a short-circuit repair.
Diagnosis Steps
- Scan the vehicle for all Diagnostic Trouble Codes (DTCs). Note if B2605 appears with B2600 or a large number of other U- and C-codes, as this points to a systemic electrical issue like G218.
- Inspect the BCM ground G218. Disconnect the battery. Remove the driver's side dash end cap. Locate G218 under the dash near the A-pillar. Remove the 10mm nut, trim any trapped insulation, clean all contact surfaces to bare metal, and retighten to 9 Nm (80 lb-in).
- Check for blown fuses in the underhood fuse block, particularly F10DL, F19DR, F43UA, and F46DR. If a fuse is blown, a short is present and must be found.
- If fuses and the ground are good, the next step is to inspect the front fascia wiring harness. This requires removing the front bumper cover for full access.
- Carefully examine the harness for any signs of chafing, especially where it routes near the sharp metal edge of the right bumper reinforcement bar.
- If damage is found, repair the wires using solder and heat-shrink tubing. Re-route or wrap the harness with protective conduit or abrasion-resistant tape (e.g., Tesa tape) to prevent future damage.
- If no damage is visible, use a multimeter to test for continuity and shorts to ground in the DRL circuit between the BCM connector and the DRL connector.
- After any repair involving a short circuit, it is necessary to reset the BCM. Disconnect the negative battery terminal for at least 30 seconds, then reconnect it. This allows the BCM's internal protection circuits to reset.
- Clear all DTCs and verify that the right DRL operates correctly and the B2605 code does not return.
Parts You'll Likely Need
- Wiring Repair Supplies — Used to fix chafed or broken wires in the front fascia harness, which is a common cause.
Trusted brands: 3M, Tesa (for anti-abrasion tape)
OEM price range: $10-$25
Aftermarket price range: $5-$15 - Front Bumper Wiring Harness
(OEM #23444884)— In cases of severe damage, the entire front harness may need replacement. This part is officially named 'Front Object Alarm Sensor Wiring Harness' and is listed for 2015-2016 models.
Trusted brands: GM Genuine Parts
OEM price range: $250-$450
Related Codes That Often Appear With This One
- B2600 — This is the code for the Left DRL Control Circuit. If both B2600 and B2605 are present, it strongly indicates a common problem like the G218 ground or the main fascia harness.
- U0073, U0100, U0121, C0544, etc. — A poor BCM ground at G218 can cause a wide range of communication (U-prefix) and chassis (C-prefix) codes to set simultaneously with B2605, as documented in TSB PIT5405C. The presence of codes like U026A, U026B, or U026C strongly suggests the front fascia harness is the culprit, as noted in TSB PIT5487F.
Technical Service Bulletins (TSBs) & Recalls
- PIT5405C: Lists B2605 as a potential code caused by a poor BCM ground at G218. Also lists dozens of other codes that can b
Platform-Specific Known Issues
- TSB PIT5405C directly calls out that a poor BCM ground at G218 can cause a multitude of DTCs, including B2605, due to the dash insulator mat interfering with the connection. The TSB provides a clear image of the trapped insulation.
- TSB PIT5487F identifies the front bumper wiring harness rubbing through on the metal bumper bar, causing shorts that trigger B2605, B2600, and various park assist codes.
- A thread on TahoeYukonForum.com titled '2015 gmc yukon led drl problem' details a user's experience diagnosing a failed DRL, which ultimately required opening the headlight assembly to repair a corroded internal circuit board, though this is less common than the external wiring faults.
Hidden / Shadow Codes Worth Checking
- B2605 01: Right Daytime Running Lamps Control Circuit Short to Battery (see via A professional scan tool like GM GDS2 will display the two-digit symptom byte along with the main DTC.)
- B2605 04: Right Daytime Running Lamps Control Circuit Open (see via A professional scan tool like GM GDS2 will display the two-digit symptom byte along with the main DTC.)
Scan Tool Commands That Help
- GM GDS2 (or equivalent professional scanner): Clear All DTCs / Reset ECU — After repairing a short circuit, the BCM's internal protection for that circuit may remain active (latched) even after the fault is gone. A simple code clear may not be enough. A full BCM reset, often achieved by disconnecting the battery for over 30 seconds or using a specific scan tool function, is required to reset the internal short-circuit counter and restore power to the DRL circuit.
Wiring & Ground Locations
- G218 — Under the driver's side of the dashboard, high up and to the left, near the base of the A-pillar and often behind the dash-mounted speaker.. This is the primary ground for the Body Control Module (BCM). TSB PIT5405C identifies that the dash insulator mat can get trapped here, creating a poor ground and causing B2605 along with dozens of other electrical codes.
- BCM Connector X5, Pin 12 — At the Body Control Module (BCM), which is located behind the driver's side of the dashboard.. This is the specific circuit for the 'Right DRL Control'. A technician would test for voltage and continuity at this pin when diagnosing a persistent B2605 code after checking grounds and the external harness.
- Headlamp Assembly Connector (X130 Right) — The main electrical connector plugging into the back of the right-side headlamp assembly.. This is the endpoint of the DRL circuit. Technicians test here to confirm if power is reaching the lamp assembly and to check for corrosion or damage at the connector itself.
Real Owner Repair Stories
- gm-trucks.com forum user (2015.5 GMC Sierra (K2XX Platform sibling)) — Right DRL not working, B2605 code present.
❌ Tried (didn't work) Replacing the headlamp assembly., Checking fuses.
✅ What actually fixed it The wiring harness behind the front bumper had chafed through on a sharp metal edge near the horn. The user reported the wires were 'rubbed completely through'. Repairing the broken wires and protecting the harness with loom and electrical tape resolved the issue.
OEM Part Supersession History
23444884→84532281— Part consolidation and/or minor design update.
Heads up: Part 23444884 is listed for 2015-2016 models. While the superseding part 84532281 may fit, it's crucial to verify compatibility with a VIN at the time of purchase as minor connector changes can occur between model years.
Helpful Videos
Used OEM Parts in Stock
New Aftermarket Parts Available

The information in this article is provided for general reference and educational purposes only. Vehicle specifications, procedures, and part compatibility can vary by production date, trim level, and region. Always consult your vehicle's factory service manual and verify part numbers before purchasing or performing repairs. Safety-critical components such as airbags, seat belts, and braking systems should be installed by a qualified professional.
- Cadillac ESCALADE:
- 🎬 Helpful Videos
- 🛍️ Shop This Part
- What's Unique About the 2015-2017 Cadillac ESCALADE
- Diagnostic Flowchart
- Symptoms You May Notice
- Most Likely Causes
- Rare But Worth Checking
- Diagnosis Steps
- Parts You'll Likely Need
- Related Codes That Often Appear With This One
- Technical Service Bulletins (TSBs) & Recalls
- Platform-Specific Known Issues
- Hidden / Shadow Codes Worth Checking
- Scan Tool Commands That Help
- Wiring & Ground Locations
- Real Owner Repair Stories
- OEM Part Supersession History
- 🎟️ Get 5% Off