

OBD-II Code B2575: Headlamp Control Circuit Malfunction
What B2575 means, why it triggers, and how to fix it
- Code B2575 indicates an electrical fault in the left headlight control circuit, resulting in a dead low-beam headlight.
- On 2014-2019 GM trucks, improper aftermarket snowplow wiring is the #1 cause, requiring a specific isolation module to fix.
- Inspect the headlight bulb, the plastic connector for melting, and the underhood fuses before replacing the $600+ Body Control Module (BCM).
- Modern vehicles use the BCM instead of a traditional relay to control headlights; you must disconnect the battery for 60 seconds to reset the BCM after a repair.
- Use a bidirectional scan tool to read 2-digit suffix codes (like 02 for short-to-ground) to instantly pinpoint the exact circuit failure.
What Does B2575 Mean?

The trouble code B2575 means your car's computer, specifically the Body Control Module (BCM), detects an electrical problem in the circuit controlling one of your headlights, usually the left low beam. The BCM sends power to turn the light on, but sees a short, an open, or an unexpected voltage reading, so it sets the code and disables that headlight circuit to prevent damage.
Technical definition: The official SAE/ISO definition for B2575 is "Headlamp Control Circuit." The Body Control Module (BCM) sets this code when it detects a short to ground, short to voltage, or an open circuit in the headlamp control circuit. On older vehicles, the BCM sends a ground signal to a relay to activate the lights. On newer vehicles (like 2014+ GM trucks), the BCM acts as a solid-state driver, directly supplying and monitoring voltage and current to the headlight bulb.
Can I Drive With B2575?

Yes, But With Caution. Yes, but only during daylight. Driving at night or in poor visibility with a non-working headlight is illegal in all 50 states and most countries, posing a significant safety risk. It reduces your visibility and causes other drivers to misjudge your vehicle's position or mistake it for a motorcycle. This leads to a "fix-it" ticket with fines ranging from $100 to $250, and in the event of an accident, makes you liable for negligence, impacting insurance claims.
Common Causes

- Improperly Installed Aftermarket Accessories (e.g., Snowplow Lights) (Very Common) — On many trucks, this is the number one cause. Aftermarket lighting systems, especially for snowplows, wired without proper isolation modules interfere with the BCM's sensitive headlight circuit, triggering the code. GM issued multiple technical service bulletins (TSBs), like PIT5412D, specifically addressing this issue.
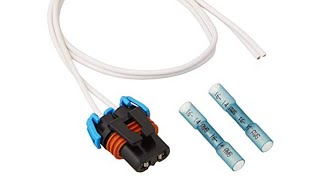
- Damaged or Corroded Headlight Connector/Pigtail (Common) — The plastic connector plugging into the back of the headlight bulb melts, corrodes, or breaks wires from heat and environmental exposure. This creates high resistance or an open circuit the BCM detects as a fault.
- Faulty or Incompatible Aftermarket Headlight Bulb (LED/HID) (Common) — Upgrading to LED or HID bulbs without proper resistors or CANbus decoders triggers this code. The BCM expects specific electrical resistance from a standard halogen bulb; if the new bulb's draw is too low, the BCM interprets it as a burned-out bulb or open circuit.
- Faulty or Corroded Ground Connection (Common) — The headlight circuit requires a clean ground connection to the chassis. A loose, rusted, or corroded ground point (e.g., G106 on a GMC Sierra) creates high resistance, causing flickering, dimming, or a circuit fault code.
- Damaged Wiring Harness (Less Common) — Wires in the headlight harness fray, break, or short to each other or the chassis due to vibration, impact damage, or rubbing against sharp edges. This directly causes the electrical fault detected by the BCM.
- Blown Headlight Fuse (Less Common) — A short circuit in the headlight system blows the corresponding fuse (e.g., F58 or F59 in a Silverado) in the underhood fuse box as a protective measure. The blown fuse is a symptom of a deeper electrical problem requiring diagnosis.
- Faulty Multifunction/Headlight Switch (Less Common) — The steering column or dashboard switch used to turn on the headlights fails internally. If it fails to send the correct 'on' signal, the BCM does not activate the headlight circuit and sets a fault code.
- Faulty Ambient Light Sensor (Rare) — The dashboard ambient light sensor tells the BCM when to turn on the headlights automatically. If this sensor fails, it sends erratic signals to the BCM, leading to lighting faults.
- Faulty Body Control Module (BCM) (Rare) — The BCM itself fails. The internal solid-state driver or relay control operating the headlight circuit burns out due to age, vibration, or voltage spikes from other failed components. Consider this only after exhausting all other possibilities.
Symptoms
- Affected headlight does not turn on — This is the most obvious symptom. The low-beam headlight on the affected side (usually the left) is completely inoperative.
- Headlight flickers or works intermittently — A loose connection, a corroded ground, or a wire starting to break causes the headlight to cut in and out, especially when driving over bumps.
- Headlight stays on and cannot be turned off — In cases of a short to voltage (B2575 01), the headlight circuit receives power constantly, causing the light to stay on and drain the battery.
- Warning message on the instrument cluster — Many vehicles display a "Check Left Low Beam Headlamp" or similar message on the driver information center (DIC) to alert you to the problem.
- Other electrical systems malfunctioning (also visible on scanner) — Since the BCM controls many body functions, a B2575 code caused by a failing BCM is accompanied by strange electrical issues with power windows, door locks, or the radio.
Diagnostic Flowchart
Tap your situation to follow the diagnostic path that matches what you're seeing on this code.
Common Fixes & Costs
- Correct Improper Aftermarket/Snowplow Wiring — Parts: $50-$200, Labor: $150-$600, ~1.5 hr book time (Professional)
- Replace Headlight Connector Pigtail — Parts: $15-$40, Labor: $100-$300, ~1.2 hr book time (Intermediate)
- Replace Headlight Bulb with OEM-Spec Bulb — Parts: $20-$60, Labor: $0-$75, ~0.5 hr book time (DIY)
- Repair Damaged Wiring Harness — Parts: $20-$100, Labor: $250-$800, ~4.5 hr book time (Professional)
- Replace Body Control Module (BCM) — Parts: $400-$700, Labor: $250-$550, ~2.5 hr book time (Professional)
Used vs. New Parts: Buying Guide
When a used part is worth it: A used Body Control Module (BCM) is a cost-effective option if the vehicle is older, has high mileage, and budget is the primary concern. Since BCMs are electronic and not 'wear' items, a used unit from a low-mileage, accident-damaged vehicle is reliable.
Donor-vehicle mileage cap: roughly under 100000 miles for the part to have meaningful remaining life.
Donor quality checklist:
- Verify the part number matches exactly. Different part numbers may have different software or hardware configurations.
- Source from a reputable salvage yard that offers a short-term functional warranty (e.g., 30-90 days).
- Ensure the donor vehicle was not scrapped due to widespread electrical or flood damage.
Decision logic:
- If The vehicle is a newer model and you plan to keep it long-term → Buy a new OEM BCM. This ensures the latest software and a full manufacturer warranty.
- If A new BCM is on backorder or unavailable → A used BCM is a viable alternative to get the vehicle back on the road.
- If The issue is a simple connector or wiring fault → Do not replace the BCM. A used or new BCM will not fix the problem.
Warranty tradeoff: Used BCMs typically come with a 30-90 day warranty. New OEM parts have a 1-year or longer warranty. The main risk with a used BCM is not the part itself, but the critical need for correct programming.
Worst-case if a used part fails: $300-$600. The biggest risk is that many shops cannot or will not program a used BCM. If the used module is faulty or cannot be programmed, you pay for diagnostic and programming labor, then purchase another module.
What Happens If You Wait — Timeline
- Immediate: Code B2575 is set. The left low-beam headlight is disabled by the BCM. A 'Check Left Low Beam' message may appear. Immediate safety risk for night driving. (MPG impact: 0%% · Added cost: $0)
- 0-3 months: Continued operation leads to risk of traffic citations (fines from $100-$370+) and failed safety inspections. If the cause is a poor connection, resistance builds, generating heat. (MPG impact: 0%% · Added cost: $100-$370 in potential fines)
- 3-6 months: If caused by high resistance, the headlight connector can begin to melt and char, damaging the wiring harness pigtail. If caused by a short, repeatedly replacing the fuse can overheat the wiring harness, making it brittle and increasing fire risk. (MPG impact: 0%% · Added cost: $150-$300 (cost to now replace the melted connector and a section of wiring))
- 6+ months: A persistent, unaddressed short circuit or voltage spike can feed back into the Body Control Module (BCM), potentially destroying the internal solid-state driver for that circuit. The BCM itself is now damaged. (MPG impact: 0%% · Added cost: $700-$1500 (cost for BCM replacement and programming, on top of fixing the original wiring fault))
Cost of Not Fixing It
- Immediate: Significantly reduced visibility at night and in poor weather, increasing accident risk. Other drivers misjudge your vehicle's size and position, mistaking it for a motorcycle. (Added cost: $100-$370+)
- 0-3 Months: Risk of receiving a 'fix-it' ticket or a non-moving violation, with fines ranging from $100 to $250 depending on the state. Leads to failing a mandatory state safety inspection. (Added cost: $100-$370+)
- 3+ Months: A persistent short circuit causes wiring to overheat, potentially damaging the Body Control Module (BCM) or creating a fire hazard. If involved in an accident, you face negligence liability, leading to higher insurance costs. (Added cost: $700-$1500+)
Diagnosis Steps

- Scan for Suffix Codes and Other DTCs
Use a professional-grade scan tool to read the full DTC, including suffix codes (e.g., 01, 02, 04). These provide critical clues: '01' for short to voltage, '02' for short to ground, and '04' for open circuit. Check for B2699 (Right Headlamp), pointing to a shared problem.
Tools: Professional Scan Tool (e.g., GM GDS2) (Professional) - Check for Aftermarket Accessories
Visually inspect the front of the vehicle for non-factory wiring, such as a snowplow, light bar, or aftermarket horn. If present, this is the most likely source of the problem on GM trucks. Disconnect the aftermarket module to see if factory headlights start working.
Tools: Flashlight (Beginner) - Inspect the Headlight Bulb and Connector
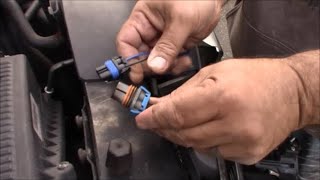
Remove the headlight bulb and check for a broken filament. Examine the electrical connector for melting, charring, green/white corrosion, or backed-out pins. Swap the bulb from the working side to the non-working side; if the problem moves, the bulb is bad.
Tools: Gloves, Trim Removal Tool (Beginner) - Check Headlight Fuses
Locate the underhood fuse box. The lid diagram shows fuses for the left (e.g., F59 on a '15 Silverado) and right low beams. Pull the appropriate fuse and check if it is blown. A blown fuse indicates a short circuit requiring location.
Tools: Fuse Puller or Needle-Nose Pliers (Intermediate) - Test the Circuit at the Connector with a Multimeter
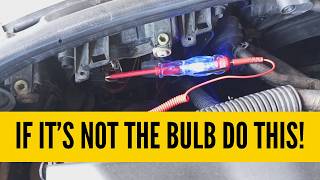
Disconnect the headlight connector. With headlights commanded ON, use a multimeter to check for battery voltage (approx. 12.6V) on the power pin and good continuity to ground on the ground pin. A test lamp should light up when connected between power and ground pins.
Tools: Multimeter, Test Lamp (Intermediate) - Pro Tip: Use Scan Tool for Bidirectional Control
A professional scan tool commands the BCM to turn the headlight on and off directly. If the light works with the scan tool command, the problem lies in the input side (e.g., multifunction switch). If it fails, the fault is in the output circuit (wiring, bulb, or BCM driver).
Tools: Professional Scan Tool (Professional) - Advanced: Test Headlight Bulb Resistance
Set a multimeter to the lowest resistance (Ω) setting. Place probes on the two main electrical terminals of the bulb. A good, cold halogen bulb shows low resistance, typically 1 to 10 ohms. An 'OL' reading indicates a broken filament, causing an open circuit code (B2575 04).
Tools: Multimeter (Advanced) - Advanced: Perform a Voltage Drop Test on the Ground Circuit
Connect the positive multimeter lead to the headlight connector's ground pin and the negative lead to the battery's negative terminal. With the headlight circuit under load (bulb installed and turned on), a good ground shows less than 0.2 volts. Higher readings indicate excessive resistance.
Tools: Multimeter (Advanced) - Trace Wiring and Check Grounds
If voltage or ground is missing, trace the wiring harness back from the headlight. Look for visible damage, chafing, or breaks. Locate the main ground point (e.g., G101/G102 on a Malibu, G106 on a Sierra) and ensure it is clean, tight, and rust-free.
Tools: Multimeter, Wrenches, Wire Brush (Advanced) - Advanced: Check BCM Live Data PIDs
Using a professional scan tool, monitor the Body Control Module's live data. Observe the BCM's operating voltage and headlamp switch input status. BCM voltage must be stable and within the manufacturer's specified range, typically 9.0 to 16.0 volts.
Tools: Professional Scan Tool (Advanced)
When This Code Triggers (Freeze-Frame Conditions)
- BCM Voltage: 9.0-16.0V (The BCM sets the code when its operating voltage is within the normal range, but the feedback from the headlight circuit is unexpected.)
- Headlight Switch Status: On/Commanded On (The code typically sets at the moment the BCM attempts to energize the headlight circuit (e.g., when the driver turns the switch to 'ON' or the ambient light sensor triggers the automatic lights).)
- Circuit Fault Type: Open, Short to Ground, or Short to Voltage (The specific fault condition (open, short) is detected instantly when the BCM performs a circuit integrity check upon commanding the light on or off.)
- Ignition Status: Run (The diagnostic runs when the ignition is on and the BCM is active. The fault can be detected without the engine running, as long as the ignition is in the 'Run' position.)
Related Codes
- B2699 — This is the identical code but for the Right Headlamp Control Circuit. B2575 always refers to the left (driver's side in North America) and B2699 to the right (passenger's side). If both codes appear together, the fault is likely in a component common to both, such as an aftermarket lighting module (like a snowplow controller), the headlight switch, or the BCM itself.
- B2575 + Suffix (01, 02, 04) — These are manufacturer-specific suffix codes that a professional scan tool can read to pinpoint the fault. To tell them apart: '01' (Short to Voltage) usually means the headlight stays on constantly. '02' (Short to Ground) often results in a blown fuse and an inoperative light. '04' (Open Circuit) means the light is off because of a break in the wiring, a bad bulb, or a loose connection.
- B-Series Body Codes — Other B-codes related to lighting, such as B1001 (Option Configuration Error) or B1325 (Device Power Circuit Voltage Out of Range), can appear alongside B2575. If these are present, it may suggest a wider BCM configuration or power supply issue rather than an isolated headlight circuit fault.
- U-Series Codes (e.g., U0140) — Communication codes (U-codes) indicate a loss of communication between modules. To tell them apart, B2575 points to a problem in a specific output circuit of the BCM. A code like U0140 (Lost Communication With Body Control Module) indicates a more severe problem where the entire BCM is offline or failing. If you have a U-code along with B2575, the BCM itself or its main power/ground connections are the primary suspects.
Climate & Environmental Factors
- Road Salt / Coastal Air: Vehicles operated in the 'Snow Belt' or coastal regions are significantly more susceptible to B2575. Saltwater acts as an electrolyte, drastically accelerating corrosion of wiring, connector pins, and chassis ground points. This corrosion creates high resistance or open circuits.
- High Humidity / Water Intrusion: High humidity and moisture penetrate non-sealed connectors or seep into compromised wire insulation. This moisture leads to corrosion and short circuits over time. On some vehicles, water leaks from the cowl drip onto fuse blocks or modules, causing widespread electrical issues.
How to Talk to a Mechanic About This Code
Say this: "I have a B2575 code for the left headlamp circuit and the light is out. I'd like to schedule a diagnostic. Please start by inspecting the bulb, connector, and grounds. If the vehicle is a GM truck, please also check for aftermarket wiring near the front, as per TSB PIT5412D. Please do not recommend a BCM replacement without first proving the wiring and components are good."
This signals you've done your research and understand common causes. It directs the technician to follow a logical, cost-effective diagnostic path, starting with the most likely and cheapest failures before jumping to an expensive BCM replacement. Mentioning the TSB for GM trucks shows specific knowledge.
Avoid saying:
- 'My headlight is out, can you fix it?' (too vague, invites a quick but possibly incorrect fix)
- 'Just replace whatever is broken.' (gives the shop a blank check)
- 'I think I need a new computer.' (can lead them to replace an expensive part without proper diagnosis)
Questions to ask before authorizing the repair:
- What specific tests did you perform to isolate the failure? (e.g., 'Did you do a voltage drop test on the ground circuit?')
- If you are recommending a wiring repair, can you show me the damaged section?
- If you are recommending a BCM replacement, what tests did you do to confirm the BCM is faulty and not the wiring to it?
- Is the quoted price for the complete repair, including any necessary programming?
- What is the warranty on the parts and labor for this specific repair?
Where to Take It: Dealer vs Independent vs Chain
- Dealer:
Recommended only if you've confirmed the BCM needs replacement and programming, or if the vehicle is under warranty. Otherwise, an independent specialist is likely more cost-effective.
Best for: Vehicles under warranty, Confirmed BCM failure requiring brand-specific programming (e.g., Ford FJDS, GM GDS2)., Recalls or TSBs directly related to the issue.
Downsides: Higher labor rates and parts costs., May be quicker to replace a whole assembly (like a wiring harness) rather than repair a single wire. (Typical cost: +50% vs. baseline) - Independent Shop:
Best fit for most B2575 scenarios. A good independent shop with strong electrical skills can efficiently diagnose and repair common causes like bad connectors, grounds, or aftermarket wiring issues, saving you money compared to a dealer.
Best for: Out-of-warranty vehicles., Diagnosing complex electrical and wiring issues., Vehicles with aftermarket accessories (like snowplows) causing the problem.
Downsides: Quality and expertise vary greatly; look for shops specializing in electrical diagnostics., May not have the expensive, dealer-level tools to program a new BCM if one is needed. (Typical cost: +0% vs. baseline) - Chain Shop:
AVOID for diagnosing B2575. While they might be able to change the bulb, they are generally not equipped for the circuit testing, wiring repair, or module-level diagnostics this code requires.
Best for: Simple bulb replacement if access is easy.
Downsides: Technicians may lack the advanced electrical diagnostic training and tools (like bidirectional scanners) needed for this code., High pressure to sell parts can lead to misdiagnosis, like selling a BCM when only a connector is needed. (Typical cost: -10% vs. baseline)
When to Walk Away From the Repair
If the estimated repair cost for the B2575 fault exceeds 40-50% of the car's private-party value, pause and consider your options. This is especially true if the car is older or has high mileage.
- Car worth $4000, fix is $2000: Walk away. The repair cost is 50% of the car's value. It's not worth investing this much into an older vehicle for a headlight issue.
- Car worth $15000, fix is $1200: Fix it. The repair cost is only 8% of the vehicle's value, which is well below the threshold. Fixing it restores safety and value.
- Car worth $3000, fix is $800: Borderline. The cost is ~27% of the value. Get a second opinion. If the fix is a guaranteed, one-time repair (like a wiring harness section) it might be worth it. If it's a speculative BCM replacement, it's riskier.
What Scan Tool You Need for This Code
Minimum: A scanner that can read Body Control Module (BCM) codes. A basic engine-only OBD-II reader will not see B-series codes like B2575.
A cheap $20 scanner will likely show 'No Codes' because it only communicates with the engine control module (ECM). You need a tool that can access the BCM to even know this code is present. For proper diagnosis, you need to read the manufacturer-specific suffix codes (01, 02, 04) and have bidirectional control to command the headlight on and off.
Budget: BlueDriver Pro (~$100) — Can read and clear BCM codes like B2575 on many vehicles, which is a step above basic readers. However, it lacks the critical bidirectional control needed to command the headlight circuit for testing. It's good for confirming the code exists but not for diagnosing it.
Mid-range: Foxwell NT710 / NT809 (~$259) — This is the sweet spot for a serious DIYer. These tools offer bidirectional control, allowing you to command the BCM to turn the headlight on/off from the scanner. This is essential for determining if the fault is in the control wiring or the output circuit. It can also read suffix codes.
Professional: Autel MaxiCOM MK906BT / MaxiSys MS906BT (~$900-1200) — Provides full professional capabilities. In addition to deep bidirectional control and reading all module codes, these tools can perform BCM programming and configuration. This is mandatory if the BCM itself needs to be replaced, as a new module will not work until it is programmed to the vehicle's VIN.
Rent vs buy: For B2575, the free rental tools from stores like AutoZone are unlikely to have the BCM and bidirectional functions needed. If you are only confirming the code, a budget pick is fine. If you intend to diagnose the wiring issue yourself, you must buy a mid-range bidirectional tool. If the BCM is the confirmed failure, the repair is best left to a professional with a pro-level tool.
How to Clear the Code After You Fix It
- Fix the underlying electrical fault (e.g., replace connector, repair wire).
- On modern GM vehicles, perform a 'hard reset' by disconnecting the negative battery cable for at least 60 seconds to reset the BCM's internal protection.
- Reconnect the battery and use an OBD-II scan tool to clear any stored Diagnostic Trouble Codes (DTCs).
- Turn the headlights on and off several times to verify the repair and ensure the code does not return.
Drive cycle (~15 minutes): A specific drive cycle is not typically required for this body code. The BCM will re-evaluate the circuit as soon as the headlights are commanded on again. A history code will typically clear after 100 consecutive ignition cycles without a fault.
Readiness monitors affected: This is a body control module code and does not directly affect powertrain emissions readiness monitors like the Catalyst or O2 sensor monitors.
Watch out for:
- Forgetting to perform a hard reset on GM vehicles; the BCM's protective circuit will remain active, and the light will not work even though the wiring is fixed.
- Simply clearing the code with a scanner without fixing the root cause; the code will return immediately upon the next headlight activation.
- Assuming the BCM is bad when the fault lies in the wiring or a connector.
Will This Fail Emissions / State Inspection?
No — by itself this code doesn't fail OBD inspection (but it can keep readiness monitors from setting, which causes a separate fail).
- California: While B2575 is a body code and passes the OBD-II emissions smog check, an inoperative headlight causes a failure of the concurrent visual/functional safety inspection. A ticket for a broken headlight costs up to $238.
- New York: New York requires an annual safety inspection explicitly checking all required lights, including headlights. An inoperative headlight due to a B2575 fault results in an automatic inspection failure.
- Texas: As of 2025, safety inspections are phased out for non-commercial vehicles in many counties. However, an inoperative headlight remains a traffic law violation. In counties still requiring inspections, a non-functional headlight is a failure reason.
Most Commonly Affected Vehicles
- GMC Sierra 1500/2500/3500 (2014-2019) — Extremely common due to the BCM's sensitivity to aftermarket snowplow lighting, as documented in GM TSB PIT5412D. The left headlamp ground is G106 on the front center of the frame cross rail.
- Chevrolet Silverado 1500/2500/3500 (2014-2019) — Shares the same platform and electrical architecture as the GMC Sierra, making it equally prone to B2575 from snowplow wiring. The left low-beam fuse is F59 ('14-'17) or F58 ('18-'19) in the underhood block.
- Ford F-150 (2015-2020) — Can experience this code due to BCM-controlled lighting. Issues are often traced to wiring faults or, less commonly, the BCM itself, which requires dealer programming (using FJDS software) upon replacement.
- Buick LaCrosse (2010-2016) — These models can set B2575 with suffixes 01, 02, or 04. Diagnosis often involves checking the underhood fuse block and testing the circuit directly from the BCM connector X1.
- Chevrolet Equinox (2008-2012) — On these models, the low beam relay is often soldered directly onto the underhood fuse block's PCB. A simple relay failure becomes a more complex repair requiring replacement of the entire fuse block assembly.
- Chevrolet Malibu (2009-2012) — Issues are often traced to the plug-in low beam relay in the underhood fuse block or the multifunction switch wiring sending the 'on' signal to the BCM. Grounds G101 (left) and G102 (right) are common fault points.
- SAAB 9-3 / 9-5 (2010-2011) — These vehicles can set B2575 with an 'Open Circuit' suffix (B2575 04) simply from a burned-out bulb or an internal fault within the headlamp assembly itself, which is a unique diagnostic behavior.
- Jeep/Chrysler Grand Cherokee, Pacifica (2017-2021) — While the code definition is the same, issues on these vehicles are frequently linked to faulty aftermarket LED bulb installations that cause the BCM to shut down the circuit.
- Hyundai Various (2010-2016) — On some Hyundai models, B2575 may be defined differently, such as 'Left Park Lamp Short to Ground', indicating a fault in the parking light circuit rather than the low beam. Always verify the code definition with a model-specific resource.
Manufacturer-Specific Notes
- General Motors (Chevrolet/GMC): On 2014+ trucks, the BCM acts as a solid-state relay. After a repair (like fixing a short), the BCM may keep the circuit disabled for protection. You must disconnect the battery for at least 60 seconds to perform a 'hard reset' on the BCM and restore power to the headlight circuit. GM has issued TSB PIT5412D and GM Upfitter Bulletin #116 to address B2575 caused by snowplow installations; this is a diagnostic guide, not a recall.
- SAAB: On some SAAB models, the system is designed to set an open circuit code (B2575 04) if the headlight bulb itself is simply burned out, which is not typical for all manufacturers.
- Chevrolet (Equinox/Malibu): On certain models like the 2008-2012 Equinox, the headlight relay is not a serviceable plug-in component. It is soldered directly to the circuit board inside the underhood fuse block. A failed relay requires the entire fuse block to be replaced.
- Ford: When replacing a BCM on modern Ford vehicles like the F-150, it is not a plug-and-play part. The new module must be programmed using the Ford Diagnostic & Repair System (FJDS) to configure it to the vehicle's specific options and security parameters. Failure to program the new BCM will result in multiple features not working.
Real Owner Stories
2017 Chevy Silverado 2500 with a new snowplow
Owner had a Fisher snowplow installed by a third-party shop. Immediately after, the left factory headlight stopped working and the B2575 code appeared, sometimes with B2699 (right headlight).
Outcome: After consulting GM TSB PIT5412D, the owner learned the issue was the plow's lighting module. The fix was to install the correct 'soft-start' isolation harness from Fisher (p/n 29760-2). This resolved the code and made the headlights function correctly.
Lesson: On 2014+ GM trucks, if B2575 appears after a snowplow install, the cause is almost certainly the aftermarket wiring. Do not replace the BCM; consult GM Upfitter Bulletin #116 and install the plow manufacturer's specific isolation module.
2015 Chevy Equinox with ~100k miles
The driver's side low-beam headlight would work intermittently and then failed completely, triggering code B2575. The owner noticed a faint burning smell near the headlight assembly.
Outcome: The owner found online forums describing a common issue with melting connectors. Upon closer inspection, their original connector was charred and melted. They replaced the connector pigtail (splicing in a new one), which fixed the problem for a few months before it melted again. The ultimate fix required ensuring a high-quality ceramic pigtail was used and applying dielectric grease to prevent moisture and resistance buildup.
Lesson: A melted connector is a very common cause. Don't immediately accept a BCM replacement diagnosis. Inspect the connector for heat damage. When replacing it, use a high-quality ceramic pigtail and dielectric grease to prevent a recurrence.
2011 Saab 9-5 with Xenon headlights
The left low-beam headlight went out, and a 'Headlamp Malfunction' message appeared on the dash along with code B2575 04 (Open Circuit).
Outcome: Following a Saab-specific diagnostic procedure, they were instructed to inspect the bulb itself for an open. It turned out the Xenon bulb had simply burned out. On this specific platform, a burned-out bulb is designed to register as an open circuit fault. Replacing the bulb cleared the code.
Lesson: The meaning of a code can have manufacturer-specific quirks. For some modern cars like Saab, a B2575 04 'Open Circuit' code can be triggered by something as simple as a burned-out bulb, so always check the easiest component first.
2012 Ford Focus after DIY LED upgrade
Owner installed aftermarket LED bulbs to replace the stock halogens. The new lights would turn on for a second and then shut off, eventually triggering a B2575 code and a BCM-related fault.
Outcome: The owner had to source a replacement BCM. They learned that the new BCM was not plug-and-play and required expensive programming by a dealer or specialist to make the car's features (including lights, locks, etc.) work again.
Lesson: Installing aftermarket LED/HID bulbs without the correct CANbus decoder or resistor can trigger this code because the BCM detects the wrong electrical load. Attempting to force it to work by modifying the wiring can easily damage the BCM, turning a simple issue into a $1000+ repair.
How to Prevent This Code From Triggering
- Apply Dielectric Grease to Connectors (Whenever a bulb is replaced or connector is serviced) — Dielectric grease is a non-conductive, silicone-based compound that seals electrical connectors from moisture, dirt, and salt. This prevents corrosion and high resistance, which is a primary cause of melted connectors and open circuits.
- Ensure Proper Installation of Aftermarket Accessories (During installation of any electrical accessory (plow, light bar, etc.)) — Always use vehicle-specific, high-quality wiring harnesses and isolation modules (e.g., per GM Upfitter Bulletin #116). Splicing directly into sensitive BCM-controlled circuits without proper isolation overloads the drivers and is the #1 cause of B2575 on work trucks.
- Periodically Clean Chassis Ground Points (Every 30,000 miles or during major service, especially in salt-belt states) — Headlight circuits rely on a clean connection to the vehicle's chassis for a ground path. Removing, wire-brushing, and re-securing main ground points (like G106 on a Sierra) prevents high resistance from rust and corrosion, which causes flickering, dimming, and circuit codes.
- Use Only OEM-Specification Bulbs (When replacing headlight bulbs) — Modern BCMs monitor the expected current draw and resistance of the bulb. Using cheap, incorrect-wattage bulbs or incompatible LED/HID bulbs can cause the BCM to misinterpret the load as a fault, triggering a code and disabling the circuit.
- Protect Headlight Assembly from Damage (Daily habit) — A cracked or broken headlight housing allows moisture and dust to enter, which can corrode the bulb socket, reflector, and internal wiring, leading to shorts or open circuits. Avoid high-pressure washing directly at the headlight seals.
Frequently Asked Questions
Can I just replace the headlight relay for a B2575 code?
On many modern vehicles, especially GM trucks from 2014 onward, there is no separate, plug-in relay for the headlights. The function is integrated into the Body Control Module (BCM), so there is no relay to swap. On older vehicles using a relay, it may be soldered into the fuse block, requiring replacement of the entire block.
I fixed the broken wire, but the light still won't turn on. What's next?
On many GM vehicles, the BCM disables the headlight circuit as a protective measure when it detects a fault. After performing the repair, you must perform a 'hard reset' by disconnecting the negative battery terminal for at least 60 seconds to allow the BCM to re-enable the circuit. Then, clear the codes with a scan tool.
What is the most common misdiagnosis for B2575?
The most common mistake is immediately assuming the Body Control Module (BCM) is bad and replacing it. The BCM is expensive and rarely the root cause. Technicians must rule out simpler failures first—especially improper aftermarket wiring on trucks—before condemning the BCM.
Why is it a bad idea to just keep replacing the fuse if it blows?
A fuse is a safety device designed to be the weak link protecting more expensive components. If the headlight circuit fuse repeatedly blows, it indicates an underlying short circuit. Continuously replacing the fuse without fixing the short overheats the wiring, damages the BCM, and creates a fire hazard.
Is it expensive to fix code B2575?
The cost varies widely based on the root cause. A simple fix like replacing a melted connector pigtail costs $150-$300, while a more involved wiring harness repair runs $300-$800. If the Body Control Module requires replacement, the cost exceeds $1000 after parts, labor, and mandatory dealer programming.
Why did this code appear after I installed a snowplow?
This is the most common trigger for B2575 on GM trucks. The sensitive Body Control Module detects improper voltage or resistance from the aftermarket plow's lighting module. The plow wiring must be corrected using a specific isolation module compatible with your truck's electrical system, per GM Upfitter Bulletin #116.
Can a bad bulb cause a B2575 code?
Yes. While a simple burnout won't always set a code on older cars, modern vehicles with sensitive BCMs detect a burned-out halogen bulb as an open circuit, triggering B2575 04. Installing an incompatible LED bulb with the wrong resistance also causes the BCM to set this code.
Key Takeaways
- Code B2575 indicates an electrical fault in the left headlight control circuit, resulting in a dead low-beam headlight.
- On 2014-2019 GM trucks, improper aftermarket snowplow wiring is the #1 cause, requiring a specific isolation module to fix.
- Inspect the headlight bulb, the plastic connector for melting, and the underhood fuses before replacing the $600+ Body Control Module (BCM).
- Modern vehicles use the BCM instead of a traditional relay to control headlights; you must disconnect the battery for 60 seconds to reset the BCM after a repair.
- Use a bidirectional scan tool to read 2-digit suffix codes (like 02 for short-to-ground) to instantly pinpoint the exact circuit failure.
Helpful Videos


The information in this article is provided for general reference and educational purposes only. Vehicle specifications, procedures, and part compatibility can vary by production date, trim level, and region. Always consult your vehicle's factory service manual and verify part numbers before purchasing or performing repairs. Safety-critical components such as airbags, seat belts, and braking systems should be installed by a qualified professional.
- 🎬 Helpful Videos
- What Does B2575 Mean?
- Can I Drive With B2575?
- Common Causes
- Symptoms
- Diagnostic Flowchart
- Common Fixes & Costs
- Used vs. New Parts: Buying Guide
- What Happens If You Wait — Timeline
- Cost of Not Fixing It
- Diagnosis Steps
- When This Code Triggers (Freeze-Frame Conditions)
- Related Codes
- Climate & Environmental Factors
- How to Talk to a Mechanic About This Code
- Where to Take It: Dealer vs Independent vs Chain
- When to Walk Away From the Repair
- What Scan Tool You Need for This Code
- How to Clear the Code After You Fix It
- Will This Fail Emissions / State Inspection?
- Most Commonly Affected Vehicles
- Manufacturer-Specific Notes
- Real Owner Stories
- 2017 Chevy Silverado 2500 with a new snowplow
- 2015 Chevy Equinox with ~100k miles
- 2011 Saab 9-5 with Xenon headlights
- 2012 Ford Focus after DIY LED upgrade
- How to Prevent This Code From Triggering
- Frequently Asked Questions
- Can I just replace the headlight relay for a B2575 code?
- I fixed the broken wire, but the light still won't turn on. What's next?
- What is the most common misdiagnosis for B2575?
- Why is it a bad idea to just keep replacing the fuse if it blows?
- Is it expensive to fix code B2575?
- Why did this code appear after I installed a snowplow?
- Can a bad bulb cause a B2575 code?
- Key Takeaways
- 🎟️ Get 5% Off