

B2470 on 2014-2018 Chevrolet Silverado 1500: OnStar & GPS Antenna Fault Fixes
On a 2014-2018 Silverado 1500, code B2470 almost always means the roof-mounted 'shark fin' antenna has failed due to a water leak. The antenna's base gasket fails, allowing water to corrode the internal electronics. Replacing the antenna assembly is the standard fix, costing around $70-$150 for the part and is a common DIY repair. Applying automotive seam sealer to the new gasket is a critical step to prevent recurrence.
- B2470 on a 2014-2018 Silverado almost always points to a failed 'shark fin' roof antenna due to a water leak from a bad gasket.
- Symptoms are consistent: red OnStar light, no GPS, and no satellite radio.
- The official GM-recommended fix (TSB 17-NA-214) is to replace the antenna and apply a bead of automotive seam sealer to the new gasket to prevent a repeat failure.
- This is a very common DIY repair that can be completed in 1-2 hours with basic tools.
What's Unique About the 2014-2018 Chevrolet SILVERADO 1500
The K2XX platform, which includes the 2014-2018 Silverado and its platform mates, is known for this specific issue. Multiple GM Technical Service Bulletins (TSBs) confirm that the original roof antenna's base gasket was prone to failure, allowing water to leak into the vehicle. This water intrusion corrodes the antenna's internal circuit board, causing the B2470 code and related communication failures. The problem was so common that GM issued revised parts and repair procedures. Some owners who have dissected failed units note the original design had a drain hole that could trap water, while newer parts have it relocated to the bottom for better drainage.
Diagnostic Flowchart
Tap your situation to follow the diagnostic path that matches what you're seeing on this vehicle.
Symptoms You May Notice
- Red LED light on the OnStar keypad/mirror.
- OnStar system is inoperative or unable to connect.
- GPS shows inaccurate location or 'No Signal'.
- SiriusXM satellite radio has 'No Signal' or poor reception.
- Visible water stains on the headliner near the overhead console, sun visors, or A-pillars.
- Weak or dead battery due to water leaking down the A-pillar and corroding the left-hand Instrument Panel fuse block (BEC).
- Musty or sour smell inside the cab from a hidden water leak.
- Replacing the radio head unit. The radio is usually not the cause, as the signal processing for OnStar, GPS, and XM is handled by the VCIM and the antenna itself.
- Assuming a headliner leak is from the third brake light. While possible, the shark fin antenna is a far more common source of water leaks on this platform.
Most Likely Causes
- Failed Roof 'Shark Fin' Antenna Assembly 🔴 High Probability As documented in TSB #17-NA-214, the antenna's base seal is prone to failure, allowing water to leak in and corrode the internal electronics. The cause can be water migrating into the antenna housing itself or leaking past the base seal into the vehicle. The original design was flawed, while newer parts aim to improve sealing and drainage.
How to confirm: Inspect the headliner for water stains near the overhead console; this is the most definitive sign. The presence of codes B2462 (GPS Antenna) and B125C (XM Antenna) alongside B2470 points directly to the multi-function antenna assembly failure. After removal, the antenna's electrical connectors will often show visible green or white corrosion.
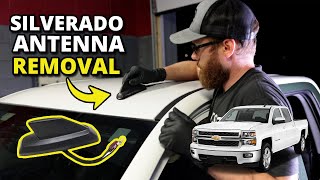
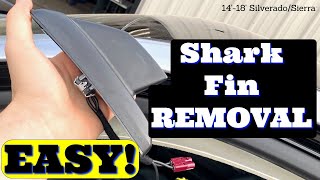
Typical fix: Replace the entire roof antenna assembly. TSB #17-NA-214 explicitly recommends applying a continuous 4-5mm bead of automotive seam sealer (like Kent High-Tech Clear Seam Sealer, P/N P10200) to the new antenna's gasket during installation to prevent future leaks. This is a very common DIY repair. 🎬 Watch: Step-by-step guide to removing the shark fin antenna.
Est. part cost: $70-$150 - Damaged Antenna Coaxial Cable ⚪ Low Probability If a water leak from the antenna base has been present for a long time, the water can run down the cable and cause corrosion in the wiring or connectors under the headliner.
How to confirm: After removing the antenna, inspect the vehicle-side electrical connectors for green or white crusty buildup. Test the cable for continuity from the antenna connection point to the VCIM using a multimeter. GM offers coaxial cable repair kits to avoid replacing the entire harness.
Typical fix: If the cable ends are corroded, they may be cleanable. If the cable itself is damaged, it will need to be repaired or replaced, which is more labor-intensive than just the antenna.
Est. part cost: $50-$100 - Faulty Vehicle Communication Interface Module (VCIM) ⚪ Low Probability
How to confirm: This should only be considered after the antenna and its wiring have been replaced or tested and confirmed to be in good condition. A GM-specific scan tool would be needed to perform advanced diagnostics on the module. A dealership may use a known-good test antenna (like the EL-49903) to quickly isolate the fault to the VCIM.
Typical fix: Replace the VCIM. This requires programming by a dealer or qualified shop with access to GM's software.
Est. part cost: $200-$400
Diagnosis Steps
- Confirm the presence of code B2470 using a scanner capable of reading Body (B) codes. Note if it is an open circuit (-04) or short to ground (-02) variant.
- Verify symptoms: check for a red OnStar light and test GPS and XM radio functionality.
- Carefully inspect the headliner around the overhead console and sun visors for water stains or dampness. This is the most telling sign of the common failure.
- If water stains are present, proceed with replacing the roof antenna assembly.
- If no water stains are visible, you will still need to partially lower the headliner to access the antenna. This typically involves removing the passenger sun visor (T15 Torx), A-pillar handle (often 8mm or 10mm bolts), and overhead console.
- Locate the single 10mm nut securing the antenna to the roof. A stubby or ratcheting wrench is helpful here. 🎬 Watch this walkthrough for accessing and removing the antenna nut.
- Disconnect the antenna's electrical connectors and inspect both the antenna side and the vehicle harness side for any signs of corrosion (green or white powder).
- If connectors are clean, and you want to be certain, test the coaxial cable for continuity and shorts to ground using a multimeter.
- If the antenna and wiring test good, the final step would be to suspect a faulty VCIM, which typically requires professional diagnosis.
Parts You'll Likely Need
- High Frequency Antenna Assembly
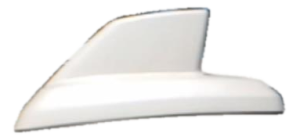
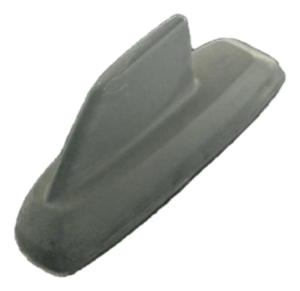
(OEM #84346801)— This is the complete 'shark fin' unit that fails due to internal water damage from a bad gasket. Replacing the entire assembly is the standard, TSB-recommended repair. This part number is for black and supersedes 23196170, 23258459, 23444526, and 84081915. Other part numbers exist for different factory colors.
Trusted brands: ACDelco, Dorman
OEM price range: $100-$180
Aftermarket price range: $60-$120 - Automotive Seam Sealer
(OEM #Kent High-Tech Clear Seam Sealer P10200)— TSB 17-NA-214 specifically recommends applying a 4-5mm bead of this sealer to the new antenna's gasket to prevent repeat failures. This is considered a critical step for a long-term repair. To order, contact Kent Automotive at 1-888-937-5368.
Trusted brands: Kent Automotive, Evercoat, SEM
OEM price range: $25-$40
Aftermarket price range: $20-$35
Related Codes That Often Appear With This One
- B2462 — This code is for a GPS Antenna fault. Since the GPS and cellular antennas are in the same 'shark fin' housing, they often fail together due to the same water intrusion issue.
- B125C — This code is for a Satellite Radio Antenna fault. Like the GPS antenna, the XM antenna is also part of the same roof assembly and fails for the same reason.
Technical Service Bulletins (TSBs) & Recalls
- 17-NA-214: Details the link between B2470, antenna malfunction, and water leaks on the headliner for 2015-2018 models. Recommends antenna replacement and applying a 4-5mm bead of Kent seam sealer to the new part.
- PIC6024: Describes the symptom of failing to connect to OnStar with a red LED and DTC B2470-04 set in the VCIM.
- PIT5362B: An earlier bulletin for early-build 2015 models that recommends replacing the antenna with the latest part number to fix B2470 and inaccurate GPS.
Platform-Specific Known Issues
- TSB #17-NA-214 (Feb 2018) is the primary document for this issue on 2015-2018 models. It links customer concerns of OnStar/XM/GPS malfunction (DTCs B2470, B2462, B125C) to water leaks on the headliner and potential battery drain. It identifies the cause as water migrating into the antenna or leaking past its base.
- TSB #PIC6024 notes that vehicles may not connect to OnStar and set DTC B2470-04 in the Vehicle Communication Interface Module, accompanied by a red LED on the keypad.
- TSB #PIT5362B (June 2015) addresses the same issue on early-build 2015 models, recommending replacement with the latest part number. It specifically mentions water intrusion into the body of the antenna assembly. Unlike the later TSB, it advises *not* to use any sealant on the replacement part, a recommendation that was superseded by TSB 17-NA-214.
- In severe cases, the water leak from the antenna can travel down the A-pillar and cause corrosion in the left-hand Instrument Panel fuse block (BEC), leading to a battery drain or other widespread electrical problems. TSB 17-NA-214 advises technicians to inspect the fuse block for corrosion if a battery drain is reported with this leak.
Mechanic-Grade Diagnostic Values
- Antenna Coaxial Cable End-to-End Resistance — expected: Less than 5.0 Ohms. Failure: A reading higher than 5.0 Ohms indicates excessive resistance or an open in the cable. Test both the center pin and the outer shield separately.
- Antenna Coaxial Cable Resistance (Center Pin to Outer Shield) — expected: Infinite Resistance (Open Line / OL). Failure: Any resistance reading less than infinite indicates an internal short circuit within the coaxial cable.
- Antenna Coaxial Cable Resistance to Ground — expected: Infinite Resistance (Open Line / OL). Failure: Any resistance reading less than infinite indicates the cable is shorted to ground. Test both the center pin and outer shield to a known good chassis ground.
- Antenna Coaxial Cable Voltage to Ground — expected: Less than 1.0 Volt. Failure: Voltage greater than 1.0 V on either the center pin or outer shield may indicate a short to a power source.
Hidden / Shadow Codes Worth Checking
- B2470 04: Cellular Phone Antenna Circuit Open. This is the most common variant, set when the VCIM does not detect the presence of the cellular antenna, indicating a break in the circuit. (see via A professional scan tool, such as GM's GDS2 (Global Diagnostic System 2), is required to read body module codes and their specific symptom bytes.)
- B2470 02: Cellular Phone Antenna Circuit Short to Ground. This indicates the VCIM has detected that the antenna circuit is shorted to a ground source. (see via A professional scan tool, such as GM's GDS2, is required to read these specific symptom codes.)
Scan Tool Commands That Help
- GM GDS2 / Tech2Win: Module Diagnostics > VCIM > DTC Display — Use this to view the specific symptom byte (e.g., 02 or 04) associated with B2470, which helps confirm whether the fault is an open circuit or a short to ground.
- GM GDS2 / Tech2Win: Clear DTCs — After replacing the antenna or repairing the circuit, this command is used to clear the fault code from the VCIM's memory. The code may also clear on its own after 50 malfunction-free ignition cycles.
- EL-49903 GM OnStar Antenna Diagnostic Tool Kit: Known-Good Antenna Test — This special tool is a test antenna. If the B2470 code clears and OnStar functions correctly with this tool connected directly to the VCIM, it proves the vehicle's original antenna or coaxial cable is faulty. If the code persists, the VCIM itself is likely the problem.
Wiring & Ground Locations
- VCIM (Vehicle Communication Interface Module) — Located behind the glove box assembly. The antenna coaxial cable runs from the roof, down the passenger A-pillar, and connects to this module.. This module is what sets code B2470. All diagnostic tests of the antenna circuit begin or end at the connectors on this module.
- G201 — In the upper left corner of the instrument panel, on the metal support structure behind the plastic dash trim near the A-pillar.. This is a primary instrument panel ground. While not exclusive to the VCIM, a poor connection at this location can cause a variety of unpredictable electrical issues with modules in the dashboard area.
Real Owner Repair Stories
- YouTube channel 'TruckNerd' (GMC Yukon (K2XX Platform mate to the Silverado)) — Red light on the OnStar mirror, GPS not working, XM radio not working, and a visible water stain on the headliner near the A-pillar.
❌ Tried (didn't work) The owner directly identified the antenna as the likely cause based on the common symptoms and TSBs, bypassing other diagnostic steps.
✅ What actually fixed it The complete replacement of the roof-mounted 'shark fin' antenna assembly. The video shows the corroded internals of the old part and highlights the improved design of the new part, where the drain hole is moved from the top/rear to the bottom/front to prevent water from being trapped. The repair included applying a bead of sealant to the new antenna's gasket as per TSB 17-NA-214.
OEM Part Supersession History
23196170, 23258459, 23444526, 84081915→84346801 (Onyx Black)— The original antenna design had a flawed gasket and a drain slit located at the rear of the base, which could trap water forced in while driving. The updated design moves the drain slit to the front/bottom of the antenna base to allow water to properly drain away.
Model Year Variations Within This Range
- 2015 vs 2015-2018: The recommended repair procedure changed. An early bulletin for 2015 models, PIT5362B, advised *not* to use any sealant on the replacement antenna. This was later superseded by TSB 17-NA-214, which covers 2015-2018 models and *explicitly requires* applying a 4-5mm bead of automotive seam sealer to the new antenna gasket to prevent repeat failure.
Helpful Videos
Used OEM Parts in Stock
New Aftermarket Parts Available


The information in this article is provided for general reference and educational purposes only. Vehicle specifications, procedures, and part compatibility can vary by production date, trim level, and region. Always consult your vehicle's factory service manual and verify part numbers before purchasing or performing repairs. Safety-critical components such as airbags, seat belts, and braking systems should be installed by a qualified professional.
- Chevrolet SILVERADO 1500:
- 🎬 Helpful Videos
- 🛍️ Shop This Part
- What's Unique About the 2014-2018 Chevrolet SILVERADO 1500
- Diagnostic Flowchart
- Symptoms You May Notice
- Most Likely Causes
- Diagnosis Steps
- Parts You'll Likely Need
- Related Codes That Often Appear With This One
- Technical Service Bulletins (TSBs) & Recalls
- Platform-Specific Known Issues
- Mechanic-Grade Diagnostic Values
- Hidden / Shadow Codes Worth Checking
- Scan Tool Commands That Help
- Wiring & Ground Locations
- Real Owner Repair Stories
- OEM Part Supersession History
- Model Year Variations Within This Range
- 🎟️ Get 5% Off