

B2425 GMC Yukon XL: Heated Seat Malfunction Causes and Fixes (2007-2014)
On a 2007-2014 GMC Yukon XL, code B2425 almost always means the driver's side seat heater element has failed or there's a wiring issue under the seat. The most common fix is replacing the driver's seat bottom heater element pad. A frequent secondary failure point is the main connector on the heated seat module under the passenger seat, which can melt. Expect to pay $70-$150 for an OEM part, with DIY difficulty at 3/5.
- B2425 points directly to a problem in the driver's seat heater, not a generic vehicle issue.
- The most likely culprit is a broken wire inside the seat bottom's heating pad.
- Before buying parts, perform a simple visual inspection of the wiring under the seat for any obvious damage.
- A multimeter is the best tool to confirm a failed heater element by checking its resistance.
- If accessory seats were installed, check for reversed connectors as detailed in TSB PIT5215A before attempting other repairs.
What's Unique About the 2007-2014 Gmc YUKON XL
The GMT900 platform, which includes the Yukon XL, Chevrolet Tahoe, Suburban, and Cadillac Escalade, commonly used both factory-installed and dealer-installed accessory heated seats. A specific Technical Service Bulletin (TSB PIT5215A) highlights that these accessory kits can be installed incorrectly, with the seat back and seat bottom heater element connectors reversed, which can trigger this code. Additionally, the heated seat module for both front seats is located under the front passenger seat, and its main power connector is a well-documented failure point prone to melting due to high current draw on single pins.
Diagnostic Flowchart
Tap your situation to follow the diagnostic path that matches what you're seeing on this vehicle.
Symptoms You May Notice
- Driver's heated seat does not work at all.
- Heated seat indicator lights turn on for a few seconds, then turn off.
- Heated seat may turn off after a short period of use (e.g., 30 seconds to 2 minutes).
- In some cases, the indicator lights stay on, but no heat is produced.
- Replacing the heated seat switch on the dashboard. The switch simply sends a request to the control module; the fault detection and code setting happen at the module level based on feedback from the seat circuit. While the switch can fail, it's less common than the element or module connector.
Most Likely Causes
- Failed Driver's Seat Bottom Heater Element 🔴 High Probability The heating element wires are thin and embedded in the seat cushion. Years of compression and flexing from getting in and out of the vehicle can cause the wires to break or burn, creating an open circuit or high resistance. This is the most common failure point.
How to confirm: Disconnect the heater element connector under the seat and measure the resistance across its two pins with a multimeter. 🎬 See this walkthrough on troubleshooting and testing seat heater elements A reading of infinite resistance (OL) indicates a broken element. The expected resistance can vary with temperature, but is typically in the 2.5 to 8.5 ohm range according to service data. Some forum users report a good element should be under 5.5 ohms. It's recommended to have someone sit in the seat and move around while testing to expose intermittent breaks.
Typical fix: Replace the seat bottom heater element pad. This requires removing the seat from the vehicle, removing the side plastic trim, and partially removing the seat upholstery by cutting the hog rings.
Est. part cost: $70-$150 - Burnt/Melted Heated Seat Module Connector 🟡 Medium Probability The heated seat module, located under the front passenger seat, controls both front seats. Its main 12-pin power connector was designed with single power and ground pins that carry too much current, causing them to overheat, scorch, and melt the connector housing. This creates a poor connection and is a very common failure.
How to confirm: Move the passenger seat all the way up and forward. Inspect the large black connector going into the silver module under the seat. Look for discoloration, a burnt smell, or a melted appearance on the connector housing and the module's pins, particularly the corner pins.
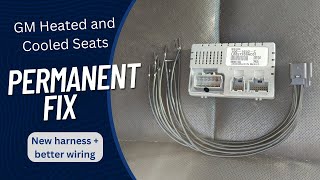
Typical fix: The permanent fix involves replacing the connector pigtail and modifying the wiring. A common replacement is the Ford/Motorcraft pigtail WPT-928. The fix requires cutting the old connector off, soldering the new pigtail on, and creating jumpers for the main power and ground wires to utilize the unused redundant pins on the connector 🎬 Watch: How to permanently fix the melted module connector, distributing the electrical load.
Est. part cost: $30-$50 for the pigtail - Damaged Wiring or Connector Under Seat 🟡 Medium Probability Wiring under the seat can be kicked, snagged by items, or sliced by the seat's own movement on its rails. Forum users report finding wires completely cut through by the seat mechanism.
How to confirm: Visually inspect all wiring harnesses and connectors under the driver's seat for signs of damage, chafing, or loose pins. Pay close attention to the harness that moves with the seat and where it passes near the metal rails.
Typical fix: Repair the damaged section of the wire with a solder joint and heat shrink, or replace the connector pigtail. Ensure the harness is properly routed and secured with zip ties away from moving parts to prevent future damage.
Est. part cost: $5-$30 - Incorrectly Installed Accessory Heated Seat Harness ⚪ Low Probability As noted in TSB PIT5215A, if GM accessory heated seats were installed, the connectors for the seat back and seat bottom elements are identical and can be easily reversed during installation.
How to confirm: Per the TSB, inspect the two heater element connectors under the driver's seat. The lead with convoluted (ribbed plastic) tubing should go to the seat back element, and the shorter, tape-covered lead should go to the seat bottom element.
Typical fix: Swap the connectors to their correct positions and re-test the system.
Est. part cost: $0
Rare But Worth Checking
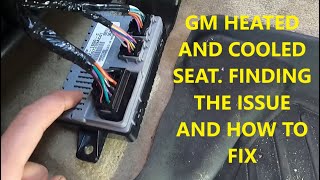
- Faulty Heated Seat Module: While less common than an element or connector failure, the control module itself can fail internally. A simple diagnostic step before replacement is to disconnect the main power connector to the module for 5-10 minutes to 'reboot' it, which can sometimes clear a temporary glitch. If the connector is not burnt and the elements/wiring test good, the module itself may be the culprit. Replacement often requires dealer programming. 🎬 Watch: A guide to fixing heated and cooled seat issues
Diagnosis Steps
- Verify the symptom: Confirm the driver's heated seat is inoperative and the indicator light turns off prematurely or produces no heat.
- Scan for Codes: Use an OBD-II scanner capable of reading Body (B) codes to confirm B2425 is present.
- Inspect Passenger Under-Seat Module: Before checking the driver's seat, start with the most accessible common failure. Move the front passenger seat fully forward and up. Visually inspect the large black connector plugged into the silver Heated Seat Module for any signs of melting, scorching, or discoloration. This is a very frequent problem.
- Inspect Driver Under-Seat Wiring: Move the driver's seat to its highest and most forward position. Visually inspect all wiring and connectors underneath for obvious damage, chafing, or wires cut by the seat rails.
- Check for TSB Compliance (if applicable): If you suspect accessory heated seats were installed, verify the seat back and bottom element connectors are not reversed, per TSB PIT5215A.
- Test Heater Element Resistance: Disconnect the connector for the seat bottom heater element. Use a multimeter set to Ohms (Ω) to measure the resistance between the two pins on the element side. A reading of 'OL' or infinite resistance confirms a broken element. A reading within the 2.5-8.5 ohm range is generally considered good, but be aware that this value changes with temperature.
- Attempt Module Reset: As a simple step, disconnect the main connector from the heated seat module under the passenger seat for 5-10 minutes, then reconnect and re-test. This can sometimes resolve software glitches.
Parts You'll Likely Need
- Driver Seat Cushion Heater Pad
(OEM #19159289)— This is the most frequent failure point. The constant flexing and weight from use breaks the internal heating wires, causing the high resistance fault.
Trusted brands: ACDelco, Dorman (Universal Kit 628-040)
OEM price range: $100-$150
Aftermarket price range: $70-$120 - Heated Seat Module Connector Pigtail
(OEM #WPT-928 (Ford/Motorcraft part))— Used to replace the commonly melted main connector on the heated seat module under the passenger seat. This Ford part is a widely accepted substitute for the GM connector.
Trusted brands: Motorcraft, Dorman
OEM price range: $30-$50
Aftermarket price range: $20-$40
Related Codes That Often Appear With This One
- B2430 — This is the corresponding code for the passenger's (right) side heated seat. If both seats have issues, or if the shared heated seat module connector is failing, you may see both codes.
- B1935 — This code is also related to heated seat circuits and is mentioned alongside B2425 in TSB PIT5215A for accessory kit installation issues.
- B2180 — Another heated seat circuit code mentioned in TSB PIT5215A, indicating a potential system-wide issue if seen with B2425.
Technical Service Bulletins (TSBs) & Recalls
- PIT5215A: Addresses inoperative heated seats and DTCs B2425/B2430, often caused by reversed heater element connectors on accessory kits.
Platform-Specific Known Issues
- TSB PIT5215A specifically calls out that on GM accessory heated seat kits, reversing the seat back and seat bottom element connectors can cause this code. The fix is to ensure the longer, convoluted-tubing-covered lead goes to the seat back, and the shorter, tape-covered lead goes to the seat bottom.
- The main power connector for the Heated Seat Module (located under the passenger seat) is a design flaw. It frequently melts due to excessive current draw. The accepted permanent fix is to replace the connector pigtail and add jumpers to utilize the unused power/ground pins to better distribute the load.
Mechanic-Grade Diagnostic Values
- Seat Cushion Heater Element Resistance — expected: Approximately 5 - 7.5 ohms. Some service data suggests 0.8-2.4 Ω. A forum user reported anything over 5.5 ohms is bad. Resistance changes with temperature.. Failure: A reading of OL (infinite resistance) or a value significantly higher than the expected range. GM elements often fail with high resistance rather than a complete open circuit.
- Seat Back Heater Element Resistance — expected: 0.8-2.4 Ω. Failure: A reading of OL (infinite resistance) or a value outside the specified range.
- Seat Circuit Breaker — expected: 20A or 30A silver metal can-style circuit breaker, not a plastic fuse.. Failure: If the breaker is hot to the touch, it indicates a short circuit. If it is cold and there is no power to the seat, the breaker itself may have failed.
Hidden / Shadow Codes Worth Checking
- B2425 0D: Driver Seat Cushion Heater Circuit High Resistance. This is the most common symptom code associated with a failed heater element. (see via Requires a scan tool capable of reading GM-specific body codes, like a Tech2 or similar professional scanner.)
- B2425 0E: Driver Seat Cushion Heater Circuit Low Resistance. This indicates a short to ground within the heater element or its wiring. (see via Requires a scan tool capable of reading GM-specific body codes, like a Tech2 or similar professional scanner.)
- B2425 0B: Driver Seat Cushion Heater Circuit High Current. This can be caused by a short to voltage or a failing element. (see via Requires a scan tool capable of reading GM-specific body codes, like a Tech2 or similar professional scanner.)
Scan Tool Commands That Help
- Snap-on or similar professional scanner: Heated Seats Functional Test — This command allows the technician to bypass some safety inputs and directly command the heated seat elements on. It is useful for verifying if the element itself is capable of heating when commanded directly by the tool, helping to isolate the fault between the element and the control/switch side of the circuit.
Wiring & Ground Locations
- G303 — Near the base of the left 'B' pillar.. This is a primary ground point for the Body Control Module (BCM) and the rear heated seat module. While not directly for the front seats, a poor ground here can cause various body electrical issues.
- G300 — Located behind the left (driver's) seat, on the floor, near the 'B' pillar.. This is a critical ground for the Driver Seat Controls and Driver Door Module, which houses the heated seat switch. A fault at this ground can interrupt the signal from the switch to the control module.
- SEAT CB (Fuse Block) — Located in the left Instrument Panel (I/P) fuse block, accessible when the driver's door is open.. This is the main circuit breaker for the power seats. While a failure here would likely cause all seat functions to stop, it's a primary power source to check.
- MBEC 1 (Underhood Fuse Block) — Located in the underhood fuse block on the driver's side.. This is a 50 Amp primary 'Mega' fuse that feeds the Mid-Bussed Electrical Center, which in turn powers the interior fuse block and the seat circuit breaker. A failure here would result in a loss of power to many interior components, including the seats.
Real Owner Repair Stories
- Tahoe Yukon Forum user 'calif phil' (2012 LT) — Both heated seats worked sporadically, sometimes for 10 minutes, sometimes for 30 seconds. Scanned and found code B2508 (short to ground).
❌ Tried (didn't work) Initial diagnosis was uncertain if it was the heating elements.
✅ What actually fixed it Found a wire in the harness under the front of the driver's seat that had rubbed through on the seat bracket, causing a short to ground. The user repaired the wire and protected the harness with a piece of split fuel line to prevent recurrence.
OEM Part Supersession History
22809551→22849895— Part number update/revision for the front seat heater control module.13506705, 13509388→13510339— Part number update/revision for the front seat heater control module.
Model Year Variations Within This Range
- 2007-2010: For vehicles with heated and cooled seats (RPO KB6), some early models may have used the Thermo-Electric Device (TED) for both heating and cooling.
- 2011-2014: In 2011, GM reportedly switched to using conventional resistive heating element mats for heat, even on vehicles that also had ventilated (cooled) seats. This means later models are less likely to have TED-related heating issues and more likely to have standard element failures.
- 2010+: Seat-mounted side airbags were added in 2010. This adds complexity to seat removal and requires careful disconnection of the yellow SRS connectors.
Helpful Videos
We Have This Part in Stock



The information in this article is provided for general reference and educational purposes only. Vehicle specifications, procedures, and part compatibility can vary by production date, trim level, and region. Always consult your vehicle's factory service manual and verify part numbers before purchasing or performing repairs. Safety-critical components such as airbags, seat belts, and braking systems should be installed by a qualified professional.
- Gmc YUKON XL:
- 🎬 Helpful Videos
- 🛍️ Shop This Part
- What's Unique About the 2007-2014 Gmc YUKON XL
- Diagnostic Flowchart
- Symptoms You May Notice
- Most Likely Causes
- Rare But Worth Checking
- Diagnosis Steps
- Parts You'll Likely Need
- Related Codes That Often Appear With This One
- Technical Service Bulletins (TSBs) & Recalls
- Platform-Specific Known Issues
- Mechanic-Grade Diagnostic Values
- Hidden / Shadow Codes Worth Checking
- Scan Tool Commands That Help
- Wiring & Ground Locations
- Real Owner Repair Stories
- OEM Part Supersession History
- Model Year Variations Within This Range
- 🎟️ Get 5% Off