

B2425 on 2007-2014 Chevrolet Suburban: Heated Seat Failure Causes and Fixes
Code B2425 on a 2007-2014 Suburban almost always means the driver's heated seat has failed due to a broken heating element in the seat cushion or, more commonly, a melted electrical connector under the passenger seat. The most frequent fix is replacing the connector pigtail and adding a redundant power/ground wire.
- B2425 means there's a high resistance fault in the driver's heated seat circuit.
- Before buying any parts, inspect the large connector on the module under the front passenger seat for melting or burn marks. This is the most common problem.
- The permanent fix for a melted connector is to replace the pigtail and wire it to use both power and ground terminals to prevent a recurrence.
- If the connector is fine, the next most likely cause is a broken heating element inside the driver's seat cushion, which can be confirmed with a multimeter.
What's Unique About the 2007-2014 Chevrolet SUBURBAN
The GMT900 platform, which includes the 2007-2014 Suburban and its sister vehicles, has a well-documented design flaw regarding the heated and cooled seats. The control module for both front seats is located under the front passenger seat. GM designed the main wiring harness to supply power and ground through single pins on the connector, even though the module has provisions for two of each. Over time, the high current draw for the seat heaters concentrates on these single pins, causing them to overheat, melt the connector, and create a high-resistance fault that triggers code B2425.
Diagnostic Flowchart
Tap your situation to follow the diagnostic path that matches what you're seeing on this vehicle.
Symptoms You May Notice
- Driver's heated seat does not work at all.
- Heated seat indicator lights on the door switch turn on, but the seat produces no heat.
- Heated seat indicator lights turn on for a few seconds, then turn off by themselves.
- In vehicles with heated/cooled seats, the cooling function may also be inoperative because it uses the same faulty power connector.
- A burning plastic smell may be noticeable from under the front passenger seat.
- Replacing the Heated Seat Control Module without first checking the connector. The module is often blamed, but the melted connector is the true culprit in a majority of cases.
Most Likely Causes
- Melted Heated Seat Module Connector 🔴 High Probability The factory wiring uses a single power (red/white wire) and ground (black wire) pin to the control module, which is insufficient for the high current draw of the heaters. This design flaw causes the specific pins to overheat and melt the plastic connector over time, creating a poor connection and a high resistance fault.
How to confirm: Unplug the large 12-pin main connector (X305) from the Heated/Cooled Seat Control Module located under the front passenger seat. Visually inspect the power (heavy gauge red/white) and ground (heavy gauge black) terminals on both the harness connector and the module for signs of melting, discoloration, or charring.
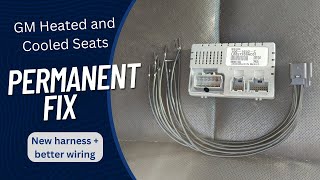
Typical fix: Replace the connector with a new pigtail (Ford/Motorcraft WPT-928 is a common, robust replacement). The permanent fix involves splicing the new pigtail to use both power and ground pins available on the module, effectively splitting the electrical load and preventing a repeat failure. 🎬 Watch: How to perform this permanent wiring harness repair.
Est. part cost: $20-$40 - Broken Heater Element in Seat Cushion 🟡 Medium Probability The thin wires that make up the heating grid inside the seat foam are subjected to constant flexing and pressure from the driver getting in and out. Over years, the wire can fatigue and break, creating an open circuit.
How to confirm: Disconnect the heater element connector under the driver's seat. Use a multimeter to measure the resistance (ohms) across the two pins of the heater element itself. A reading of 'OL' (Open Loop) or infinite resistance means the element is broken. A good element should have a low resistance, with service documents suggesting a range between 1 and 7 ohms. More specific GM documentation suggests a range of 1.4-2.5 Ω for the cushion element.
Typical fix: Replace the faulty seat heater element. This requires removing the seat's upholstery, laying the new adhesive-backed element on the foam cushion, and reinstalling the upholstery using new hog rings.
Est. part cost: $60-$150 - Damaged Wiring Under Driver's Seat ⚪ Low Probability Wiring under the seat can get snagged, chafed, or broken from items stored under the seat or from the seat's movement. A broken lumbar support mechanism is also known to chafe through the wiring harness inside the seat back.
How to confirm: Visually inspect all wiring harnesses running to and from the driver's seat for any signs of physical damage, chafing, or broken wires. Check inside the seat back if power seat functions are also intermittent.
Typical fix: Repair the damaged section of wire using solder and heat shrink tubing or appropriate butt connectors.
Est. part cost: $5-$10
Rare But Worth Checking
- Faulty Heated Seat Control Module: While possible, the module itself is rarely the point of failure. It should only be replaced after confirming the connector, wiring, and heating elements are all in good condition. The module often gets replaced needlessly when the melted connector is the actual problem.
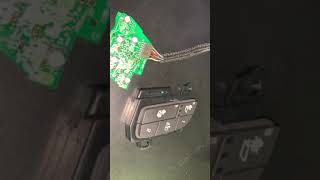
- Faulty Heated Seat Switch: A faulty switch in the door panel can prevent the system from activating. One owner found that after many presses the seat would eventually turn on, indicating worn contacts inside the switch itself. The switch can be removed and the contacts cleaned as a potential no-cost fix. 🎬 Watch: How to disassemble and clean the door switch contacts.
- Melted Harness Connector Under Driver's Side Carpet: In at least one documented case, a different connector in the main harness, located under the driver's side carpet near the seat, was found to have a melted power terminal. This also caused a complete failure of the heated/ventilated seats and required bypassing the melted pin with a new wire.
Diagnosis Steps
- Scan the vehicle's modules and confirm the presence of B2425, noting any symptom bytes like '0D' (High Resistance).
- Check for a faint burning plastic odor inside the cabin, particularly near the front passenger floor area.
- Move the front passenger seat all the way forward and up to access the control module underneath it.
- Disconnect the large electrical connector (X305) from the seat control module. Carefully inspect the connector and the module's pins for any signs of melting, charring, or discoloration, paying close attention to the larger red/white (power) and black (ground) wires.
- If the connector is melted, this is the cause. The connector pigtail must be replaced and the wiring modified to use the redundant power/ground pins.
- If the connector is in good condition, proceed to the driver's seat. Locate the connectors for the seat cushion and seat back heater elements under the seat.
- Disconnect the driver's seat cushion heater element. Using a multimeter set to Ohms, measure the resistance across the element's two terminals. An open circuit (infinite resistance or 'OL') indicates a failed element. A good element should read between 1-7 ohms. More specific service data indicates a target of 1.4-2.5 Ω for the cushion and 0.8-2.4 Ω for the backrest.
- If the cushion element tests good, perform the same resistance test on the seat back heater element.
- If both elements have good resistance, inspect the wiring under the seat and within the seat back for any visible damage or chafing.
- If all wiring and elements are good, investigate the door switch for faulty contacts before condemning the control module.
Parts You'll Likely Need
- Heated Seat Module Connector Pigtail
(OEM #ACDelco PT2387)— This is the most common failure point. The original connector melts due to high electrical resistance from an undersized factory power/ground circuit.
Trusted brands: ACDelco, Dorman, Motorcraft (WPT-928 is a common, confirmed cross-reference as Ford used the same module)
OEM price range: $30-$50
Aftermarket price range: $20-$40 - Driver Seat Heater Element (Cushion)
(OEM #20792748 (replaces 15232559), or 23168136)— This element fails from wear and tear, causing an open circuit (high resistance) that triggers code B2425 0D.
Trusted brands: ACDelco, Dorman, GM Genuine
OEM price range: $90-$150
Aftermarket price range: $60-$90 - Driver Seat Heater Element (Back)
(OEM #20792749 (replaces 15232560, 25911156))— Less common to fail than the cushion, but can also break and cause an open circuit.
Trusted brands: ACDelco, Dorman, GM Genuine
OEM price range: $90-$150
Aftermarket price range: $60-$90
Related Codes That Often Appear With This One
- B2430 — B2430 is the equivalent code for the Passenger Seat Heater Circuit. Since the main power connector for both seats is the same, a melted connector can cause both codes to appear simultaneously.
- B1935 — This code can also be related to seat heater circuit faults as noted in TSB #PIT5215A.
Technical Service Bulletins (TSBs) & Recalls
- PIT5215A: Addresses inoperative GM accessory heated seats, noting that DTC B2425 Sym 0D can be set. The cause is often related to inspecting the accessory wiring harness and ensuring the heater element connectors for the seat back and cushion are not reversed.
Platform-Specific Known Issues
- TSB PIT5215A - Accessory Heated Seat Issues: TSB #PIT5215A addresses inoperative heated seats and codes including B2425 after installing an accessory heated seat kit, often caused by reversing the seat back and bottom element connectors.
- Owner Experience: Diagnosing the Shutdown: A user on tahoeyukonforum.com described a classic failure scenario: the driver's seat bottom stopped heating, and soon after, the entire system would shut off within minutes of being activated. This points to the module detecting the high resistance of the failed bottom element and shutting down the circuit for safety. The user confirmed the fix was replacing the driver's side bottom heater element.
Mechanic-Grade Diagnostic Values
- Driver Seat Cushion Heater Element Resistance — expected: 1.4 - 2.5 Ohms (Ω). Failure: A reading greater than 2.5 Ω (high resistance/open) or less than 1.4 Ω (low resistance/short) will set the code.
- Driver Seat Back Heater Element Resistance — expected: 0.8 - 2.4 Ohms (Ω). Failure: A reading outside this range indicates a faulty element.
- System Operating Voltage — expected: 9 - 16 Volts. Failure: The module will not attempt to run the DTC check if voltage is outside this range.
Hidden / Shadow Codes Worth Checking
- B2425 04: Left Seat Heater Cushion Circuit Open (see via A professional scan tool like a GM Tech 2 or equivalent is required to read symptom bytes.)
- B2425 0B: Driver Seat Cushion Heater Circuit High Current (see via A professional scan tool like a GM Tech 2 or equivalent is required to read symptom bytes.)
- B2425 0D: Driver Seat Cushion Heater Circuit High Resistance (see via A professional scan tool like a GM Tech 2 or equivalent is required to read symptom bytes.)
- B2425 0E: Driver Seat Cushion Heater Circuit Low Resistance (see via A professional scan tool like a GM Tech 2 or equivalent is required to read symptom bytes.)
Scan Tool Commands That Help
- GM Tech 2 / GDS2: Heated Seat Output Control / Special Functions — This allows a technician to command the heated seat elements ON and OFF directly, bypassing the door switch. If the seat heats up using the scan tool command but not the switch, it isolates the fault to the switch or its wiring. If it still doesn't heat, the fault is in the module, wiring, or elements.
- GM Tech 2 / GDS2: Clear DTCs — After a repair is completed, the history code must be cleared. The system will self-restore operation once the fault is gone, but the code will remain in history for up to 100 ignition cycles if not cleared manually.
Wiring & Ground Locations
- X305 — Under the front passenger seat, connecting to the Heated/Cooled Seat Control Module.. This is the main 12-pin connector where the power and ground pins are known to melt. The main battery power is on Pin A (Red/White wire) and the main ground is on Pin G (Black wire). The fix involves using the empty adjacent pins (Pin B for power, Pin H for ground) to share the load.
- G303 — At the base of the left 'B' pillar (the pillar between the front and rear doors).. This is the main grounding point for the driver's side power seat and associated modules. A loose or corroded G303 could cause various electrical issues, including intermittent heated seat operation, though it's a less common cause than the melted connector.
Real Owner Repair Stories
- PerformanceTrucks.net Forums user (2004 Silverado SS (similar GMT800 architecture but relevant diagnosis)) — Driver seat (B2425) worked for 2 minutes then shut off. Passenger seat (B2430) shut off almost instantly.
❌ Tried (didn't work) Swapping the Driver Seat Module (DSM) with a known-good one from another truck produced the exact same faults., Replacing the heater elements was considered but aborted after new elements measured nearly the same resistance as the old ones.
✅ What actually fixed it The user noted that even though his heater element resistance readings (4.5 Ω and 8.6 Ω) were outside the service manual spec of 1.5-5.5 Ω, a known-good truck had similar out-of-spec readings. The ultimate conclusion pointed towards a needed software calibration update in the module (DSM) to be less sensitive to resistance variations, a fix only a dealer with access to TIS could perform. This highlights that minor resistance deviations might be a red herring.
OEM Part Supersession History
20963028, 22863113, 22901763, and others→23338340— Part has been updated and consolidated over the vehicle's lifespan.
Heads up: This part is the Driver Side Heated Seat Module which often includes the memory seat functions. When replacing, it may require programming via a Tech 2 or other J2534 pass-through device with a GM subscription to enable all features like memory and cooling.15232559→20792748, then 23168136— Updates and revisions to the seat cushion heater element.
Heads up: Part number 23168136 is listed for 2014+ models but is often used as a replacement for the earlier elements. Always verify fitment with VIN, but it is generally considered the correct current replacement.
Helpful Videos
We Have This Part in Stock



The information in this article is provided for general reference and educational purposes only. Vehicle specifications, procedures, and part compatibility can vary by production date, trim level, and region. Always consult your vehicle's factory service manual and verify part numbers before purchasing or performing repairs. Safety-critical components such as airbags, seat belts, and braking systems should be installed by a qualified professional.
- Chevrolet SUBURBAN:
- 🎬 Helpful Videos
- 🛍️ Shop This Part
- What's Unique About the 2007-2014 Chevrolet SUBURBAN
- Diagnostic Flowchart
- Symptoms You May Notice
- Most Likely Causes
- Rare But Worth Checking
- Diagnosis Steps
- Parts You'll Likely Need
- Related Codes That Often Appear With This One
- Technical Service Bulletins (TSBs) & Recalls
- Platform-Specific Known Issues
- Mechanic-Grade Diagnostic Values
- Hidden / Shadow Codes Worth Checking
- Scan Tool Commands That Help
- Wiring & Ground Locations
- Real Owner Repair Stories
- OEM Part Supersession History
- 🎟️ Get 5% Off