

B2425 on 2007-2013 Chevrolet Avalanche: Heated Seat Failure Causes and Fixes
On a 2007-2013 Avalanche, code B2425 means there's a fault in the driver's side heated seat circuit. The most common cause is a broken heating element inside the seat cushion, followed by damaged wiring under the seat or a melted connector at the control module under the passenger seat. Expect to pay around $70-$150 for a new heating element.
- B2425 on your Avalanche means the driver's heated seat isn't working due to an electrical fault.
- The most likely cause is a broken heating element inside the bottom seat cushion. This can be confirmed with a multimeter.
- Before buying parts, always perform a visual inspection of the wiring under the seat for any obvious damage, as this is a simple and cheap fix.
- Do not replace the expensive control module unless you have definitively ruled out the heating elements and wiring as the problem.
- This is a comfort-related issue and is safe to ignore until you are ready to perform the repair; it will not affect the truck's operation.
What's Unique About the 2007-2013 Chevrolet AVALANCHE
The GMT900 platform, which includes the 2007-2013 Avalanche, Silverado, Tahoe, and their GMC counterparts, is well-known for heated seat failures. The primary issue is the design of the heating elements themselves; the thin wires embedded in the seat cushions are prone to breaking after years of stress from passengers getting in and out of the vehicle. This repeated flexing eventually causes an open circuit. A secondary, but very common, design flaw on these trucks is the main power connector for the heated seat module (under the passenger seat). The module uses single power and ground pins which can overheat from the high current draw, melting the connector and causing a high-resistance fault.
Diagnostic Flowchart
Tap your situation to follow the diagnostic path that matches what you're seeing on this vehicle.
Symptoms You May Notice
- Driver's side heated seat does not work at all.
- Heated seat indicator lights turn on for a few seconds, then turn off by themselves.
- Heated seat may turn on but shuts off after 30 seconds to 2 minutes.
- Heated seat indicator lights stay on, but the seat produces no heat.
- A clicking sound may or may not be heard from the control module under the passenger seat.
- This is a body code, so it will NOT illuminate the Check Engine Light.
- Replacing the Heated Seat Control Module without first testing the heating elements and inspecting the module's main electrical connector for melting. The elements and connector are the most common failure points.
Most Likely Causes
- Broken Driver's Seat Cushion Heating Element 🔴 High Probability The thin resistive wires inside the heating pad are susceptible to breaking from the repeated stress and flexing of the seat cushion over time. The driver's side fails more often due to more frequent use.
How to confirm: Disconnect the heating element connector under the driver's seat and measure the resistance of the element with a multimeter. 🎬 Watch this video to see how to troubleshoot and test your seat heater. An open circuit (infinite resistance or 'OL') confirms a broken element. A good element should have a low resistance. GM service data specifies a range of 1.4-2.5 Ω for the cushion element and 0.8-2.4 Ω for the backrest element. Anything significantly outside this range, especially a reading over ~5 ohms, indicates a failure.
Typical fix: Replace the faulty seat heater element pad. This requires removing the seat from the truck, taking off the upholstery (which is held by clips and hog rings), sticking the new element to the foam cushion, and reinstalling the cover.
Est. part cost: $70-$150 - Melted Heated Seat Module Connector 🔴 High Probability The control module, located under the front passenger seat, powers both front seats. The main connector uses a single power and ground pin for a high-current load, causing it to overheat and melt over time, creating a high-resistance connection that triggers B2425.
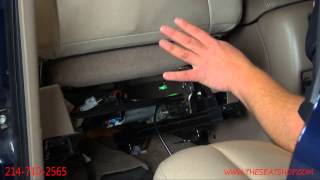
How to confirm: Unbolt the passenger seat and tilt it back. Disconnect the large main connector at the Climate Control Seat Module (CCSM). Inspect the connector and the module pins for any signs of melting, burning, or black/brown discoloration, particularly on the heavy-gauge power and ground wires.
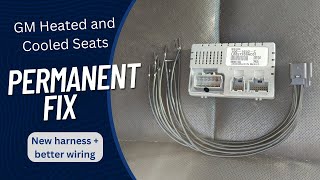
Typical fix: Replace the melted connector with a new pigtail. A common permanent fix is to add jumper wires to utilize the unused redundant power and ground terminals 🎬 See how to perform this permanent wiring fix on the module connector. in the connector, distributing the electrical load across two pins instead of one. The Motorcraft pigtail WPT-928 is a widely cited cross-fit part for this repair.
Est. part cost: $25-$50 - Damaged Wiring or Connector Under Seat 🟡 Medium Probability Wiring under the seat can be kicked, stretched, corroded, or chafed by the seat's own movement on its track. TSB #PIT5215A specifically calls out inspecting the accessory heated seat wiring harness and connectors as a potential cause.
How to confirm: Perform a thorough visual inspection of the wiring harnesses and connectors under the driver's seat for any signs of damage, chafing, or loose pins. On some related GM trucks, the main connector on the heated seat module (often under the passenger seat) can melt.
Typical fix: Repair the damaged section of wire or replace the faulty connector pigtail.
Est. part cost: $20-$50 - Reversed Heater Element Connectors ⚪ Low Probability This applies specifically if a GM accessory heated seat kit was installed. The harness has two identical connectors for the seat back and bottom elements. Per TSB #PIT5215A, if these are reversed, it can cause this code and inoperative seats.
How to confirm: Verify the harness connections. The longer lead (with convoluted tubing) should go to the seat back element, and the shorter lead (taped) goes to the seat bottom element.
Typical fix: Correct the connector positions.
Est. part cost: $0
Rare But Worth Checking
- Failed Heated Seat Control Module: This module, located under the front passenger seat, controls the system. It's expensive and rarely the cause of a single-seat failure. It should only be replaced after confirming the heating elements, wiring, and especially the main connector are all good.
- Faulty Heated Seat Switch: The switch on the door panel can fail internally, often due to broken solder joints on the circuit board. This is less common than element or wiring failure, but can be repaired by re-soldering the joints.
- Blown Fuse: A blown fuse can disable the system, but it usually points to a larger electrical problem, like a shorted heating element.
Diagnosis Steps
- Scan for codes using a scanner capable of reading Body Control Module (BCM) codes. Note any symptom bytes (e.g., 0D for high resistance).
- Verify the symptom. Press the driver's heated seat button and observe the indicator lights and whether the seat heats up.
- Begin with the easiest and most common platform-specific check: unbolt the front passenger seat, tilt it back, and inspect the large connector at the Climate Control Seat Module for any signs of melting, burn marks, or discoloration.
- If the module connector is fine, move to the driver's seat. Perform a visual inspection of all wiring and connectors under the driver's seat. Look for obvious damage, chafing, or loose connections.
- Disconnect the driver's seat cushion heater element. Using a multimeter, test the resistance across the two pins of the element itself. A reading of 'OL' or infinite resistance indicates a broken element. A good element will have a low resistance value, specifically 1.4-2.5 ohms.
- If the cushion element tests good, repeat the resistance test for the seat back heating element. A good backrest element should read between 0.8-2.4 ohms.
- If both elements have good resistance, check for power and ground at the element connector when the heated seat is turned on. Absence of power points to a problem upstream in the wiring or the control module.
- If a GM accessory kit was installed, verify the element connectors are not reversed per TSB #PIT5215A.
Parts You'll Likely Need
- Driver Seat Cushion Heater Element
(OEM #23168136 (replaces 20792748, 15232559))— This is the most common failure point, where the internal wires break from repeated use, causing an open circuit and triggering code B2425.
Trusted brands: ACDelco, Dorman (e.g., 641-201), GM Genuine
OEM price range: $100-$150
Aftermarket price range: $60-$90 - Heated Seat Module Connector Pigtail
(OEM #Motorcraft WPT-928 (Confirmed cross-fit))— On these models, the main power connector on the control module under the passenger seat can overheat and melt due to an undersized circuit, requiring replacement. The Ford/Motorcraft part is a widely used and confirmed substitute.
Trusted brands: ACDelco, Motorcraft, Dorman
OEM price range: $40-$60
Aftermarket price range: $25-$40 - Driver Seat Back Heater Element
(OEM #20792749 (replaces 15232560, 25911156))— While less common to fail than the seat bottom, the backrest element can also break and cause an open circuit. Sometimes it can burn out severely.
Trusted brands: ACDelco, Dorman, GM Genuine
OEM price range: $90-$150
Aftermarket price range: $60-$90
Related Codes That Often Appear With This One
- B2430 — This is the corresponding code for the passenger (right) side heated seat circuit. It may appear if there is a shared power/ground issue (like a melted main connector) or if both seats have failing elements.
- B1935 — Mentioned in TSB #PIT5215A alongside B2425, this code also relates to seat heater circuit faults.
- B2180 — Also cited in TSB #PIT5215A, this is another related body code for seat system faults.
Technical Service Bulletins (TSBs) & Recalls
- PIT5215A: Addresses inoperative GM accessory heated seats, potentially with code B2425, and points to reversed heater element connectors as a possible cause.
Platform-Specific Known Issues
- GM issued Technical Service Bulletin #PIT5215A for 2007-2013 Avalanche models (among others) regarding inoperative heated seats after installing an accessory kit. The bulletin notes that DTC B2425 with symptom 0D can be set if the seat back and bottom element connectors are reversed. It also describes the symptom of indicator lights staying on with no heat.
- A very common failure on the GMT900 platform is the main connector for the heated/cooled seat module under the passenger seat melting due to high current draw on a single pin. The fix involves replacing the connector pigtail and adding jumpers to utilize the redundant power/ground pins on the module.
Mechanic-Grade Diagnostic Values
- Driver's Seat Cushion Heating Element Resistance — expected: 1.4 - 2.5 Ω. Failure: A reading of 'OL' (Open Loop / infinite resistance) or a value significantly outside the expected range. Some sources state anything over 5 Ω indicates a problem. A reading above 65 Ω will set the code.
- Driver's Seat Backrest Heating Element Resistance — expected: 0.8 - 2.4 Ω. Failure: A reading of 'OL' (Open Loop / infinite resistance) or a value significantly outside the expected range. Some sources state a good reading is around 5.4 Ω, with anything over 7-8 Ω being too high.
- System Operating Voltage at Module — expected: 9 - 16 Volts. Failure: Voltage below 9V will prevent the module from operating correctly and may set various codes.
Hidden / Shadow Codes Worth Checking
- B2425 0D: Left Seat Heater Cushion Circuit Resistance Above Threshold. This is the most common variant, indicating a broken wire in the element (open circuit). (see via GM Tech2 or equivalent professional scan tool capable of reading body codes and symptom bytes.)
- B2425 0E: Left Seat Heater Cushion Circuit Resistance Below Threshold. This indicates a short or partially shorted heating element. (see via GM Tech2 or equivalent professional scan tool.)
- B2425 0B: Left Seat Heater Cushion Circuit Current Above Threshold. This also points to a short circuit in the heating element. (see via GM Tech2 or equivalent professional scan tool.)
- B2425 04: Left Seat Heater Cushion Circuit Open. This is set when the module does not detect a temperature change within a set time (e.g., 210 seconds), implying an open circuit. (see via GM Tech2 or equivalent professional scan tool.)
Scan Tool Commands That Help
- GM Tech2 / GDS2: Output Control > Heated Seat Actuator Tests — After verifying wiring and element resistance, this command can be used to manually activate the heated seat output from the module. This helps determine if the module itself is capable of sending the command, isolating the fault to the module or the downstream circuit.
- GM Tech2 / GDS2: Data Display > Heated Seat Status — This allows the technician to view live data, including the requested state (On/Off), the actual state, and the temperature sensor readings (if equipped). This is useful for seeing if the module is receiving the request from the switch and what it's doing in response.
Wiring & Ground Locations
- X305 — The large 12-pin main connector at the Climate Control Seat Module (CCSM) located under the front passenger seat.. This is the connector that is prone to melting. Pin A (Red/White) is the primary power feed, and Pin F (Black) is the primary ground. These are the pins that overheat. The permanent fix involves adding jumpers to the unused redundant power (Pin G) and ground (Pin M) terminals.
- G303 / G304 — Located on the floor under the driver's side carpet, near the sill plate. These are common grounding points for various interior components.. A corroded or loose ground at these locations can cause intermittent or high-resistance faults for the entire seat circuit, including the control module. While the melted connector is more common, a bad chassis ground can cause similar symptoms.
- MBEC 1 Fuse — A 50-Amp square J-case fuse in the Underhood Fuse Block.. This is the main fuse that supplies power to the Mid-Bussed Electrical Center, which in turn feeds the circuit breaker for the heated seats. If this fuse is blown, neither seat will have power.
Real Owner Repair Stories
- YouTube user FTP Speed Shop (2011 Chevrolet Suburban (GMT900 Platform)) — Heated and cooled seats had not worked for a couple of years. The owner's wife complained her "ass is cold."
❌ Tried (didn't work) The owner went straight for the known common failure.
✅ What actually fixed it The main connector on the control module under the passenger seat was visibly burnt and melted. The owner replaced the connector with a new pigtail (Motorcraft WPT-928 equivalent). Crucially, they implemented the permanent fix by soldering jumper wires to use the module's redundant power and ground pins, distributing the electrical load across two circuits instead of one to prevent future melting. - Tahoe Yukon Forum user (GMT900 SUV) — B2425 code persisted, driver's seat would not heat.
❌ Tried (didn't work) Replacing the driver's seat BOTTOM cushion heating element.
✅ What actually fixed it After the bottom element didn't fix the issue, the owner disassembled the seat backrest. They discovered the backrest heating element had severely burned out, scorching the foam inside the seat. Replacing the seat BACKREST heating element finally resolved the code. This highlights the need to test both elements.
OEM Part Supersession History
15232559→20792748, then 23168136— Part revision and consolidation by GM.
Heads up: The newer part numbers are generally direct replacements for the older ones for the specified vehicle range.GM Connector (part of harness)→Motorcraft WPT-928 (pigtail)— The original GM connector is prone to melting. The Motorcraft WPT-928 is a widely documented, robust, and readily available pigtail used for the repair. It is a direct cross-fit for the GM module's 12-pin connector.
Helpful Videos
We Have This Part in Stock



The information in this article is provided for general reference and educational purposes only. Vehicle specifications, procedures, and part compatibility can vary by production date, trim level, and region. Always consult your vehicle's factory service manual and verify part numbers before purchasing or performing repairs. Safety-critical components such as airbags, seat belts, and braking systems should be installed by a qualified professional.
- Chevrolet AVALANCHE:
- 🎬 Helpful Videos
- 🛍️ Shop This Part
- What's Unique About the 2007-2013 Chevrolet AVALANCHE
- Diagnostic Flowchart
- Symptoms You May Notice
- Most Likely Causes
- Rare But Worth Checking
- Diagnosis Steps
- Parts You'll Likely Need
- Related Codes That Often Appear With This One
- Technical Service Bulletins (TSBs) & Recalls
- Platform-Specific Known Issues
- Mechanic-Grade Diagnostic Values
- Hidden / Shadow Codes Worth Checking
- Scan Tool Commands That Help
- Wiring & Ground Locations
- Real Owner Repair Stories
- OEM Part Supersession History
- 🎟️ Get 5% Off