

OBD-II Code B2300: Driver Seat Memory Error
What B2300 means, why it triggers, and how to fix it
- Code B2300 indicates a failure in the driver's seat memory system, requiring manual adjustment to ensure safe driving posture and airbag effectiveness.
- A weak 12-volt battery dropping below 12.4V is the most common trigger, causing the seat module to lose its saved memory positions.
- Perform a hard reset by disconnecting the negative battery terminal for 30 minutes before replacing any parts to clear temporary software glitches.
- For 2020-2022 GM and 2015-2022 Ford models, a dealer-performed software update costing $150-$250 often resolves this code without replacing the $500 seat module.
- Verify the seat module receives at least 12.2V of power and has a ground resistance of less than 0.1 Ω before condemning the hardware.
What Does B2300 Mean?
The B2300 code indicates the Body Control Module (BCM) or Seat Control Module cannot store, recall, or verify driver's seat memory positions. As a body-related ('B') code, it does not illuminate the Check Engine Light, though a 'Service Seat' message often appears on the instrument cluster.
Technical definition: SAE/ISO defines B2300 as 'Seat Driver Memory Position Error.' The Driver Seat Module (DSM) or Body Control Module (BCM) triggers this fault when seat position sensor feedback fails to match the commanded position, or when the module cannot read/write to its internal non-volatile memory storage.
Can I Drive With B2300?
Yes. This code affects convenience features and does not impact engine performance. However, if the seat is stuck in an unsafe position, it compromises driver control and airbag effectiveness. Manually adjust the seat to a safe driving position before operating the vehicle.
Common Causes
- Low Battery Voltage or Parasitic Drain (Very Common) — Memory modules require a stable 12.4-volt power supply to write and retain information. A weak battery or failing alternator causes the module to lose its memory or fail during the write process when the car turns off.
- Faulty Driver Seat Module (DSM) or Memory Seat Module (MSM) (Very Common) — The internal memory of the seat control module corrupts or the processor fails, permanently preventing it from saving or recalling positions.
- Software Glitch or Outdated Calibration (Common) — A programming bug causes the module to misinterpret data or fail to save settings. Manufacturers frequently release Technical Service Bulletins (TSBs) with software updates to patch these specific bugs.
- Corroded Wiring, Connectors, or Poor Ground (Common) — The wiring harness under the driver's seat is exposed to moisture, dirt, and physical impact. Corroded pins, broken wires, or a loose chassis ground strap interrupt power and data flow to the module.
- Failed Seat Position Sensor (Less Common) — Seat track and recline potentiometers report exact positions to the module. If a sensor develops a dead spot or provides erratic signals, the module cannot confirm the seat's location and sets the fault.
- Faulty Door Control Module (DCM) or Memory Switch Pack (Less Common) — Memory seat buttons often route through the driver's door module. A fault within the DCM or the switch pack prevents the 'set' or 'recall' signal from reaching the seat module.
- CAN Bus Communication Failure (Less Common) — A break or short in the CAN wiring isolates the seat module from the rest of the vehicle network, preventing it from receiving commands or sending status updates.
- Objects Obstructing Seat Movement (Rare) — Debris lodged in the seat track prevents the seat from reaching its saved position. The module interprets this physical blockage as a position sensor error.
Symptoms
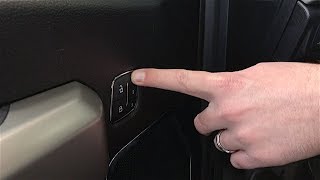
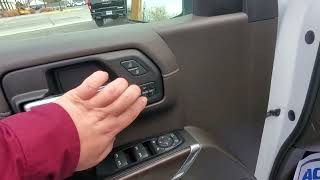
- Memory seat buttons are unresponsive — Pressing the memory buttons ('1', '2', 'Exit') does nothing, and the seat refuses to move to the preset position.
- Seat returns to a random or default position — Upon startup, the seat moves to a neutral factory position, an incorrect location, or slowly 'creeps' out of alignment over several days.
- Power seat adjustment works intermittently — The main power adjustment controls on the side of the seat stop working entirely or only function sporadically.
- Memory mirrors and steering column fail simultaneously — If the vehicle links side mirrors and the power steering column to the memory system, they stop working alongside the seat, pointing to a central module failure.
- Service message displays on the dash — The instrument cluster displays a 'Seat Memory Malfunction' or 'Service Seat System' warning.
Diagnostic Flowchart
Tap your situation to follow the diagnostic path that matches what you're seeing on this code.
Common Fixes & Costs
- Replace Weak Battery — Parts: $150-$250, Labor: $0-$50, ~0.5 hr book time (DIY)
- Reprogram the Driver Seat Module (DSM) — Parts: $0, Labor: $150-$250, ~1.0 hr book time (Professional)
- Replace Driver Seat Module (DSM) or Memory Seat Module (MSM)
— Parts: $200-$550, Labor: $125-$225, ~1.5 hr book time
(Intermediate)
GMC / Chevrolet (Yukon, Silverado, etc.): OEM 23338340, 13510339 (Alt: Dorman 590-002)
Ford (F-150, Explorer, etc.): OEM BL1Z-14C708-B (Alt: Dorman 601-704)
Ram (1500, 2500, etc.): OEM 68433909AC, 68217268AF (Alt: Dorman 601-715) - Repair Damaged Wiring or Connectors — Parts: $15-$60, Labor: $150-$350, ~2.0 hr book time (Advanced)
- Replace Seat Position Sensor — Parts: $60-$150, Labor: $175-$300, ~2.0 hr book time (Intermediate)
Used vs. New Parts: Buying Guide
When a used part is worth it: Avoid used Driver Seat Modules (DSM) for DIY repairs. Most require VIN programming via professional tools, negating any cost savings.
Donor-vehicle mileage cap: roughly under 50000 miles for the part to have meaningful remaining life.
Donor quality checklist:
- Match the part number exactly. Superseded numbers require different programming.
- Ensure the seller offers a warranty of at least 90 days.
- Avoid modules from flood-damaged vehicles due to internal corrosion.
Decision logic:
- If The vehicle requires module programming to the VIN (most modern cars) → Buy a new OEM part and have it professionally installed and programmed.
- If The vehicle is older and the module is known to be 'plug-and-play' → A used part from a low-mileage vehicle is a cost-effective option.
- If The root cause is a known software bug fixed by a TSB → Do not buy any part; pay a dealer to perform the software update.
Warranty tradeoff: Used parts typically have a 30-90 day parts-only warranty. New aftermarket parts carry a 1-year warranty. New OEM parts installed by a dealer carry a 1-2 year parts and labor warranty.
Worst-case if a used part fails: $300-$600 if a used module is incompatible, covering repeat labor and the cost of a new module.
What Happens If You Wait — Timeline
- 0-1 month: Memory function fails to recall or works intermittently. All other seat power functions operate normally. (MPG impact: 0%% · Added cost: $0)
- 1-6 months: If caused by a parasitic drain, the battery weakens, causing slower engine cranking in the morning. (MPG impact: 0%% · Added cost: $0)
- 6-12 months: Persistent parasitic drain causes battery sulfation. The car fails to start, requiring jump starts. (MPG impact: 0%% · Added cost: $150-$250)
- 12+ months: The battery dies completely. The alternator fails from the strain of charging a dead battery. (MPG impact: 0%% · Added cost: $400-$800)
Cost of Not Fixing It
- Immediate: Loss of memory seat, mirror, and steering column functions. Inconvenience for multiple drivers. (Added cost: $0)
- 1-6 months: If caused by a parasitic drain, the vehicle's battery weakens, leading to slow cranking and eventual failure. (Added cost: $150 - $250)
- 6+ months: A persistent parasitic drain permanently damages the battery and strains the alternator, leading to complete charging system failure. (Added cost: $400 - $800)
Diagnosis Steps
- Test the Vehicle Battery and Charging System
Use a multimeter to check battery voltage with the car off; it must be at least 12.4 volts. Start the car and verify the voltage reads between 13.7 and 14.7 volts to confirm the alternator is charging properly.
Tools: Multimeter (Beginner) - Check Related Fuses
Consult the owner's manual and inspect fuses for the Driver Seat Module (DSM), Memory Seat Module (MSM), and Door Control Module (DCM). Replace any blown fuses.
Tools: Owner's manual, fuse puller (Beginner) - Attempt a Module Hard Reset
Disconnect the negative terminal of the car's battery for 30 minutes to force all electronic modules to reboot. Reconnect the battery, save a new memory position, and test the function.
Tools: 10mm wrench (Beginner) - Scan for All Body and Network Codes
Use a professional-grade OBD-II scanner to read Body (B) and Network (U) codes. Confirm B2300 is present and note any communication or voltage faults that dictate the next diagnostic steps.
Tools: Advanced OBD-II Scanner (Intermediate) - Inspect Under-Seat Wiring and Connectors
Move the seat to its highest and most forward position. Inspect the wiring harness underneath for pinched wires. Disconnect the main module connectors and check for bent pins or green corrosion.
Tools: Flashlight (Intermediate) - Pro Tip: Analyze Scan Tool Live Data
Access the live data stream for the Driver Seat Module. Monitor the seat position sensor PIDs as you move the seat; values must change smoothly. Verify the module registers button presses from the door switch.
Tools: Advanced OBD-II Scanner with Live Data (Advanced) - Pro Tip: Test for Power and Ground at the Module
Identify the main power and ground pins on the DSM connector using a wiring diagram. With the ignition on, verify the B+ pin reads at least 12.2V. Test the ground pin against the chassis; resistance must be less than 0.1 Ω.
Tools: Multimeter, vehicle-specific wiring diagram (Advanced) - Pro Tip: Test the Seat Position Sensors
Back-probe the signal wire of a seat position sensor with a multimeter set to DC volts. Slowly move the seat along its track. The voltage must change linearly (e.g., 0.5V to 4.5V). Sudden jumps or dead spots indicate a failed sensor.
Tools: Multimeter, back-probe kit, wiring diagram (Advanced) - Pro Tip: Check CAN Bus Network Signals
If U-codes are present, test the CAN bus at the DSM connector. With the battery disconnected, resistance between CAN High and CAN Low must be 60 Ohms. An oscilloscope should show mirror-image square waves during communication.
Tools: Oscilloscope, multimeter, wiring diagram (Professional)
When This Code Triggers (Freeze-Frame Conditions)
- Module Voltage: 10.5-11.8V (During engine crank or with a weak battery)
- Ignition Status: Accessory or ON (When memory recall or save is attempted)
- Command Source: Door Switch or Key Fob (Code sets when a memory recall command is received)
- Fault Type: Position Mismatch / No Communication / Internal Memory Failure (Module self-test fails or sensor feedback doesn't match expected values)
Related Codes
- B2301 — Indicates the identical error for the passenger's seat. Seeing both codes strongly suggests a shared power, ground, or network issue rather than two failed modules.
- U0141 — Lost Communication With Body Control Module. Indicates a network problem is the primary fault; diagnostics must focus on CAN bus wiring, not the seat itself.
- B1317 / B1318 — Indicates high or low battery voltage. The voltage issue is the root cause of the memory failure; diagnose the battery and alternator first.
- B2228 — Driver's Seat Memory Switch Circuit Failure. Confirms the problem is the physical button panel on the door, not the seat module or motors.
Climate & Environmental Factors
- High Humidity / Moisture: Moisture, especially combined with winter road salt, corrodes under-seat electronics. This increases electrical resistance, causing intermittent signals and module failure.
- Cold Weather: Temperatures below freezing drop battery voltage during startup. If voltage falls below the module's operating threshold, memory writes fail and trigger the code.
- Hot Weather: Extreme cabin heat warps plastic connectors and softens wire insulation, increasing the risk of electrical shorts under the seat.
How to Talk to a Mechanic About This Code
Say this: "I have a B2300 code. Please test the battery, check power and ground at the seat module, and verify if any software update TSBs apply before quoting a module replacement."
This directs the technician to perform a logical, cost-effective diagnosis instead of immediately quoting the most expensive part. It prevents them from 'shotgunning' parts at your expense.
Avoid saying:
- 'My memory seat doesn't work'
- 'The seat does weird things, can you fix it?'
- 'Just do whatever it takes to fix it.'
Questions to ask before authorizing the repair:
- Did you confirm the module is getting stable 12V power and has a good ground (<0.1 Ohms)?
- Have you checked for any applicable software updates or TSBs first?
- Will the new module require programming to my vehicle's VIN?
- What is the parts and labor warranty for this repair?
Where to Take It: Dealer vs Independent vs Chain
- Dealer:
Often necessary. Because fixes involve software updates or VIN programming, the dealer is frequently the only option for a correct repair.
Best for: Vehicles under warranty., Known software issues requiring a dealer-only reprogram., Complex European brands needing brand-specific initialization tools.
Downsides: Highest labor rates., May default to replacing modules rather than repairing wiring. (Typical cost: +50% vs. baseline) - Independent Shop:
Good fit, provided they have the advanced diagnostic tools to program a new module if needed. Verify their capabilities before booking.
Best for: Out-of-warranty vehicles with battery, fuse, or wiring issues., Shops specializing in your vehicle's brand with advanced diagnostic software.
Downsides: May lack the expensive software required for module reprogramming. (Typical cost: +0% vs. baseline) - Chain Shop:
Avoid. Chain shops lack the tools to read B-codes correctly or perform necessary programming.
Best for: Simple battery replacement.
Downsides: Technicians lack training and tools for body module diagnostics., High risk of misdiagnosis. (Typical cost: -10% vs. baseline)
When to Walk Away From the Repair
If the repair cost exceeds your 'annoyance budget' or 10% of the car's value for a non-essential feature, consider manually adjusting the seat and leaving it unfixed.
- Car worth $8000, fix is $250: Fix it. This is a low cost to restore a useful feature, especially for multiple drivers.
- Car worth $15000, fix is $850: Borderline. Get a second opinion. If you are the only driver, manually adjust the seat and ignore the memory function.
- Car worth $4000, fix is $850: Walk away. The repair cost is over 20% of the car's value. Sell the car 'as-is' disclosing the issue.
What Scan Tool You Need for This Code
Minimum: A scanner capable of reading and clearing Body Control Module (BCM) 'B-codes'. Basic engine-only readers will not see code B2300.
A $20 engine code reader cannot communicate with the Body Control Module. It will report 'No Codes Found' while the problem persists.
Budget: BlueDriver Pro (~$100) — Reads and clears B-codes and displays live data to verify button presses and voltage stability.
Mid-range: Foxwell NT510 Elite (~$200) — Includes manufacturer-specific software to perform 'active tests', commanding the seat to move to isolate motor vs. module issues.
Professional: Autel MaxiCOM MK808 (~$500) — Offers full bidirectional control and performs post-repair seat initialization and battery registration procedures.
Rent vs buy: Auto parts stores rent basic engine readers that cannot read B-codes. You must buy a B-code capable scanner like the BlueDriver or visit a professional shop.
How to Clear the Code After You Fix It
- Fix the underlying mechanical or electrical fault.
- Use a B-code capable OBD-II scan tool to clear the fault from the Seat Control Module or BCM.
- Perform the vehicle-specific seat initialization procedure, moving the seat to its full forward, back, up, down, and recline limits to reteach the module.
Drive cycle (~5 minutes): Body codes do not require a drive cycle. Clear the code, cycle the ignition, and attempt to save a new memory position. If the code stays off, the repair is successful.
Watch out for:
- Clearing the code without fixing the root cause results in the code returning immediately.
- Disconnecting the battery clears the code but causes the module to lose initialization, requiring a relearn procedure.
- Basic engine code readers cannot communicate with the Body Control Module to clear this code.
Will This Fail Emissions / State Inspection?
No — by itself this code doesn't fail OBD inspection (but it can keep readiness monitors from setting, which causes a separate fail).
- California: B2300 does not trigger an emissions failure. The Smog Check tests powertrain ('P') codes and emissions readiness, not body control module faults.
- New York: B2300 does not cause an inspection failure. The safety inspection checks physical seat security, not body-related fault codes.
- Texas: B2300 does not cause an inspection failure. Emissions testing does not scan for B-codes.
Most Commonly Affected Vehicles
- GMC / Chevrolet / Cadillac Yukon, Tahoe, Suburban, Escalade (2020-2022) — TSB 21-NA-297 addresses a software anomaly causing inoperable memory functions. The fix is a dealer-performed reprogram of the seat module, not part replacement.
- Ford F-150, F-250, Explorer (2015-2022) — Owners frequently report 'seat creep' where positions are not recalled correctly. Re-linking the key fob to the memory setting sometimes resolves it; otherwise, DSM replacement is required.
- Jeep Grand Cherokee (2019-2023) — Memory seat failures are often tied to software glitches between Uconnect driver profiles. A dealer software update for the radio head unit usually resolves the issue.
- Chrysler / Dodge / Ram Pacifica, Durango, Charger, Ram 1500/2500 (2018-2022) — Faults where memory settings fail to save are often traced to the Door Control Module or its fuse, which handles the memory button inputs.
- BMW 3-Series, 5-Series, X3, X5 (2012-2019) — The seat module loses its initialization after a battery replacement. A 'normalization' procedure using ISTA diagnostic software is required to reteach the seat's position range.
- Mercedes-Benz C-Class, E-Class, S-Class (2010-2018) — Issues frequently stem from the door control module housing the memory switch pack. A full diagnostic scan with XENTRY is critical before replacing parts.
- Volvo XC90, S60, V70 (2010-2018) — Memory seat logic is housed in the Driver Door Module (DDM). B2300 is often fixed by a dealer-performed software reload for the DDM.
- Mazda Mazda3, Mazda6, CX-5 (2014-2020) — Associated with internal memory failure or CAN bus errors. A hard reset by disconnecting the battery is the required first step.
Manufacturer-Specific Notes
- General Motors (Chevy, GMC, Cadillac): GM Service Update N212354510 for 2022 trucks dictates a software-first diagnostic approach. The fix is a module reprogram, explicitly advising against part replacement.
- Ford: Ford trucks suffer from 'seat creep' tied to the easy entry/exit feature. TSBs 19-2346 and 20-2024 address this via module reprogramming or replacement.
- Jeep / Chrysler / Dodge / Ram: Memory settings tie directly to Uconnect driver profiles. Fixes often require a system reset or a dealer-installed update to the radio head unit, not the seat module.
- BMW / Mercedes-Benz: Seat modules lose 'normalization' data after battery disconnects. A re-initialization procedure must be performed with brand-specific diagnostic software to reteach the module the seat's physical limits.
Real Owner Stories
2019 Ford F-150 with intermittent memory failure
The memory seat failed to move into position on startup. Mirrors randomly tilted to their limits.
What they tried:
- Disabled the easy entry/exit feature.
- Attempted to re-save the memory position.
- Linked the memory setting to the specific key fob.
Outcome: Linking the memory position to the key fob partially resolved the issue. The underlying cause was a known software glitch requiring a DSM update.
Lesson: On modern Fords, save the memory position directly to the key fob profile through the dash menu to bypass communication glitches.
2013 Ford F-150 where manual seat controls died but memory buttons worked
The 10-way power seat switch stopped working, but door memory buttons still moved the seat correctly.
What they tried:
- Replaced the 'Memory Seat Module' fuse (#74) with no success.
- Swapped the seat switch with the passenger side.
- Checked the passenger kick panel fuses.
Outcome: Replacing a blown 20A 'Memory Module' fuse (#5) in the kick panel restored all functions.
Lesson: Check ALL potentially related fuses. Separate fuses often power the memory recall function and the manual adjustment switch.
GMC truck with intermittent memory seat function
The memory seat functions failed intermittently, working perfectly some days and failing on others.
What they tried:
- Considered replacing the control module.
- Inspected the wiring harness under the seat.
Outcome: The problem was traced to a corroded connector plug under the driver's seat. Cleaning the pins restored full function.
Lesson: Intermittent electrical issues are frequently caused by simple corrosion in the under-seat wiring harness, not expensive module failures.
How to Prevent This Code From Triggering
- Keep under-seat area clean and dry (During every interior cleaning) — Prevents moisture from causing corrosion on the seat module and connectors, a leading cause of intermittent electrical faults.
- Use a battery tender/maintainer (If vehicle sits for more than 1-2 weeks) — Prevents battery discharge. Stable voltage is crucial for electronic modules to retain memory and avoid software corruption.
- Perform regular battery terminal cleaning (Every 12 months) — Ensures a solid connection, preventing voltage drops that trigger faults in sensitive modules.
- Avoid placing loose objects under the seat (Daily habit) — Prevents objects from blocking the seat track or damaging the exposed wiring harness.
Frequently Asked Questions
Can I fix the B2300 code myself?
Basic checks like inspecting fuses, testing the battery, and performing a battery disconnect reset are DIY-friendly. However, definitive fixes require an advanced scanner, wiring diagrams, and dealer-level software for reprogramming. Stop DIY and go to a shop if basic resets fail.
Why did my seat memory stop working after the battery died?
The seat module needs constant power to retain its memory. When the battery dies, the module loses its saved settings. If it continues failing after battery replacement, the low-voltage event corrupted the software, requiring a dealer reset.
Will clearing the code make it go away?
No. Clearing the code only erases the fault record temporarily. Because B2300 triggers from a persistent hardware or software fault, the module fails its self-test and the code returns immediately upon using the memory function.
How do I reset my driver's seat module?
Perform a hard reset by disconnecting the car's negative battery terminal for 30 minutes to force all modules to reboot. For European brands like BMW or Mercedes, a professional diagnostic tool must perform a true re-initialization.
Why do my memory settings work intermittently?
Intermittent operation points to a borderline weak battery, a loose under-seat connector, or a poor ground connection. The electrical connection remains unstable, working sometimes but failing during voltage drops.
My memory mirrors and steering column also stopped working. Is that related?
Yes. The Driver Seat Module (DSM) or Body Control Module (BCM) controls memory functions for the seat, mirrors, and steering column together. Simultaneous failure points to a central module or power feed issue, not individual motors.
What is the most common misdiagnosis for a B2300 code?
The most common mistake is replacing the expensive Driver Seat Module (DSM) without testing the battery or wiring. A weak battery, bad ground, or corroded under-seat wire are frequent, cheaper root causes. Always test power and grounds before replacing modules.
Can a blown fuse cause the B2300 code?
Yes. A blown fuse immediately cuts power to the module. Check your owner's manual for separate fuses controlling the seat module, door memory buttons, and power seat motors before starting complex diagnostics.
The dealer wants to replace the whole seat, is that necessary?
No. The problem lies with a specific electronic component like the control module, a sensor, a motor, or the wiring. You can replace these parts individually at a fraction of the cost of a full seat assembly.
Does the B2300 code affect my car's safety?
This code does not directly disable primary safety systems like airbags or brakes. However, an improperly adjusted seat compromises driver control and airbag effectiveness during a crash. Manually adjust the seat to a safe driving position until repaired.
Key Takeaways
- Code B2300 indicates a failure in the driver's seat memory system, requiring manual adjustment to ensure safe driving posture and airbag effectiveness.
- A weak 12-volt battery dropping below 12.4V is the most common trigger, causing the seat module to lose its saved memory positions.
- Perform a hard reset by disconnecting the negative battery terminal for 30 minutes before replacing any parts to clear temporary software glitches.
- For 2020-2022 GM and 2015-2022 Ford models, a dealer-performed software update costing $150-$250 often resolves this code without replacing the $500 seat module.
- Verify the seat module receives at least 12.2V of power and has a ground resistance of less than 0.1 Ω before condemning the hardware.
Helpful Videos



The information in this article is provided for general reference and educational purposes only. Vehicle specifications, procedures, and part compatibility can vary by production date, trim level, and region. Always consult your vehicle's factory service manual and verify part numbers before purchasing or performing repairs. Safety-critical components such as airbags, seat belts, and braking systems should be installed by a qualified professional.
- 🎬 Helpful Videos
- What Does B2300 Mean?
- Can I Drive With B2300?
- Common Causes
- Symptoms
- Diagnostic Flowchart
- Common Fixes & Costs
- Used vs. New Parts: Buying Guide
- What Happens If You Wait — Timeline
- Cost of Not Fixing It
- Diagnosis Steps
- When This Code Triggers (Freeze-Frame Conditions)
- Related Codes
- Climate & Environmental Factors
- How to Talk to a Mechanic About This Code
- Where to Take It: Dealer vs Independent vs Chain
- When to Walk Away From the Repair
- What Scan Tool You Need for This Code
- How to Clear the Code After You Fix It
- Will This Fail Emissions / State Inspection?
- Most Commonly Affected Vehicles
- Manufacturer-Specific Notes
- Real Owner Stories
- 2019 Ford F-150 with intermittent memory failure
- 2013 Ford F-150 where manual seat controls died but memory buttons worked
- GMC truck with intermittent memory seat function
- How to Prevent This Code From Triggering
- Frequently Asked Questions
- Can I fix the B2300 code myself?
- Why did my seat memory stop working after the battery died?
- Will clearing the code make it go away?
- How do I reset my driver's seat module?
- Why do my memory settings work intermittently?
- My memory mirrors and steering column also stopped working. Is that related?
- What is the most common misdiagnosis for a B2300 code?
- Can a blown fuse cause the B2300 code?
- The dealer wants to replace the whole seat, is that necessary?
- Does the B2300 code affect my car's safety?
- Key Takeaways
- 🎟️ Get 5% Off