

B1938 on 2019-2020 Alfa Romeo Giulia: A/C Humidity Sensor Fault Causes and Fixes
This code indicates a fault with the A/C humidity sensor, often causing the climate control to malfunction. The most common fix is replacing the sensor, but a 'Proxi Alignment' procedure with a specialized scan tool is frequently required, especially if other modules have been recently replaced or the odometer is flashing.
- B1938 on a Giulia points directly to the A/C humidity sensor or its communication line.
- Before replacing any parts, check if the odometer is flashing or if another electronic part was recently replaced; a 'Proxi Alignment' may be all that is needed.
- This is not a simple DIY fix for most owners due to the requirement for specialized diagnostic software (AlfaOBD/MultiECUScan) and specific hardware to perform the Proxi Alignment.
- The sensor itself is located on the windshield near the rearview mirror.
- If the code suffix is -96 ('Component Internal Failure'), the sensor has likely failed and will need replacement, followed by a Proxi Alignment.
What's Unique About the 2019-2020 Alfa Romeo GIULIA

On the Alfa Romeo Giulia and its platform-mate, the Stelvio, this code is uniquely tied to the vehicle's electronic configuration. As highlighted in manufacturer technical service bulletins, the B1938 code often appears after another electronic module in the car has been replaced. This is because the Giulia uses a 'Proxi' configuration file that keeps an inventory of all installed modules. If this file isn't updated after a hardware change using a specific 'Proxi Alignment' procedure, communication errors like a flashing odometer and DTC B1938 can occur, even if the humidity sensor itself is not faulty.
Diagnostic Flowchart

Tap your situation to follow the diagnostic path that matches what you're seeing on this vehicle.
Symptoms You May Notice
- Air conditioning (A/C) system does not operate properly or at all.
- Inability to control cabin temperature; may blow hot air unexpectedly.
- Front defroster/demister works poorly, leading to a foggy windshield.
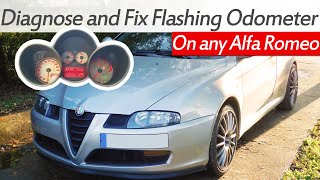
- Flashing odometer, which is a common indicator that a Proxi Alignment is required.
- Check Engine Light may be illuminated.
- Replacing the humidity sensor without performing a Proxi Alignment. A new sensor may not be recognized by the system, causing the code to return immediately. This is a common experience reported by owners on forums.
- Assuming the humidity sensor is faulty when the root cause is a Proxi configuration issue triggered by the replacement of a completely unrelated part, like a door control module.
Most Likely Causes

- Faulty Humidity Sensor 🔴 High Probability The sensor can fail internally, as indicated by the B1938-96 fault code variant, which explicitly means 'Component Internal Failure'. Forum users report these sensors failing intermittently before failing completely.
How to confirm: Scan the vehicle for the specific fault code suffix. If it's B1938-96, the sensor is the primary suspect. Using AlfaOBD or MultiECUScan, check the live data parameters for the humidity sensor. Fixed, nonsensical, or no readings confirm a failed sensor.
Typical fix: Replace the humidity sensor located on the windshield, typically near the rearview mirror mount. A Proxi Alignment is often required after replacement to register the new component with the Body Control Module (BCM).
Est. part cost: $50-$150 - Proxi Alignment Required 🔴 High Probability As noted in TSB S2024000006, this code often appears after another vehicle module has been replaced (e.g., a door module, radio). The Body Control Module (BCM) loses track of the valid components on the CAN bus network, causing a communication fault and a flashing odometer.
How to confirm: Check the vehicle's repair history. If a module was recently replaced and the odometer is flashing, a Proxi Alignment is almost certainly needed. This is confirmed by connecting a compatible scan tool and checking the PROXI status; the tool will often show a mismatch or failed EOL (End of Line) check for a specific module.
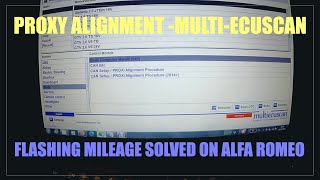
Typical fix: Perform a full Proxi Alignment procedure using AlfaOBD or MultiECUScan software and a compatible OBD2 interface and adapter cables. This rewrites the configuration file to all modules, synchronizing the system. 🎬 See this walkthrough on fixing a flashing odometer with MultiECUScan.
Est. part cost: $0 (Software and tools cost extra, approx. $50 for software and $50-$100 for hardware) - Wiring Harness or Connector Damage ⚪ Low Probability The sensor is located behind the rearview mirror, and wiring can be disturbed during windshield replacement or other repairs in that area.
How to confirm: Visually inspect the wiring and connector going to the humidity sensor for any signs of damage, corrosion, or loose pins. This requires removing the plastic trim around the rearview mirror mount. Test the LIN bus wire for correct voltage.
Typical fix: Repair the damaged section of the wiring harness or clean/replace the connector.
Est. part cost: $5-$50 - Low Battery Voltage ⚪ Low Probability Modern Alfa Romeos are sensitive to battery voltage. A low or failing battery can cause numerous, seemingly unrelated electronic glitches, including CAN bus communication errors that could potentially trigger a B1938 code or a flashing odometer.
How to confirm: Test the battery voltage and health. Check for other electrical gremlins like start/stop system unavailability. Use MultiECUScan to check the IBS (Intelligent Battery Sensor) state of charge.
Typical fix: Charge or replace the vehicle's battery. A Proxi Alignment may still be needed after restoring proper voltage to clear the configuration errors.
Est. part cost: $200-$400
Rare But Worth Checking
- Faulty HVAC Control Module: While rare, the module that reads the sensor could be the source of the problem. This should only be considered after the sensor, wiring, and Proxi configuration have been ruled out.
Diagnosis Steps
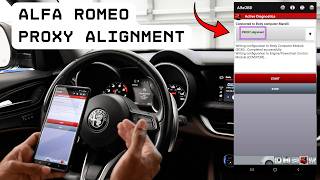
- Connect a diagnostic tool compatible with Alfa Romeo (e.g., MultiECUScan, AlfaOBD) to the OBD-II port, using an SGW bypass module if necessary. 🎬 Watch: How to perform a Proxi Alignment using AlfaOBD.
- Scan the Body Control Module (BCM) and HVAC module for codes. Confirm the presence of B1938 and note the suffix (-64 or -96).
- Check if the odometer is flashing. A flashing odometer strongly indicates a Proxi Alignment is needed.
- Review vehicle history. If any electronic module was recently replaced, prioritize performing a Proxi Alignment.
- If the code is B1938-96 (Internal Failure), the sensor is very likely bad. Proceed to inspect wiring and then replace the sensor if wiring is okay.
- If the code is B1938-64 (Signal Plausibility) and/or the odometer is flashing, a Proxi Alignment should be the first corrective action.
- If the alignment fails or the code returns, inspect the wiring and connector at the humidity sensor. Using a multimeter set to 'peak' min/max, test the LIN bus wire (Blue-Green at Pin 12 of the HVAC module connector). A healthy signal should toggle between approximately 1V and 12V. A steady 12V may indicate a short to power, while near 0V suggests a short to ground or an open circuit.
- If wiring is intact and the Proxi Alignment did not resolve the issue, replace the humidity sensor.
- After replacing the sensor, clear all DTCs and perform another Proxi Alignment to ensure the new hardware is correctly registered by the BCM.
- After a successful Proxi Alignment, several warning lights may appear on the dash. These typically require additional calibrations, such as resetting the steering angle sensor, which can also be done with MultiECUScan.
Parts You'll Likely Need
- Windshield Humidity / Condensation Sensor
(OEM #68440808AA)— This sensor is the component that fails internally (B1938-96) or provides the implausible signal (B1938-64) that triggers the code. The part number 68440808AA supersedes the previous number 55111389AF.
Trusted brands: Mopar
OEM price range: $80-$120
Aftermarket price range: $50-$100
Technical Service Bulletins (TSBs) & Recalls
- S2024000006: Notes that A/C systems may not operate properly and DTC B1938-64 can be set after a module replacement, indicating a 'Signal Plausibility Failure' with the Humidity Sensor LIN Bus. The prescribed fix is a Proxi Alignment.
Platform-Specific Known Issues
- The appearance of DTC B1938-64 after replacing an unrelated electronic module is a known issue, as documented in TSB S2024000006. The fix is not to replace the sensor, but to perform a Proxi Alignment to re-synchronize the vehicle's modules.
- A user on the Multiecuscan forums reported purchasing two new humidity sensors that did not work, still throwing the B1938-96 code, highlighting the critical nature of the Proxi/calibration procedure even with new parts.
- A flashing odometer is the most common symptom that points directly to a Proxi configuration error, which can be caused by this sensor or any other module change on the CAN network.
Mechanic-Grade Diagnostic Values
- LIN Bus Signal Voltage — expected: Toggling voltage between approx. 1V (min) and 12V (max). A stable ~12V indicates the bus is at rest.. Failure: Voltage that is not present (indicates open or short to ground) or voltage that is steady at battery voltage and not toggling (indicates a short to power).
Scan Tool Commands That Help
- MultiECUScan / AlfaOBD: CANdela/Proxy Alignment Procedure — This is the primary service function required after replacing the humidity sensor or any other electronic module on the vehicle. It synchronizes the Body Control Module's list of installed components, resolving communication errors that cause B1938-64 and a flashing odometer.
- MultiECUScan: Proxi Configuration Byte Editing (Ctrl+Alt+C) — This is an advanced function for manually changing vehicle configuration settings at the byte level. While not a standard repair step for this DTC, it demonstrates the tool's capability to alter module configurations, which is the root of many Proxi-related issues. A user might need this for retrofits or troubleshooting complex configuration corruption.
Wiring & Ground Locations

- HVAC Module Connector Pin 12 — On the main connector for the automatic climate control module (NCL).. This is the specific pin for the 'Linea LIN sensore pioggia e luminosità/ comandi clima' (LIN line for rain/light sensor/climate controls). The wire color is Blu-Verde (Blue-Green). This is the exact point to test for the LIN bus signal integrity when diagnosing B1938.
Real Owner Repair Stories
- Multiecuscan Forums (Alfa Romeo Giulia) — Persistent B1938-96 'Component Internal Failure' code for the humidity sensor.
❌ Tried (didn't work) Replacing the humidity sensor with a brand new part., Replacing the humidity sensor a second time with another new part.
✅ What actually fixed it The user reported that the original sensor worked intermittently, while two new sensors did not work at all. The discussion concluded that the issue was not the sensor itself but likely a required calibration or Proxi Alignment procedure that was not being performed correctly, preventing the system from recognizing the new hardware. This highlights that the software/configuration procedure is as critical as the part replacement.
OEM Part Supersession History
55111389AF (and ...AB, ...AC, ...AD, ...AE)→68440808AA— Part revision and update by the manufacturer.
Heads up: No incompatibility is noted; 68440808AA is the correct current replacement part for the earlier numbers.
Helpful Videos
We Have This Part in Stock

The information in this article is provided for general reference and educational purposes only. Vehicle specifications, procedures, and part compatibility can vary by production date, trim level, and region. Always consult your vehicle's factory service manual and verify part numbers before purchasing or performing repairs. Safety-critical components such as airbags, seat belts, and braking systems should be installed by a qualified professional.
- Alfa Romeo GIULIA:
- 🎬 Helpful Videos
- 🛍️ Shop This Part
- What's Unique About the 2019-2020 Alfa Romeo GIULIA
- Diagnostic Flowchart
- Symptoms You May Notice
- Most Likely Causes
- Rare But Worth Checking
- Diagnosis Steps
- Parts You'll Likely Need
- Technical Service Bulletins (TSBs) & Recalls
- Platform-Specific Known Issues
- Mechanic-Grade Diagnostic Values
- Scan Tool Commands That Help
- Wiring & Ground Locations
- Real Owner Repair Stories
- OEM Part Supersession History
- 🎟️ Get 5% Off