

OBD-II Code B1656: Driver's Seat Belt Buckle Switch Circuit Malfunction
The Ultimate Guide to B1656: What it means, why it triggers, and how to fix it for good
- Code B1656 disables or alters your driver's airbag deployment, making it a critical safety failure that automatically fails state inspections.
- Over 80% of B1656 codes stem from a broken wire under the driver's seat or a failed internal microswitch inside the seat belt buckle assembly.
- Always test the under-seat wiring harness with a multimeter before spending $150 to $250 on a replacement buckle assembly.
- Disconnect the negative battery terminal and wait at least 90 seconds before touching any yellow SRS connectors to prevent accidental airbag deployment.
What Does B1656 Mean?

B1656 indicates the Supplemental Restraint System (SRS) module detects an electrical fault in the driver's seat belt buckle switch. The computer cannot determine if the driver is buckled. This critical input dictates airbag deployment force and timing during a crash.
Technical definition: The SAE/ISO definition for B1656 is "Seat Belt Buckle Switch LH Circuit Malfunction." The airbag control module detects an abnormal circuit condition—an open circuit, short to ground, or short to battery voltage (B+)—in the Left-Hand seat belt buckle switch circuit for over 2 seconds.
Can I Drive With B1656?
Yes, But With Caution. Yes, the vehicle drives, but this is a critical safety failure. The Supplemental Restraint System (SRS) is compromised. In a collision, the driver's airbag fails to deploy or deploys with incorrect force, significantly increasing injury risk. Driving with a known SRS fault carries severe insurance and liability implications and guarantees a failed safety inspection.
Common Causes

- Broken Wiring Under the Driver's Seat (Very Common) — Constant flexing from seat adjustments fatigues the wires running from the buckle to the main harness. Over time, these wires break internally or fray, causing an open circuit.
- Defective Seat Belt Buckle Assembly (Very Common) — The microswitch inside the buckle assembly wears out from daily use. It breaks internally or fails due to contamination, sending a permanent open or closed signal.
- Debris or Liquid in Buckle (Common) — Spilled drinks or debris gum up the mechanical parts and short the electrical switch. This causes corrosion and blocks the switch from closing.
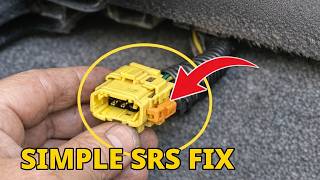
- Loose or Corroded Electrical Connector (Common) — The main yellow SRS connector under the seat loosens over time. Humidity or spilled liquids corrode the pins, creating high electrical resistance.
- Pinched Wiring During Maintenance (Less Common) — Wiring under the seat gets pinched or cut during deep cleaning, audio installations, or seat removal. 🎬 See how to fix under-seat connectors after a deep clean.
- Rodent Damage (Rare) — Rodents nest under seats in parked vehicles and chew through the soy-based wiring insulation, causing shorts.
- Failed Airbag Control Module (SRS/ECU) (Very Rare) — The SRS module itself fails, but this is extremely rare. Rule out the buckle, wiring, and connectors before replacing the module.
Symptoms

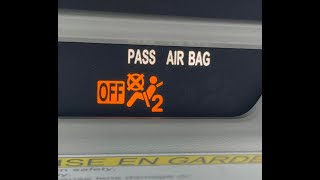
- Airbag Warning Light On — The red SRS or airbag symbol illuminates and stays on the dashboard. This is the primary symptom.
- Flashing Seat Belt Warning Light — The separate seat belt reminder light flashes continuously or stays on, even when the driver's belt is securely buckled.
- Incorrect Seat Belt Chime — The audible warning chime fails to sound when starting the car unbuckled, or it continues to chime after buckling up.
- Failed Safety Inspection — The vehicle automatically fails state-mandated safety inspections if the airbag warning light is illuminated.
- SRS System in Failsafe Mode (scan-tool only — no driver-felt sign) — The SRS module enters a failsafe mode, disabling the driver's airbag or defaulting to a single, predetermined deployment strategy.
Diagnostic Flowchart

Tap your situation to follow the diagnostic path that matches what you're seeing on this code.
Common Fixes & Costs
- Replace Driver's Seat Belt Buckle Assembly
— Parts: $80-$250, Labor: $100-$200, ~1.0 hr book time
(DIY)
Toyota RAV4 (2013-2018): OEM ['73230-0R070-C0', '73230-42090-C0'] (Alt: Dorman (check application))
Toyota Camry (2015-2017): OEM ['73240-06xxx series'] - Repair Damaged Wiring Under Seat — Parts: $5-$20, Labor: $120-$300, ~1.5 hr book time (Intermediate)
- Clean or Re-seat Electrical Connectors — Parts: $0-$15, Labor: $60-$200, ~0.8 hr book time (DIY)
- Replace Wiring Harness Pigtail
— Parts: $25-$75, Labor: $150-$250, ~2.0 hr book time
(Intermediate)
Universal/Various: OEM ['Vehicle-specific pigtail kits'] (Alt: Dorman) - Replace Airbag Control Module — Parts: $200-$800, Labor: $150-$300, ~1.5 hr book time (Professional)
Used vs. New Parts: Buying Guide
When a used part is worth it: The seat belt buckle contains a critical safety switch. A used buckle from a certified auto recycler saves money on older vehicles but carries risk. It makes sense only when a new OEM part is prohibitively expensive or discontinued.
Donor-vehicle mileage cap: roughly under 60000 miles for the part to have meaningful remaining life.
Donor quality checklist:
- Verify the part comes from a certified auto recycler guaranteeing a non-deployed, functional OEM part.
- Avoid parts from vehicles with flood or water damage to prevent hidden corrosion.
- Match the part number exactly, including color codes.
- Visually inspect the part for stress, rust, or damage to the wiring pigtail.
Decision logic:
- If Vehicle is under 10 years old OR the new OEM part costs less than $300 → Buy new OEM. The safety assurance and warranty outweigh the minimal cost savings of a used part.
- If Budget is the primary constraint and the vehicle has high mileage → A certified used part is a viable option, but understand it has a shorter remaining lifespan and no long-term warranty.
- If The part is a known high-failure item with a wear-out mode (like this switch) → Strongly favor a new part to ensure you are not installing a part close to failing.
Warranty tradeoff: Used parts typically have a 30-90 day warranty for function only. New OEM parts carry the manufacturer's parts warranty (typically 12 months).
Worst-case if a used part fails: $200-$400 if a used part fails after the short warranty period, requiring a second part and repeat labor.
What Happens If You Wait — Timeline
- 0-1 Day: Code B1656 sets during the initial key-on self-test. The red SRS warning light illuminates. The system enters failsafe mode. (MPG impact: 0%% · Added cost: $0)
- Immediate and Ongoing: The SRS module disables the driver's airbag or defaults to a single-stage deployment strategy, increasing injury risk. (MPG impact: 0%% · Added cost: $0)
- During a Collision: The compromised airbag system fails to provide optimized protection. Insurance companies deny claims based on negligent maintenance. (MPG impact: 0%% · Added cost: Potentially unlimited (medical bills, legal liability).)
- At Next Safety Inspection: The vehicle automatically fails its mandatory safety inspection. The car cannot be legally registered. (MPG impact: 0%% · Added cost: $50-$150 (Cost of failed inspection and re-inspection fees).)
Cost of Not Fixing It
- Immediate: Driver's airbag system is compromised. It fails to deploy in a crash or deploys at the incorrect force, increasing risk of serious injury. (Added cost: N/A)
- During a Collision: Increased risk of severe injury or death. Insurance companies deny claims or increase personal liability due to negligent maintenance of a critical safety system. (Added cost: Potentially unlimited (medical bills, legal liability).)
- At Next Vehicle Inspection: An illuminated airbag light is an automatic failure of mandatory safety inspections, preventing legal registration renewal. (Added cost: Cost of repair + re-inspection fees.)
Diagnosis Steps
- Verify the Fault with a Scan Tool
Confirm B1656 is the active code using an OBD-II scanner capable of reading the SRS module. Note any other codes, as a wiring issue triggers multiple faults.
Tools: SRS-Capable OBD-II Scanner (Beginner) - Check Live Data (Pro Tip)
Use the scanner's live data function to monitor the 'Driver's Buckle Switch' parameter. Observe the screen as you insert and release the seat belt. The status must change cleanly from 'Unbuckled' to 'Buckled'. If the status is stuck, the fault is present.
Tools: Advanced OBD-II Scanner (Intermediate) - Perform a Thorough Visual Inspection
Move the driver's seat all the way forward and up. Look for broken wires, chafed insulation, or unplugged connectors under the seat. Pay close attention to where the wire harness bends.
Tools: Flashlight (Beginner) - Disconnect Battery and Inspect Connectors
CRITICAL SAFETY STEP: Disconnect the negative battery terminal and wait at least 90 seconds for the SRS system's backup power to discharge. Disconnect the yellow SRS connector under the seat. Inspect the pins for corrosion or moisture. Clean and reconnect firmly.
Tools: Wrench set, Electrical Contact Cleaner (Intermediate) - Test the Buckle Switch Resistance
With the buckle connector unplugged, use a multimeter set to Ohms (Ω). Probe the two pins on the buckle side. A functioning switch shows an open circuit ('OL') when unbuckled, and low resistance (under 100 Ohms) when buckled. No change confirms a faulty buckle switch.
Tools: Multimeter (Intermediate) - Check for Short to Power (B+) and Open Circuit Voltage
With the buckle connector unplugged and battery reconnected, set a multimeter to DC Volts. Probe the vehicle-side harness connector pins and a good ground. Both wires should read below 1V with the ignition ON. A 12V reading indicates a short to power in the harness.
Tools: Multimeter (Advanced) - Test Harness for Continuity and Shorts
With both the buckle and SRS module connectors unplugged, test the two wires running between them. Check for continuity (resistance < 1 Ohm). Check for a short to ground (resistance 'OL'). Check for a short between the two wires (resistance 'OL').
Tools: Multimeter, Vehicle Wiring Diagram (Advanced) - Clear Codes, Initialize, and Retest
Reconnect all connectors and the battery. Clear the B1656 code from the SRS module. Turn the ignition on and wait 60 seconds. If the light stays off, the repair is successful.
Tools: SRS-Capable OBD-II Scanner (Beginner)
When This Code Triggers (Freeze-Frame Conditions)
- System State: KOEO (Key On, Engine Off) (The SRS module runs a self-test on its components every time the ignition turns on.)
- Fault Detection Time: Approx. 2-5 seconds (The code sets after the module detects a continuous open circuit or short for this duration.)
- Vehicle Speed: 0 mph (Fault is detected during the initial startup self-check before the vehicle moves.)
- Battery Voltage: 11.5V - 14.5V (Normal operating voltage. B1656 is specific to the buckle circuit, not general low voltage.)
Related Codes
- B1655 — The passenger's side equivalent of B1656. It indicates an identical fault for the Right-Hand seat. Diagnosis is identical.
- B1653 — Driver's Seat Position Sensor Circuit. This sensor wiring runs under the seat alongside the buckle wiring. A damaged harness frequently triggers both B1653 and B1656 simultaneously.
- B1735 — Anchor Pretensioner Resistance Too Low. The pretensioner wiring often runs alongside the buckle switch wiring. A single point of damage affects both circuits.
- B1650 — Passenger's Occupant Classification System (OCS) fault. Unrelated to the driver's side buckle but part of the overall SRS system.
Climate & Environmental Factors
- High Humidity / Moisture: Moisture from humidity, spilled drinks, or wet climates seeps into under-seat connectors or the buckle mechanism. This corrodes electrical pins, increases resistance, and causes circuit faults.
- Extreme Cold / Temperature Fluctuations: Cold weather makes plastic wire insulation brittle. Moving the driver's seat cracks this hardened insulation, exposing the wire and causing a short or open circuit.
How to Talk to a Mechanic About This Code
Say this: "I have an airbag light on, and my scanner shows code B1656 for the driver's buckle switch circuit. Please check the wiring and connector under the driver's seat for continuity and damage before recommending a full buckle replacement."
This directs the technician to perform a proper diagnosis (checking the cheaper-to-fix wires first) rather than jumping to replacing the expensive buckle assembly.
Avoid saying:
- 'My airbag light is on, can you fix it?'
- 'Just replace the seat belt thing.'
- 'Do whatever you think is necessary.'
Questions to ask before authorizing the repair:
- Did you find a broken wire, or did the buckle switch itself fail the resistance test?
- If it's a broken wire, will you perform a solder and heat-shrink repair?
- If the buckle needs replacement, is the part you're quoting an OEM part?
- Can you show me the damaged part or the failed readings before I approve the work?
Where to Take It: Dealer vs Independent vs Chain
- Dealer:
A safe but expensive choice. They default to a full buckle replacement which might not be necessary.
Best for: Vehicles under warranty., Complex cases requiring manufacturer-specific tools., When you want the highest assurance of OEM parts.
Downsides: Highest labor rates and part costs., Less willing to perform a simple wire repair. (Typical cost: +50% vs. baseline) - Independent Shop:
Best fit, provided you choose a reputable shop that explicitly works on SRS systems. Their willingness to repair wiring saves significant money.
Best for: Out-of-warranty vehicles., Shops specializing in electrical or SRS repairs., Getting an honest diagnosis leading to a cheaper wire repair.
Downsides: Some general shops refuse SRS work due to liability., You must vet the shop to ensure SRS experience. (Typical cost: +0% vs. baseline) - Chain Shop:
AVOID. This is a critical safety system repair outside the scope of chain shops.
Best for: Tires, oil changes, and brakes.
Downsides: Technician skill is highly variable., Not equipped or trained for SRS diagnostics. (Typical cost: -10% vs. baseline)
When to Walk Away From the Repair
If the estimated repair cost exceeds 40-50% of the car's value, consider selling. However, because an airbag light is a critical safety failure and an automatic inspection fail, this repair is non-negotiable if you plan to keep driving legally.
- Car worth $4000, fix is $450: Fix it. The cost is below the threshold, and it's a critical safety repair required to pass inspection.
- Car worth $2500, fix is $1500: Walk away. The repair cost is over 50% of the car's value.
- Car worth $15000, fix is $500: Fix it without question. This is a minor cost relative to the vehicle's value.
What Scan Tool You Need for This Code
Minimum: A scanner that reads and clears codes from the SRS (Airbag) control module. A basic engine-only code reader fails to read B1656.
A standard $20 OBD-II scanner only communicates with the Engine Control Unit (ECU). The B1656 code is stored in the separate SRS module.
Budget: Autel MaxiCheck ML629 / FOXWELL NT604 Elite (~$80) — Reads and clears codes from the SRS module. This is the minimum required tool to confirm B1656 and turn the light off.
Mid-range: BlueDriver Pro / Innova 5610 (~$120) — Offers Live Data for the SRS module. You watch the 'Buckle Switch' status change in real-time as you buckle the belt, instantly confirming if a repair was successful.
Professional: Autel MaxiCOM MK808S / Launch X431 Series (~$450-900) — Provides full-system access with comprehensive live data and graphing. Overkill for just this code, but invaluable for serious DIYers.
Rent vs buy: Auto parts stores read check engine lights for free, but their basic scanners usually cannot read SRS codes. Find a store with an SRS-capable scanner in their 'Loan-A-Tool' program for a one-time fix. Buy a mid-range scanner if you perform regular maintenance.
How to Clear the Code After You Fix It
- Ensure the physical fault is properly repaired.
- Reconnect the negative battery terminal.
- Use an SRS-capable OBD-II scan tool to connect to the Airbag/SRS control module.
- Select 'Clear DTCs' or 'Erase Fault Codes'.
- Turn the ignition off, then back on, and wait 60 seconds for the SRS module to complete its self-test. The airbag light illuminates briefly and turns off.
Drive cycle: No specific drive cycle is required. The system's readiness is determined by a self-test performed at each key-on event. If the light stays off after startup, the repair is successful.
Readiness monitors affected: None. SRS system status does not affect emissions readiness monitors.
Watch out for:
- Using a basic OBD-II scanner that only reads engine codes. You must use a scanner that accesses the SRS module.
- Clearing the code without fixing the underlying electrical problem. The code returns immediately on the next self-test.
- Forgetting to wait 90 seconds after disconnecting the battery before working on SRS components.
Will This Fail Emissions / State Inspection?
No — by itself this code doesn't fail OBD inspection (but it can keep readiness monitors from setting, which causes a separate fail).
- California: Passes smog inspection. The airbag system is not part of the emissions test, and California lacks a separate mandatory vehicle safety inspection for most vehicles.
- New York: Passes safety inspection. The inspector checks the airbag light for advisement only; it is not a cause for rejection.
- Texas: Passes safety inspection. The airbag system is not listed as an inspected item under Texas Department of Public Safety rules.
Most Commonly Affected Vehicles
- Toyota RAV4 (2013-2025) — Extremely common. Caused by a faulty internal buckle switch. Part number for 2014+ models is 73230-0R070-C0.
- Toyota Camry (2015-2018) — Frequently reported on these models, with the buckle assembly being the primary culprit.
- Scion tC (2011-2016) — Well-documented cases of failed buckles and broken wires under the driver's seat due to seat movement.
- Toyota Corolla (2013-2019) — The driver's side buckle switch circuit is a known failure point on this high-volume model.
- Lexus LS, ES, RX (2005-2015) — Sharing SRS components with Toyota, these models are highly susceptible. Diagnosis is identical.
- Subaru Outback, Legacy, Ascent (2015-2023) — TSB 17-20-24 issued for the Ascent acknowledges harness design flaws causing open circuits.
- Volkswagen Jetta, Golf, Passat, Atlas (2011-2023) — VW models suffer from brittle under-seat wiring harnesses. Multiple recalls and a class-action lawsuit exist for wiring harness issues.
- Hyundai / Kia Elantra, Forte, Sonata (2010-2018) — A fault in the under-seat harness triggers buckle and pretensioner codes simultaneously.
Manufacturer-Specific Notes
- Toyota/Lexus/Scion: The internal switch in the buckle assembly fails frequently. Technicians report replacing the buckle is a more permanent fix than attempting a wire repair due to the high failure rate of the switch itself.
- Subaru: TSB 17-20-24 for the 2019-2023 Ascent acknowledges excessive free play in the seat belt buckle wire harness causes wear and open circuits. This highlights a known design sensitivity to harness stress.
- Volkswagen: Under-seat and door wiring harnesses are a notorious weak point. Insulation becomes brittle, and copper wires fatigue and break. Multiple recalls and class-action lawsuits confirm this pattern.
- Hyundai/Kia: Major recalls affect 2019-2023 models for exploding seat belt pretensioners. The pretensioner wiring bundles with the buckle switch wiring. Damage to this harness triggers both codes.
Real Owner Stories
2012 Scion tC with flashing seatbelt light
Airbag light stayed on and the seatbelt light flashed constantly with no chime.
What they tried:
- Replaced the passenger-side airbag module.
- Replaced the driver's side seatbelt buckle.
- Attempted to clear the code multiple times.
Outcome: After removing the driver's seat, the owner discovered two broken wires in the harness. Splicing the wires solved the problem, and the airbag light turned off.
Lesson: Don't assume the most expensive part is the cause. A visual inspection of the under-seat wiring harness for breaks reveals the true, cheaper problem.
2014 Toyota RAV4 with airbag and seatbelt lights on
The seatbelt light remained on even when buckled. A scanner confirmed code B1656.
What they tried:
- Used a scanner's live data feature to monitor the buckle switch status. The data showed 'unset' and did not change when buckling the belt.
- Visually inspected the under-seat wiring and found no damage.
Outcome: The owner replaced the entire driver's seat belt buckle assembly (Part #73230-0R070-C0). After installation, live data showed the status changing correctly, and the warning lights stayed off.
Lesson: Using a scanner with live data is a powerful diagnostic step. If live data shows the switch status is stuck and wires are intact, replace the buckle assembly.
2017 Toyota Camry with a puppy
The airbag light came on after the owner's puppy rode in the car.
What they tried:
- Took the car to the Toyota dealership for diagnosis.
Outcome: The dealership found the puppy chewed through two airbag wires under the driver's seat. The wires were repaired, and the system reset.
Lesson: Pets or stored items under your seat cause wiring damage. Check for physical damage before assuming a component failed internally.
How to Prevent This Code From Triggering
- Keep the area under the front seats clear (Always) — Items stored under the seat shift and snag the delicate SRS wiring harness, causing a circuit fault.
- Install protective wire loom (Once) — Adding split plastic wire loom over the under-seat harness provides a barrier against abrasion, chewing, and crushing damage.
- Be mindful when moving the seat (Daily habit) — Avoid slamming the seat to its limits. This reduces stress and fatigue on the wiring harness.
- Use caution when vacuuming (During cleaning) — Aggressively jamming a vacuum nozzle under the seat dislodges connectors or damages wires.
- Apply dielectric grease to connectors (During any under-seat repair) — Applying dielectric grease to the seal prevents moisture intrusion and corrosion.
Frequently Asked Questions
Can I just clear the code to turn the airbag light off?
You can clear it with a scanner, but it is a hard fault. The SRS module performs a self-test at every startup. If the electrical problem still exists, the code returns immediately.
What's the most common mistake when diagnosing B1656?
The biggest mistake is immediately replacing the expensive seat belt buckle assembly without testing the wiring harness. Many owners waste money on a new buckle when the true cause is a simple broken wire under the seat. Always perform a visual and multimeter test first.
Can I just put a resistor in the plug to trick the system?
This is strongly discouraged and extremely dangerous. A resistor tricks the SRS module into thinking the driver is always buckled, leading to incorrect airbag deployment force in a crash. It creates a massive safety liability and is not a legal repair.
Will my car pass a safety inspection with code B1656?
No. In any jurisdiction with mandatory vehicle safety inspections, an illuminated airbag warning light is an automatic and immediate failure.
What does 'Short to B+' mean in the technical definition?
B+ stands for Battery Positive, meaning the car's full 12-volt battery power. A 'Short to B+' means the buckle switch signal wire is accidentally touching a 12V power wire. This feeds the SRS module a constant, incorrect high-voltage signal.
Why did my independent mechanic refuse to work on the airbag system?
Many general repair shops avoid SRS system work due to severe liability concerns. The safety-critical nature of airbags means a small mistake carries massive legal and physical consequences. You must take the vehicle to an SRS specialist or dealership.
Is it safe to repair SRS wiring myself?
Yes, if you are experienced with automotive electrical diagnostics. However, you MUST disconnect the negative battery terminal and wait at least 90 seconds before touching any yellow SRS components. This prevents accidental airbag deployment, which causes severe injury.
Key Takeaways
- Code B1656 disables or alters your driver's airbag deployment, making it a critical safety failure that automatically fails state inspections.
- Over 80% of B1656 codes stem from a broken wire under the driver's seat or a failed internal microswitch inside the seat belt buckle assembly.
- Always test the under-seat wiring harness with a multimeter before spending $150 to $250 on a replacement buckle assembly.
- Disconnect the negative battery terminal and wait at least 90 seconds before touching any yellow SRS connectors to prevent accidental airbag deployment.
Helpful Videos
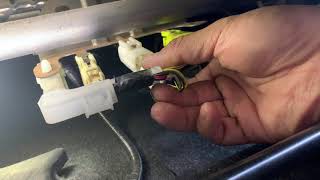
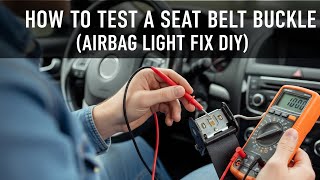
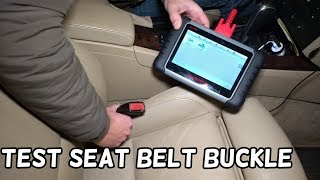

The information in this article is provided for general reference and educational purposes only. Vehicle specifications, procedures, and part compatibility can vary by production date, trim level, and region. Always consult your vehicle's factory service manual and verify part numbers before purchasing or performing repairs. Safety-critical components such as airbags, seat belts, and braking systems should be installed by a qualified professional.
- 🎬 Helpful Videos
- What Does B1656 Mean?
- Can I Drive With B1656?
- Common Causes
- Symptoms
- Diagnostic Flowchart
- Common Fixes & Costs
- Used vs. New Parts: Buying Guide
- What Happens If You Wait — Timeline
- Cost of Not Fixing It
- Diagnosis Steps
- When This Code Triggers (Freeze-Frame Conditions)
- Related Codes
- Climate & Environmental Factors
- How to Talk to a Mechanic About This Code
- Where to Take It: Dealer vs Independent vs Chain
- When to Walk Away From the Repair
- What Scan Tool You Need for This Code
- How to Clear the Code After You Fix It
- Will This Fail Emissions / State Inspection?
- Most Commonly Affected Vehicles
- Manufacturer-Specific Notes
- Real Owner Stories
- 2012 Scion tC with flashing seatbelt light
- 2014 Toyota RAV4 with airbag and seatbelt lights on
- 2017 Toyota Camry with a puppy
- How to Prevent This Code From Triggering
- Frequently Asked Questions
- Can I just clear the code to turn the airbag light off?
- What's the most common mistake when diagnosing B1656?
- Can I just put a resistor in the plug to trick the system?
- Will my car pass a safety inspection with code B1656?
- What does 'Short to B+' mean in the technical definition?
- Why did my independent mechanic refuse to work on the airbag system?
- Is it safe to repair SRS wiring myself?
- Key Takeaways
- 🎟️ Get 5% Off