

OBD-II Code B1630: Right Low Beam Circuit High Voltage
What B1630 means, why it triggers, and how to fix it
- On Chrysler, Dodge, and Jeep vehicles, code B1630 specifically disables the passenger-side low beam headlight due to a high-voltage circuit fault.
- Perform a 5-minute, $0 bulb swap from the driver to the passenger side before spending $500+ on a new Totally Integrated Power Module (TIPM).
- Driving with an inoperative passenger headlight risks a $25-$250 traffic ticket and reduces nighttime visibility by 50%.
- Verify your vehicle's specific code definition; on 2007-2020 Toyota models, B1630 indicates a critical side airbag failure, not a headlight issue.
What Does B1630 Mean?

B1630 means the vehicle's Body Control Module (BCM) or Totally Integrated Power Module (TIPM) detected voltage in the passenger-side low beam headlight circuit exceeding the maximum threshold. The computer interprets this as a fault, shuts down the circuit to prevent electrical damage, stores the code, and illuminates a dashboard warning light.
Technical definition: The SAE/ISO definition for B1630 (primarily used by Chrysler, Dodge, and Jeep) is "Right Low Beam Control Circuit High". The module detected excessive voltage when commanding the headlight on. Crucially, Toyota uses this exact code for a Curtain Shield Airbag Sensor fault, and Kia uses it for security system errors.
Can I Drive With B1630?
Yes, But With Caution. Yes, but your passenger-side low beam headlight will not function. This creates a significant safety hazard by reducing visibility and making your vehicle less visible at night or in adverse weather. Driving without a fully functional headlight is illegal in all 50 states and results in a $25-$250 traffic ticket. It poses no mechanical risk to the engine, but requires immediate repair for safety.
Common Causes

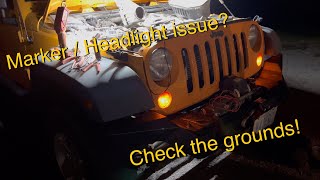
- Corroded or broken ground wire (Very Common) — The headlight circuit requires a solid connection to the vehicle's chassis to complete the circuit. If this connection point becomes loose, corroded, or breaks, it creates high resistance. The control module sees this unexpected resistance as a high voltage condition, triggering the code.
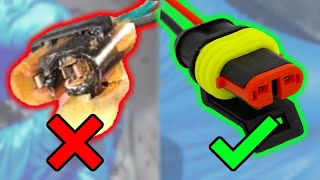
- Faulty or incorrect headlight bulb (Common) — A failing bulb creates an internal short or changes resistance, causing voltage spikes. Installing low-quality aftermarket LED or HID kits not designed for the vehicle's computer presents a resistance level the BCM/TIPM interprets as a fault. 🎬 See how to fix light out errors when installing LEDs.
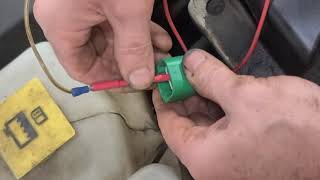
- Damaged or corroded electrical connector (Common) — The plastic connector plugging into the headlight bulb or the main connector at the TIPM/BCM suffers water damage, corrosion, or melted pins. This poor connection causes erratic voltage readings flagged as a fault.
- Aftermarket accessory interference (Less Common) — Improperly installed aftermarket accessories, such as remote start systems or alarms, interfere with headlight circuits. If tapped into the wrong wires, they introduce voltage fluctuations causing the BCM/TIPM to register a B1630 code.
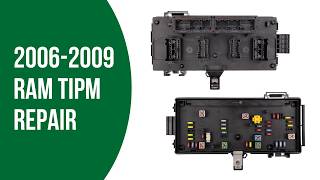
- Faulty Totally Integrated Power Module (TIPM) or Body Control Module (BCM) (Less Common) — The electronic module controlling the headlights has an internal failure. The specific field-effect transistor (FET) sending power to the bulb malfunctions, causing a high voltage reading. This $500+ repair is the last resort after eliminating wiring and ground faults. 🎬 Watch this guide on diagnosing and replacing a faulty TIPM.
- Wiring shorted to voltage (Rare) — The power wire controlling the right low beam rubs through its insulation and contacts another wire carrying battery voltage. This sends constant, excessive voltage down the low beam circuit, immediately detected as a 'Circuit High' fault.
- Previous accident or body repair (Rare) — Improper front-end collision repairs pinch wiring harnesses, leave ground wires loose, or damage connectors, leading to a high voltage condition weeks or months after the repair.
Symptoms

- Right (passenger side) low beam headlight is out — The control module shuts down the circuit, preventing the bulb from illuminating. The high beam on the same side usually still works via a separate circuit.
- Headlight works intermittently — The headlight flickers or turns on and off over bumps, pointing to a loose connection, a failing bulb, or a wire intermittently shorting out.
- Check Engine Light or warning light is on — The vehicle's main computer illuminates a dashboard warning light alerting the driver to a body electrical circuit fault.
- Burning smell or melted connector — Severe shorts or high resistance cause the electrical connector at the headlight bulb to overheat, resulting in a burning plastic smell or visible melting.
- Unrelated electrical issues (also visible on scanner) — If the root cause is a shared bad ground point, you will notice simultaneous problems like dimming interior lights, brake warning lights, or erratic turn signals.
Diagnostic Flowchart
Tap your situation to follow the diagnostic path that matches what you're seeing on this code.
Common Fixes & Costs
- Replace headlight bulb
— Parts: $15-$50, Labor: $0-$50, ~0.5 hr book time
(DIY)
Jeep Wrangler (JK): OEM H13 (9008) (Alt: Sylvania H13, Philips H13)
Dodge Ram 1500 (2006-2012): OEM H13 (9008) (Alt: Sylvania H13)
Chrysler 300 (Gen 1): OEM 9006 (Low Beam) (Alt: Sylvania 9006) - Repair ground connection — Parts: $0-$15, Labor: $80-$150, ~1.0 hr book time (Intermediate)
- Replace headlight connector pigtail
— Parts: $15-$40, Labor: $100-$180, ~1.0 hr book time
(Intermediate)
Dodge Ram 1500 (2011-2022): OEM Mopar 68444837AA (Alt: Standard Motor Products S-553, Dorman 645-943)
Jeep Wrangler (JK): OEM N/A (Alt: Dorman 645-943 (H13 style)) - Replace Body Control Module (BCM) / TIPM
— Parts: $400-$800, Labor: $150-$300, ~1.5 hr book time
(Professional)
Dodge Ram 1500 (2012): OEM Mopar 68089323AE (Alt: GoECM (Reman), MAKS Enterprises (Reman))
Jeep Grand Cherokee (2011-2013): OEM Check by VIN (Alt: Circuit Board Medics (Repair Service)) - Repair short or open in wiring harness — Parts: $5-$20, Labor: $150-$400+, ~2.5 hr book time (Advanced)
DIY vs Professional
- Replace headlight bulb — Beginner:
- Repair ground connection — Beginner:
- Replace headlight connector pigtail — Beginner:
- Replace Body Control Module (BCM) / TIPM — Beginner:
Used vs. New Parts: Buying Guide
When a used part is worth it: A used TIPM from a junkyard is a high-risk option. It makes sense only if the budget is extremely tight and the part numbers match exactly. Used TIPMs carry hidden faults and require dealer programming to match your vehicle's VIN and options.
Donor-vehicle mileage cap: roughly under 100000 miles for the part to have meaningful remaining life.
Donor quality checklist:
- Match the OEM part number exactly, including suffix letters (e.g., 'AG' vs 'AL'), which denote hardware revisions.
- Avoid modules from vehicles with flood or fire damage.
- Ensure the donor vehicle's options (fog lights, security system) match your own to simplify programming.
Decision logic:
- If The problem is confirmed to be an internal TIPM failure → A remanufactured TIPM from a reputable specialist is the best value. These units are repaired, updated to fix common failure points, and include a warranty.
- If Budget is the absolute primary concern and you accept the risk → A used TIPM is an option, but factor in the $150-$250 dealer programming cost and the risk of the part being faulty.
- If You want maximum reliability and a dealer warranty → Buy a new OEM TIPM from a dealership, but be prepared for the highest overall cost.
Warranty tradeoff: Junkyard parts typically offer a 30-day warranty covering only the part, not labor or programming. Remanufactured units from specialists often include a 1-year warranty.
Worst-case if a used part fails: $500-$800 if a used or improperly programmed TIPM fails, requiring repeat labor, programming fees, and a second module purchase.
What Happens If You Wait — Timeline
- Immediate: Code B1630 is set, and the TIPM/BCM disables the right low beam. The headlight is completely out, but no physical damage has occurred yet.
- Weeks to Months: If caused by a poor connection, high resistance generates excessive heat, melting the plastic connector housing and damaging the bulb base.
- 2-6 months: If caused by a chafed wire, continued vibration worsens the short. Intermittent shorting severely stresses the electronic driver circuit within the TIPM.
- 6+ months: A persistent short circuit permanently destroys the solid-state driver inside the TIPM. The module is now internally damaged.
Cost of Not Fixing It
- Immediate: Significantly reduced visibility at night. It is illegal to drive with a non-functioning headlight in all 50 states. (Added cost: $25-$250 in fines, depending on the state. May be issued as a 'fix-it' ticket.)
- 0-3 months: Increased risk of being pulled over, ticketed, and having points added to your driving record. Increases liability in an accident. (Added cost: $100-$500+ in increased insurance premiums if the violation is reported.)
- 3+ months: If the cause is a wiring short, continued driving destroys the wiring harness or permanently burns out the expensive TIPM/BCM module. (Added cost: $400-$1000+ to replace a damaged TIPM/BCM that could have been avoided.)
Diagnosis Steps

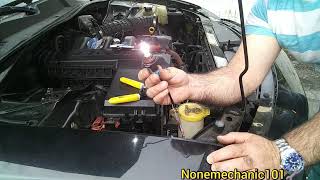
- Perform a Bulb Swap
Swap the non-working right low beam bulb with the known-good left low beam bulb. If the problem moves to the left side, the bulb is faulty. If the right side still fails, the problem lies in the wiring or control module. This costs nothing and definitively rules out the bulb.
Tools: Gloves (Beginner) - Inspect the Headlight Connector and Wiring
Unplug the electrical connector from the headlight bulb. Use a flashlight to inspect the terminals for green/white corrosion, melted plastic, or pushed-back pins. Gently tug the wires to ensure they are secure.
Tools: Flashlight (Beginner) - Test the Ground Circuit Resistance
Set a multimeter to Ohms. Place one probe on the ground pin in the headlight connector and the other on the negative battery terminal or a clean chassis ground. A reading above 1.0 ohm or 'OL' indicates a faulty ground connection requiring repair.
Tools: Multimeter, Vehicle Wiring Diagram (Intermediate) - Clear Codes and Re-Scan
Use an OBD-II scanner to clear the B1630 code. Turn the headlights on. If the code returns immediately, it is an active 'hard fault'. If it delays, it is an intermittent issue like a loose connection or chafed wire.
Tools: OBD-II Scanner (Beginner) - Activate the Circuit with a Test Light
Reconnect the TIPM/BCM connector but leave the headlight unplugged. Connect a 12-volt test light between the power and ground pins in the headlight connector. Turn the headlights on. If it fails to illuminate brightly despite good wiring and grounds, the TIPM/BCM driver is faulty.
Tools: 12V Test Light (Intermediate) - Check for Voltage Where It Shouldn't Be
Turn the ignition on, headlights off. Disconnect the headlight connector. Set the multimeter to DC Volts. Probe the power wire pin and a known good ground. Any reading above 0 volts confirms a short to a power source in the harness.
Tools: Multimeter, Vehicle Wiring Diagram (Advanced) - Check for an Open in the Control Circuit
Ignition off. Disconnect the headlight and TIPM/BCM connectors. Measure resistance on the low beam control wire between the headlight pin and the module pin. A reading above 1.0 ohm or 'OL' indicates a broken wire.
Tools: Multimeter, Vehicle Wiring Diagram (Advanced) - Test Control Circuit for Shorts
Ignition off. Disconnect the headlight and TIPM connectors. Measure resistance between the low beam control circuit pin and the positive battery terminal. A reading other than 'OL' confirms a short to power.
Tools: Multimeter, Vehicle Wiring Diagram (Advanced) - Suspect the Power Module (TIPM/BCM)
If the bulb, connector, ground, and wiring circuits test perfectly, the internal solid-state driver inside the TIPM/BCM has failed. Replacing this module requires programming it to the vehicle with a professional scan tool.
Tools: Advanced Scan Tool (Professional)
When This Code Triggers (Freeze-Frame Conditions)
- Headlight Switch Status: On (The code sets the moment the BCM/TIPM commands the headlight circuit on and detects voltage higher than the expected threshold.)
- System Voltage: 12.6V - 14.8V (The fault logs with the engine off (battery voltage) or running (charging system voltage).)
- Fault Type: Active/Current (If the code sets instantly upon turning on the headlights, it indicates a 'hard fault' like a direct short to voltage or an open ground.)
- Component Status: Disabled (After detecting the 'Circuit High' condition, the BCM/TIPM disables the output driver for the right low beam to prevent damage.)
Related Codes
- B162C — Left Low Beam Control Circuit High. The direct companion code for the driver's side. If both B162C and B1630 are present, suspect incompatible aftermarket LED bulbs, a shared faulty ground, or a major TIPM failure.
- B1638 — Right High Beam Control Circuit High. If this appears alongside B1630, the fault is common to the entire passenger headlight unit, such as its main ground wire or main connector.
- B1634 — Left High Beam Control Circuit High. Seeing all four codes (B162C, B1630, B1634, B1638) guarantees the vehicle's computer is rejecting incompatible aftermarket LED/HID headlights.
- C1008 — Brake Fluid Level Circuit High. On Jeeps, the brake fluid level sensor shares a ground point with the headlights. Cleaning this single shared ground resolves both codes simultaneously.
Climate & Environmental Factors
- Humidity and Water Ingress: High humidity, heavy rain, and car washes force moisture into unsealed headlight assemblies and electrical connectors, accelerating the corrosion that triggers code B1630.
- Road Salt (Cold Climates): Salt spray coats engine bay and chassis components, rapidly degrading ground points and wiring connectors, significantly increasing the likelihood of this fault.
How to Talk to a Mechanic About This Code
Say this: "I have a B1630 code for the right low beam, and the headlight is out. I've already swapped the bulbs, so it's not the bulb itself. Please check the headlight connector for melting and test the main ground connection for that circuit before quoting a new TIPM."
This signals you have ruled out the most basic issue. It directs the mechanic to follow a logical diagnostic path (connector, ground, wiring) instead of jumping to the most expensive conclusion (a bad TIPM).
Avoid saying:
- 'My headlight is out, can you fix it?'
- 'The code is B1630, just replace whatever part is needed.'
- 'I think I need a new computer, can you give me a price?'
Questions to ask before authorizing the repair:
- What was the resistance reading on the ground circuit? Was it under 1 ohm?
- Did you find any corrosion or melting on the headlight connector pigtail?
- If recommending a TIPM replacement, can you confirm you tested the wiring between the TIPM and the headlight and found no shorts or opens?
- What is the warranty on this repair, including both parts and labor?
Where to Take It: Dealer vs Independent vs Chain
- Dealer:
Use if the final diagnosis is a failed TIPM needing OEM programming, or if under warranty. Be cautious of a quick diagnosis without evidence that simpler causes were ruled out.
Best for: Vehicles under warranty, Confirmed TIPM/BCM failure requiring OEM replacement and programming
Downsides: Highest labor rates, May replace the expensive TIPM module before thoroughly checking wiring, grounds, or connectors (Typical cost: +50% vs. baseline) - Independent Shop:
Best fit for initial diagnosis. A good independent electrical specialist solves 90% of B1630 causes for less than a dealer and can install pre-programmed remanufactured TIPMs.
Best for: Out-of-warranty vehicles, Diagnosing and repairing common causes like bad grounds, wiring issues, or faulty connectors
Downsides: Quality varies; ensure the shop has strong electrical diagnostic skills, May lack specific tools to program a new TIPM, requiring a dealer trip (Typical cost: +0% vs. baseline) - Chain Shop:
AVOID for diagnosing a B1630 code. They are unlikely to correctly identify a ground or wiring fault and may recommend unnecessary parts.
Best for: Simple bulb replacement only
Downsides: Technician skill in electrical diagnosis is highly variable, Often lack advanced diagnostic tools or wiring diagrams to trace faults beyond the bulb (Typical cost: -10% vs. baseline)
When to Walk Away From the Repair
If the estimated repair cost exceeds 40-50% of the car's private-party value, seriously consider selling the car as-is or trading it in.
- Car worth $4000, fix is $1000: Fix it. A $1000 repair for a TIPM replacement is below the 40% threshold and restores a critical safety function.
- Car worth $2500, fix is $1500: Walk away. The repair cost is 60% of the vehicle's value. It is not financially sound to invest this much into an older, lower-value car.
What Scan Tool You Need for This Code
Minimum: A scanner that reads manufacturer-specific Body Control Module (BCM/TIPM) codes. A basic engine-only code reader will NOT see 'B' codes like B1630.
A standard $20 code reader only accesses the Powertrain Control Module. B1630 is stored in the body computer, requiring a tool that communicates with all vehicle modules.
Budget: BlueDriver Pro Scan Tool (~$100) — Confirms the presence of B1630 and reads/clears codes from the BCM/TIPM. It does not offer bidirectional control.
Mid-range: Foxwell NT510 Elite for Chrysler/Jeep/Dodge (~$180) — Provides full system diagnostics and bidirectional control to command the headlight on/off directly from the scanner, confirming if the TIPM driver or wiring is at fault.
Professional: Autel MaxiCOM MK808S (~$450) — Offers comprehensive, dealer-level diagnostics, full bidirectional control to test the headlight circuit, and views live data from the BCM.
Rent vs buy: Auto parts store scanners often cannot read BCM codes. For Chrysler/Dodge/Jeep owners, app-based tools like AlfaOBD or Jscan ($75 total for app, license, and adapter) are extremely cost-effective for DIY diagnosis and clearing codes.
How to Clear the Code After You Fix It
- Use an OBD-II scan tool to clear the trouble code from the BCM/TIPM.
- Disconnecting the negative battery terminal for 15-30 minutes clears the code on older models, but a scan tool is preferred.
- Turn the headlights on to confirm the repair and ensure the code does not return.
Drive cycle (~5 minutes): Body codes like B1630 do not require a complex drive cycle. Clear the code, turn the ignition off, restart the vehicle, and turn the headlights on. If the light stays on, the repair is successful. A short drive verifies intermittent issues are resolved.
Readiness monitors affected: None
Watch out for:
- Disconnecting the battery fails to clear the code from the module's permanent memory on newer vehicles; a scan tool is mandatory.
- If the code returns immediately, the root cause of the fault remains unrepaired.
- Forgetting to clear the code leaves the dashboard warning light illuminated even after a successful physical repair.
Will This Fail Emissions / State Inspection?
No — by itself this code doesn't fail OBD inspection (but it can keep readiness monitors from setting, which causes a separate fail).
- California: A B-code will not fail the OBD-II emissions check, but a non-functional headlight fails the visual/functional safety inspection, resulting in a 'fix-it' ticket.
- New York: New York requires an annual safety inspection checking all lighting. A non-working headlight is an automatic failure resulting in a rejection sticker.
- Texas: In counties requiring safety inspections, all headlights must function. A B1630 code causing an inoperative headlight fails the inspection.
Most Commonly Affected Vehicles
- Jeep Wrangler (JK), Grand Cherokee, Patriot, Compass (2005-2017) — Extremely common. Often caused by a failing TIPM or a corroded ground point near the front of the vehicle.
- Dodge Ram 1500/2500/3500, Caliber, Magnum, Charger (2006-2012) — These vehicles use a TIPM notoriously prone to internal failures of the solid-state headlight driver circuits.
- Chrysler 300, Town & Country (2005-2010) — Shares the same TIPM architecture as Dodge and Jeep, making it highly susceptible to identical headlight circuit faults.
- Toyota Corolla, RAV4, FJ Cruiser, Land Cruiser Prado (2007-2020) — CRITICAL: On these models, B1630 points to a malfunction in the Curtain Shield Airbag Sensor. This is a major safety issue completely unrelated to headlights.
- Kia Sorento, Opirus, Amanti (2010-2015) — Indicates a LIN Transmission Error or a fault within the vehicle's security system. Diagnosis requires a brand-specific scan tool.
- Hyundai Elantra, Sonata, Santa Fe (2006-2018) — Indicates an Internal Control Processor failure within a module, representing a serious internal communication fault.
- Chevrolet Spin, Colorado (2015-2024) — Defined as a fault in the right-side power mirror motor circuit, demonstrating the importance of verifying the code definition by manufacturer.
- GMC Canyon, Sierra (2010-2022) — Relates to various body electrical functions and is not standardized as a headlight code.
Manufacturer-Specific Notes
- Chrysler / Dodge / Jeep: B1630 almost always means 'Right Low Beam Control Circuit High'. The most frequent culprits are a bad ground or a failing TIPM. Owners should check for TSBs related to their VIN.
- Toyota: B1630 is a critical safety code for a 'Curtain Shield Airbag Sensor Malfunction'. It indicates a fault in the side airbag sensor circuit and requires immediate professional attention.
- Hyundai / Kia: B1630 means 'Internal Control Processor' failure or 'LIN Transmission Error'. These are serious communication faults unrelated to lighting.
- General Motors (GM): This code applies to the power mirror motor circuit or other body electrical functions. It is not a standard headlight code.
- Ford: B1630 is not a commonly used code. If it appears, it is likely a misreading by a generic, low-quality scanner.
Real Owner Stories
2012 Jeep Patriot at 110K miles - The Easy Ground Fix
The passenger headlight went out and the handbrake light stayed on constantly. Codes B1630 and C1008 (Brake Fluid Level Circuit High) were present.
What they tried:
- Suspected a bad bulb, but the dual symptoms pointed to a shared electrical problem.
- Researched common ground point issues for Jeep Patriots.
Outcome: Located the main ground point (G104) on the passenger frame rail. The wires were heavily corroded. The owner cut the corroded terminals, stripped the wires, crimped new ring terminals, and secured them to clean chassis metal. This fixed both issues for $0 using existing supplies.
Lesson: If B1630 appears alongside unrelated electrical faults, suspect a shared ground point. Cleaning a ground connection is a common, free fix.
2008 Dodge Ram 1500 - The Costly Misdiagnosis
Passenger low beam was out, code B1630 active. The light flickered over bumps.
What they tried:
- Replaced the headlight bulb, but the problem persisted.
- Purchased and installed a remanufactured TIPM for $500 based on forum advice.
- The B1630 code returned immediately.
Outcome: The owner inspected the headlight connector and found the plastic housing melted with a loose female pin. Replacing the $15 headlight connector pigtail solved the problem permanently.
Lesson: Never assume the most expensive part is the cause. A flickering light points to a mechanical connection issue. Inspect the bulb connector for melting before condemning the control module.
2014 Jeep Wrangler JK - The Aftermarket LED Headache
After installing aftermarket LED headlights, the owner found codes B1630, B162C, B1638, and B1634. The headlights functioned but flickered.
What they tried:
- Cleared the codes, but they returned after a few drive cycles.
- Swapped the original halogen bulbs back in, and all codes disappeared.
Outcome: The Jeep's computer misinterpreted the low power draw of the LEDs as a 'Circuit High' fault. The owner installed an 'anti-flicker' harness with built-in load resistors to simulate halogen bulbs, clearing the codes.
Lesson: If B1630 appears immediately after an LED upgrade, the bulbs are the cause. Install load resistors or use a programming tool like Jscan to configure the computer for LEDs.
How to Prevent This Code From Triggering
- Apply Dielectric Grease to Connectors (Whenever a bulb is replaced or a connector is unplugged.) — Dielectric grease seals electrical connectors from moisture and dirt, preventing the corrosion that causes high resistance and triggers the B1630 code.
- Inspect and Clean Chassis Ground Points (Every 30,000 miles or every few years, especially in wet or snowy climates.) — Disconnecting major engine bay grounds, cleaning the terminals to bare metal, and re-securing them prevents high-resistance faults from developing.
- Use High-Quality, OEM-Specification Bulbs (At every bulb change.) — The TIPM/BCM is calibrated for the specific electrical signature of an OEM bulb. Cheap bulbs or improper LED kits trigger circuit faults.
- Ensure Fuse Box (TIPM) Cover is Sealed (After any under-hood service.) — If the TIPM cover gasket is unseated, water enters and shorts out the delicate electronics inside, leading to headlight faults.
Frequently Asked Questions
Can a bad fuse cause code B1630?
No. Vehicles setting this specific code use a 'smart' computer (TIPM/BCM) with internal solid-state drivers instead of traditional fuses. The B1630 code indicates this internal driver detected a problem and shut the circuit down electronically.
I installed LED headlights and now I have this code. Why?
The vehicle's computer expects the specific electrical resistance of a halogen bulb. Aftermarket LEDs have much lower resistance, which the computer misinterprets as a circuit fault. You must install a load resistor or 'anti-flicker' harness to mimic the original bulb.
What is the most common misdiagnosis for B1630?
The most costly misdiagnosis is replacing the expensive TIPM/BCM without performing basic electrical checks. The actual problem is usually a simple corroded ground wire, a bad bulb, or a melted connector.
Is there a recall for the TIPM causing headlight problems?
Despite class-action lawsuits regarding faulty Chrysler/Dodge/Jeep TIPMs, there is no universal recall specifically for the B1630 headlight code. Check with a dealer using your VIN to see if specific Technical Service Bulletins (TSBs) apply.
What is the difference between a TIPM and a BCM?
A Body Control Module (BCM) controls body electronics. A Totally Integrated Power Module (TIPM) is a Chrysler-specific unit combining the BCM and the main fuse box into a single 'smart' module under the hood.
How do I find the bad ground wire?
Obtain a vehicle-specific wiring diagram to locate ground points, often labeled 'G104'. For headlights, these are bolted to the vehicle's frame, radiator support, or inner fender well. Look for a black wire bolted directly to bare metal.
I cleared the code and it came back instantly. Does that mean the TIPM is bad?
Not necessarily. An instantly returning code signifies a 'hard fault' actively present in the system. This is often a dead short in the wiring, a completely open ground circuit, or a dead bulb.
Key Takeaways
- On Chrysler, Dodge, and Jeep vehicles, code B1630 specifically disables the passenger-side low beam headlight due to a high-voltage circuit fault.
- Perform a 5-minute, $0 bulb swap from the driver to the passenger side before spending $500+ on a new Totally Integrated Power Module (TIPM).
- Driving with an inoperative passenger headlight risks a $25-$250 traffic ticket and reduces nighttime visibility by 50%.
- Verify your vehicle's specific code definition; on 2007-2020 Toyota models, B1630 indicates a critical side airbag failure, not a headlight issue.
Helpful Videos



The information in this article is provided for general reference and educational purposes only. Vehicle specifications, procedures, and part compatibility can vary by production date, trim level, and region. Always consult your vehicle's factory service manual and verify part numbers before purchasing or performing repairs. Safety-critical components such as airbags, seat belts, and braking systems should be installed by a qualified professional.
- 🎬 Helpful Videos
- What Does B1630 Mean?
- Can I Drive With B1630?
- Common Causes
- Symptoms
- Diagnostic Flowchart
- Common Fixes & Costs
- DIY vs Professional
- Used vs. New Parts: Buying Guide
- What Happens If You Wait — Timeline
- Cost of Not Fixing It
- Diagnosis Steps
- When This Code Triggers (Freeze-Frame Conditions)
- Related Codes
- Climate & Environmental Factors
- How to Talk to a Mechanic About This Code
- Where to Take It: Dealer vs Independent vs Chain
- When to Walk Away From the Repair
- What Scan Tool You Need for This Code
- How to Clear the Code After You Fix It
- Will This Fail Emissions / State Inspection?
- Most Commonly Affected Vehicles
- Manufacturer-Specific Notes
- Real Owner Stories
- 2012 Jeep Patriot at 110K miles - The Easy Ground Fix
- 2008 Dodge Ram 1500 - The Costly Misdiagnosis
- 2014 Jeep Wrangler JK - The Aftermarket LED Headache
- How to Prevent This Code From Triggering
- Frequently Asked Questions
- Can a bad fuse cause code B1630?
- I installed LED headlights and now I have this code. Why?
- What is the most common misdiagnosis for B1630?
- Is there a recall for the TIPM causing headlight problems?
- What is the difference between a TIPM and a BCM?
- How do I find the bad ground wire?
- I cleared the code and it came back instantly. Does that mean the TIPM is bad?
- Key Takeaways
- 🎟️ Get 5% Off