

OBD-II Code B1479: A/C Flow Sensor Circuit Malfunction
The Ultimate 2026 Guide to What B1479 Means, Why It Triggers, and How to Fix It for Good
- Code B1479 on 2010-2018 Toyota, Lexus, and Scion vehicles indicates a failing A/C flow sensor, causing the system to disable the compressor.
- The primary symptom is warm air from the vents, triggered when the A/C amplifier detects sensor voltage below 3.8V and shuts down the compressor.
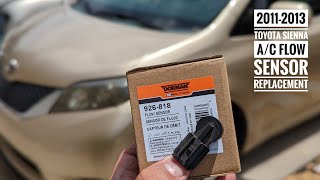
- Avoid a $2,000 dealership compressor replacement by swapping the standalone flow sensor (Dorman 926-818) for under $100.
- Confirm a bad sensor for free using the 'magnet test': place a strong magnet against the sensor body to temporarily restore the signal and engage the A/C clutch.
- Ignore A/C diagnostics if you drive a Hyundai or Kia; on those brands, B1479 indicates a passenger-side curtain airbag circuit fault.
What Does B1479 Mean?

B1479 means the air conditioning amplifier detects an out-of-range signal from the A/C flow sensor circuit. This sensor measures the refrigerant movement rate through the A/C system. When the computer receives an incorrect signal, it preemptively shuts down the A/C compressor to prevent damage. The A/C amplifier expects approximately 4.0V from the sensor when the A/C is off; if this standby voltage drops below 3.8V, it logs B1479 and disables the compressor clutch.
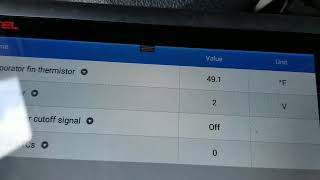
Technical definition: The SAE/ISO definition for B1479 is "Flow Sensor Circuit." This indicates an electrical fault or illogical signal in the A/C flow sensor circuit. The Hall effect sensor converts refrigerant flow rate into voltage; as flow increases, voltage decreases. 🎬 Watch: Real-time demonstration of Toyota A/C flow sensor voltage readings. The A/C amplifier provides a 5-volt reference and monitors the return signal. A fault registers if the signal remains below 0.3V or above 4.7V for more than 4 seconds, or if standby voltage degrades below the manufacturer's threshold.
Can I Drive With B1479?
Yes. Driving with code B1479 is safe and will not damage your engine. The only consequence is a disabled air conditioning system. In the extremely rare event the code stems from a seized compressor, the serpentine belt will break, causing an immediate loss of power steering and alternator function that requires an immediate stop.
Common Causes

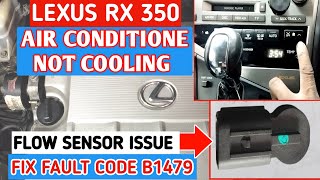
- Faulty A/C Flow Sensor (Very Common) — The Hall effect sensor degrades from heat and vibration, causing its output voltage to drop below the acceptable 3.8V threshold. On affected Toyota and Lexus vehicles, this is the primary point of failure. 🎬 See this step-by-step walkthrough for replacing a faulty flow sensor.
- Wiring Harness or Connector Issues (Common) — Wires running to the sensor fray or corrode. The compressor connector is highly vulnerable to moisture and vibration, creating an open or short circuit.
- Low Refrigerant Level (Less Common) — A severely undercharged A/C system causes erratic no-flow signals. Verify adequate static pressure before condemning the sensor.
- Faulty A/C Compressor (Rare) — Internal mechanical failures block refrigerant flow or affect the integrated sensor. Dealerships often require replacing the entire compressor assembly to resolve this.
- Faulty A/C Amplifier (Control Module) (Rare) — The control unit misinterprets a good signal. Consider this only after proving the sensor and wiring are fully functional.
- Faulty Aftermarket Sensor (Rare) — Newly installed aftermarket sensors are sometimes defective or improperly calibrated, causing the code to return immediately after replacement.
- Code Ambiguity Across Manufacturers (Rare) — On non-Toyota vehicles (like Hyundai or Kia), B1479 indicates a passenger-side curtain airbag fault, not an A/C issue.
Symptoms

- A/C blows warm or hot air — The computer disables the A/C compressor as a protective measure, stopping all cooling.
- Intermittent A/C Operation — The A/C works for 10-15 minutes and then suddenly blows warm air. Cycling the A/C off and on temporarily restores cooling.
- A/C cooling fan does not turn on — The radiator cooling fan associated with the A/C fails to activate because the compressor is not commanded on.
- A/C compressor clutch does not engage (also visible on scanner) — The typical 'click' of the A/C compressor turning on is absent, and engine RPM does not fluctuate when pressing the A/C button.
- A/C warning light blinks (also visible on scanner) — The B1479 code rarely illuminates the Check Engine Light. Instead, the A/C button light blinks, or the code stores silently in the HVAC module.
Diagnostic Flowchart

Tap your situation to follow the diagnostic path that matches what you're seeing on this code.
Common Fixes & Costs
- Replace A/C Flow Sensor
— Parts: $25-$70, Labor: $75-$200, ~0.8 hr book time
(DIY)
Universal Fit for Toyota/Lexus/Scion: OEM Not Sold Separately (Alt: Dorman 926-818) - Install a Flow Sensor Bypass/Booster Module
— Parts: $20-$50, Labor: $50-$150, ~1.2 hr book time
(Intermediate)
Universal DIY/Aftermarket: OEM N/A (Alt: Various plug-and-play 'FLS' modules) - Replace A/C Compressor Assembly
— Parts: $400-$900, Labor: $400-$800, ~4.5 hr book time
(Professional)
Toyota Camry (2012-2013): OEM 88310-0R014 (Alt: Denso 471-1017)
Lexus RX350 (2010-2012): OEM 88320-48220 (Alt: Denso 471-1017) - Repair Wiring or Connector — Parts: $5-$30, Labor: $100-$250, ~1.5 hr book time (Intermediate)
- Address Refrigerant Leak and Recharge System — Parts: $20-$100, Labor: $150-$300, ~2.0 hr book time (Professional)
Used vs. New Parts: Buying Guide
When a used part is worth it: A used A/C compressor from a low-mileage donor vehicle is a cost-effective option for older cars. Never buy a used A/C flow sensor, as the failure is age-related.
Donor-vehicle mileage cap: roughly under 70000 miles for the part to have meaningful remaining life.
Donor quality checklist:
- Verify the donor vehicle's mileage and reason for being scrapped.
- Ensure the part number matches exactly.
- Check that the clutch spins freely and ports are capped.
Decision logic:
- If The fault is confirmed to be only the external flow sensor. → Buy a new aftermarket sensor (Dorman 926-818). This is the cheapest and most reliable fix.
- If The entire compressor must be replaced on a vehicle with >150K miles. → A quality remanufactured or low-mileage used compressor is an acceptable budget choice.
- If The vehicle is newer or has low mileage. → Buy a new OEM or high-quality aftermarket (Denso) compressor for maximum longevity.
Warranty tradeoff: Used parts offer a 30-90 day warranty for the part only. Remanufactured parts offer 6-12 months. New aftermarket parts come with a 1-year to limited lifetime warranty.
Worst-case if a used part fails: $500-$1000 if a used compressor fails shortly after installation, requiring repeat labor and a system flush.
What Happens If You Wait — Timeline
- 0-3 months: A/C works intermittently. It runs for 10-15 minutes before shutting off. The B1479 code is stored. (MPG impact: 0%% · Added cost: $0)
- 3-6 months: The A/C fails to engage. The computer consistently reads out-of-spec voltage and disables the compressor clutch upon startup. (MPG impact: 0%% · Added cost: $0)
- 6+ months (Low Risk Scenario): The vehicle operates normally but without air conditioning. The flow sensor fault causes no further mechanical damage. (MPG impact: 0%% · Added cost: $0)
- Unknown (Worst-Case Scenario): If B1479 was an early symptom of mechanical compressor failure, the compressor seizes, shredding the serpentine belt and causing loss of power steering. (MPG impact: N/A% · Added cost: $800 - $3,000+)
Cost of Not Fixing It
- Immediate: No air conditioning. The A/C compressor is disabled by the computer. (Added cost: Negligible)
- Long-Term (Low Risk): If the fault is related to an impending compressor seizure, continuing to drive causes the compressor to lock up completely, shredding the serpentine belt. (Added cost: $300-$800+)
- Long-Term (Very Low Risk): A broken serpentine belt at speed damages other engine bay components, leading to complex repairs. (Added cost: $1000-$3000+)
Diagnosis Steps
- Read the Trouble Code
Use an OBD-II scanner capable of reading Body ('B') codes from the HVAC module to confirm B1479. Basic powertrain scanners cannot see this code.
Tools: Advanced OBD-II Scanner (Beginner) - Check Flow Sensor Voltage
Using a scan tool's live data or a multimeter, check the voltage on the sensor's signal wire. With the key on and A/C OFF, voltage must be between 3.8V and 4.2V. A reading between 3.4V and 3.7V confirms a degraded sensor.
Tools: Multimeter or Advanced Scan Tool (Intermediate) - Pro Tip: The Magnet Test
Place a strong magnet directly against the sensor body while the engine is running and A/C is on. If the compressor clutch engages, the sensor's internal magnet has failed and the sensor must be replaced.
Tools: Small Strong Magnet (Intermediate) - Check A/C System Static Pressure
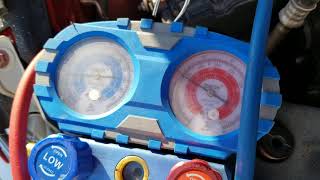
Connect an A/C manifold gauge set with the engine off. Static pressure should roughly match ambient temperature in Fahrenheit. If pressure is under 40 PSI, repair the refrigerant leak before proceeding.
Tools: A/C Manifold Gauge Set (Intermediate) - Pro Tip: Active Test with Scan Tool
Navigate to the A/C module's 'Active Test' function and manually command the 'Magnetic Clutch Relay' ON. If the compressor engages and blows cold, the refrigerant system is healthy, isolating the fault to the sensor circuit.
Tools: Advanced Bidirectional Scanner (Advanced) - Inspect the Flow Sensor Wiring
Visually inspect the three-wire harness and connector at the compressor for damage, corrosion, or frayed wires.
Tools: Flashlight (Beginner) - Pro Tip: Perform a Harness Wiggle Test
While monitoring the flow sensor's voltage, physically wiggle the wiring harness. If the voltage jumps or cuts out, repair the intermittent break in the wiring.
Tools: Advanced Scan Tool or Multimeter (Intermediate) - Test the Circuit for Power and Ground
Disconnect the sensor and probe the harness. Verify a 5-volt reference signal, a solid ground (less than 1 ohm), and the signal wire. Missing voltage or ground points to wiring or amplifier failure.
Tools: Multimeter (Advanced) - Advanced: Harness Resistance Test
Disconnect the A/C amplifier and flow sensor. Measure resistance between the two connectors. Each wire must read less than 1.0 Ω. Test each pin to chassis ground to ensure no short exists.
Tools: Multimeter, Vehicle Wiring Diagram (Advanced) - Pro Tip: Analyze the Scope Pattern
Connect an oscilloscope to the signal and ground wires. With A/C off, look for a flat DC line between 3.8V and 4.2V. When A/C turns on, voltage should drop cleanly to 1.5V-3.0V and vary with RPM.
Tools: Oscilloscope (Expert)
When This Code Triggers (Freeze-Frame Conditions)
- Engine Coolant Temp: 175-210°F (Engine at normal operating temperature.)
- Engine RPM: 700-2500 RPM (Idle or steady-state cruise.)
- A/C Switch Status: ON (Driver has requested air conditioning.)
- Ambient Temperature: > 50°F (Warm enough for A/C to be requested and needed.)
Related Codes
- B1421 — Solar Sensor Circuit. Monitor live data; if the value is illogical in direct sunlight, the fault is the solar sensor. B1479 is isolated to the flow sensor.
- B1424 — In-Vehicle Temperature Sensor Circuit. If cabin temp readings are wildly inaccurate, the fault lies with B1424. B1479 strictly affects refrigerant flow monitoring.
- P0534 — A/C Refrigerant Charge Loss. Points directly to low refrigerant. If static pressure is normal but flow sensor voltage is <3.8V, B1479 is the primary fault.
- B1474 — A/C Lock Sensor Circuit. Detects if the compressor is seized. Differentiating between the 'Flow Sensor' and 'Lock Sensor' PIDs is key to ordering the correct part.
Climate & Environmental Factors
- High Heat and Humidity: Prolonged exposure to high ambient temperatures degrades the sensor's internal magnet and electronics, causing standby voltage to drop.
- Road Salt and Moisture: Salt and moisture accelerate corrosion of the flow sensor's electrical connector, leading to an open or short circuit.
How to Talk to a Mechanic About This Code
Say this: "I have a B1479 code on my Toyota/Lexus and the A/C is blowing warm. Please check the flow sensor voltage and test the circuit before recommending a full compressor replacement."
This signals you are an informed customer. It directs the technician to perform specific diagnostic steps and prevents them from defaulting to the most expensive repair without justification.
Avoid saying:
- 'My A/C is broken, can you fix it?'
- 'I think I need a new compressor.'
- 'Just do whatever it takes to get it working.'
Questions to ask before authorizing the repair:
- What was the exact voltage reading from the flow sensor with the A/C off?
- Did you perform a 'magnet test' or an 'active test' with a scan tool to confirm the compressor clutch engages?
- If you recommend a full compressor replacement, why isn't replacing just the sensor a viable option?
- What is the warranty on the parts and labor for this repair?
Where to Take It: Dealer vs Independent vs Chain
- Dealer:
Use with caution. Best for an accurate diagnosis, but be prepared to decline the expensive repair and take the diagnosis to an independent shop.
Best for: Vehicles still under warranty., Complex electrical issues requiring manufacturer-specific diagnostic software (Toyota Techstream).
Downsides: Significantly higher labor rates., Very likely to recommend the most expensive fix: a full compressor replacement. (Typical cost: +50% vs. baseline) - Independent Shop:
Best fit. Experienced independent mechanics are aware of the common flow sensor failure and offer less-expensive repair options (sensor-only replacement or bypass module).
Best for: Out-of-warranty vehicles where cost is a major factor., Shops specializing in Japanese imports or automotive A/C repair.
Downsides: Diagnostic capabilities vary. Vet the shop through online reviews. (Typical cost: +0% vs. baseline) - Chain Shop:
Not recommended for diagnosis. They are not the best choice to identify the B1479 problem initially.
Best for: Simple A/C services like a refrigerant recharge.
Downsides: Technician skill is inconsistent. May lack specific knowledge to diagnose this manufacturer-specific code correctly. (Typical cost: -10% vs. baseline)
When to Walk Away From the Repair
If the estimated repair cost exceeds 50% of the car's private-party value, sell the car as-is or trade it in.
- Car worth $8000, fix is $2000: Fix it. A $2000 dealership quote is high, but the actual fix is likely much cheaper. Even at the high quote, it's well below the 50% threshold.
- Car worth $4000, fix is $2000: Borderline. A full compressor replacement is not economically viable. Seek a second opinion for a sensor-only replacement ($300-$400).
- Car worth $2500, fix is $1500: Walk away. The repair cost is too high relative to the vehicle's value.
What Scan Tool You Need for This Code
Minimum: A scanner that reads manufacturer-specific Body ('B') or HVAC trouble codes. A basic $20 engine-only code reader will NOT see B1479.
Standard OBD-II scanners only read Powertrain ('P') codes. B1479 is a Body ('B') code stored in the climate control module.
Budget: BlueDriver Pro (~$100) — Reads enhanced codes (including B1479) and displays live sensor data, allowing you to see the A/C flow sensor's voltage reading on your smartphone.
Mid-range: Foxwell NT650 / Innova 5610 (~$200-400) — Offers full-system diagnostics and bidirectional controls ('Active Tests') to manually command the A/C compressor clutch to engage.
Professional: Autel MaxiCOM MK808 / MK906BT (~$500-1200) — Provides full OE-level bidirectional control and access to all manufacturer-specific data PIDs for in-depth diagnosis.
Rent vs buy: Auto parts stores offer free code scanning, but loaner tools may not read HVAC codes. Buying a scanner like the BlueDriver Pro is a worthwhile investment.
How to Clear the Code After You Fix It
- Use an OBD-II scan tool capable of reading HVAC codes to clear the B1479 code.
- Alternatively, disconnect the negative battery terminal for 15 minutes to reset all vehicle memory.
- Perform a drive cycle to allow the vehicle's computers to re-learn and confirm the fix.
Drive cycle (~30 minutes): Perform a cold start. Idle for 5 minutes with A/C on. Drive for 10-15 minutes at a steady highway speed (55 mph). Perform 5-10 minutes of stop-and-go city driving.
Readiness monitors affected: Evaporative System Monitor, Catalyst Monitor, O2 Sensor Monitor
Before emissions retest: drive at least 100 miles to fully set monitors.
Watch out for:
- Using a basic powertrain scanner that cannot clear Body ('B') codes.
- Clearing the code without fixing the root cause, causing it to return immediately.
- Attempting an emissions test before readiness monitors set, resulting in automatic failure.
Will This Fail Emissions / State Inspection?
No — by itself this code doesn't fail OBD inspection (but it can keep readiness monitors from setting, which causes a separate fail).
- Universal: B1479 is a Body ('B') code and does not illuminate the Check Engine Light (CEL). It will not cause a direct failure of an OBD-II emissions scan.
- California: The code won't fail the test. However, disconnecting the battery to perform the repair resets OBD readiness monitors. You must complete a full drive cycle before the retest.
- Texas: The B1479 code will not cause a failure, but incomplete readiness monitors after a repair will.
- New York: Since B1479 does not turn on the CEL, it does not cause a failure. Readiness monitors must be set to 'Ready' to pass.
Most Commonly Affected Vehicles
- Toyota Camry (2010-2013) — Toyota issued TSB T-SB-0084-13 for 2012-2013 models, recommending compressor replacement if sensor voltage is below 3.7V.
- Lexus RX350 (2010-2015) — TSB L-SB-0177-09 Rev2 addresses this issue. Due to high OEM replacement costs, this model is a popular candidate for the DIY sensor bypass fix.
- Toyota Sienna (2011-2018) — Shares the problematic A/C system design with the Highlander and RX350.
- Toyota Highlander (2011-2018) — Highly prone to flow sensor issues. The DIY booster circuit fix is well-documented for these models.
- Toyota Corolla (2010-2013) — Mechanics report the flow sensor is not sold separately for some trims, forcing a full compressor replacement.
- Toyota RAV4 (2010-2018) — The 'magnet test' is a well-documented diagnostic shortcut for RAV4 owners experiencing B1479.
- Scion Various Models (tC, xB, iQ) (2010-2016) — Scion models use the same compressor technology and are susceptible to B1479. The Dorman 926-818 sensor is a common fix.
Manufacturer-Specific Notes
- Toyota/Lexus/Scion: This code is almost exclusively a problem on Toyota-made vehicles from roughly 2010-2018.
- Toyota/Lexus: The manufacturer's official repair is to replace the entire A/C compressor assembly, leading to repair quotes exceeding $1,500.
- Toyota/Lexus: The A/C amplifier disables the compressor if the sensor's standby voltage drops below 3.8V or 3.7V, depending on the model's TSB.
Real Owner Stories
2010 Lexus RX350 with intermittent A/C
The A/C blew cold for 15 minutes, then turned warm. The dealership quoted $2,000 for a new compressor.
What they tried:
- Confirmed flow sensor voltage was low (3.68V) with the A/C off using Techstream.
- Performed an 'Active Test' to manually engage the compressor, proving the A/C system cooled properly.
- Built a DIY 'booster circuit' using a 741 op-amp for under $30 to amplify the sensor's voltage back to 3.8-4.2V.
Outcome: The DIY booster circuit restored full A/C function and resolved the B1479 code, saving nearly $2,000.
Lesson: A DIY or pre-made voltage booster is an effective, long-term fix if the root cause is a degraded but functional flow sensor.
2012 Toyota Camry with no A/C
The A/C stopped working completely. A mechanic quoted $1,300 for a new compressor.
What they tried:
- Scanned the vehicle and found code B1479.
- Performed the 'magnet test' by placing a strong magnet on the flow sensor body. The A/C compressor immediately kicked on.
- Purchased a new aftermarket flow sensor online for $25.
Outcome: Replaced only the flow sensor via the snap ring. The repair restored full A/C function and cleared the code.
Lesson: Always try the 'magnet test' before agreeing to a full compressor replacement. It definitively proves the cheaper flow sensor is the sole point of failure.
2013 Toyota Corolla with B1479 returning after sensor replacement
A/C was intermittent. The owner replaced the aftermarket flow sensor, but the code returned.
What they tried:
- Replaced the flow sensor a second time.
- Tried the magnet trick, which did not work.
- Sourced a used A/C amplifier from a junkyard for $30.
Outcome: Replacing the A/C amplifier module fixed the problem permanently. The original amplifier was unable to correctly interpret the signal from a good sensor.
Lesson: If a new sensor and the magnet test fail to resolve B1479, and wiring is good, the A/C amplifier is the next most likely failure point.
How to Prevent This Code From Triggering
- Run the A/C system periodically in winter (10 minutes every 2-3 weeks) — Circulates refrigerant and oil to keep internal seals lubricated and prevent them from drying out.
- Keep the condenser clean (Annually (spring)) — Hose off the condenser to remove bugs and dirt. This improves heat exchange, reducing system pressure and compressor workload.
- Avoid prolonged use on max-cold/lowest fan setting (Daily habit) — Running the system at maximum puts unnecessary strain on the compressor. Use a moderate temperature once the cabin cools.
- Schedule professional A/C service (Every 2-3 years) — A technician checks for minor leaks, ensures proper lubrication, and inspects components before they fail.
Frequently Asked Questions
Can I just add more refrigerant to fix code B1479?
No. B1479 is an electrical circuit code. If static pressure is normal, adding refrigerant will not help and overcharging causes damage.
The shop quoted me $2,000 to fix my A/C. Is that right?
That price is for a full A/C compressor replacement at a dealership. You can often fix the problem for a fraction of that cost by replacing only the sensor or installing a bypass module.
Do I need to empty the refrigerant to replace the flow sensor?
No. The flow sensor sits in a dry cavity on the outside of the compressor and is removed via a snap ring without opening the sealed refrigerant system.
Why does the 'magnet test' for the B1479 code work?
The flow sensor relies on a weak internal magnet that degrades from heat. Placing a strong external magnet on the sensor body temporarily restores the magnetic field. This tricks the computer into engaging the A/C, proving the sensor is the failure point.
I have a B1479 code on my Hyundai/Kia, is it my A/C flow sensor?
No. On a Hyundai or Kia, B1479 points to a fault in the passenger-side curtain airbag circuit. The A/C flow sensor issue is specific to Toyota, Lexus, and Scion vehicles.
I replaced the flow sensor, but the B1479 code came back. What's next?
Ensure the replacement sensor is a compatible, high-quality part. Next, verify the A/C system has proper static refrigerant pressure. If both check out, perform a full circuit integrity test on the wiring between the sensor and the A/C amplifier.
Is it safe to use a flow sensor bypass module?
Many owners successfully use bypass modules to fix this issue at a very low cost. While not an OEM-approved repair, it is widely accepted in the automotive community. It eliminates the computer's ability to monitor refrigerant flow, which is generally deemed an acceptable risk.
What should the A/C flow sensor voltage be?
With the ignition on but A/C off, the sensor must read a steady voltage between 3.8V and 4.2V. When the A/C turns on, voltage drops to between 1.5V and 3.0V. A reading below 3.8V with the A/C off triggers the B1479 code.
Key Takeaways
- Code B1479 on 2010-2018 Toyota, Lexus, and Scion vehicles indicates a failing A/C flow sensor, causing the system to disable the compressor.
- The primary symptom is warm air from the vents, triggered when the A/C amplifier detects sensor voltage below 3.8V and shuts down the compressor.
- Avoid a $2,000 dealership compressor replacement by swapping the standalone flow sensor (Dorman 926-818) for under $100.
- Confirm a bad sensor for free using the 'magnet test': place a strong magnet against the sensor body to temporarily restore the signal and engage the A/C clutch.
- Ignore A/C diagnostics if you drive a Hyundai or Kia; on those brands, B1479 indicates a passenger-side curtain airbag circuit fault.
Helpful Videos


The information in this article is provided for general reference and educational purposes only. Vehicle specifications, procedures, and part compatibility can vary by production date, trim level, and region. Always consult your vehicle's factory service manual and verify part numbers before purchasing or performing repairs. Safety-critical components such as airbags, seat belts, and braking systems should be installed by a qualified professional.
- 🎬 Helpful Videos
- What Does B1479 Mean?
- Can I Drive With B1479?
- Common Causes
- Symptoms
- Diagnostic Flowchart
- Common Fixes & Costs
- Used vs. New Parts: Buying Guide
- What Happens If You Wait — Timeline
- Cost of Not Fixing It
- Diagnosis Steps
- When This Code Triggers (Freeze-Frame Conditions)
- Related Codes
- Climate & Environmental Factors
- How to Talk to a Mechanic About This Code
- Where to Take It: Dealer vs Independent vs Chain
- When to Walk Away From the Repair
- What Scan Tool You Need for This Code
- How to Clear the Code After You Fix It
- Will This Fail Emissions / State Inspection?
- Most Commonly Affected Vehicles
- Manufacturer-Specific Notes
- Real Owner Stories
- 2010 Lexus RX350 with intermittent A/C
- 2012 Toyota Camry with no A/C
- 2013 Toyota Corolla with B1479 returning after sensor replacement
- How to Prevent This Code From Triggering
- Frequently Asked Questions
- Can I just add more refrigerant to fix code B1479?
- The shop quoted me $2,000 to fix my A/C. Is that right?
- Do I need to empty the refrigerant to replace the flow sensor?
- Why does the 'magnet test' for the B1479 code work?
- I have a B1479 code on my Hyundai/Kia, is it my A/C flow sensor?
- I replaced the flow sensor, but the B1479 code came back. What's next?
- Is it safe to use a flow sensor bypass module?
- What should the A/C flow sensor voltage be?
- Key Takeaways
- 🎟️ Get 5% Off