

B1443 on 2016-2019 Lexus IS 300: Air Outlet Damper Servo Causes and Fixes
B1443 indicates a fault with the air outlet damper servo motor, which controls airflow to your cabin vents. The most common fix is replacing the faulty servo motor, a part costing around $200. However, due to its location deep within the dashboard, professional repair is very labor-intensive and can cost between $1,200 and $2,200. This is a well-documented issue on this platform and its relatives (Lexus RC, GS).
- B1443 on your IS 300 means the small motor that directs air to your vents has failed.
- Symptoms are straightforward: air won't come out of the selected vents, and you may hear a clicking sound from the dash.
- The problem is almost always a failed servo motor, a known issue on the IS, GS, and RC platforms.
- While the part itself is affordable (~$250), be prepared for a very high labor cost at a repair shop ($1200-$2200+) due to the 8-13 hours needed to access and replace the servo.
- This is not a recommended DIY repair for beginners due to the need for extensive dashboard disassembly.
- Before committing to a costly repair, ask a technician about performing a servo re-initialization or checking for an A/C amplifier software update, which can sometimes resolve the issue.
What's Unique About the 2016-2019 Lexus IS 300
The 2016-2019 Lexus IS 300, part of the third-generation (XE30) platform shared with the Lexus RC and GS, uses a complex climate control system with up to 10 or more servo motors. This specific fault is common enough that Lexus issued Technical Service Bulletin (TSB) L-SB-0001-21 Rev, which addresses B1443 and a dozen other related servo motor circuit codes. This indicates a known pattern of failure for these components, often leading to expensive repairs due to the labor required to access them deep within the dashboard. Some owners report intermittent issues that temporarily resolve after restarting the car, only to return later.
Diagnostic Flowchart
Tap your situation to follow the diagnostic path that matches what you're seeing on this vehicle.
Symptoms You May Notice
- Airflow is stuck in one position (e.g., only blows on the windshield/defrost).
- Inability to change which vents the air comes from (face, floor, etc.).
- Clicking, grinding, or buzzing noises from behind the dashboard, especially when changing climate settings or on startup.
- HVAC system seems unresponsive to mode changes.
- A noticeable delay (30+ seconds) for the climate control system to become active after starting the car.
- The issue may be intermittent, correcting itself after the vehicle is turned off and restarted, only to fail again later.
- Replacing the main HVAC control unit on the dashboard when the fault lies with the inexpensive but hard-to-reach servo motor.
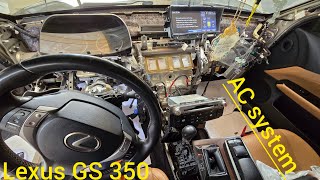
- Assuming any clicking from the dash is a bad servo without confirming which of the multiple servos is the source of the noise. 🎬 See how to identify and replace clicking HVAC servo motors.
- Replacing servo motors when a simple re-initialization or a software update for the A/C Amplifier could resolve the issue, at least temporarily.
Most Likely Causes
- Failed Air Outlet Damper Servo Motor 🔴 High Probability As documented in TSB L-SB-0001-21, these servo motors are a known failure point on this platform due to internal electrical or mechanical wear. The internal plastic gears can fail or the internal position sensor can malfunction.
How to confirm: Listen for clicking or buzzing from the servo's location when changing vent modes. A technician can use a scan tool like Toyota Techstream to command the servo using the 'Active Test' function and observe its response in the data stream. If power is confirmed at the connector but the servo doesn't move or clicks erratically, it has failed.
Typical fix: Replace the faulty Air Outlet Damper Servo Motor. This is a very labor-intensive job requiring significant dashboard disassembly to access the component. The TSB also recommends replacing the associated plastic lever (Part No. 87296-53010) at the same time.
Est. part cost: $200-$300 - Wiring or Connector Issue ⚪ Low Probability
How to confirm: Visually inspect the servo motor's connector for damage or corrosion. Use a multimeter to test for proper voltage and ground signals at the connector when vent modes are changed. A technician can also check for continuity between the A/C amplifier connector and the servo connector.
Typical fix: Repair or replace the damaged section of the wiring harness or clean/replace the connector.
Est. part cost: $5-$50 - Faulty A/C Amplifier (HVAC Control Module) ⚪ Low Probability
How to confirm: This should be the last resort after definitively ruling out the servo motor and wiring. In some cases, a software glitch can cause these symptoms. A dealer or specialist with access to Toyota's TIS can check if a software update is available for the A/C amplifier, as mentioned in TSB L-SB-0019-20 for some models.
Typical fix: Flash the A/C Amplifier with updated software. If the module has failed hardware, it will require replacement.
Est. part cost: $400-$700
Rare But Worth Checking
- Mechanically Jammed Damper Door: Less common than motor failure, but the plastic linkage or the door itself can bind or break. This can sometimes be caused by improper cabin air filter replacement, which can damage HVAC linkages. Some owners have also had success with a temporary 'percussive maintenance' (tapping the servo) to unjam it. In one documented case, a technician freed a jammed door, avoiding a full dashboard removal.
Diagnosis Steps
- Connect an OBD-II scanner capable of reading Body codes (like Carista or Toyota Techstream) to confirm B1443 is present. Note any other HVAC-related codes.
- Cycle through the HVAC modes (Face, Floor, Defrost, Bi-Level) and listen carefully for clicking, grinding, or buzzing sounds from behind the passenger side dashboard.
- Observe if the airflow actually changes to the selected vents. A lack of change is a key symptom.
- Using a capable scan tool (Techstream), perform a 'Servomotor Initialization' under the 'Body / Air Conditioner / Utility' menu. This commands all servos through their full range of motion and can sometimes temporarily restore function or help pinpoint the failing unit.
- In Techstream, use the 'Active Test' to command the 'Air Outlet Servo (D)' specifically and monitor the 'A/O DAMP POS' (Air Outlet Damper Position) value in the Data List. A discrepancy between the target and actual position confirms the fault.
- If a noise is heard, try to pinpoint its location. The Air Outlet servo is often located deep within the dash assembly, sometimes accessible after removing the glove box.
- For advanced diagnosis, a technician will remove the glove box and surrounding trim to gain access to the HVAC unit.
- With the servo connector exposed, use a multimeter to check for power and ground signals from the A/C Amplifier when the mode is changed. A bench test can also be performed by applying 12V directly to terminals 4 and 5 of the motor to check for movement.
- If power is present but the servo does not move or clicks erratically, the servo motor is confirmed to be faulty and must be replaced.
- If no power is present, the wiring harness or the A/C Amplifier is the likely cause.
Parts You'll Likely Need
- Air Outlet Damper Servo Motor
(OEM #87106-30540)— This is the component that fails electrically or mechanically, directly causing the B1443 code. It is also referred to as 'Damper Servo Sub-Assy, Air Conditioner Radiator, No. 3'.
Trusted brands: Lexus (OEM), Aisin
OEM price range: $210-$295
Aftermarket price range: $150-$220 - Heater Air Damper Control Lever
(OEM #87296-53010)— The official Lexus TSB suggests this lever may also need to be replaced along with the servo motor, as it can be a point of failure or get damaged during the repair.
Trusted brands: Lexus (OEM)
OEM price range: $15-$30
Related Codes That Often Appear With This One
- B1441 — This code is for the Front Passenger Side Lower Air Mix servo. Both are part of the same TSB (L-SB-0001-21 Rev) and can fail due to similar reasons.
- B1442 — This code is for the Air Inlet Damper Control Servo. It is also listed in TSB L-SB-0001-21 Rev and is part of the same system.
- B1446 — This code is for the Driver Side Lower Air Mix servo, another component covered by the same TSB and prone to similar failures.
Technical Service Bulletins (TSBs) & Recalls
- L-SB-0001-21 Rev: Defines code B1443 as 'Air Outlet Damper Control Servo Motor Circuit' and lists it with over a dozen other HVAC servo motor circuit faults for IS, GS, and RC models. It provides a diagnostic flowchart for technicians.
- L-SB-0019-20: Pertains to some 2017-2019 models and suggests that in some cases, a flash reprogram of the air conditioning amplifier can resolve HVAC issues, as an alternative to mechanical replacement.
Platform-Specific Known Issues
- Lexus issued Technical Service Bulletin L-SB-0001-21 Rev, which includes B1443, acknowledging a pattern of servo motor failures in the HVAC system for this vehicle generation.
- The repair is notoriously difficult due to the servo's location, requiring almost complete removal of the dashboard and instrument panel for access. One owner on ClubLexus reported a dealer quote of $3,440 ($454 part, 13 hours labor) for a similar servo replacement.
- A Customer Support Program (CSP) was issued that extended the warranty for this issue, but it has since expired for most vehicles. Some owners have had success getting dealers to offer goodwill discounts on the repair even after expiration.
Mechanic-Grade Diagnostic Values
- Techstream Live Data: 'A/O DAMP POS' (Air Outlet Damper Position) — expected: Damper at 'FACE': -10.0%; Damper at 'FOOT': 33.5% or 49.0%; Damper at 'FOOT/DEF': 69.0% or 95.0%.. Failure: A fixed value of 50.0% can indicate an open circuit; a value that does not change when commanded indicates a fault.
- Servo Motor Bench Test — expected: Apply 12V to terminals 4 and 5 of the servo motor; the lever should move smoothly. Reversing polarity should move it smoothly in the opposite direction.. Failure: No movement, or jerky/grinding movement indicates a failed motor.
- Harness Resistance Check — expected: Less than 1 Ω between the A/C amplifier connector terminals and the corresponding servo motor connector terminals.. Failure: High resistance or an open circuit (OL) indicates a break or corrosion in the wire.
Hidden / Shadow Codes Worth Checking
- History Code B1443: Even if the fault is intermittent and not currently active, the A/C Amplifier will often store a history code for B1443. Finding this in the code history confirms a past or intermittent failure of the servo circuit. (see via Toyota Techstream or a professional scanner capable of reading Lexus-specific history codes from the Body Control Module.)
Scan Tool Commands That Help
- Toyota Techstream: Body / Air Conditioner / Utility / Servomotor Initialization — Required after replacing a servo motor, disconnecting the battery, or replacing the A/C amplifier to allow the system to relearn the damper end points. It can also be used as a diagnostic step to attempt to temporarily resolve an intermittent fault.
- Toyota Techstream: Body / Air Conditioner / Active Test — Used to command a specific servo motor (e.g., 'Air Outlet Servo (D)') to move, allowing a technician to verify its operation and monitor its position sensor data without disassembling the dashboard.
- Toyota Techstream: Body / Air Conditioner / Data List — Used to monitor the 'Target Pulse' ('A/O DAMP TARG') and 'Actual Pulse' ('A/O DAMP POS') of the servo motors in real-time. A mismatch confirms the servo is not completing the commanded movement.
Wiring & Ground Locations
- A/C Amplifier Assembly — Located in the center of the dash, typically behind and below the radio, often accessible after removing the glove box.. This is the control module that sends all power and command signals to the B1443 servo motor. All circuit testing for the servo originates or terminates here.
- Ground Points J1, J2 — J1 is located in the driver's side kick panel area. J2 is on the left side of the shift lever assembly.. These are primary ground points for the instrument panel wire harness, which the A/C system relies on. A poor or corroded ground at these locations could cause erratic behavior or a loss of power for various modules, including the A/C amplifier and servos.
- Air Outlet Damper Servo Connector — On the servo motor itself, which is located on the central HVAC unit, typically on the passenger side. It is often a blue connector.. This is the final connection point before the motor. Testing for voltage here is the definitive way to determine if the fault is in the wiring/amplifier or the motor itself.
Real Owner Repair Stories
- YouTube channel 'Mountain light auto shop' (2015 Lexus GS 350 (similar HVAC system)) — No air coming from the driver's side vents, passenger side worked correctly. Scan tool showed code B1443.
❌ Tried (didn't work) Resetting the code with a scan tool.
✅ What actually fixed it The technician partially disassembled the dash and removed the servo motor. He found the motor itself was functional, but the plastic damper door it controlled was physically jammed inside the HVAC case. He manually freed the jammed door and reinstalled the original servo, restoring airflow and avoiding a full dashboard removal. - ClubLexus forum user (2015 Lexus GS 350 (similar HVAC system)) — Airflow stuck on defrost vents after pressing the defrost button; could not change to face vents.
❌ Tried (didn't work) Cycling the A/C system on and off., Manually selecting different modes on the control panel.
✅ What actually fixed it The owner disconnected the vehicle's battery for a period of time. After reconnecting it, the HVAC system reset and the vents began to operate normally. This indicates a temporary fix for a software glitch or calibration loss, not a permanent repair for a failing motor. - ClubLexus user 'ChineseKFC' (Lexus RC (similar HVAC system)) — 30-45 second delay on startup before HVAC controls would respond. Techstream showed B1443.
❌ Tried (didn't work) Running the 'Servomotor Initialization' utility in Techstream and clearing codes did not immediately fix the fault.
✅ What actually fixed it The issue temporarily resolved itself after the owner cycled the system between max A/C and max heat. While this worked, it is noted that this is often a temporary fix and the underlying servo failure is likely to return.
OEM Part Supersession History
87106-30540→N/A— This appears to be the current and original part number for this application.
Heads up: While this part number is correct for the Air Outlet servo (B1443), the HVAC unit contains multiple other servos that look physically similar but have different part numbers and functions. It is critical to order the exact part number associated with the specific fault code.
Model Year Variations Within This Range
- 2017-2019: The 2017 model year marked a mid-cycle refresh for the IS, which included interior updates like changes to the audio and ventilation control panels. However, the underlying HVAC servo motors and the A/C amplifier design remained largely the same, and these models are still susceptible to the same servo failures and B1443 code as the 2016 models. TSB L-SB-0019-20 specifically calls out 2017-2019 models as potentially benefiting from an A/C amplifier software update.
Helpful Videos
We Have This Part in Stock



The information in this article is provided for general reference and educational purposes only. Vehicle specifications, procedures, and part compatibility can vary by production date, trim level, and region. Always consult your vehicle's factory service manual and verify part numbers before purchasing or performing repairs. Safety-critical components such as airbags, seat belts, and braking systems should be installed by a qualified professional.
- Lexus IS 300:
- 🎬 Helpful Videos
- 🛍️ Shop This Part
- What's Unique About the 2016-2019 Lexus IS 300
- Diagnostic Flowchart
- Symptoms You May Notice
- Most Likely Causes
- Rare But Worth Checking
- Diagnosis Steps
- Parts You'll Likely Need
- Related Codes That Often Appear With This One
- Technical Service Bulletins (TSBs) & Recalls
- Platform-Specific Known Issues
- Mechanic-Grade Diagnostic Values
- Hidden / Shadow Codes Worth Checking
- Scan Tool Commands That Help
- Wiring & Ground Locations
- Real Owner Repair Stories
- OEM Part Supersession History
- Model Year Variations Within This Range
- 🎟️ Get 5% Off