

OBD-II Code B1318: Battery Voltage Low
What B1318 means, why it triggers, and how to fix it
- Code B1318 indicates system voltage dropped below 9-11 volts, usually due to a dying battery or failing alternator.
- Test the battery and alternator first; a healthy battery must read at least 12.4V off and 13.8V while running.
- Expect immediate drivability issues like a no-start condition, loss of power steering, or a cascade of unrelated dashboard warning lights.
- On General Motors vehicles, B1318 specifically means a 'LH Sun Load Sensor Fault' and requires a $30-$80 dashboard sensor replacement, not a battery.
What Does B1318 Mean?

The B1318 code means a control module detected electrical system voltage below the normal operating level. This triggers when voltage drops below a specific threshold—typically 9 to 11 volts—for a set period. Your car's computers require a steady electricity supply to function, making this a critical warning of a compromised power source.
Technical definition: The SAE/OBD-II definition for B1318 is "Battery Voltage Low." It sets when a control module (like the PCM, BCM, or ABS Module) detects supply voltage dropping below a pre-defined threshold (e.g., 9-11 volts) for a specific duration. For example, Ford modules set this code when voltage stays below 9 volts for 10 seconds. This threshold varies by manufacturer and module.
Can I Drive With B1318?
No — Do Not Drive. No, driving is not recommended. The vehicle runs on limited battery power and stalls without warning, creating a dangerous situation at intersections or on the highway. You lose power steering and brake assist, making the vehicle difficult to control. Continuing to drive destroys the battery and stresses the alternator, adding hundreds of dollars to your repair bill.
Common Causes

- Weak or aging battery (Very Common) — The most frequent cause is a battery that no longer holds a full charge. Internal sulfation reduces capacity, causing voltage to drop below the required level during high-demand situations like engine cranking.
- Failing alternator (Common) — The alternator recharges the battery and powers the electrical system while the engine runs. If the alternator or its internal voltage regulator fails, it stops producing the required 13.8–14.4 volts, draining the battery and triggering the code.
- Corroded or loose battery terminals (Common) — Corrosion or loose connections on the battery posts, cable ends, or main ground straps create high electrical resistance. This resistance prevents the battery from receiving a full charge and restricts electricity flow to the vehicle's modules.
- Parasitic electrical drain (Less Common) — A parasitic drain is an electrical component that continues drawing power after the car turns off. A faulty module, stuck relay, or incorrectly installed aftermarket accessory drains the battery overnight. A drain over 50 milliamps (0.05A) is excessive. 🎬 See this simple way to find a parasitic battery drain
- Faulty Battery Monitoring Sensor (BMS) (Less Common) — Modern vehicles use a BMS on the negative battery terminal to track the state of charge. A faulty sensor, or one not reset after a battery replacement, forces improper charging strategies and triggers a B1318 code even with a healthy battery and alternator.
- Damaged wiring or high circuit resistance (Rare) — A shorted wire, blown fusible link, or high resistance in the power feed or ground circuit causes a localized voltage drop. The affected module sees low voltage and sets the code, even if the main battery voltage is normal. A voltage drop greater than 0.5V indicates this issue.
- Corrupted module software (Rare) — If a control module's software calibration corrupts or its internal voltage-sensing circuit fails, it falsely logs a B1318 code despite normal system voltage. This requires a software update or module replacement from a dealer.
Symptoms

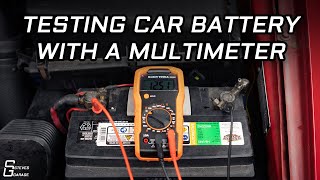
- Difficulty starting the engine — The engine cranks very slowly or emits a rapid clicking sound when you turn the key. During cranking, healthy battery voltage remains above 9.6 volts. 🎬 Watch: How to test your car battery with a multimeter
- Battery or charging system warning light — A red battery symbol or a "Check Charging System" message illuminates on the instrument cluster.
- Dim or flickering lights — Headlights, interior dome lights, and dashboard backlighting appear dimmer than usual or flicker noticeably at idle.
- Loss of power steering and slow accessories — Vehicles with Electronic Power Assist Steering (EPAS) disable steering assist to conserve power. Power windows move slowly, and the infotainment system cuts out or resets.
- Multiple unrelated warning lights (also visible on scanner) — Low voltage causes communication errors (U-codes) between modules, triggering a cascade of warning lights for systems like ABS, airbags, and traction control.
Diagnostic Flowchart
Tap your situation to follow the diagnostic path that matches what you're seeing on this code.
Common Fixes & Costs
- Replace battery and register with BMS — Parts: $150-$350, Labor: $50-$100, ~0.5 hr book time (DIY)
- Replace alternator — Parts: $250-$800, Labor: $200-$400, ~2 hr book time (Intermediate)
- Clean battery terminals and cable ends — Parts: $5-$15, Labor: $25-$50, ~0.2 hr book time (DIY)
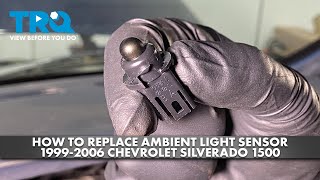
- Replace GM Sun Load Sensor (GM vehicles only) — Parts: $30-$80, Labor: $75-$150, ~0.8 hr book time (DIY)
- Repair wiring or ground strap — Parts: $10-$50, Labor: $100-$200, ~1.5 hr book time (Professional)
- Replace/Reprogram control module — Parts: $300-$1200, Labor: $100-$250, ~1.5 hr book time (Professional)
DIY vs Professional
- Clean battery terminals and cable ends — Beginner: Yes
Tools: Wrench set, wire brush, safety glasses, gloves. - Replace battery — Beginner: Yes, with caution.
Tools: Wrench set, terminal cleaner, scan tool capable of BMS reset. - Replace GM Sun Load Sensor — Beginner: Yes
Tools: Plastic trim removal tools. - Replace alternator — Beginner: No.
Tools: Socket/wrench set, serpentine belt tool, pry bar. - Repair wiring or ground strap — Beginner: No.
Tools: Multimeter, wiring diagrams, wire strippers, crimpers, soldering iron, heat shrink. - Replace/Reprogram control module — Beginner: No.
Tools: Dealer-level scan tools for programming, coding, and immobilizer synchronization.
Used vs. New Parts: Buying Guide
When a used part is worth it: A used OEM alternator from a low-mileage wrecked vehicle is a cost-effective option for an older, lower-value car. Never buy a used battery.
Donor-vehicle mileage cap: roughly under 100000 miles for the part to have meaningful remaining life.
Donor quality checklist:
- Verify the donor vehicle's mileage.
- Match the part number exactly to your original alternator.
- Visually inspect for heavy corrosion, physical damage, or signs of oil contamination.
- Ask about the warranty period (typically 30-90 days for used parts).
Decision logic:
- If Vehicle is under 8 years old or has low mileage → Buy a new OEM or high-quality remanufactured (Bosch, Denso) part. The reliability is worth the cost.
- If Vehicle is over 10 years old and budget is the main concern → A used OEM or a remanufactured store-brand part with a lifetime warranty is a reasonable choice.
- If The alternator is very difficult to access (high labor cost) → Favor a new or premium remanufactured part to avoid paying for labor twice if a cheaper part fails prematurely.
Warranty tradeoff: Used parts offer a short 30-90 day warranty. Remanufactured parts range from 1 year to a limited lifetime warranty. New OEM parts typically carry a 1-2 year warranty.
Worst-case if a used part fails: $300-800 (Cost of repeat labor plus the cost of another replacement part if the first one fails outside its short warranty period.)
What Happens If You Wait — Timeline
- 0-1 Day (Initial Event): Code B1318 sets. You experience a slow engine crank, dimming lights, or a battery warning light. The vehicle is at high risk of stalling unexpectedly. (MPG impact: 0%% · Added cost: $100 - $350 (Cost of towing plus potential permanent damage to the battery from deep discharge).)
- 1-7 Days: If the cause is a failing alternator, the battery repeatedly deep-discharges, causing irreversible sulfation. Electronic systems malfunction or shut down intermittently. (MPG impact: 0-5%% · Added cost: $350 - $950 (The original battery is destroyed and requires replacement. The failing alternator is under extreme stress.))
- 1-4 Weeks: Complete failure of the alternator occurs. The vehicle becomes completely unreliable. Sustained, fluctuating voltage causes logic errors or permanent damage to sensitive control modules. (MPG impact: N/A (Vehicle is unreliable)% · Added cost: $800 - $2500+ (Cost of alternator, battery, and potential replacement of a damaged control module).)
- 1+ Month: The vehicle is undrivable. Cascading electronic failures occur, where voltage spikes from a failing alternator or jump-start attempts damage multiple modules. (MPG impact: N/A% · Added cost: $2000 - $4000+ (Worst-case scenario involving replacement of an alternator, battery, and multiple major control modules.))
Cost of Not Fixing It
- Immediate (0-1 Day): High risk of being stranded. The vehicle stalls without warning. Deep discharging a standard lead-acid battery causes permanent damage. (Added cost: $100 - $600 (Towing + new battery))
- Short-Term (1-4 Weeks): Complete failure of the alternator due to sustained overload. Fluctuating voltage damages sensitive electronic components like the instrument cluster or body control module. (Added cost: $600 - $2000+ (Alternator replacement + potential module replacement))
- Long-Term (1+ Month): The vehicle becomes unreliable and undrivable far before this timeframe. The primary risk escalates from stranding to cascading electronic failures. (Added cost: N/A)
Diagnosis Steps

- Visually Inspect Battery and Charging System
Inspect battery terminals for blue-green or white corrosion. Ensure battery cables are tight and immovable. Verify the alternator drive belt is tight and not slipping. Check main ground straps from the battery and engine to the chassis for secure, clean connections.
Tools: Safety glasses, gloves (Beginner) - Check Battery Voltage (Engine Off)
Measure voltage directly at the battery terminals using a multimeter set to DC volts. A fully charged, healthy battery reads 12.4 to 12.6 volts. A reading below 12.2 volts indicates a discharged or failing battery.
Tools: Multimeter (Beginner) - Test Charging System (Engine Running)
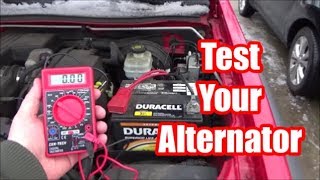
Start the engine and measure battery voltage again. A healthy alternator outputs between 13.8 and 14.4 volts. If the voltage remains below 13.5 volts or fails to increase, the alternator is faulty.
Tools: Multimeter (Beginner) - [PRO TIP] Check Cranking Voltage Drop
Measure battery voltage while a helper cranks the engine. The voltage must stay above 9.6 volts. A drop below this level indicates a weak battery lacking the necessary cold cranking amps (CCA), which triggers low voltage codes.
Tools: Multimeter, helper (Intermediate) - Perform Battery Load Test
A load test checks the battery's ability to deliver sustained power, simulating a start-up. Auto parts stores perform this test for free. This definitively confirms if the battery itself requires replacement.
Tools: Battery load tester (or visit an auto parts store) (Intermediate) - [PRO TIP] Perform Alternator Ripple Test
A failing alternator diode introduces AC voltage (ripple) into the DC system, confusing modules. Set the multimeter to AC volts and connect probes to the battery terminals with the engine running. A reading higher than 0.5V AC confirms a failing internal rectifier.
Tools: Multimeter with AC Voltage setting (Intermediate) - Check for Parasitic Drain
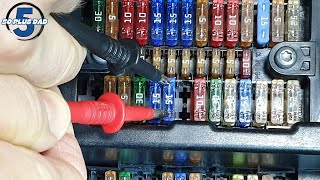
Disconnect the negative battery terminal and connect a multimeter in series to measure amperage draw. With the car off, doors closed, and modules in 'sleep mode' (after 30-60 minutes), the draw must stay under 50 milliamps (0.050A). If higher, pull fuses individually to isolate the draining circuit.
Tools: Multimeter with amperage setting (10A minimum) (Advanced) - Check Module-Specific Voltage Drop and Wiring
If a specific module set the code, measure voltage directly at its power input pin using a wiring diagram. Compare this to battery voltage. A drop exceeding 0.5 volts indicates high resistance. Inspect the power wire for damage and verify the ground wire resistance to the chassis is under 5 ohms.
Tools: Multimeter, vehicle-specific wiring diagram (Advanced) - [ADVANCED] Analyze Scan Tool Live Data
Monitor the voltage PID (Parameter ID) reported by the specific module setting the code using an advanced scan tool. Compare this value to the PCM voltage PID and actual battery voltage. Significant discrepancies point to a wiring issue or internal module fault.
Tools: Advanced bi-directional scan tool (Advanced)
When This Code Triggers (Freeze-Frame Conditions)
- Module Voltage: < 10.5V (The voltage reported by the specific module setting the code dropped below its operational threshold.)
- Electrical Load: High (The code sets when high-draw accessories like headlights, HVAC blower fan, or electric power steering are active, increasing the demand on a weak electrical system.)
- Engine State: Cranking or Running (The voltage drop occurs during engine start-up (cranking) when the starter motor draws maximum amperage, or while running if the alternator fails to keep up with demand.)
- Engine RPM: 0 - 1500 RPM (The fault triggers at idle (low RPM) when alternator output is lowest, or during a cranking/no-start event (0 RPM).)
Related Codes
- B1317 — This is the opposite code, 'Battery Voltage High.' B1318 sets when voltage drops below ~9-11V, while B1317 sets when it exceeds ~16V, usually due to a faulty alternator voltage regulator.
- P0562 — 'System Voltage Low' is the generic powertrain equivalent of B1318. Having both strongly confirms a vehicle-wide low voltage problem originating from the battery or alternator.
- P1000 — On Ford, Mazda, and Jaguar vehicles, this code means the onboard diagnostic checks are incomplete. It appears after the battery dies or is disconnected.
- B1676 — On Ford vehicles, this code means 'Battery Pack Voltage Out of Range.' It sets alongside B1317 or B1318, indicating voltage is outside the acceptable window.
- U-Series Codes (e.g., U0121, U0401) — These are communication codes. When modules lack sufficient power, they drop off the network, causing a cascade of U-codes alongside the initial B1318.
Climate & Environmental Factors
- Hot Weather (>80°F / 27°C): High heat is the primary cause of reduced battery lifespan. It accelerates the chemical degradation of internal lead plates and evaporates battery fluid, permanently reducing capacity.
- Cold Weather (<32°F / 0°C): Cold weather reveals battery weaknesses caused by summer heat. The chemical reaction that produces electricity is less efficient in the cold, while thicker engine oil requires more power to crank, leading to a severe voltage drop.
- High Humidity: Humidity accelerates corrosion on battery terminals, ground straps, and wiring connectors. This corrosion increases electrical resistance, causing localized voltage drops.
How to Talk to a Mechanic About This Code
Say this: "I have a B1318 low voltage code and symptoms like dim lights and slow cranking. I'd like to schedule a diagnostic for the charging system. Please perform a comprehensive test including a battery load test, an alternator output and AC ripple test, and a check for parasitic draw before replacing any parts."
This signals you've done your research and prevents a shop from just swapping the battery. It directs them to perform the specific tests needed to correctly diagnose a weak battery, a failing alternator, or a parasitic drain, saving you from paying for unnecessary parts.
Avoid saying:
- 'My battery is dead, I need a new one.' (This invites them to sell you a battery without checking the alternator).
- 'My car won't start, just fix it.' (This is too vague and gives a dishonest shop a blank check to replace multiple parts).
- 'I think my alternator is bad.' (It's better to ask for a full system test to confirm instead of guessing).
Questions to ask before authorizing the repair:
- What were the results of the battery load test, and what was the cranking voltage drop?
- What was the alternator's charging voltage and AC ripple measurement?
- If you're recommending a battery replacement on my modern car, does the estimate include the Battery Monitoring System (BMS) reset procedure?
- Can you show me the old part that you are replacing?
Where to Take It: Dealer vs Independent vs Chain
- Dealer:
Recommended if your car is under warranty, is a modern European brand, or if you suspect a complex module or software issue that requires a BMS reset.
Best for: Vehicles under warranty., Diagnosing manufacturer-specific quirks (like the GM sun load sensor issue)., Repairs requiring proprietary software, like a Battery Monitoring System (BMS) reset or module programming.
Downsides: Highest labor rates and part costs., May be less flexible, preferring to replace entire assemblies rather than smaller components. (Typical cost: +50% vs. baseline) - Independent Shop:
Best choice for most B1318 situations. A good independent shop easily handles battery, alternator, and basic wiring diagnostics and offers the best value.
Best for: Out-of-warranty vehicles where cost is a factor., Diagnosing and repairing common causes like a bad battery or alternator., Building a long-term relationship with a trusted mechanic.
Downsides: Quality and expertise vary widely; check for ASE certifications and good reviews., May not have the latest manufacturer-specific tools for BMS resets on all models. (Typical cost: +0% vs. baseline) - Chain Shop:
Use with caution. Acceptable for a free battery test or a simple battery swap that doesn't require a BMS reset. AVOID for comprehensive diagnosis of a B1318 code.
Best for: Simple, clear-cut battery replacement if you've already confirmed the battery is the sole problem., Getting a free battery and alternator check.
Downsides: High pressure to upsell is common; they might sell you a battery when your alternator is the real issue., Technician skill varies dramatically and they are often not equipped for in-depth electrical diagnostics like parasitic draws. (Typical cost: -10% vs. baseline)
When to Walk Away From the Repair
If the estimated repair cost exceeds 40-50% of your car's private-party value (check Kelley Blue Book or Edmunds), you should seriously consider selling or trading it in.
- Car worth $4000, fix is $1800: Walk away. The repair cost is 45% of the car's value. It's not financially sound to invest this much into an older vehicle.
- Car worth $12000, fix is $1100: Fix it. The repair is less than 10% of the car's value and is a critical maintenance item.
- Car worth $2500, fix is $900: Borderline. The repair is ~36% of the car's value. If the rest of the car is in excellent shape, it might be worth it. Get a second opinion before proceeding.
What Scan Tool You Need for This Code

Minimum: A scanner that can read Body (B) codes and display live data for system voltage.
A cheap, engine-only (P-code) reader cannot see the B1318 code. To properly diagnose, you need to see live voltage from the module's perspective, which requires live data streaming. For modern cars, a simple reader cannot perform the required Battery Monitoring System (BMS) reset.
Budget: BlueDriver Pro (~$99) — Reads B-codes like B1318, provides detailed repair reports, and streams live voltage data to your phone. Can also perform a BMS reset on many supported vehicles.
Mid-range: Foxwell NT510 Elite (~$180) — Provides manufacturer-specific diagnostics, including reading B1318 from specific modules. It has strong bi-directional controls and performs battery registration (BMS reset) on many makes.
Professional: Autel MaxiCOM MK808 / MK906BT (~$500-1200) — Offers full bidirectional control, comprehensive battery registration, and accesses manufacturer-specific data. This is a professional-level tool that diagnoses complex electrical issues and programs modules.
Rent vs buy: For a one-time code read, many auto parts stores scan codes for free. However, to diagnose B1318 properly by monitoring live voltage or performing a BMS reset, you must own a capable scanner. Buying makes sense if you plan to do any future DIY work.
How to Clear the Code After You Fix It
- Ensure all repairs are complete and the battery is fully charged.
- Use an OBD-II scan tool to select the 'Clear/Erase Codes' function.
- Perform a complete drive cycle to allow the vehicle's readiness monitors to run.
Drive cycle (~20 minutes): A general drive cycle includes: 1) Cold start and idle for 2-3 minutes. 2) Drive in stop-and-go city traffic for 10 minutes. 3) Drive at a steady highway speed (55-60 mph) for 5-10 minutes. 4) Allow the vehicle to cool down completely.
Readiness monitors affected: Catalyst Monitor, Evaporative System Monitor, Oxygen Sensor Monitor, Comprehensive Component Monitor
Before emissions retest: drive at least 50 miles to fully set monitors.
Watch out for:
- Clearing the code does not fix the problem; it returns immediately if the low voltage condition still exists.
- Disconnecting the battery clears the code but resets all readiness monitors, causing an automatic failure at an emissions testing station.
Will This Fail Emissions / State Inspection?
Yes — this code typically fails an OBD-II emissions inspection.
- California: A vehicle fails if the Check Engine Light is on or if readiness monitors are incomplete. After a repair, a specific drive cycle (often 50-100 miles) is required before a retest.
- New York: The NYS vehicle inspection includes an OBD-II scan. An illuminated Check Engine Light from a related P-code causes the vehicle to fail the emissions portion.
- Texas: In counties where emissions testing is required, the On-Board Diagnostic (OBD) test is performed. An active Check Engine Light results in a failure.
Most Commonly Affected Vehicles
- Ford F-150 (2004-2014) — Very common code. Sets via the 4x4 Control Module (disabling 4WD), Driver Seat Module, or Instrument Cluster. Diagnosis requires Ford's specific 'Pinpoint Tests'.
- Ford Focus (2000-2011) — Older models are prone to battery and alternator wear, making B1318 a common code indicating a failing battery or alternator.
- Ford Kuga / Escape (2013-2019) — Frequently caused by an aging original battery. The BMS sensor must be reset after replacement to ensure proper charging.
- Ford Taurus (2000-2007) — Problems with the Generic Electronic Module (GEM) or Instrument Cluster detecting low voltage are noted for this model range.
- Mazda 3, 6, CX-5 (2004-2015) — Shares electrical architecture with Ford models, making it susceptible to similar battery, alternator, and corroded wiring faults.
- Chevrolet / GMC Various trucks and SUVs (2000-2014) — CRITICAL: On most GM vehicles, B1318 is defined as 'LH Sun Load Sensor Fault' and relates to the climate control system, NOT battery voltage.
- BMW 3-Series, 5-Series (2006-2013) — Often caused by a failing Intelligent Battery Sensor (IBS) which incorrectly monitors the battery state, leading to undercharging.
- Subaru Outback, Forester, Impreza (2001-2012) — Triggered by an 'Alternator Charge Cut-out Function' in the ECU that reduces alternator output to save fuel, causing undercharging on short trips.
- Jaguar / Land Rover Various Models (2002-2015) — These vehicles have highly sensitive electronic modules; a low voltage event triggers a cascade of communication and system fault codes alongside B1318.
Manufacturer-Specific Notes
- General Motors (GM): On many GM vehicles, B1318 is defined as 'LH Sun Load Sensor Fault.' This relates to the automatic climate control system and has nothing to do with battery voltage.
- Ford: Ford uses this code across many different modules, each with its own specific voltage threshold. For example, the 4x4 module sets the code at 9V, disabling 4WD.
- Subaru: The ECU intentionally reduces alternator output to ~12.9V under no-load conditions to improve fuel economy. This 'Alternator Charge Cut-out Function' often fails to keep the battery charged on short trips.
- Jaguar / Land Rover: These vehicles are notoriously sensitive to voltage fluctuations. A weak battery causes a cascade of seemingly unrelated electronic faults, from airbag lights to transmission warnings, alongside B1318.
Real Owner Stories
2013 Ford F-150 with ~100k miles
Truck wouldn't start, just a clicking sound. After a jump start, the battery light stayed on with a B1318 code and multiple 4x4 warning lights.
What they tried:
- Replaced the 5-year-old original battery. The truck started, but the code and warning lights returned after a day.
- Took it to a shop where the alternator passed testing.
- The shop performed a parasitic draw test and found a draw over 200mA.
- By pulling fuses, they isolated the draw to the driver's seat module circuit.
Outcome: The driver's seat module failed internally and was not 'going to sleep', causing a constant drain. Replacing the module resolved the B1318 and the parasitic drain for $700.
Lesson: If a new battery doesn't fix a low voltage code, suspect a bad alternator or a parasitic drain. Don't ignore unrelated warning lights; they are clues to which module is causing the problem.
2006 Ford F350 6.0L Diesel
After the truck sat for months, the alternator stopped charging, setting a B1318 code. The owner installed a new alternator and two new batteries, but the problem persisted.
What they tried:
- Verified the new alternator and batteries were good.
- Inspected the wiring harnesses for damage.
- Found a section of the wiring harness near the radiator where mice chewed through several wires.
Outcome: The owner repaired the chewed wires. The alternator began charging correctly at 13.9 volts, and the B1318 code cleared.
Lesson: If a vehicle sits for an extended period, always check for rodent damage to wiring harnesses before replacing expensive parts.
2012 Chevy Silverado
The automatic climate control blew hot air when it should be cold. A scan revealed a B1318 code.
What they tried:
- The owner initially thought it was a battery issue based on the code number.
- After research, they learned that on GM vehicles, B1318 indicates a 'LH Sun Load Sensor Fault'.
- They located the sensor on the dashboard near the windshield.
Outcome: Replacing the small sun load sensor (GM Part #13589748) fixed the climate control issue and cleared the B1318 code.
Lesson: Always verify the specific definition of a code for your vehicle's manufacturer. The same code number means completely different things on different brands.
How to Prevent This Code From Triggering
- Periodically Clean Battery Terminals (Every 6-12 months or during oil changes) — Removes corrosion that creates resistance and prevents the battery from charging and delivering power effectively.
- Take Longer Drives Regularly (At least once a week) — Short trips (under 20 minutes) prevent the alternator from fully recharging the battery. A weekly 30-minute highway drive maintains a full charge and prevents sulfation.
- Test Battery Health Before Winter (Annually (especially for batteries > 3 years old)) — Cold weather significantly reduces a battery's power output. A load test identifies a failing battery before it leaves you stranded in the cold.
- Use a Battery Tender for Stored Vehicles (When storing a vehicle for more than 2-3 weeks) — All vehicles have a small parasitic draw. A battery tender provides a slow, steady charge that prevents deep discharge damage.
- Reset Battery Monitoring System (BMS) After Replacement (Every time a new battery is installed on a BMS-equipped vehicle) — Failing to reset the BMS tells the car the new battery is old, leading to chronic undercharging and premature failure.
Frequently Asked Questions
My car is a Chevy/GM and has a B1318 code. Is my battery bad?
No. On most General Motors vehicles, B1318 indicates a 'LH Sun Load Sensor Fault' for the automatic climate control system. It has nothing to do with the battery. Always verify the code definition for your specific manufacturer.
What does B1318 mean on a Jaguar or Ford?
On Jaguar and Ford vehicles, B1318 means 'Battery Voltage Low.' It indicates a control module detected its power supply dropped below the minimum required voltage.
Why did the B1318 code appear after I replaced the battery?
The code is either a stored history code needing clearance, or the Battery Monitoring System (BMS) requires a reset. Failing to register the new battery causes the system to undercharge it, triggering the code again.
Can a new battery fix code B1318?
Yes, if the root cause is a weak battery. However, if the alternator is failing, it quickly drains the new battery and the code returns. Always test the entire charging system before replacing parts.
Why did the B1318 code appear after I jump-started my car?
The low voltage condition that required the jump-start triggered the code. Clear the code after confirming the charging system works correctly and the battery holds a charge.
Will clearing the code make it go away?
No. The control module detects the low voltage again and the code reappears immediately or after a short drive.
How can I prevent the B1318 code from coming back?
Regularly test your battery, especially if it exceeds three years of age. Keep terminals clean and fix any known parasitic drains. On modern vehicles, ensure any new battery is properly registered with the computer.
Key Takeaways
- Code B1318 indicates system voltage dropped below 9-11 volts, usually due to a dying battery or failing alternator.
- Test the battery and alternator first; a healthy battery must read at least 12.4V off and 13.8V while running.
- Expect immediate drivability issues like a no-start condition, loss of power steering, or a cascade of unrelated dashboard warning lights.
- On General Motors vehicles, B1318 specifically means a 'LH Sun Load Sensor Fault' and requires a $30-$80 dashboard sensor replacement, not a battery.
Helpful Videos



The information in this article is provided for general reference and educational purposes only. Vehicle specifications, procedures, and part compatibility can vary by production date, trim level, and region. Always consult your vehicle's factory service manual and verify part numbers before purchasing or performing repairs. Safety-critical components such as airbags, seat belts, and braking systems should be installed by a qualified professional.
- 🎬 Helpful Videos
- What Does B1318 Mean?
- Can I Drive With B1318?
- Common Causes
- Symptoms
- Diagnostic Flowchart
- Common Fixes & Costs
- DIY vs Professional
- Used vs. New Parts: Buying Guide
- What Happens If You Wait — Timeline
- Cost of Not Fixing It
- Diagnosis Steps
- When This Code Triggers (Freeze-Frame Conditions)
- Related Codes
- Climate & Environmental Factors
- How to Talk to a Mechanic About This Code
- Where to Take It: Dealer vs Independent vs Chain
- When to Walk Away From the Repair
- What Scan Tool You Need for This Code
- How to Clear the Code After You Fix It
- Will This Fail Emissions / State Inspection?
- Most Commonly Affected Vehicles
- Manufacturer-Specific Notes
- Real Owner Stories
- 2013 Ford F-150 with ~100k miles
- 2006 Ford F350 6.0L Diesel
- 2012 Chevy Silverado
- How to Prevent This Code From Triggering
- Frequently Asked Questions
- My car is a Chevy/GM and has a B1318 code. Is my battery bad?
- What does B1318 mean on a Jaguar or Ford?
- Why did the B1318 code appear after I replaced the battery?
- Can a new battery fix code B1318?
- Why did the B1318 code appear after I jump-started my car?
- Will clearing the code make it go away?
- How can I prevent the B1318 code from coming back?
- Key Takeaways
- 🎟️ Get 5% Off