

OBD-II Code B1291: Park Assist Sensor 4 Fault
The Ultimate Guide to What B1291 Means, Why It Triggers, and How to Fix It for Good
- Code B1291 specifically flags a failure in Park Assist Sensor #4, located on the inner passenger-side front bumper of Chrysler, Dodge, Jeep, and Ram vehicles.
- Clean the sensor face and the area behind the bumper first; dirt, ice, or heavy wax causes over 40% of these false alarms.
- Perform a 'swap test' by moving sensor #4 to position #3; if your scanner shows the code change to B1290, the sensor is dead and requires replacement.
- You can safely drive with a B1291 code, but you must manually clear the code with an OBD-II scanner after repairs to reactivate the parking assist system.
What Does B1291 Mean?

Trouble code B1291 indicates the vehicle's Park Assist Module (PAM) detects a corrupt, illogical, or missing signal from park assist sensor #4. The system shuts down as a safety measure to prevent false readings and triggers a dashboard warning message.
Technical definition: B1291 formally designates a "Signal Shape / Waveform Failure" from Park Assist Sensor #4 (B1291-25). This means the ultrasonic signal returning to the module is faulty due to an internal sensor failure, wiring damage, or a physical obstruction.
Can I Drive With B1291?
Yes. You can safely drive your vehicle. This code disables the parking assist system, which is a convenience feature. Essential driving functions remain unaffected, requiring you to rely entirely on your mirrors and visual checks when parking.
Common Causes

- Obstructed or Dirty Sensor Face (Very Common) — Dirt, mud, snow, ice, or heavy wax covering the sensor face blocks the ultrasonic signal. This is the most frequent trigger and requires only a simple cleaning. 🎬 Watch: How to clean sensors and clear winter service warnings.
- Failed Park Assist Sensor (Common) — Internal electronics degrade over time from weather, moisture intrusion, and road vibration, causing the sensor to permanently stop sending a valid signal.
- Damaged Wiring Harness or Connector (Common) — Moisture and road debris cause chafed wires or corroded pins in the electrical connector. Ram trucks frequently suffer failures at the main harness connector located behind the driver's side wheel well liner.
- Faulty Aftermarket Sensor (Common) — Non-OEM replacement sensors frequently fail out of the box or lack software compatibility with the module, causing the code to persist even after a repair.
- Debris Behind the Bumper (Common) — Mud, ice, or leaves lodged behind the bumper interfere with the back of the sensor. TSB #9003059 notes this triggers a fault even if the visible sensor face is perfectly clean.
- Broken Sensor Retainer/Bezel (Less Common) — Brittle plastic clips break, allowing the sensor to misalign or fall backward into the bumper, instantly disrupting its field of view.
- Park Assist Module (PAM) Software Glitch (Rare) — Specific 2014 Ram and Jeep models suffer from module over-sensitivity. TSB 08-071-14 requires a dealer-level software update to resolve false codes.
Symptoms

- "Service Park Assist System" Message — A warning message appears on the instrument cluster display, alerting you that the system is unavailable.
- Parking Assist System is Inoperative — The system produces no audible beeps or visual distance indicators when parking.
- Solid Tone When Shifting to Reverse — The vehicle emits a long, continuous beep when put into reverse to indicate a system fault instead of normal proximity warnings.
- Park Assist Button Light Flashes — The LED indicator on the physical park assist toggle button flashes or stays illuminated to indicate a hard fault.
Diagnostic Flowchart
Tap your situation to follow the diagnostic path that matches what you're seeing on this code.
Common Fixes & Costs
- Cleaning the Park Assist Sensor — Parts: $0, Labor: $0, ~0.2 hr book time (DIY)
- Replacing the Faulty Park Assist Sensor — Parts: $25-$80 (Aftermarket), $90-$160 (OEM), Labor: $100-$200, ~1 hr book time (DIY)
- Repairing Damaged Wiring or Connector — Parts: $5-$50, Labor: $120-$300, ~1.5 hr book time (Intermediate)
- Replacing Broken Sensor Retainer/Bezel — Parts: $5-$30, Labor: $0-$100, ~1 hr book time (DIY)
- Replacing the Bumper Wiring Harness — Parts: $100-$250, Labor: $150-$350, ~2.5 hr book time (Professional)
Used vs. New Parts: Buying Guide
When a used part is worth it: A used OEM sensor from a low-mileage donor vehicle provides factory reliability at a lower cost and is significantly more reliable than a cheap new aftermarket part.
Donor-vehicle mileage cap: roughly under 80000 miles for the part to have meaningful remaining life.
Donor quality checklist:
- Verify the part number matches your original sensor exactly.
- Inspect for physical damage like cracks in the housing or bent connector pins.
- Choose a seller offering a 30-day functional warranty.
Decision logic:
- If The cost of a new OEM sensor is only marginally higher than a used one → buy new OEM for the longer warranty and guaranteed condition.
- If Budget is the primary concern and the vehicle is older → a used OEM sensor offers the best value. Avoid new aftermarket sensors due to high failure rates.
Warranty tradeoff: Used parts typically carry a 30-90 day warranty. New OEM parts carry a 1-2 year warranty.
Worst-case if a used part fails: $150 - $400
What Happens If You Wait — Timeline
- Immediate: The 'Service Park Assist' message appears, and the system disables completely. There is no impact on vehicle drivability. (MPG impact: 0%% · Added cost: $0)
- 1-3 Months: Increased risk of minor parking incidents. The driver forgets the system is off, leading to lightly scraping a bumper on a low wall or post. (MPG impact: 0%% · Added cost: $150 - $600 for minor cosmetic bumper scuff repair.)
- 3-6 Months: Higher probability of a noticeable impact while parking, causing a cracked bumper cover, broken sensor retainers, or damage to adjacent sensors. (MPG impact: 0%% · Added cost: $700 - $1,500 for a full bumper cover replacement and paint.)
Cost of Not Fixing It
- Immediate: The park assist system disables entirely, removing all audible warnings during parking. (Added cost: $0)
- Ongoing: Increased risk of low-speed collisions with objects, curbs, or other vehicles while parking in tight spaces. (Added cost: $250 - $2,500)
- Long-Term: A minor parking impact causes functional damage to the bumper cover or adjacent sensors, requiring professional bodywork. (Added cost: $800 - $1,200)
Diagnosis Steps

- Read and Clear the Specific Code
Use a Body-code capable OBD-II scanner to confirm B1291. Note any suffixes (-11, -12, -25) for diagnostic clues. Clear the code, cycle the ignition, and shift into Reverse. If the code returns immediately, proceed to physical inspection.
Tools: OBD-II Scanner (Body Code Capable) (Beginner) - Visually Inspect and Clean
Thoroughly wash the face of sensor #4 (inner passenger-side front bumper on most trucks) with soap and water. Reach behind the bumper to clear any packed mud or leaves pressing against the back of the sensor.
Tools: Soap, water, soft cloth (Beginner) - Perform a Sensor 'Touch Test'
With the ignition ON and the vehicle in Reverse (engine OFF), lightly touch the face of each sensor. A healthy sensor emits a faint, rapid clicking you can feel and hear. If sensor #4 is silent while others click, it has failed internally.
Tools: None (Beginner) - Swap Sensor Locations
Swap the suspected bad sensor (#4) with a known good one from another position (like #3). Clear codes and re-test. If the code changes to B1290, the sensor is dead. If the code remains B1291, the wiring at location #4 is broken.
Tools: Trim removal tools (Intermediate) - Inspect Wiring and Connector
If the code did not move during the swap test, unplug the #4 connector. Look for green corrosion, pushed-out pins, or chafed wires. Inspect the main harness connector behind the driver's side wheel well liner for water intrusion.
Tools: Flashlight, pick tool (Intermediate) - Test the Circuit with a Multimeter
Disconnect the sensor. With the ignition ON, probe the harness connector. Pin 1 (Signal) requires ~8.0V in Park. Pin 2 (Ground) requires <5.0 ohms to chassis ground. Pin 3 (Supply) requires 8.0-8.5V. Missing voltage or ground confirms a wiring harness failure.
Tools: Multimeter, vehicle wiring diagram (Advanced)
When This Code Triggers (Freeze-Frame Conditions)
- Ignition Status: On/Run (The ignition must be on for the Park Assist Module to receive power.)
- System Voltage: 11-14 Volts (The fault records while the module has normal operating voltage.)
- Transmission Gear: Reverse or Drive (The system monitors sensors when reverse is selected or when in drive at low speeds.)
- Vehicle Speed: < 10 mph (16 km/h) (The fault sets during low-speed maneuvers consistent with parking.)
Related Codes
- B1290, B1292, B1293 — These codes indicate faults in the other park assist sensors (#3, #5, #6). If multiple codes appear simultaneously, suspect a damaged main wiring harness or corroded central connector rather than multiple failed sensors.
- B1291-11 / B1291-12 — These suffixes point directly to a wiring problem. B1291-11 means 'Circuit Short to Ground,' and B1291-12 means 'Circuit Short to Battery.' Prioritize testing the harness with a multimeter before replacing the sensor.
- B1291-25 — This is the most common variant, meaning 'Signal Shape / Waveform Failure.' It indicates poor signal quality, typically caused by an obstructed or internally failed sensor.
- B1291-92 — This variant means 'Performance or Incorrect Operation.' It indicates a data communication problem, often resolved by firmly disconnecting and reconnecting the sensor plug to fix a loose connection.
Climate & Environmental Factors
- Snow, Ice, and Slush: A layer of snow or ice blocks the sensor's ultrasonic signal, causing an immediate fault. The code clears itself once the sensor is cleaned or the ice melts.
- Road Salt (Corrosion): Salt spray penetrates behind the bumper and corrodes the sensor's connector pins, leading to permanent shorts or open circuits that require wiring repair.
- Extreme Cold: Extreme cold causes the plastic and internal components of an aging sensor to contract, creating a temporary open circuit that disappears as the vehicle warms up.
How to Talk to a Mechanic About This Code
Say this: "I have a 'Service Park Assist' warning and my scanner shows code B1291 for sensor #4. I've already cleaned the sensor face, but the code came back. I'd like to book a diagnostic appointment to confirm if it's the sensor or the wiring."
This shows you've done basic homework and guides the technician away from just re-cleaning the sensor. It frames the job as a specific diagnostic task, preventing scope creep.
Avoid saying:
- 'My parking beepers are broken, just replace the bad one.'
- 'The internet says it's the sensor, so just put a new one in.'
- 'Just fix whatever's wrong with the park assist.'
Questions to ask before authorizing the repair:
- Can you perform a 'swap test' by moving sensor #4 to another position to confirm if it's a bad sensor or a wiring issue?
- If the code points to a wiring issue, will you inspect the main harness connector for corrosion before recommending a full harness replacement?
- What is the cost difference between an OEM and an aftermarket sensor, and what is the warranty on each?
- Does your estimate include clearing the B-codes from the Park Assist Module to ensure the system reactivates?
Where to Take It: Dealer vs Independent vs Chain
- Dealer:
Recommended only if the vehicle is under warranty or requires a specific TSB software update. Otherwise, it is unnecessarily expensive.
Best for: Vehicles still under the basic bumper-to-bumper warranty., Known software-related TSBs requiring a dealer-level software flash.
Downsides: Highest labor rates, often 1.5-2x more than an independent shop., May default to replacing an entire wiring harness instead of repairing a single wire. (Typical cost: +50% vs. baseline) - Independent Shop:
Best fit for most owners. An experienced independent mechanic easily diagnoses sensor and wiring faults at a significantly lower cost.
Best for: Out-of-warranty vehicles where cost is a factor., Straightforward diagnosis and part replacement.
Downsides: Shop quality varies; look for ASE-certified technicians., May lack dealer-level tools for complex software updates. (Typical cost: +0% vs. baseline) - Chain Shop:
Acceptable for simple sensor replacements if the diagnosis is already confirmed. Avoid for complex wiring diagnostics.
Best for: Simple, visible fixes like replacing a confirmed dead sensor.
Downsides: Technician skill varies dramatically; often lacks experience with body electrical codes., May not stock the specific sensor or connector pigtails needed. (Typical cost: -10% vs. baseline)
When to Walk Away From the Repair
If the total estimated repair cost exceeds 40-50% of the vehicle's current private-party value, consider selling or trading it in.
- Car worth $15000, fix is $300: Fix it. The repair cost is a tiny fraction of the car's value and restores a key convenience feature.
- Car worth $3000, fix is $2000: Walk away. The B1291 fix is minor, but if the car needs $1,500+ in other work, the total cost is too high relative to its value.
What Scan Tool You Need for This Code
Minimum: A scanner that reads and clears Body ('B') trouble codes. A basic engine-only code reader will NOT see the B1291 code.
Cheap $20 scanners only read 'P' (Powertrain) codes. B1291 is stored in the Park Assist Module (PAM), requiring a tool that communicates with body control modules.
Budget: BlueDriver Pro or Autel AP200 (~$60) — These Bluetooth dongles connect to your smartphone to read and clear codes from all vehicle modules, including the PAM. This is sufficient to read B1291 and clear it after repair.
Mid-range: Autel MaxiCOM MK808 or Launch Creader (~$250) — These handheld scanners offer full-system diagnostics and show live data from the park assist module, helping confirm wiring integrity.
Professional: Autel MS906BT or XTool D8s (~$500-1200) — Provides full bidirectional control, allowing a technician to command modules directly. Overkill for a standard B1291, but necessary for complex module diagnostics.
Rent vs buy: Auto parts stores offer free code reading, but their basic tools may not read Body codes. Use their 'loan-a-tool' program for a more capable scanner if available. Buy a scanner only if you plan to do regular DIY diagnostics.
How to Clear the Code After You Fix It
- Use a Body-code capable OBD-II scan tool to clear active and stored codes from the Park Assist Module (PAM).
- Cycle the ignition off, then back on.
- Shift into Reverse to activate the system and confirm the warning message is gone.
Drive cycle (~5 minutes): No specific drive cycle is required. Start the vehicle, shift into Reverse, and drive slowly near an object to confirm the sensors beep correctly.
Readiness monitors affected: None
Watch out for:
- Replacing the sensor but failing to clear the stored B1291 code with a scanner, leaving the system disabled.
- Using a basic $20 code reader that cannot access or clear Body (B) codes.
- Assuming the problem is fixed after cleaning the sensor without clearing the code to re-enable the module.
Will This Fail Emissions / State Inspection?
No — by itself this code doesn't fail OBD inspection (but it can keep readiness monitors from setting, which causes a separate fail).
- California: Will NOT fail. Smog Check inspects for emissions-related faults only. B1291 is a body fault.
- New York: Will NOT fail. A faulty parking sensor is not on the list of required safety items and does not trigger an emissions failure.
- Texas: Will NOT fail. Emissions testing only checks for powertrain codes, and parking aids are not safety inspection criteria.
Most Commonly Affected Vehicles
- Ram 1500 (2013-2020) — Extremely common. 4th Gen uses part #1EW63TZZAA. 5th Gen uses #68449212AB.
- Ram 2500 / 3500 (2014-2018) — Heavy-duty trucks frequently experience this code due to sensor obstruction in harsh conditions.
- Jeep Grand Cherokee (2010-2021) — Shares ParkSense components. A 2014 TSB (08-071-14) addresses PAM software over-sensitivity.
- Dodge Durango (2011-2023) — Uses the identical ParkSense system and sensors as other Stellantis vehicles.
- Dodge Charger (2010-2024) — Service manuals list B1291 as a fault for Park Assist Sensor #4 with identical diagnostic procedures.
- Chrysler 300 (2009-2023) — Uses the same sensor numbering system and B1291 code for a fault in the #4 position.
- Chrysler Pacifica (2017-2024) — Utilizes the ParkSense system and logs B1291 for the identical sensor fault.
- Jeep Cherokee (2014-2023) — Shares diagnostic logic and sensor hardware with the Grand Cherokee.
Manufacturer-Specific Notes

- Stellantis (Chrysler / Dodge / Jeep / Ram): This family of brands is the primary user of code B1291. They number sensors clockwise starting from the front driver's side. Sensor #4 is almost always the inner sensor on the front passenger-side bumper.
- Ford / Lincoln: Ford does NOT use B1291 for parking sensors. They use codes like B129C and B129D for their Active Park Assist systems.
- GM (Chevrolet / GMC): GM uses a different set of proprietary body codes for their Park Assist system, not B1291.
- All: The plastic sensor retainers holding the sensors in the bumper are notoriously brittle and break easily during removal. Always have a replacement retainer on hand before starting the repair.
Real Owner Stories
2018 Ram 1500 with intermittent B1291
The 'Service Park Assist' message appeared when speed reached 8 mph. Initial codes B1291-11 and B1291-12 pointed to electrical shorts.
What they tried:
- Replaced sensor #4 with a cheap aftermarket sensor. The problem persisted.
- Ordered and installed an OEM Bosch sensor for the #4 position.
Outcome: Replacing the faulty aftermarket sensor with the OEM Bosch part and clearing the codes resolved the issue completely.
Lesson: Aftermarket sensors are unreliable for this specific system. If a replacement sensor fails to fix the issue, the new part itself is likely the problem.
2014 Ram 2500 with persistent B1291 after cleaning
The warning light illuminated for the front passenger inner sensor (#4). The owner thoroughly cleaned the sensor face, but the code immediately returned.
What they tried:
- Performed a 'swap test' by moving the suspected bad sensor (#4) to the #3 position, and the good #3 sensor to the #4 position.
- Cleared the codes and re-tested the system.
Outcome: The trouble code changed from B1291 to B1290 (sensor #3 fault). This definitively proved the sensor itself was dead, ruling out a wiring issue.
Lesson: The sensor swap test is the most powerful DIY diagnostic step. If the code follows the sensor, replace the sensor. If the code stays, inspect the wiring.
2012 Ram with multiple rear sensor codes (B1295-B1298)
The park assist system was dead, and all four rear sensor codes were active simultaneously, indicating a short to ground.
What they tried:
- A previous mechanic replaced the Park Assist Module (PAM), which failed to fix the problem.
- Tested the 8.4V supply voltage from the module, which passed.
- Inspected the main wiring harness connector for the rear bumper.
Outcome: The main harness connector was full of water, shorting all signal lines together. Cleaning and drying the connector resolved all codes.
Lesson: When multiple sensor codes appear at once, suspect a single point of failure in the main harness or connector rather than four simultaneously failed sensors.
How to Prevent This Code From Triggering
- Regularly Clean Sensors (Monthly or after driving in mud/snow) — Prevents the buildup of road grime, ice, or thick wax that obstructs the ultrasonic signal and triggers false alarms.
- Apply Dielectric Grease to Connectors (Whenever a sensor is replaced) — Dielectric grease blocks moisture and road salt from reaching the metal pins, preventing the corrosion that causes permanent wiring faults.
- Avoid High-Pressure Washing Up Close (During every car wash) — Direct, high-pressure water spray forces moisture past aging sensor seals, instantly shorting out the internal electronics.
Frequently Asked Questions
Can I fix code B1291 myself?
Yes. The most common fixes, like cleaning or replacing the sensor, require basic tools and often avoid full bumper removal.
Where is parking sensor #4 located?
On Stellantis vehicles (Ram, Jeep, Dodge), sensors are numbered clockwise starting from the driver's side front bumper. Sensor #4 is the inner sensor on the passenger side of the front bumper.
What does park assist sensor #4 cover?
Sensor #4 detects objects in the inner front passenger-side zone. Its field of view overlaps with adjacent sensors to provide seamless coverage.
Do I need to reprogram a new parking sensor?
No specific reprogramming is required for Stellantis vehicles. However, you must clear the stored B1291 fault code from the Park Assist Module using an OBD-II scanner to reactivate the system.
Can you replace just one parking sensor?
Yes. The sensors operate independently, so you only need to replace the specific unit that failed.
Do I need to paint the new parking sensor?
Most replacement sensors arrive unpainted. You should paint them to match your bumper using standard automotive base and clear coat, ensuring the layers aren't excessively thick.
Why did the light come back on after replacing the sensor?
You likely didn't clear the original code from the module's memory with a scanner. Alternatively, the new aftermarket sensor is faulty, or the root cause is actually a damaged wiring harness.
Key Takeaways
- Code B1291 specifically flags a failure in Park Assist Sensor #4, located on the inner passenger-side front bumper of Chrysler, Dodge, Jeep, and Ram vehicles.
- Clean the sensor face and the area behind the bumper first; dirt, ice, or heavy wax causes over 40% of these false alarms.
- Perform a 'swap test' by moving sensor #4 to position #3; if your scanner shows the code change to B1290, the sensor is dead and requires replacement.
- You can safely drive with a B1291 code, but you must manually clear the code with an OBD-II scanner after repairs to reactivate the parking assist system.
Helpful Videos
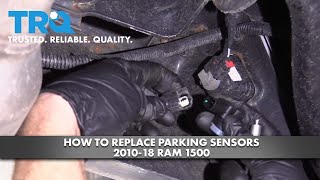
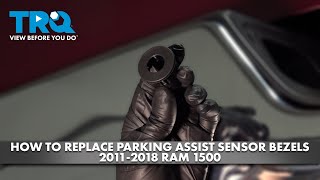


The information in this article is provided for general reference and educational purposes only. Vehicle specifications, procedures, and part compatibility can vary by production date, trim level, and region. Always consult your vehicle's factory service manual and verify part numbers before purchasing or performing repairs. Safety-critical components such as airbags, seat belts, and braking systems should be installed by a qualified professional.
- 🎬 Helpful Videos
- What Does B1291 Mean?
- Can I Drive With B1291?
- Common Causes
- Symptoms
- Diagnostic Flowchart
- Common Fixes & Costs
- Used vs. New Parts: Buying Guide
- What Happens If You Wait — Timeline
- Cost of Not Fixing It
- Diagnosis Steps
- When This Code Triggers (Freeze-Frame Conditions)
- Related Codes
- Climate & Environmental Factors
- How to Talk to a Mechanic About This Code
- Where to Take It: Dealer vs Independent vs Chain
- When to Walk Away From the Repair
- What Scan Tool You Need for This Code
- How to Clear the Code After You Fix It
- Will This Fail Emissions / State Inspection?
- Most Commonly Affected Vehicles
- Manufacturer-Specific Notes
- Real Owner Stories
- 2018 Ram 1500 with intermittent B1291
- 2014 Ram 2500 with persistent B1291 after cleaning
- 2012 Ram with multiple rear sensor codes (B1295-B1298)
- How to Prevent This Code From Triggering
- Frequently Asked Questions
- Can I fix code B1291 myself?
- Where is parking sensor #4 located?
- What does park assist sensor #4 cover?
- Do I need to reprogram a new parking sensor?
- Can you replace just one parking sensor?
- Do I need to paint the new parking sensor?
- Why did the light come back on after replacing the sensor?
- Key Takeaways
- 🎟️ Get 5% Off