

B1289 on 2007-2011 GMC Yukon Denali: Radio & Nav Screen Fix Guide
On a 2007-2011 GMC Yukon Denali, code B1289 almost always means the radio/navigation screen is failing due to a specific broken or shorted wire. The fix is typically a wiring repair behind the dash, not a costly radio replacement.
- B1289 on a 2007-2011 Yukon Denali points directly to a wiring problem, not a bad radio.
- The problem is a known issue documented in GM Technical Service Bulletin PIT4474E.
- The faulty wire is in 'Circuit 7066'; repairing this wire is the standard fix.
- Do not replace the expensive head unit until this specific wiring fault has been ruled out.
What's Unique About the 2007-2011 Gmc YUKON DENALI
The GMT900 platform, which includes the 2007-2011 Yukon Denali, has a known issue with the infotainment wiring harness. GM released Technical Service Bulletins (TSBs) specifically addressing this common failure. The problem is so frequent that the primary suspect for a blank radio screen and a B1289 code is a short or break in Circuit 7066. TSB PIT4474E explicitly identifies the most common failure location as the wiring harness near the rear DVD display screen under the headliner. This makes diagnosis more direct than on other vehicles, where a blank screen might immediately suggest a failed head unit.
Diagnostic Flowchart
Tap your situation to follow the diagnostic path that matches what you're seeing on this vehicle.
Symptoms You May Notice
- Navigation or radio display is completely blank.
- Navigation or radio display flashes on and off, especially right after startup, before going completely blank.
- No sound from any speakers, including turn signal clicks or door chimes.
- Rear DVD screen is inoperative (if equipped).
- Clock display may light up for a few seconds when a button is pressed, then go dark again.
- The head unit may appear to load or eject a CD but will not play it or power on the radio function.
- Replacing the entire radio/navigation head unit without first inspecting the wiring harness for the known Circuit 7066 fault.
Most Likely Causes
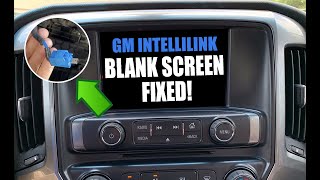
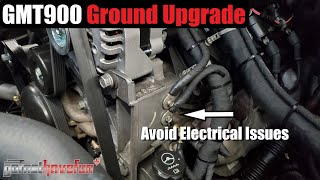
- Shorted or Broken Wire in Circuit 7066 🔴 High Probability This is a well-documented failure point addressed by GM in TSB #PIT4474E. The wiring harness can chafe or break over time due to vehicle vibrations and routing. 🎬 Watch: How to upgrade grounds and fix GMT900 electrical issues. The TSB identifies the most common area of concern as the harness near the rear DVD display screen under the headliner.
How to confirm: Visually inspect the radio wiring harness behind the head unit and, more importantly, trace the harness going to the rear DVD screen under the headliner. Perform a continuity or short-to-ground test on Circuit 7066 (remote enable signal wire) using a multimeter.
Typical fix: Repair the broken or shorted section of the wire using a butt connector with heat shrink or by soldering and insulating the connection. The wire may need to be re-routed to prevent future damage.
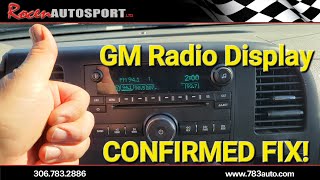
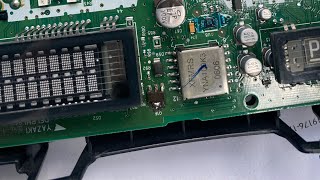
Est. part cost: $5-$20 - Loose or Corroded Connector 🟡 Medium Probability Vibrations can cause wires to back out of connectors over time. One owner on Tahoe Yukon Forum reported fixing their display by finding a single wire that had pulled loose from a connector on the radio's circuit board and firmly pushing it back into place.
How to confirm: After gaining access to the back of the radio, unplug and inspect the main wiring harness connector for any signs of damage, corrosion, or loose pins. Gently tug on individual wires at the connector to ensure they are secure.
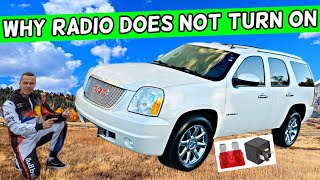
Typical fix: Clean any corrosion from the connector pins and ensure it is securely re-seated. If a wire has backed out, push it firmly back into its slot. Sometimes simply unplugging and replugging the connector can resolve the issue. 🎬 See this quick guide on checking your stereo fuses first.
Est. part cost: $0-$10
Rare But Worth Checking
- Faulty Radio/Navigation Head Unit: This should only be considered after all wiring and connections for Circuit 7066 have been thoroughly inspected and tested. It is far more common for the wiring to fail than the head unit itself for these specific symptoms.
Diagnosis Steps
- Confirm the symptoms: blank/flashing screen, no audio, and inoperative rear DVD.
- Scan for codes to confirm B1289 and the presence of B1265 or B1288.
- Turn the key off, remove it, and open the driver's door to turn off Retained Accessory Power. Wait for at least 5 minutes to allow the radio's internal circuit protection to reset.
- Turn the key back on. If the screen flashes briefly then goes blank within about two minutes, it strongly suggests a persistent short in Circuit 7066.
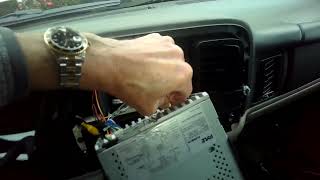
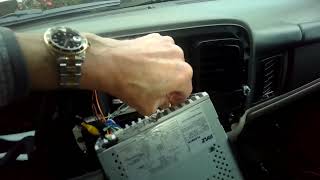
- Carefully remove the dash trim surrounding the radio to gain access to the unit. 🎬 Watch: How to remove the dash trim and access the radio.
- Disconnect the main wiring harness from the back of the radio.
- Inspect the harness and connector for any obvious signs of damage, chafing, or broken wires. Check for any pins that have backed out of the connector.
- Using a wiring diagram for your vehicle, identify Circuit 7066 (remote enable signal wire).
- With the connector unplugged, use a multimeter set to resistance (Ohms) to check for a short to ground on Circuit 7066.
- If a short is detected, trace the harness to find the damaged section of wire. Per TSB PIT4474E, the most common location is near the rear DVD player in the headliner.
- Once the damaged section is found, cut out the bad portion and repair it with a quality butt connector or by soldering and using heat shrink tubing.
- Clear the codes and test the system before reassembling the dashboard.
Parts You'll Likely Need
- Wire Repair Supplies — The most common fix is repairing a broken or shorted wire, which requires basic electrical supplies rather than a specific replacement part.
Trusted brands: 3M, Dorman
OEM price range: $5-$25
Aftermarket price range: $5-$20 - Radio/Navigation Head Unit
(OEM #e.g., 15896129 (for '07 Escalade))— This is the part that is often misdiagnosed as the problem. It should only be replaced as a last resort after confirming Circuit 7066 is intact. Part numbers vary by year and options.
Trusted brands: ACDelco (OEM)
OEM price range: $500-$1500
Aftermarket price range: $300-$800 (used/remanufactured)
Related Codes That Often Appear With This One
- B1265 — This code is also related to the entertainment system and is often triggered by the same underlying wiring fault in Circuit 7066, as noted in TSB PIT4474E.
- B1288 — Like B1265, this code is part of the same family of infotainment faults and is frequently stored alongside B1289 due to the short in Circuit 7066.
Technical Service Bulletins (TSBs) & Recalls
- PIT4474E: Navigation or Radio Display Blank Or Flashing DTC B1265 B1288 Or B1289
- PIT4474D: Superseded by PIT4474E, but also references the same issue.
Platform-Specific Known Issues
- GM issued Technical Service Bulletin #PIT4474E, which directly addresses this issue. It notes that a blank or flashing radio/nav screen accompanied by codes B1265, B1288, or B1289 is likely caused by a short to ground in Circuit 7066.
- The TSB specifically highlights the most common chafe point for the harness is under the headliner near the rear DVD screen on vehicles equipped with one.
Mechanic-Grade Diagnostic Values
- Low-Speed GMLAN (Circuit 7066) Voltage — expected: The single-wire circuit should toggle between approximately 0.2V (logic '1') and over 4.0V (logic '0') during active communication. At rest, the voltage may be low (~0.2V).. Failure: A constant 0V reading indicates a short to ground, which is the primary cause of code B1289. A constant voltage that does not toggle could indicate an open circuit or a module failure.
Scan Tool Commands That Help
- GM Tech 2 / GDS2: Radio Module Data Display / Bidirectional Controls — While there isn't a specific command to 'test circuit 7066,' a technician can use the Tech 2 to see if the radio module is communicating on the GMLAN bus. By navigating to the radio module, a technician can observe its status. If the module is listed as 'Not Communicating,' it supports the diagnosis of a fault in its power, ground, or data lines, including the enable signal on Circuit 7066. The tool can also be used to command other body modules to confirm the rest of the GMLAN network is functional.
Wiring & Ground Locations
- Radio Connector X1 — The main 16-pin rectangular connector on the back of the radio/navigation head unit.. This connector contains the 'Remote Enable Signal' wire, Circuit 7066. A visual inspection here for backed-out pins or damage is a critical first step after accessing the radio.
- G301 — A primary ground point located under the left side of the front passenger's seat.. Wiring diagrams for the radio system reference this ground point. While less likely to be the cause than a chafed wire, a loose or corroded main ground can cause unpredictable behavior in the infotainment system.
- BCM Ground — A ground for the Body Control Module (BCM) is located inside the cab, next to the front left speaker, requiring removal of the A-pillar trim and lifting the dash trim to access.. The BCM acts as a gateway for data networks in the vehicle. A poor ground connection at the BCM could potentially disrupt GMLAN communication, although the direct wire short in Circuit 7066 is a far more common cause for B1289.
OEM Part Supersession History
Varies→Varies— How to Decode GM Delco Radio Part Numbers (c. 1968-1975+)
Heads up: When sourcing a used radio, the service model number can be decoded. The first digit is the model year (e.g., '7' for 2007). The second digit is the car line ('6' for GMC). The following letters identify the body style and radio features (e.g., AM/FM, CD, etc.). This helps ensure the replacement unit is correct for the vehicle's year and options, as radios for different speaker systems (Bose vs. non-Bose) are not interchangeable.
Helpful Videos

We Have This Part in Stock



The information in this article is provided for general reference and educational purposes only. Vehicle specifications, procedures, and part compatibility can vary by production date, trim level, and region. Always consult your vehicle's factory service manual and verify part numbers before purchasing or performing repairs. Safety-critical components such as airbags, seat belts, and braking systems should be installed by a qualified professional.
- Gmc YUKON DENALI:
- 🎬 Helpful Videos
- 🛍️ Shop This Part
- What's Unique About the 2007-2011 Gmc YUKON DENALI
- Diagnostic Flowchart
- Symptoms You May Notice
- Most Likely Causes
- Rare But Worth Checking
- Diagnosis Steps
- Parts You'll Likely Need
- Related Codes That Often Appear With This One
- Technical Service Bulletins (TSBs) & Recalls
- Platform-Specific Known Issues
- Mechanic-Grade Diagnostic Values
- Scan Tool Commands That Help
- Wiring & Ground Locations
- OEM Part Supersession History
- 🎟️ Get 5% Off