

B1289 on 2007-2014 GMC Yukon: Rear Screen & Radio Faults Explained
On a 2007-2014 GMC Yukon, code B1289 indicates a fault in the brightness control circuit for the rear entertainment screen. This is almost always a wiring problem, as noted in GM technical bulletins. The fix typically involves finding and repairing a short or open in the specific control wire, circuit 7066, which often gets damaged in the headliner near the rear DVD display.
- B1289 on a 2007-2014 Yukon is an entertainment system code, not a climate control code.
- Symptoms include a blank or flashing radio, no sound, and a non-working rear screen.
- The most probable cause is a damaged wire (Circuit 7066) between the radio and the rear screen, as confirmed by GM service bulletins.
- Diagnosis requires checking for a specific 100-300 Hz signal at the rear screen's connector.
- Do not replace any expensive components until the wiring has been thoroughly tested for shorts and opens.
What's Unique About the 2007-2014 Gmc YUKON
Unlike generic definitions that might point to climate control servos, on the GMT900 platform (which includes the 2007-2014 Yukon, Tahoe, Suburban, and Escalade), GM uses this B-code for a very specific infotainment issue. The problem is common enough that General Motors issued multiple Technical Service Bulletins (TSBs) about it. These bulletins guide technicians to inspect and repair a specific wire, 'circuit 7066', confirming this is a known wiring issue rather than a component failure. TSB PIT4474E explicitly states the most common failure point is a shorted wiring harness near the rear DVD display screen, located under the headliner.
Diagnostic Flowchart
Tap your situation to follow the diagnostic path that matches what you're seeing on this vehicle.
Symptoms You May Notice
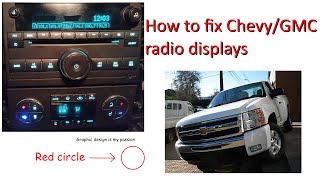
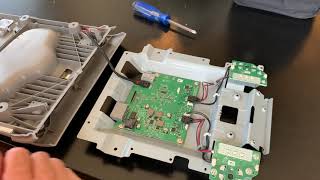
- Radio or navigation display is blank or flashes intermittently. 🎬 See this quick fix for a blank GMC Yukon display
- No sound from any speakers.
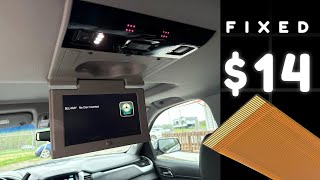
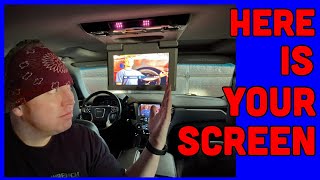
- Rear Seat Entertainment (RSE) / DVD screen is inoperative or stuck at full brightness.
- Loss of communication with the radio or entertainment modules.
- Navigation disclaimer message is displayed intermittently.
- Replacing the rear video display first. The wiring and the radio are far more likely to be the cause of the problem.
- Assuming the code relates to a climate control blend door actuator, based on generic online code definitions that are incorrect for this GMC vehicle.
Most Likely Causes
- Video Display Brightness Control Circuit Wiring Fault 🔴 High Probability As identified in GM TSBs #PIT4474E and #PIT4474D, the control wire (Circuit 7066) is susceptible to shorts or breaks. The TSBs pinpoint the most common failure location as the wiring harness near the rear DVD display, under the headliner, where it can chafe and short to ground.
How to confirm: Disconnect the harness at the rear video display. With the ignition on, test for a 100-300 Hz signal at terminal 9 of the harness connector. If the signal is absent or incorrect, test the wire (circuit 7066) between the radio and the display for continuity, short to ground, and short to power. The wire is often tan with a white stripe.
Typical fix: Locate the damaged section of the wire in the headliner area near the RSE unit and repair it using a quality butt connector with heat shrink or by soldering. It is also recommended to re-route the repaired wire to prevent future chafing.
Est. part cost: $5-$25 - Faulty Radio / Head Unit 🟡 Medium Probability The radio module is responsible for generating the PWM signal. An internal failure of this driver circuit will prevent the signal from being sent. This is the next logical step if the wiring is confirmed to be intact.
How to confirm: If the wiring circuit from the radio to the rear display tests perfectly normal (no shorts or opens), but the correct 100-300 Hz signal is still not present at the back of the radio, the radio itself is the likely culprit.
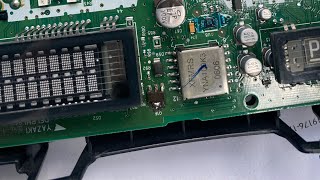
Typical fix: Replacement of the radio head unit. 🎬 Watch: How to repair a broken GM radio display screen This often requires programming by a dealer or qualified shop to match the vehicle's VIN and options. Some aftermarket suppliers sell pre-unlocked units.
Est. part cost: $200-$600 - Poor Vehicle Ground Connection ⚪ Low Probability The GMT900 platform is known for having issues with main ground connections, particularly the braided strap from the engine to the firewall. Poor grounds can cause floating voltages and unpredictable behavior in various electronic modules, including the radio.
How to confirm: Perform a voltage drop test on the main battery, engine, and body grounds. Check for any corrosion or looseness at major grounding points, especially G103 (passenger cylinder head) and G108 (firewall).
Typical fix: Clean all contact surfaces of the ground straps and bolts with a wire brush until they are bright metal. Replace any corroded or broken ground straps.
Est. part cost: $10-$30
Rare But Worth Checking
- Faulty Rear Video Display: The service manual lists this as the last possibility. An internal short in the display's circuitry could theoretically disrupt the signal from the radio, but it's much less common than a wiring or radio fault. If the 100-300Hz signal is present at the connector, but the screen still doesn't work, the display is the likely cause.
Diagnosis Steps
- Verify the complaint: Check for a blank/flashing radio display, no sound, and an inoperative rear screen.
- Scan for all DTCs. Note if B1289 is present with B1265 or B1288, as suggested by TSBs.
- Check battery voltage to ensure it is stable and between 9-16 volts.
- Turn the ignition OFF. Gain access to the rear video display unit by partially lowering the headliner.
- Disconnect the electrical harness from the rear video display unit.
- Turn the ignition ON. Using a multimeter with a frequency (Hz) setting, probe terminal 9 of the harness connector for the rear display.
- A normal reading should be a signal between 100-300 Hz.
- If the signal is correct, the issue is likely with the rear video display itself. Replace the display.
- If the signal is NOT correct (0 Hz, steady voltage, or no reading), inspect the wiring harness near the display for any visible chafing, pinching, or damage, as this is the most common failure point.
- If damage is found, repair the wire (Circuit 7066).
- If no visible damage is found, test the control wire (circuit 7066) for a short to voltage, short to ground, or an open/high resistance between the display connector and the radio connector.
- If a wiring fault is confirmed, repair the wire.
- If the wiring tests normal from end-to-end, the fault is likely internal to the radio head unit. Replace the radio.
- After any repair, clear all DTCs and verify that the radio and rear display function correctly. Note that the radio may need a full power-down (key off for 5+ minutes) to reset its protective circuit after a short is fixed.
Parts You'll Likely Need
- Radio Head Unit
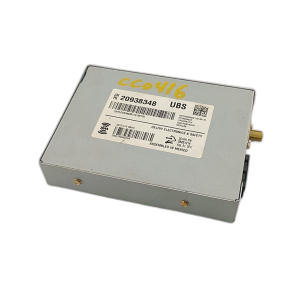
(OEM #15882766, 25894203, 15940103 (Varies by year and options, verify with VIN))— This is the second most likely cause after a wiring fault. The radio generates the control signal, and if its internal circuit fails, it must be replaced. Part numbers vary based on year and whether the unit has navigation (Option U3U or UVB).
Trusted brands: ACDelco
OEM price range: $400-$700
Aftermarket price range: $200-$500 - Wiring Repair Supplies — The most common cause is a break or short in the control wire. You will need wire, butt connectors, and heat shrink tubing to perform a durable repair.
OEM price range: $10-$25
Aftermarket price range: $5-$20
Related Codes That Often Appear With This One
- B1265 — Mentioned in TSB #PIT4474E and #PIT4474D as a related code that can appear with the same symptoms of a flashing or blank display due to the same short in circuit 7066.
- B1288 — Also mentioned in TSB #PIT4474E and #PIT4474D as a companion code for the same radio/display faults, likely indicating a related circuit issue caused by the short in circuit 7066.
Technical Service Bulletins (TSBs) & Recalls
- PIT4474E: Addresses blank/flashing display, no sound, and inoperative rear DVD screen, pointing to a repair of circuit 7066. It specifies the most common location of the short is near the rear DVD display under the headliner.
- PIT4474D: An earlier version of the same bulletin, also mentioning DTCs B1265, B1288, or B1289 for flashing or blank navigation/radio displays and pointing to a shorted circuit 7066.
Platform-Specific Known Issues
- GM Technical Service Bulletin #PIT4474E explicitly calls out DTC B1289 (along with B1265 and B1288) for symptoms of a blank/flashing display and no audio, directing technicians to repair 'circuit 7066'.
- The bulletin specifically identifies the most common point of failure as the wiring harness being shorted to ground near the rear DVD display screen, under the headliner.
Mechanic-Grade Diagnostic Values
- Video Display Brightness Control Signal Frequency — expected: 100-300 Hz (Pulse Width Modulated Signal). Failure: A reading of 0 Hz, a steady DC voltage, or 0V indicates an open or short in the circuit, or a failed radio driver.
Scan Tool Commands That Help
- GDS2 (Global Diagnostic System 2): Radio Setup / Configuration — This function is required after replacing the radio head unit. It configures the new radio to the specific options in the vehicle, such as the presence of a Rear Seat Entertainment (RSE) system, Bose amplifier, navigation, etc. Failure to perform this step can result in features not working correctly.
- GDS2 / Tech2Win: Module Diagnostics > Data Display — Used to view the live data status from the Radio (or Audio Control Module) and other related modules. While it may not show the PWM frequency directly, it can confirm if the module is communicating and if it has commanded the RSE system on or off.
Wiring & Ground Locations
- Circuit 7066 — Runs from the main radio head unit, up the A-pillar, and along the headliner to the Rear Seat Entertainment (RSE) video display. The most common chafe/short point is in the harness near the RSE display itself.. This is the specific wire identified in GM TSBs that carries the brightness control signal. A short or open on this circuit is the direct cause of DTC B1289.
- RSE Connector X3, Pin 9 — This is the specific terminal for the brightness control signal at the electrical connector on the rear video display unit.. This is the exact pin a technician must probe with a multimeter or oscilloscope to test for the 100-300 Hz signal from the radio.
- Ground G103 — Located on the front of the passenger side cylinder head. Some service documents for similar platforms show it on the cowl, above the brake booster, grounding the radio and Instrument Panel Cluster.. This is a primary ground for the radio. A poor connection here can cause a host of unpredictable electronic issues, including faults with signal-generating modules like the radio.
- Ground G303 — Located on the left side (driver's side) B-pillar, behind the plastic trim panel.. This is a key interior body ground. Since the fault wire runs through the interior, ensuring body grounds in the vicinity are clean and tight is a valid diagnostic step.
OEM Part Supersession History
25894203 (For 2008-2009 models with Navigation, Option U3U)→20807045, 25846420, 25857365 are listed as compatible part numbers.— Standard part revisions and supplier changes.
Heads up: Part suppliers state units are for 'REPLACEMENT ONLY' and must match the original part number and option code. Even with correct plugs, 'data streams may be different,' preventing proper programming and function. Radios for vehicles with premium sound systems (e.g., Bose) may require dealer configuration even if the replacement unit is 'unlocked'.
Model Year Variations Within This Range
- 2007-2014: While the wiring fault in circuit 7066 applies to the entire generation, the specific part number for the radio head unit changes. For example, part number 25894203 is specified for 2008-2009 models. Other years may use different part numbers, and units are generally not interchangeable across years or option packages without programming issues.
Helpful Videos
We Have This Part in Stock



The information in this article is provided for general reference and educational purposes only. Vehicle specifications, procedures, and part compatibility can vary by production date, trim level, and region. Always consult your vehicle's factory service manual and verify part numbers before purchasing or performing repairs. Safety-critical components such as airbags, seat belts, and braking systems should be installed by a qualified professional.
- Gmc YUKON:
- 🎬 Helpful Videos
- 🛍️ Shop This Part
- What's Unique About the 2007-2014 Gmc YUKON
- Diagnostic Flowchart
- Symptoms You May Notice
- Most Likely Causes
- Rare But Worth Checking
- Diagnosis Steps
- Parts You'll Likely Need
- Related Codes That Often Appear With This One
- Technical Service Bulletins (TSBs) & Recalls
- Platform-Specific Known Issues
- Mechanic-Grade Diagnostic Values
- Scan Tool Commands That Help
- Wiring & Ground Locations
- OEM Part Supersession History
- Model Year Variations Within This Range
- 🎟️ Get 5% Off