

B1289 on 2007-2011 GMC Sierra: Radio Flashing or No Sound Causes and Fixes
On a 2007-2011 GMC Sierra, code B1289 almost always points to a wiring issue in the infotainment system. The most common cause is a broken or shorted wire in 'Circuit 7066', as documented by GM's Technical Service Bulletin #PIT4474E. The screen may flash initially, then go blank if the short persists. The fix is typically a simple wiring repair, not a costly radio replacement.
- B1289 on a 2007-2011 Sierra is specific to the radio/infotainment system, not other vehicle systems.
- The most likely cause is a simple wiring fault in 'Circuit 7066', as documented in a GM service bulletin.
- Do not replace the expensive radio head unit until you have thoroughly inspected and ruled out this common wiring issue.
- Symptoms include a flashing or blank radio screen, no sound, and loss of chimes.
- A simple power-down of the vehicle for 5+ minutes is worth trying first to reset the radio's protection circuit.
What's Unique About the 2007-2011 Gmc SIERRA
The GMT900 truck platform, which includes the 2007-2011 Sierra and its Chevrolet, GMC, and Cadillac counterparts, is known for this specific electrical fault. General Motors issued a Technical Service Bulletin (PIT4474E) that directly addresses this code, linking it to a fault in Circuit 7066. Unlike generic definitions for B1289 that might point to climate control systems, on this Sierra, the code is definitively linked to the infotainment system wiring.
Diagnostic Flowchart
Tap your situation to follow the diagnostic path that matches what you're seeing on this vehicle.
Symptoms You May Notice
- Radio or navigation display is completely blank
- Display flashes on and off, especially after starting the truck or before going blank
- No sound from any speakers
- Loss of turn signal clicks or door chimes, 🎬 Watch: Troubleshooting guide for no sound from your truck speakers. as they are played through the speakers
- Rear DVD screen (if equipped) is inoperative
- Instrument Panel Cluster may show an 'Audio Off' message
- Navigation disclaimer message is displayed intermittently
- Replacing the entire radio/head unit without first checking for the common wiring fault in Circuit 7066.
- Replacing radio fuses (#41 for amplifier and #42 for radio in the under-hood fuse box), which are rarely the cause unless the entire unit is dead or there is no sound 🎬 See this video for common reasons your Sierra radio won't power. from a working screen.
Most Likely Causes
- Broken or Shorted Wire in Circuit 7066 🔴 High Probability As documented in TSB #PIT4474E, the wiring harness can chafe against metal structures. The most common failure point is the harness under the headliner near the rear DVD screen (even on models without a DVD player, the wiring is often present). Other potential chafe points are behind the dashboard near the radio unit.
How to confirm: Visually inspect the wiring harness for Circuit 7066 (often a dark green or white wire) for breaks, chafing, or shorts to ground, starting with the area under the headliner. Use a multimeter to test for continuity to ground on the wire with the radio connector unplugged; there should be none.
Typical fix: Repair the damaged section of the wire using a butt connector or by soldering and protecting it with heat shrink tubing. Reroute the wire away from sharp metal edges to prevent recurrence.
Est. part cost: $1-$10 - Internal Radio/Display Failure (Cold Solder Joints) 🟡 Medium Probability Vibrations and heat cycles over many years can cause the solder connections on the radio's internal circuit board to crack, particularly the pins that connect the front display panel to the main board.
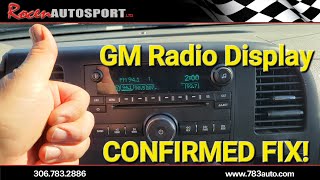
How to confirm: This requires removing and disassembling the radio unit to visually inspect the circuit board where the display connector is soldered. Tapping on the dash or radio face and seeing the display flicker or change is a strong indicator of a cold solder joint. A YouTube video by ROCEN AUTOSPORT titled 'GM RADIO DISPLAY NOT WORKING. CONFIRMED FIX!' details this exact issue and repair. 🎬 Watch: How to repair cracked solder joints on your radio.
Typical fix: Carefully re-flow the cracked solder joints with a soldering iron. This re-establishes the electrical connection. Alternatively, the radio can be sent to a mail-in repair service or replaced entirely.
Est. part cost: $0-$400 - Software Glitch / Module Lock-up ⚪ Low Probability
How to confirm: Perform a 'hard reset' by disconnecting the negative battery terminal for 15-30 minutes. If radio function returns, the issue was a temporary glitch. Note that this may also temporarily fix the wiring issue by resetting the radio's protection circuit.
Typical fix: Disconnect and reconnect the battery. This is often the first and easiest diagnostic step.
Est. part cost: $0
Diagnosis Steps
- Verify Symptoms: Confirm that the radio display is blank or flashing and that there is no sound, including chimes.
- Perform a System Reset: Turn the vehicle off, remove the key, and let it sit for at least 5 minutes. This allows the radio's internal protection circuit to reset. If the radio works temporarily upon restart, it strongly points to a short in Circuit 7066.
- Check for Companion Codes: Use a capable OBD-II scanner to check for codes B1265 or B1288, which would reinforce the diagnosis of a wiring fault.
- Inspect Wiring (Circuit 7066): This is the most critical step. Begin by carefully lowering the rear of the headliner to access the wiring harness near the rear DVD player location (even if not equipped). This is the most common failure point per TSB PIT4474E. Look for the wire for circuit 7066 (check diagrams, but often dark green or white) and inspect it for any signs of chafing, breaks, or pinches where it could be shorting to the metal chassis or support brackets.
- Test Circuit Integrity: If no visual damage is found, access the connector at the back of the radio. Unplug it and use a multimeter to test the suspect wire for a short to ground.
- Repair Wiring: If a short or break is found, perform a durable repair using solder and heat shrink or a quality butt connector. Ensure the wire is routed away from the original point of friction.
- Inspect Radio Internals: If the wiring is confirmed to be good, the next step is to remove the radio and inspect the internal circuit board for cracked or 'cold' solder joints, particularly around the display connector, as shown in owner repair videos.
- Consider Radio Replacement/Repair: If the solder joints are bad and you are not comfortable repairing them, the unit will need to be repaired by a specialist or replaced.
Parts You'll Likely Need
- Wire Repair Supplies — The most common fix is repairing a broken or shorted wire in Circuit 7066.
OEM price range: $1-$10
Aftermarket price range: $1-$10 - Radio/Navigation Head Unit
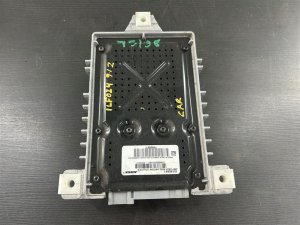
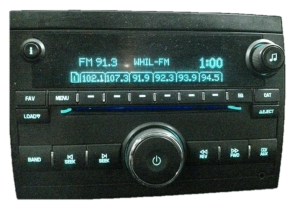
(OEM #20918429, 15909951, 15868808, 15202715 (numbers can vary by option package and may be superseded))— This is needed only if the internal circuit board has failed and cannot be repaired.
Trusted brands: ACDelco
OEM price range: $400-$800
Aftermarket price range: $150-$400
Related Codes That Often Appear With This One
- B1265 — This code is also related to the radio/infotainment system and is mentioned in the same TSB (PIT4474E) as being set along with B1289 for the same wiring fault.
- B1288 — Like B1265, this code is also cited in TSB PIT4474E as a companion code to B1289, pointing to the same root cause in the infotainment wiring.
Technical Service Bulletins (TSBs) & Recalls
- PIT4474E: Addresses a blank or flashing radio/nav screen, no sound, and inoperative rear DVD due to a fault in circuit 7066. Explicitly states the most common area of concern is a shorted harness near the rear DVD display screen under the headliner.
Platform-Specific Known Issues
- GM Technical Service Bulletin #PIT4474E specifically calls out a blank or flashing radio display with codes B1289, B1265, or B1288. It identifies the cause as a fault in circuit 7066 and instructs technicians to repair the circuit. It notes that the screen may flash at first, but if the short persists for over 2 minutes, the radio's protection circuit will blank the screen entirely.
Mechanic-Grade Diagnostic Values
- Radio On / Remote Enable Signal Voltage (Circuit 7066) — expected: ~12V (or battery voltage) with key in ON or ACC position.. Failure: A reading of 0V, or a voltage that is intermittent or drops out, indicates a short or open in Circuit 7066 between the BCM and the radio.
- Video Display Brightness Control Signal (Circuit 7066 on RSE-equipped models) — expected: A Pulse-Width Modulated (PWM) signal of 100-300 Hz.. Failure: A reading of 0 Hz or a signal outside this range indicates a fault in the circuit or the radio's signal-generating driver.
Hidden / Shadow Codes Worth Checking
- B1289 01: Video Display Brightness Control Signal Short to Battery (see via A professional scan tool like the GM Tech2 or GDS2 is required to read these specific symptom bytes.)
- B1289 02: Video Display Brightness Control Signal Short to Ground (see via A professional scan tool like the GM Tech2 or GDS2 is required to read these specific symptom bytes.)
- B1289 04: Video Display Brightness Control Signal Open Circuit (see via A professional scan tool like the GM Tech2 or GDS2 is required to read these specific symptom bytes.)
Scan Tool Commands That Help
- Tech2 / GDS2: Body Control Module (BCM) -> Special Functions -> Radio Enable Signal Command — This is a definitive bidirectional test to isolate the fault. A technician can command the radio enable signal ON and OFF directly from the scan tool. If the command is sent but voltage does not appear at the radio connector (Pin B3), the fault is in the wiring. If voltage is present when commanded but the radio remains off, the radio itself is faulty. This can prevent unnecessary disassembly when diagnosing.
Wiring & Ground Locations
- Circuit 7066 — Typically a Dark Green or Pink wire. Located at Pin B3 on the main 24-pin radio connector (X1). Originates at the Body Control Module (BCM).. This is the 'Radio On Signal' wire identified in TSB PIT4474E. A short or open on this wire is the direct cause of code B1289 and the resulting symptoms.
- G218 — On the left side of the instrument panel, near the A-pillar, behind the kick panel.. This is a primary ground for the Body Control Module (BCM). While not the most common cause for B1289, a poor connection at G218 can cause the BCM to malfunction, potentially affecting the radio enable signal it is supposed to send.
- Radio Connector X1 — The main 24-pin gray connector on the back of the radio head unit.. This is the primary connector for testing. Voltage for Circuit 7066 (Pin B3) and the main radio ground (Pin 12, BLK/WHT wire) can be verified here to quickly determine if the issue is external or internal to the radio.
Real Owner Repair Stories
- gm-trucks.com forum user (2008 GMC Sierra (GMT900)) — Radio display would flash, then go completely blank with no sound. All chimes and turn signal clicks were also gone. Code B1289 was present.
❌ Tried (didn't work) Replacing the radio fuses., Disconnecting the battery (radio would work for a few minutes after reconnecting, then fail again).
✅ What actually fixed it Following TSB PIT4474E, the owner lowered the headliner near the overhead console/DVD player area. He found a dark green wire (Circuit 7066) that was pinched and chafed against a metal support bracket, causing an intermittent short to ground. He repaired the wire with a butt connector and heat shrink, then wrapped the harness in anti-abrasion tape. The problem was permanently resolved.
OEM Part Supersession History
Various (e.g., 15909951, 20918429)→Various— Part numbers for radios are highly specific to the vehicle's option list (RPO codes), such as UQ3 (base audio), UQA (Bose), U3U (Navigation), etc.
Heads up: A replacement radio MUST match the vehicle's original RPO codes. Installing a radio from a vehicle with different options (e.g., putting a Bose radio in a non-Bose truck) will result in improper function or no function at all. A replacement radio, even with the correct part number, often requires dealer programming using the GM SPS (Service Programming System) to link it to the vehicle's VIN.
Helpful Videos

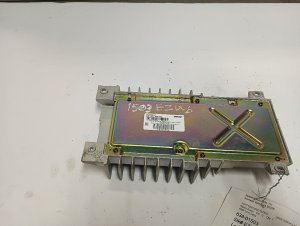
We Have This Part in Stock




The information in this article is provided for general reference and educational purposes only. Vehicle specifications, procedures, and part compatibility can vary by production date, trim level, and region. Always consult your vehicle's factory service manual and verify part numbers before purchasing or performing repairs. Safety-critical components such as airbags, seat belts, and braking systems should be installed by a qualified professional.
- Gmc SIERRA:
- 🎬 Helpful Videos
- 🛍️ Shop This Part
- What's Unique About the 2007-2011 Gmc SIERRA
- Diagnostic Flowchart
- Symptoms You May Notice
- Most Likely Causes
- Diagnosis Steps
- Parts You'll Likely Need
- Related Codes That Often Appear With This One
- Technical Service Bulletins (TSBs) & Recalls
- Platform-Specific Known Issues
- Mechanic-Grade Diagnostic Values
- Hidden / Shadow Codes Worth Checking
- Scan Tool Commands That Help
- Wiring & Ground Locations
- Real Owner Repair Stories
- OEM Part Supersession History
- 🎟️ Get 5% Off